manuals.online logo
Brands
  1. Home
  2. •
  3. Brands
  4. •
  5. Kidde
  6. •
  7. Fire Alarm
  8. •
  9. Kidde GSA-M278 Assembly instructions

Kidde GSA-M278 Assembly instructions

© 2017 United Technologies Corporation 1 / 2 P/N P-047550-1819-EN • REV 005 • ISS 22MAR17
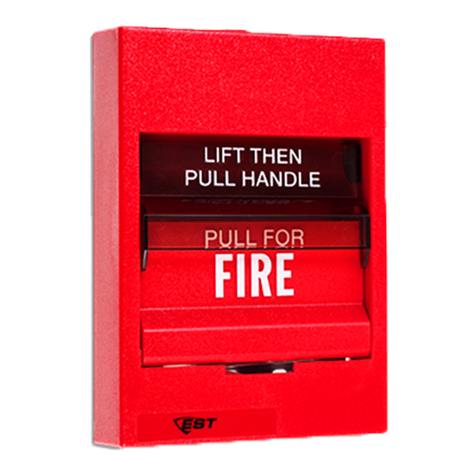
GSA-M278 Double Action Fire
Alarm Station Installation Sheet
Description
The GSA-M278 Double Action Fire Alarm Station is an addressable,
normally-open, dry contact signal initiating device that requires two
user actions to initiate an alarm. First, the upper door marked LIFT
THEN PULL HANDLE must be raised to access the alarm handle.
Second, the alarm handle must be pulled to initiate an alarm. The
single input module mounted on the back of the unit supervises the
station and sends an alarm signal to the Signature controller when the
switch is closed (i.e., when the handle is pulled).
The device requires one address on the signaling line circuit (SLC).
Addresses are assigned electronically. There are no address switches.
Diagnostic LEDs provide a visible indication of the status of the module
when the unit is removed from the electrical box.
• Normal: green LED flashes
• Alarm/active: red LED flashes
Personality codes
The module requires the loop controller to download a personality
code that determines how the module operates. Table 1 shows the
personality codes available for the GSA-M278.
Table 1: Personality codes
Code Description
1 Alarm - NO latching (Class B)
4 Active - NO latching (Class B)
Installation
Install and wire this device in accordance with applicable national and
local codes, ordinances, and regulations.
Notes
• The device is shipped from the factory as an assembled unit; it
contains no user-serviceable parts and should not be
disassembled.
• This device will not operate without electrical power. As fires
frequently cause power interruption, we suggest that you discuss
further safeguards with your local fire protection specialist.
• Electrical supervision requires that the wire run be broken at each
terminal. Do not loop the field wires around the terminals.
To install the GSA-M278:
1. Insert the key into the cover lock and turn the key to open the
station, rotating the cover away from the backplate.
2. Verify that all field wiring is free of opens, shorts, and ground
faults.
3. Wire the module as shown in Figure 2.
4. Write the address assigned to the module on the label provided,
and apply the label to the module. Remove the serial number label
from the module, and then attach it to the project documentation.
5. Using the two #6-32 × 1/2 machine screws provided, mount the
pull station on the electrical box.
6. Install the glass rod into the mounting brackets inside the cover.
7. Set the toggle switch on the backplate to the NORMAL position.
8. Rotate the cover back into position on the backplate, turn the key
to secure the cover, and then remove the key.
Figure 1: Mounting the GSA-M278
(1) Compatible electrical box
(2) Backplate
(3) #6-32 × 1/2 screw (2X)
(4) Cover lock and key
(5) Front cover
(1)
(2)
(3)
(5) (4)
2 / 2 P/N P-047550-1819-EN • REV 005 • ISS 22MAR17
Figure 2: Wiring diagram (rear view)
(1) Factory connections — do not alter
(2) Green LED (normal)
(3) Red LED (alarm/active)
(4) Signaling line circuit (SLC) from previous device
(5) Signaling line circuit (SLC) to next device
(6) All wiring is power-limited and supervised. Refer to the Signature
Controller Module installation sheet for wiring specifications.
Specifications
Voltage 15.20 to 19.95 VDC
Current
Standby
Activated
250 µA
400 µA
Wire size 12 to 18 AWG (1.0 to 4.0 mm²).
16 and 18 AWG (1.0 and 1.5 mm²) are
preferred
Operating mechanism Double action, pull lever
Construction High impact plastic with steel backplate
Compatible electrical
boxes North American 2-1/2 in. (64 mm) deep
single-gang box
Standard 4 in. square box 1-1/2 in. (38 mm)
deep box with single-gang cover
276B-RSB red surface mount box
Operating environment
Temperature
Relative humidity
32 to 120°F (0 to 49°C)
0 to 93% noncondensing
Replacement glass
rods P/N 276-GLR (pkg. 20 rods)
Regulatory information
A
DA This device meets the ADA requirements for
manual pull stations.
ULC requirements To meet CAN/ULC-S527 ESD requirements, the
device must be mounted in a grounded metal
backbox.
FCC compliance This device complies with part 15 of the FCC
Rules. Operation is subject to the following two
conditions: (1) This device may not cause harmful
interference, and (2) this device must accept any
interference received, including interference that
may cause undesired operation.
Contact information
For contact information, see www.kiddelifesafety.com
(6)
TB1
(1)
(2)
(3)
4321
(4) (5)

Other Kidde Fire Alarm manuals

Kidde VM-1 Product manual

Kidde

Kidde VM-1 Product manual

Kidde Gemini II User manual

Kidde

Kidde Gemini II User manual

Kidde FX-278 Assembly instructions

Kidde

Kidde FX-278 Assembly instructions

Kidde Scorpio CPD 7051 Series Instruction manual

Kidde

Kidde Scorpio CPD 7051 Series Instruction manual

Kidde FX-270 Assembly instructions

Kidde

Kidde FX-270 Assembly instructions

Kidde PE9UK User manual

Kidde

Kidde PE9UK User manual

Kidde FX-64 Product manual

Kidde

Kidde FX-64 Product manual

Kidde Genesis EG1 Series Assembly instructions

Kidde

Kidde Genesis EG1 Series Assembly instructions

Kidde DM3000E Assembly instructions

Kidde

Kidde DM3000E Assembly instructions

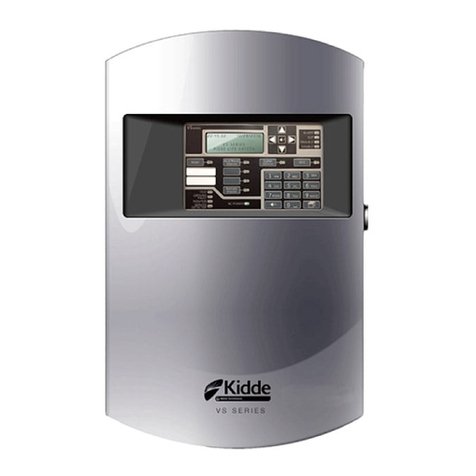
Kidde VS Series Product manual

Kidde

Kidde VS Series Product manual

Popular Fire Alarm manuals by other brands

Honeywell ESSER Fire Alarm Control Panel Compact Commissioning Instruction

Honeywell

Honeywell ESSER Fire Alarm Control Panel Compact Commissioning Instruction

Simplex 4903 installation instructions

Simplex

Simplex 4903 installation instructions

Fire Detection Devices CR 135-2 Installation instructions manual

Fire Detection Devices

Fire Detection Devices CR 135-2 Installation instructions manual

Cooper Notification RSSR-2415C installation instructions

Cooper Notification

Cooper Notification RSSR-2415C installation instructions

Wheelock MT-241575W installation instructions

Wheelock

Wheelock MT-241575W installation instructions

GST C-9401 Installation and operation manual

GST

GST C-9401 Installation and operation manual

Spectrex SharpEye 40/40 Duct Mount installation manual

Spectrex

Spectrex SharpEye 40/40 Duct Mount installation manual

Tyco 513D quick start guide

Tyco

Tyco 513D quick start guide

White Rodgers 3098-134 installation instructions

White Rodgers

White Rodgers 3098-134 installation instructions

Advanced MxPro4 Series Installation Sheet & Quick Reference Guide

Advanced

Advanced MxPro4 Series Installation Sheet & Quick Reference Guide

Zeta Alarm Systems Premier Quatro QT/4P User manual, maintenance guide & log book

Zeta Alarm Systems

Zeta Alarm Systems Premier Quatro QT/4P User manual, maintenance guide & log book

Zeta MKII-HR installation guide

Zeta

Zeta MKII-HR installation guide

Cooper Wheelock Series RSS specification

Cooper Wheelock

Cooper Wheelock Series RSS specification

EMS FIRECELL Maintenance Guide

EMS

EMS FIRECELL Maintenance Guide

Edwards MPSR Series Installation sheet

Edwards

Edwards MPSR Series Installation sheet

Apollo SA5900-928 installation guide

Apollo

Apollo SA5900-928 installation guide

Siemens SSD-C Instalation instructions

Siemens

Siemens SSD-C Instalation instructions

ADEMCO 1022 Troubleshooting

ADEMCO

ADEMCO 1022 Troubleshooting

manuals.online logo
manuals.online logoBrands
  • About & Mission
  • Contact us
  • Privacy Policy
  • Terms and Conditions

Copyright 2025 Manuals.Online. All Rights Reserved.