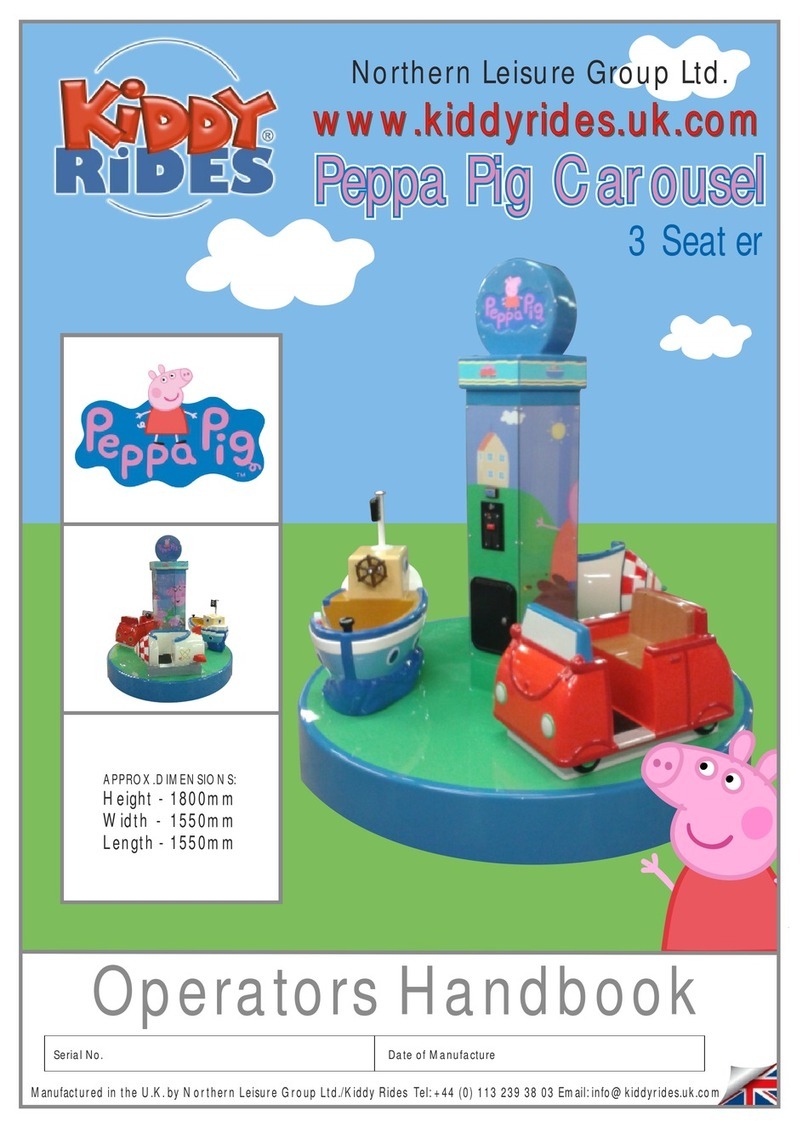
Kiddy Rides Peppa Pig User manual

1
INTRODUCTION
Thank you for purchasing your new children’s coin operated ride from Northern Leisure Group
Ltd. / Kiddy Rides! We trust it will give you many years of profitable service!
Established in 1986, the Northern Leisure Group of companies is the UK’s leading independent
operator, dealer, manufacturer, and distributor of children’s coin operated rides. Our extensive
experience in a wide range of electronic entertainment products has allowed us to offer the ultimate in
choice, safety and quality.
Complete customer satisfaction is what motivates us. Being independent allows us to nurture this goal
–ultimately giving thousands of children and parents world-wide, the assurance that they are in a safe,
clean, and fun environment.
Kiddy Rides supplies a wide range of children’s rides for sale, income share, or on a fixed rental basis.
As well as supplying the rides, it is responsible for unbeatable after-sales support and service for all
Kiddy Rides customers as well as other operators.
Our equipment has been manufactured to the highest standard of construction and safety in order to
conform to the H.S.E. Fairground and Amusement Parks, A Code of Safe Practice and the U.K. Health
and Safety at Work Act 1974.
All our rides have undergone thorough examinations, and come with a 12 months ADIPS certification
of conformity.
The guidance in this manual is relevant to the safe operation of children’s rides wherever they may be
operated.
NORTHERN LEISURE GROUP LTD.
UNIT 3 KINGSMARK COURT
INTERCITY WAY,
SWINNOW
LEEDS
LS13 4LY
TEL: +44 (0) 113 239 38 03 FAX: +44 (0) 113 236 31 94
www.kiddyrides.co.uk

2
SAFETY MATTERS
Northern Leisure/Kiddy Rides is a registered Inspection Body of ADIPS (the Amusement Device
Inspection Procedure Scheme), conducting independent examinations and certification of children’s
coin operated rides in accordance with guidance published by the Health and Safety Executive (HSE).
By independent, we mean we are not linked to any particular manufacturer and will apply the guidance
with equal diligence, regardless of the type of ride, or it’s manufacturer. Remember, our aim is to help
you comply with the HSE guidelines.
Because of the young age of those who enjoy coin operated children’s rides (kiddie rides), safety
should be of paramount importance to operators. There is surely a moral duty to safeguard the children
that use our industry’s products.
Safety doesn’t just happen however, it requires commitment from manufacturers, operators and
inspectors to ensure high standards. As an operator it is your duty to make yourself aware of safety
requirements, especially as failure to comply can lead to injury to children, and furthermore,
prosecution. By adopting a few simple procedures and having annual safety checks performed on your
rides, you can show yourself to be conforming with HSE and Local Authority guidelines. Also you will
gain peace of mind knowing that you have taken active steps to minimize the risks to young children
who use your rides.
It is not always easy to find out exactly what is required of an operator. However there are strict
guidelines laid down by BACTA (British Amusement and Catering Trade Association) entitled Kiddie
Rides; A Safety Guide. It is produced by a committee of BACTA members, some of whom represent
manufacturers of kiddie rides themselves. The guide is fully endorsed by the HSE.
In an attempt to highlight the importance of safety within the industry, ADIPS has been integrated
into the BACTA guidelines. This initiative sets out procedures which must be observed by registered
Inspection Bodies. Furthermore, ADIPS is unified with the HSE Fairground and Amusement Parks
Code of Safe Practice.
To comply with this, a ride must undergo a thorough examination, and documentation must be issued,
be retained, and be available for inspection by the Health and Safety Inspectorate and/or an officer of
the Environmental Health Department of the local authority.
Thorough examinations must be carried out at least every fourteen months (annual examinations are
recommended).
Certification of rides by approved inspectors will give responsible operators within our industry the
credibility they deserve. An ADIPS certificate is a badge of excellence, ensuring you have taken all the
necessary steps to ensure danger risks are kept to a minimum.
In the past, inspections of children’s rides by the HSE appeared to be taking place in response to safety
related incidents. However, this is changing rapidly, and it would appear random tests are under way.
Inspectors requesting ADIPS documentation after a safety related incident is likely to become standard
practice.
So, safety first. Don’t wait for an accident to happen before you consider the safety of your rides, get
them ADIPS tested now.
Call +44 (0) 113 2393803 Email:[email protected]
ADIPS

3
INITIAL INSPECTION
Upon arrival of the machine, it is important to check the following items:
a. Damage to external packing.
b. Physical damage to the ride.
c. Correct documentation is present.
d. Ride Serial Number.
e. Correct main’s voltage rating
f. Coin mechanism currency and credits
Any damage or discrepancies should be reported to your supplier immediately.
How The Ride Should Operate
a. Read the operators manual fully prior to operating the ride.
b. Prior to connecting the machine to the mains supply, ensure that it corresponds to the supply
rating, which should be stated on a sticker or plate on the rear of the base close to the mains
cable outlet.
c. Upon power up, the lights on the buttons should illuminate, and begin to flash. The monitor
(where applicable) will begin to display the attract video sequence. An audible message may
also be heard, stating the ride type, and the version of software used within the control system.
i.e. “3-0-6-0 Peppa Pig, version 9.8”.
d. Insert the correct coinage for the operation of the ride, after which the start button will flash,
and / or an audible prompt will be heard for you to press the start button. On video rides with
monitor, a prompt screen will be displayed also. If the start button is not pressed within 10
seconds, the ride will begin itself after an audible 10 sec. count down.
e. Whilst the ride is in operation, check that everything is working correctly, and that there are
no unusual noises or vibrations. When the ride has operated for the pre set duration (usually
around 90 seconds) the ride will automatically stop. A farewell voice message may be heard,
and the ride is once again ready to accept coins.
f. Make a note of the rides serial number. This is located on the silver manufacturer plate at the
rear of the ride. The serial number gives access to essential details of your machine, including
your machines parts and history.

4
SITING THE RIDE
The following conditions must be observed when siting the machine:
a. The machine must be placed on level ground which is firm and free from any holes etc. Where
possible, a non-slip surface would be recommended.
b. The ride is designed for protected locations. The ride should not be sited in any area where it
would be subjected to water splash. The ride, in some circumstances, may be sited outdoors
under a canopy,which will protect it from rain, although this is not recommended.
c. The machine should be connected to a Residual Current Device (RCD).
d. The ride should be sited clear from any obstruction. The manufacturer recommends that the
machine is sited a minimum of 1.8 metres from any other obstruction or item of equipment.
e. The ride should be situated as close as possible to the power source, and the mains cable must
be safely secured and protected, to eliminate any risk of tripping or damage.
f. The ride should not be sited in an area where it may cause an obstruction.
g. Always ensure that the mains plug is accessible, so that the mains power may be isolated in an
emergency.
ELECTRONIC COIN MECHANISM & START PROCEDURE
Electronic coin mechanisms or multi-mechs are pre-programmed to accept various coinage
denominations, which will be typical of the local coinage used. The electronic timer unit or control
board is pre-programmed to give single or multiples of rides, which will correspond to the amount of
coinage accepted by the mechanism. The programming also allows for ride discounting (for example: 1
ride for 50p, 3 rides for £1.00). The coin mechanism will accept recognised coins until the programmed
price is reached. The start button will then begin to flash, and an audible prompt to “Press start” may be
heard. Video rides with monitor, will also display a prompt on screen.
If the start button is not pressed on rides using the KERMIT control system, a 10 second countdown
will be heard after the phrase “the ride is about to begin”.The ride will automatically begin to operate
after the 10 seconds have elapsed, commencing with the phrase, “hold on tight, here we go!”
ELECTRO-MECHANICAL COIN METER
The ride is fitted with a coin meter which records the number of coins or units accepted by the coin-
mech. The meter is located inside the front seat of the ride. This can be viewed through the coin mech
door.

5
STANDARD OPERATION & ADJUSTMENT
Kermit Control System Volume – The volume control buttons are located on the right hand side of the
control box as indicated by the diagram on the box lid. Here you will find 2 small push buttons, one to
turn the volume up “+” and one to turn the volume down “-” (The power must remain on to adjust the
volume settings on this control system).These buttons control the volume level for the sound effects,
which are heard when a pushbutton is activated. The sound effects must be running through a sequence
whilst the level is adjusted.
Theme Tune & Video Volume – The main theme tune and video volume can be adjusted by a silver
toggle switch located on the left hand side of the Kermit Box, next to the top of the main loom D-Plug.
The ride must be operating whilst this volume is adjusted. Toggle the switch towards yourself to
increase the volume, and away from yourself to decrease the volume. A level indicator will be briefly
displayed on the monitor screen.
*Please note: On versions without video and monitor screens, the Kermit Control System Volume controls the
levels for both the theme tune, and the pushbuttons. The silver toggle switch is not present.
ADJUSTMENT OF RIDE TIME
The length of time a ride cycle lasts for is mainly dependant on the type of ride. In most cases, the ride
runs for the same amount of time as the theme tune or soundtrack (the music played in the background
while the ride is in motion). On Peppa Pig models without video, the ride time can be adjusted via dip
switch settings. These are located on the Kermit Control Box, and can be set as the settings shown in
the table below. However, monitor versions of Peppa Pig, the ride time can not be adjusted. This is
determined by the duration of the video. If you have any problems, please contact the manufacturer.
PRICE OF PLAY
The price of play is the cost of each turn on the ride, e.g. 1 ride for 50p. The cost per ride and currency
is set at manufacture, and the operator’s preference must be stated at the time of purchase. However, if
you find it absolutely necessary to have these settings changed at a later date, then it is possible. Please
refer to the table below. Contact the manufacturer for any support or advice.
*Please note that the rides power must be off when changing any switch settings. The power should then be
switched back on, once completed, for any changes to take effect.
SWITCH SETTINGS ON KERMIT CONTROL BOX
FUNCTION SW1 SW2 SW3 SW4
TIME DURATION 90 SEC OFF OFF X X
TIME DURATION 75 SEC ON OFF X X
TIME DURATION 60 SEC OFF ON X X
TIME DURATION 45 SEC ON ON X X
PRICE/CREDITS 20/1, 50/3, 100/7 X X OFF OFF
PRICE CREDITS 30/1, 50/2, 100/5 X X ON OFF
PRICE CREDITS 50/1, 100/3, 200/7 X X OFF ON
PRICE CREDITS 100/1, 200/3, 400/7 X X ON ON
Northern Leisure Group Ltd.
Unit 3 Kingsmark Court, Intercity Way, Swinnow, Leeds, LS13 4LY, United Kingdom
Tel:+44 (0) 113 239 38 03 Fax:+44 (0) 113 236 31 94 E-mail:[email protected]

6
TAKING CARE OF YOUR RIDE
All Northern Leisure Group Ltd. rides are manufactured in a high quality Lead Free self coloured GRP.
This material can be maintained easily, and kept to a very high standard by taking day to day care of
your ride.
CLEANING
To ensure you get the maximum life span from your machine, a day to day clean is recommended.
Clean the main areas of the ride with a damp cloth rinsed out in soapy water. Ensure the cloth is not
drenched in water and avoid any electrical components such as coin-mech, lights, buttons etc. Do not
hose down or flood the machine! Ensure no water is used on and around the monitor display, a simple
household glass cleaner may be used for cleaning a dirty screen. Alternatively, for the body work, a
household furniture polish can also be used, or in cases of an extremely dirty ride, Kiddy Rides
recommend using a good automotive cleaning compound. This material is available through Northern
Leisure / Kiddy Rides. Do not use any solvent based materials when cleaning your ride.
REMOVAL OF BODY SHELL
The body of the ride is held down to the base in 4 locations. There are 2 in the back, and 2 in the foot
well. Always disconnect the mains supply before carrying out the removal procedure!
a. Remove the rear inspection cover.
b. Locate the 2 adjacent mounting nuts and washers, which go through the wooden mounting
floor towards the rear, and remove them both from the locating studs (a 13mm socket/spanner
will be required).
c. Disconnect all connectors from the control box, taking note of where each one should go. The
D-Plugs are secured into place using 2 locating pegs either side, which need to be unscrewed
for removal. All other connections are simply pulled from their sockets.
d. The second set of mounting bolts, are located inside the foot well, in front of the seat of the
ride. These are M8 Button Socket Hex Bolts, and can be removed using a 6mm Hex Key
(allen key).
e. Carefully lift the rides shell from the base, ensuring no wires are caught or still connected (2
persons or more is recommended as the shell will be heavy. H.S.E. guidelines on lifting safely
should be followed).
You are now also able to make a full inspection of the base unit and all components.
CARE OF MECHANICAL PARTS
All the mechanisms used on our Kiddy Rides machines are designed for low maintenance. When the
ride is separated and where applicable, all the procedures below should be carried out:
a. Check condition and tension of Drive Belt (adjust as needed)
b. Test security and condition of any pulleys.
c. Check all nuts and bolts remain tight.
d. Lubricate and check bearings
e. Ensure all moving parts are free from excess play and wear.
f. Check overall condition of metal structure
If any guidance as to how to carry out any of the above operations is required, please contact the
manufacturer.

7
DAILY CHECKS
Acheck of each coin-operated Kiddy Ride should, whenever reasonably practical, be carried out each
day before it is made available for public use. The following checks are recommended:
a. Check that the mains plug is undamaged and securely attached to the mains cable, with no
visible wires.
b. Check the mains cable itself has no damage.
c. Make sure there are no broken, damaged or sharp parts of the ride which may cause injury.
d. Check that all covers and guards are in place thus preventing any access to the rides
mechanism.
e. Ensure there is no excess wobble or play from the ride.
f. Make sure all advisory literature is in place.
g. Ensure the area around the ride is free from obstruction and that persons passing by are not in
any danger.
h. The ride should be kept clean and free from any customised additions unless approved by the
manufacturer.
i. Insert coins and run the ride to ensure everything is operating correctly.
If as a result of the above visual checks any doubt arises, then the company, supplier, or person
responsible for the ride should be notified immediately.

8
DAILY INSPECTION CHECK LIST
Please make copies of blank sheet before filling in.
Fill in the column’s with either a “tick” for ok. or a “cross” for fail.
DATE
PLUG
MAINS
LEAD
BODY
DAMAGE
ADVISORY
BADGES
RIDE
CLEARENCE
OPERATION
NAME
SIGN

9
SPARE PARTS
HOW TO ORDER
TELEPHONE
Call us on +44 (0) 113 2393803
Confirm your order by 2.00pm and we will ship the same day. If goods aren’t in stock, you will be
given an expected shipping date before confirming your order.
.
FAX
Fax us on +44 (0) 113 2363194
Confirm your order by 2.00pm, and we will ship stock items the same day.
POST
Send us an order by post. If you don’t have an account with us, please include payment for the full
amount including delivery and VAT.
E-MAIL
E-mail your order directly to orders@kiddyrides.co.uk or browse our web pages at
www.kiddyrides.co.uk and e-mail us directly from there.
METHODS OF PAYMENT
Subject to approval, we offer thirty day Credit Accounts. Please call for more information.
If you are not an account holder, you can post a cheque along with your order.
We would also welcome receiving your payment by BACS direct credit. Please call for more details.
Northern Leisure Group also accept payment from all major credit cards.
If you have any queries regarding an account, then please contact us. You can also get information by
e-mailing our accounts dept. at accounts@kiddyrides.co.uk

10
SPARE PARTS cont.
NO MINIMUM ORDER VALUE
We want you to order what you want, when you want it. So you can order whatever quantities you like
from Kiddy Rides, and you won’t be penalized with a minimum order value.
ADDRESS
All postal communication should be sent to:
Northern Leisure Group Ltd.
Unit 3 Kingsmark Court,
Intercity Way,
Swinnow,
Leeds LS13 4LY
ON-SITE REPAIRS
If you are unable to return parts for repair, or fit spares yourself, we can arrange for one of our regional
engineers to make a site visit. Just call for details.
HOURS OF BUSINESS
Our office and sales lines are open Mon – Fri: 9.00am to 5.30pm. You can still call our number
(+44 (0) 113 239 38 03 ) outside these hours, and leave a message with our pager service.
Alternatively, you can contact us by fax or e-mail.
All goods are supplied on the conditions that Northern Leisure shall not be liable for any direct or consequential damage arising
from delay in delivery or from defective material, other than is covered by our usual form of guarantee.
Whilst every effort is made to ensure the accuracy of the particulars contained in this book, modifications and specification
changes to kiddie rides are on going. These may affect the information specified.

11

12
FAULT FINDING
To be carried out by a competent person. Ensure volume is turned up for testing purposes.
SYMPTOM CHECK
No lights / self test message
Mains voltage supply.
Mains supply to control box.
Green 4 way plug on control box.
2x yellow wires into 4 way plug.
Break in connection on yellow wires to button lamps
Coins do not accept
Check mains power is on.
No voltage to coin mech.
Faulty coin mech.
Broken Ribbon Cable
Coins accept but counter / meter does
not turn.
Check connections to counter / meter
Check cable that runs to the “D” connector on the control box.
Check control box.
Faulty meter.
Ride Will Not Start.
Counter / meter turns when coins
inserted but will not operate the start
button message when the credit is
reached.
Check control box and “D” plug connections.
Check connections on interface and
wiring to start button.
Faulty control box.
When start button is pressed, sound
Operates but no movement occurs.
Check for mains output to motor from control box whilst the
ride is operating.
Connect motor direct to mains to see if it runs.
Check pulley and Drive belt on the mechanism.
No display on monitor screen
Check there is power to the machine.
Make sure all connections to monitor are present and secure.
Check there is power to the power supply (located through
rear inspection door).
Check all output connections from the control box are fit
correctly.
Ride permanently runs. Faulty relay in control box.
Check that mains supply is not direct to motor.
*For advise and support on any problem, please call our Technical Dept. on +44 (0) 113 239 38 03 or
Email technical@kiddyrides.co.uk

13

14
GENERAL INFORMATION
BODY WORK
The main body of the ride is made from fully lead free gel coated GRP to ensure the longevity and
bright attraction of the ride.
COIN MECHANISM LOCATION
The coin mechanism is mounted on the dashboard of the ride. This is clearly visible near to the
entrance of the ride. The plate can be locked and unlocked by a single key. Once the plate is opened,
the coin mech. can be easily accessed to aid in the clearance of any jams etc.
COUNTER / METER
Inside the coin mech door you will find the Counter / Meter. This clocks up the amount of coins which
the ride has taken, enabling you to keep an eye on your rides performance. The meter is non resetable
and tamper resistant.
CONTROL BOX
The control box, or Kermit, is located inside the rear of the ride. The box is mounted to the back
mounting plate of the base. This is accessed through the door at the back of the ride. This can be
opened by unlocking the lock fitted to the door. The door has 2 locating pins at the top which will
simply dislodge when the door is lifted. The control box and its connections are now fully accessible.

15
SPARE PARTS
1. Please quote the machine description and serial number (if applicable) when ordering Spares
for your Kiddy Ride.
2. Also quote the full part number and description of the item as set out in the following lists.
3. State precisely how parts are to be despatched.
U.K.: By post, carrier, or road transport OVERSEAS: Sea freight, air mail or air freight.
*Replacement parts which are not of genuine Northern Leisure Group Kiddy Rides supply, cannot be
relied upon to be the correct specification, material or quality. Kiddy Rides therefore cannot be
expected to extend their Warranty to rides which have been fitted with parts which Northern Leisure
has not supplied.
A.C. STANDARD BASE
Description Qty Description Qty
Mechanical Base Shroud (1) 1Drive Belt (14) 1
Sub-Frame (2) 1 Gearbox Crank (15) 1
Front Pivot (H-Frame) (4) 1Crank Bearing (16) 1
Front Pivot Bearings (4) 4NLG Serial Number Plate 1
Towing Eye (5) 1 Back Mounting Plate (9) 1
Towing Eye Bolt Set (6) 1Motor Bolts - M8 x 30 4
Castors 2 Gearbox Bolts - M8 x 20 4
Base Feet 4 Front Pivot Bolts - M8 x 35 4
Control Box 1 Castor Bolts – M8 x 70 2
Mains Power Lead 1 Crank Bolt – M12 x 90 1
Mains Power Lead Clamp 1 Crank Pinch Bolt – M8 x 50 1
A.C. Motor (240v) (7)(10) 1Pivot Bearing Bolt – M10 x 40 2
Gearbox (8)(11) 1Back Plate Bolt 4
Motor Pulley (12) 1Back Plate Earth Point 1
Gearbox Pulley (13) 1IEC Inlet socket 1
Cash Box 1 Cash Box Lock 1

16
BILL OF MATERIALS
DESCRIPTION PART NUMBER
STEERING WHEEL PEPPASTEER
COINMECH PLATE BUZZMECHPLATE
COIN MECH.MECHM33013012S
MINI FACE PLATE MECHFACE13042
FOOT PLATE PEPPAFOOTPLATE
50mm ROUND BUTTON BUTTCIRC03031
METER (non resetable) METEBASE53002N
WIRING LOOM PEPPALOOM
SPEAKER TRACSPEAK81006
SPEAKER BOLT M4x30 Cup Squ. Hex.
SPEAKER NUTS M4 Full Nut
SPEAKER WASHERS M4 Shake Proof
SPEAKER COVER TRACSPEAKG81007
BODY-BASE BOLT M8x80 Button Cap
LOCKS LOCKMISC37019
BUTTON DECALLS PEPPABUTTSTIC
BULBS BULBWEDGE04003
DECALL SET STICPEPPA
KERMIT CONTROL BOX LAZYKERMIT
LCD MONITOR 10.4LCD
HEADLAMP LENS TRACLENS
HEADLIGHT BULB BULBBA9S
MONITOR POWER SUPPLY LCDPSU
VIDEO LEAD 3MPHONO
SPEAKER LEAD SPEAKLEAD

17
WIRING COLOUR CODES
Mains Cable: Size 3 x 1.5mm Connection
Brown Live
Blue Neutral
Yellow / Green Earth IEC Plug (Female)
Motor Supply Cable Size 3 x 1.5mm
Brown Live
Blue Neutral
Yellow / Green Earth IEC Plug (Male)
12v Circuit: Size 16 x 0.2mm Connection
Start Pink 25-way D-Type Connector
Start / Return (common) Black 25-way D-Type Connector
Start Lamp Red 25-way D-Type Connector
Start Lamp Brown 25-way D-Type Connector
Counter Blue 25-way D-Type Connector
Counter White 25-way D-Type Connector
Pushbutton 1 Green 25-way D-Type Connector
Pushbutton 2 White 25-way D-Type Connector
1st Speaker + Black 25-way D-Type Connector
1stSpeaker - Black / White 25-way D-Type Connector
2nd Speaker Black 3.5mm Jack Plug (male)
2nd Speaker Black / White 3.5mm Jack Plug (male)
Pushbutton 3 Purple 15-way-D-Type Connector
Pushbutton 4 Orange 15-way-D-Type Connector
Secondary Common (not ground) White / Red 15-way-D-Type Connector
Lamps: Size 16 x 0.2mm Connection
12v Flasher Yellow 4-way Control Box Connector
Please see diagram on next page for further reference.
*Please note: The secondary common in the 15-way plug is not Ground. This is a Multi-plexed
common, and must not be connected to any other ground or common.

18

19
YOUR NOTES
RIDE HISTORY / LOG
DATE DETAILS / ACTION TAKEN SIGN PRINT

20
YOUR NOTES
RIDE HISTORY / LOG
DATE DETAILS / ACTION TAKEN SIGN PRINT
Table of contents
Other Kiddy Rides Toy manuals
Popular Toy manuals by other brands

beeloom
beeloom minigolf instruction manual

Canon
Canon CREATIVE PARK Pop-up card (Swings) Assembly instructions

Kyosho
Kyosho Sunstorm 600 instruction manual

Adrian Olson
Adrian Olson ODOM Assembly manual

Fisher-Price
Fisher-Price BUTTERFLY DREAMS Mobile C0108 manual

SIG
SIG Ryan S-T Operating, assembly instructions and parts list