Kiehn-Holz KH 34-008 User manual

1
AAL_KH 34-008_200521_T1_(FR)
Kiehn-Holz GmbH
Braaker Grund 1 · D 22145 Braak
KH 34008 MONTAGEANLEITUNG
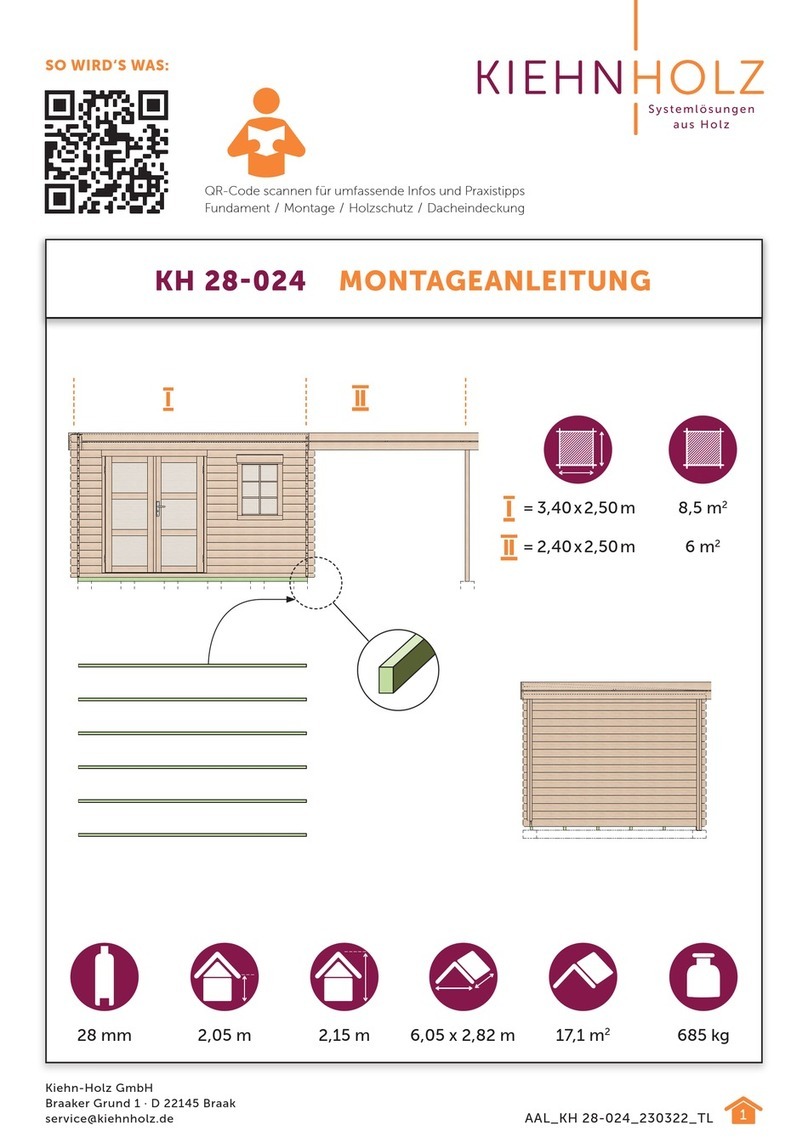
1,93 m 2,47 m 8,9 m212,8 m2650 kg
3,30 x 2,70 m
3,75 x 3,35 m
Systemlösungen
aus Holz
34 mm

2AAL_KH 34-008_200521_T1_(FR)
Kiehn-Holz GmbH
Braaker Grund 1 · D 22145 Braak
KH 34008
Sehr geehrte Kundin, sehr geehrter Kunde,
danke für Ihre Kaufentscheidung.
Bitte machen Sie sich schon vor der Montage mit der Aufbauanleitung vertraut
und folgen Sie genau den Zeichnungen, Bauschritten und Erklärungen.
So wird’s perfekt und Sie haben lange Freude an Ihrem Blockbohlenhaus.
Bei der Meldung eines Garantiefalls geben Sie bitte den Garantiecode Ihres
Hauses und die Teile- sowie die Artikelnummer an.
Bestimmte holzhandwerkliche Fähigkeiten sind für den Aufbau erforderlich.
Berücksichtigen Sie die allgemeinen sowie Ihre örtlichen Bauvorschriften. Sollten
besondere Anforderungen über unsere für dieses Haus verfügbare Statik hinaus
bauamtlich verlangt werden, sind diese nicht in unserem Leistungsumfang
enthalten. Dies betrifft auch die Fundamentierung.
SO WIRD’S WAS IHR NEUES GARTENHAUS
FUNDAMENT Das A&O und Ihr erster Bauschritt. Optimal ist ein Streifen- oder
Punktfundament unter den Wänden. Betonplatte / Pflaster sind
ebenfalls möglich. Auf jeden Fall aber immer perfekt ausnivelliert,
frostfrei und tragfähig.
BAUBEGINN Bauteile trocken auspacken und als erstes anhand der
Teileliste die Vollständigkeit und die Unversehrtheit überprüfen.
Bei Reklamationen Teile mit Angabe Garantiecode sowie Teile- und
Artikelnummer bei Ihrem Markt nachbestellen. Keine beschädigten
Bauteile verbauen. Hilfreich: jetzt schon die Teile nach Wänden und
Bauschritten sortieren. Immer zuverlässig vor Nässe schützen.
HOLZSCHUTZ Ihr Haus ausschließlich erst nach fertigem Aufbau (umgehend)
behandeln. Offenporige, pigmentierte Lasuren (keine farblosen!) sind
ideal. Immer mit Holzschutz-Grundierung, außen und besonders im
Bodenbereich, vorbehandeln. Gilt auch bei Verwendung deckender,
atmungsaktiver Farben. Ausschließlich für den Außenbereich bestimmte
Farben verwenden (niemals Lacke!). Herstellerangaben beachten.

3
AAL_KH 34-008_200521_T1_(FR)
Kiehn-Holz GmbH
Braaker Grund 1 · D 22145 Braak
SO WIRD’S WAS IHR NEUES GARTENHAUS
AUFBAU Bitte genau der Aufbauanleitung folgen, Wandbohlen niemals miteinander
verbinden, vernageln, verschrauben, besonders auch nicht Türrahmen und,
falls vorhanden, Fensterrahmen an Wandbohlen verschrauben. Ebenfalls
keine Einbauten, Leitungen, Regale etc. an mehreren Wandbohlen
befestigen. Wände und Elemente müssen bei den natürlichen Temperatur-
und Feuchtigkeitsschwankungen frei ‚arbeiten‘ können.
BESONDERHEIT TÜR und FENSTER
Sehr wichtig: Naturholz und damit auch die Wände Ihres Hauses ‚arbeiten‘
stetig und um dies auszugleichen, sitzen Tür- und Fensterrahmen ‚lose‘ in
den Wandausschnitten mit immer etwas ‚Spiel‘ zu den Seiten und, besonders
sichtbar, nach oben (‚Schlitze‘, diese werden durch Abdeckungen optisch
geschlossen, diese Bretter nicht an Wandbohlen befestigen). Montage des
Türrahmens immer perfekt rechtwinklig und maßgenau. Rahmen nach
wenigen Wandbohlen in die Wandausschnitte einschieben, genau mittig
positionieren und einzig (!) die Schwelle des Türrahmens an unterer
Wandbohle befestigen. Abschließend den Türrahmen rechtwinklig
ausrichten, dann Türflügel exakt und passgenau nach Zeichnung
montieren – nur am Türrahmen befestigen (nicht an den Wandbohlen).
Nachjustieren des Türrahmens bleibt so immer möglich und damit wird
‚Türklemmen‘ schnell behoben.
DACH Die Pfetten, Giebel und obere, in Dachneigung geschrägte Abschlussbohlen
der Seitenwände genau bündig montieren. Wenn nötig, die Wandbohlen
hierzu beim Aufbau in der Höhe Nut-in-Feder angleichen. Auf stabile Auflage
und Befestigung der Profile achten, Profile nicht zu stramm, sondern mit
etwas ‚Spiel‘ Feder in Nut verlegen, damit das Holz bei Temperatur- und
Feuchtigkeitswechsel ‚arbeiten‘ kann.
FERTIGSTELLUNG
Fenstersprossen, Windfedern, Traufbretter etc. anbringen.
DACHEINDECKUNG
Bitte niemals nur Dachpappe/Bitumenbahn ohne Unterspannbahn verbauen
– nur hochwertige und dauerhafte Dachbaustoffe plus Regenrinnen, immer
mit Traufblechen und Ortblechen zum Schutz der gefährdeten Holzteile
fachgerecht ausgeführt, garantieren dauerhaften und zuverlässigen Schutz
vor Nässe und Verrottung und damit eine lange Lebensdauer Ihres Hauses
PFLEGE Regelmäßige Sichtkontrolle, auch der Dacheindeckung (hier insbesondere
Traufkanten, Ortgänge, Windfedern). Staunässe zuverlässig vermeiden.
Rechtzeitig und ausreichend nachlasieren / nachstreichen. Austretendes
Harz mit Nitro-Verdünnung oder Terpentin entfernen.

4AAL_KH 34-008_200521_T1_(FR)
Kiehn-Holz GmbH
Braaker Grund 1 · D 22145 Braak
TOUT CE QU’IL FAUT POUR VOTRE
NOUVELLE MAISON DE JARDIN
FONDATION
La clé du succès et votre première étape de construction. L‘idéal est une fondation en
bandes ou par points sous les murs. La dalle / le pavage en béton sont également possibles.
Dans tous les cas, cependant, elle doit être toujours parfaitement nivelé, à l‘abri du gel et
solide.
DÉBUT DE LA CONSTRUCTION
Déballez les composants à sec et, tout d‘abord, vérifiez selon la liste des pièces l‘exhaustivité
et l‘intégrité de la livraison. En cas de réclamation, commandez à nouveau les pièces dans
votre magasin en indiquant le code de garantie et le numéro de pièce et d‘article. N‘installez
pas de composants endommagés. Utile : triez les pièces par paroi et étape de construction
dès maintenant. Protégez-les toujours de manière fiable contre l‘humidité.
PROTECTION DU BOIS
Traitez votre maison seulement après la fin des travaux (immédiatement après). Les lasures
pigmentées à pores ouverts (pas incolores !) sont idéales. Prétraitez le bois toujours avec
un primer de protection du bois, à l‘extérieur et surtout au niveau du sol. Cela s’applique
également à l‘utilisation de couleurs opaques et respirantes. N‘utilisez que des produits
destinés à être utilisées à l‘extérieur (jamais de vernis !). Respectez les instructions des
fabricants.
KH 34008 FR
Chère cliente, cher client,
Merci pour votre décision d‘achat.
Veuillez-vous familiariser avec les instructions de montage avant l‘installation
et suivre exactement les dessins, les étapes de construction et les explications.
Votre construction sera alors parfaite et vous pourrez profiter longtemps de
votre maison de jardin.
Lorsque vous signalez un cas de garantie, veuillez entrer le code de garantie
de votre entreprise et le numéro de pièce et d‘article.
Certaines compétences en matière de travail du bois sont nécessaires pour
la construction. Respectez les réglementations générales et locales en matière
de construction. Si les autorités de construction locales exigent des exigences
particulières au-delà de la statique disponible pour cette maison, celles-ci ne
sont pas incluses dans l’étendue de nos prestations. Cela vaut également pour
les fondations.

5
AAL_KH 34-008_200521_T1_(FR)
Kiehn-Holz GmbH
Braaker Grund 1 · D 22145 Braak
TOUT CE QU’IL FAUT POUR VOTRE
NOUVELLE MAISON DE JARDIN
CONSTRUCTION
Veuillez suivre scrupuleusement les instructions de montage,ne reliez, clouez et ne vissez
pas les planches murales, surtout ne vissez pas les encadrements de portes et, le cas
échéant, de fenêtres aux planches murales. De même, ne fixez pas d‘appareils, de tuyaux,
d‘étagères, etc. à plusieurs planches murales. Les parois et éléments doivent pouvoir
résister aux changements de température naturels et les fluctuations d‘humidité et doivent
pouvoir « travailler » librement.
SPÉCIALITÉ PORTES et FENÊTRES
Très important : Le bois naturel et donc les parois de votre maison « travaillent » en
permanence et pour le compenser, les encadrements de portes et de fenêtres reposent «
librement » dans les découpes murales avec toujours un certain « jeu » latéral et, surtout,
bien visible en haut, (des « fentes », celles-ci sont cachées optiquement par des
couvertures, ne fixez surtout pas ces planches aux planches murales). Le montage de
l‘encadrement de la porte doit être toujours parfaitement à angle droit et précis. Après
quelques planches murales, faites glisser l’encadrement dans les découpes de la paroi,
placez-le exactement au milieu et ne fixez que (!) le seuil de l’encadrement de la porte à la
planche murale inférieure. Enfin, alignez l’encadrement de la porte à angle droit, puis
montez le vantail de la porte exactement et précisément selon le dessin – ne le fixez que
sur l’encadrement de la porte (pas sur les planches murales). Cela signifie que le
réajustement de l’encadrement de la porte est toujours possible et qu’un éventuel blocage
de la porte est rapidement éliminé.
TOIT
Montez les pannes, les pignons et les planches d‘extrémité supérieure des parois latérales,
qui sont biseautées pour correspondre à la pente du toit, exactement à fleur. Si nécessaire,
ajustez la hauteur de la languette et de la rainure des planches murales lors du montage.
Veillez à ce que les profilés du toit soient stables et bien fixés. Ne posez pas les profilés trop
serrés, mais avec un peu de « jeu » pour que le bois puisse « travailler » en fonction des
changements de température et d‘humidité.
ACHÈVEMENT
Finalement, installez les barreaux de fenêtre, les avant-toits, les ressorts à vent et les
bandes d‘ancrage au vent, etc.
REVÊTEMENT DU TOIT
N‘utilisez jamais que du papier goudronné sans écran de sous-toiture – seuls des matériaux
de toiture de haute qualité et durables ainsi qu’une gouttière garantissent une protection
contre l‘humidité et donc une longue durée de vie.
ENTRETIEN
Effectuez une inspection visuelle régulière, réappliquez de la lasure, évitez l‘humidité
stagnante sous le plancher, réajustez les éléments de la porte. ... Et assurez une bonne
protection du bois et une étanchéification de la toiture professionnelle et durable.
6AAL_KH 34-008_200521_T1_(FR)
Kiehn-Holz GmbH
Braaker Grund 1 · D 22145 Braak
WELCOME TO YOUR NEW GARDEN HOUSE
FOUNDATION A solid basis and the first step of construction. A strip or point
foundation is ideal under the walls. A concrete slab / paving are also
possible. In any event, it must always be perfectly level, frost-free and
capable of bearing the weight.
STARTING CONSTRUCTION
Unpack the components in a dry place and first check that they are
complete and undamaged using the parts list. If you have any cause for
complaint, please re-order parts from your store quoting the warranty
code as well as the parts and article number. Do not install damaged
components. A helpful tip: sort the parts by walls and construction
steps at this early stage. Protect against moisture at all times.
WOOD PROTECTION
Only treat your house (immediately) after completion of construc-
tion. Open-pored, pigmented varnishes (not colourless!) are ideal.
Always pre-treat with wood protection primer, on the outside and as
well as the floor area in particular. This also applies when using
opaque, breathable paints. Only use varnishes intended for outdoor
use (never use lacquer!). Observe the manufacturer‘s instructions.
KH 34008 GB
Dear Customer,
Thank you for choosing a Kiehnholz product.
Please familiarise yourself with the assembly instructions prior to construction
and carefully follow the drawings, construction steps and explanations.
This will ensure that it is perfect and you will enjoy your garden house for
many years.
When notifying us of a warranty claim, please make sure to include the warranty
code of your garden house as well as the parts and article number.
Construction requires certain woodworking skills.
Please observe general and local building regulations. Our scope of service does
not include any static information that may be required by building authorities in
addition to the structural calculations provided by us for the cabin. This also ap-
plies to the foundations.

7
AAL_KH 34-008_200521_T1_(FR)
Kiehn-Holz GmbH
Braaker Grund 1 · D 22145 Braak
WELCOME TO YOUR NEW GARDEN HOUSE
CONSTRUCTION
Please follow the assembly instructions exactly, never connect wall planks to
each other, nail or screw them together, in particular do not fix door frames
and, when present, window frames to wall planks using screws. Similarly, do
not attach fixtures, pipes, shelves etc. to several wall planks. Walls and
elements must be able to ‚work‘ freely in response to
natural variations in temperature and humidity.
SPECIAL NOTES ON DOOR and WINDOWS
Very important: natural wood and thus the walls of your house are constantly
‚working‘ and, to compensate for this, door and window frames sit ‚loosely‘
in the wall cut-outs and always have a degree of ‚play‘ at the sides and – es-
pecially visible – at the top (‚slots‘, these are covered for optical purposes; do
not fasten these boards to wall planks). Always mount the door frame at a
precise right-angle and dimensionally accurately. After assembling a few wall
planks, slide the frame into the wall cut-outs, position it exactly in the middle
and fix only (!) the sill of the door frame to the lower wall plank. Finally, align
the door frame at a right angle, mount the door leaf exactly and accurately
according to the drawing – making sure to only attach to the door frame
(not to the wall planks). This allows the door frame to be adjusted at any time
and door jamming can be quickly eliminated.
ROOF Assemble the purlins, gables and upper finishing planks of the side walls,
which are angled to the roof pitch, exactly flush. Where necessary, adjust the
height of the wall planks for this purpose using tongue and groove as you
assemble them. Make sure that the profiles for the roof are stable and firmly
fixed in place. Do not lay the profiles too tightly, but with a little ‚play‘, so
that the wood can ‚work‘ as temperature and humidity change.
COMPLETION
Finally, fit window bars, eave boards, gable boards and wind-bracing strips etc.
ROOF COVERING
Never use just roofing felt without an underlay – only high-quality and
durable roofing materials and rain guttering guarantee protection from
moisture and thus a long service life.
CARE Regular visual inspections, re-varnishing, avoid waterlogging, readjust door
elements. Please ensure good wood protection and professional, durable
roofing.

8AAL_KH 34-008_200521_T1_(FR)
Kiehn-Holz GmbH
Braaker Grund 1 · D 22145 Braak
AÜBERSICHT AUFBAU und TEILEZUORDNUNG
12
14
07
11
04
05
06
03
1321 202215 1618 1710 19 05
08
02
01
09

9
AAL_KH 34-008_200521_T1_(FR)
Kiehn-Holz GmbH
Braaker Grund 1 · D 22145 Braak
3300
2900 400
16 3332
100 100
07
124
124 3500
100100
05 05
02
08
ÜBERSICHT AUFBAU WÄNDE B
04
04
03
08
06
02

10 AAL_KH 34-008_200521_T1_(FR)
Kiehn-Holz GmbH
Braaker Grund 1 · D 22145 Braak
X
04
02
WANDAUFBAU

11
AAL_KH 34-008_200521_T1_(FR)
Kiehn-Holz GmbH
Braaker Grund 1 · D 22145 Braak
WANDAUFBAU
B
X
3300
2900 400
16 3332
100 100
07
124
124 3500
100100
05 05
02
08
ÜBERSICHT AUFBAU WÄNDE B
04
04
03
08
06
02

12 AAL_KH 34-008_200521_T1_(FR)
Kiehn-Holz GmbH
Braaker Grund 1 · D 22145 Braak
90°
19
18
17
22
22
22
2.
3.
TÜRRAHMEN
1.
17

13
AAL_KH 34-008_200521_T1_(FR)
Kiehn-Holz GmbH
Braaker Grund 1 · D 22145 Braak
WANDAUFBAU und GIEBELBEFESTIGUNG
08
07
06
03
B
3300
2900 400
16 3332
100 100
07
124
124 3500
100100
05 05
02
08
ÜBERSICHT AUFBAU WÄNDE B
04
04
03
08
06
02
05

14 AAL_KH 34-008_200521_T1_(FR)
Kiehn-Holz GmbH
Braaker Grund 1 · D 22145 Braak
08
09
09 09
PFETTEN und DACH
01
01

15
AAL_KH 34-008_200521_T1_(FR)
Kiehn-Holz GmbH
Braaker Grund 1 · D 22145 Braak
11
14
14
11
12
12
01
DACH

16 AAL_KH 34-008_200521_T1_(FR)
Kiehn-Holz GmbH
Braaker Grund 1 · D 22145 Braak
TÜRELEMENTE
3 mm
150 mm
5 mm
6 mm
1 mm
16
05
16

17
AAL_KH 34-008_200521_T1_(FR)
Kiehn-Holz GmbH
Braaker Grund 1 · D 22145 Braak
FERTIGSTELLUNG
10

18 AAL_KH 34-008_200521_T1_(FR)
Kiehn-Holz GmbH
Braaker Grund 1 · D 22145 Braak
10 mm
FERTIGSTELLUNG
21
20

19
AAL_KH 34-008_200521_T1_(FR)
Kiehn-Holz GmbH
Braaker Grund 1 · D 22145 Braak
FERTIGSTELLUNG
13
13
13

20 AAL_KH 34-008_200521_T1_(FR)
Kiehn-Holz GmbH
Braaker Grund 1 · D 22145 Braak
TEILELISTE: KH 34008
Pos. Dimensionen mm Art.-Nr.
Stück/
pieces
74
2
16
32
32
1
1
2
3
2
4
2
4
4
1
1
1
1
1
2
2
1
2
1
1
01
02
03
04
05
06
07
08
09
10
11
12
13
14
15
16
17
18
19
20
21
22
16 x 89 x 1939
34 x 57 x 3500
34 x 114 x 3500
34 x 114 x 2900
34 x 114 x 995
34 x 114 x 3300
34 x 114 x 3300
34 x 551 x 3232
34 x 145 x 3300
20 x 120 x 1560
16 x 120 x 1990
16 x 45 x 3300
16 x 45 x 1900
16 x 45 x 1990
32 x 720 x 1714
32 x 740 x 1714
56 x 55 x 1749
56 x 55 x 1749
56 x 55 x 1547
10 x 40 x 750
10 x 40 x 601
12 x 56 x 1502
34 x 57 x 250
020160891939
022340573500
022341143500
022341142900
021341140995
024341143302
024341143303
029345513232
022341453301
020201201560
023161201990
020160453300
021160451900
020160451990
041207201714
040007351714
022560551749
023560551749
021560551547
020100400750
020100400601
083412561502
020340570250
081900000030
082834001100
Kontrolle
Name:
Adresse:
Tel:
Garantiecode
Ihre Lieferanschrift
Dachprofile
Anfangswandbohlen
Wandbohlen, Rückwand
Wandbohlen, Seitenwände
Wandbohlen, Vorderwand neben Türen
Wandabschlußbohle, Seitenwand rechts
Wandabschlußbohle, Seitenwand links
Giebeldreiecke, fertig montiert
Pfetten
Verkleidungen, Tür oben
Windfedern
Traufbretter
Windverankerungsleisten für innen
Dacheindeckungsleisten
Doppeltür, links, DT-L-02
Doppeltür, rechts, DT-R-02 ZY
Rahmenleiste Doppeltür RH-R-02 34, rechts
Rahmenleiste Doppeltür RH-L-02 34, links
Rahmenleiste Doppeltür RH-O-02 34, oben
Fenstersprossen Tür, vertikal
Fenstersprossen Tür, horizontal
Metallschwelle
Montagehölzer
Montagebeutel, Tür KH 34-008
Montagebeutel, Haus
Table of contents
Languages:
Other Kiehn-Holz Garden House manuals
Popular Garden House manuals by other brands

Luoman
Luoman Lillevilla 36 manual

Palmako
Palmako FRKK44-5540 installation manual

Palmako
Palmako Pavilion PA44-4730 Assembly, installation and maintenance manual

Grosfillex
Grosfillex ABRI UTILITY ZF63 Assembly instructions

Billyoh
Billyoh INS-0054 Building instructions

Palmako
Palmako Bret installation manual

Tiger
Tiger SAMPI General assembly instructions

oldfields Treco
oldfields Treco UTZ1015 manual

Mercia Garden Products
Mercia Garden Products 03DTSHPN1006FGD2TW-V1 General instructions

Lemeks
Lemeks Palmako FRBC44-5540 installation manual

Lasita Maja
Lasita Maja Faro 4 manual

Luoman
Luoman LILLEVILLA Siikajoki Assembly and Maintenance