2
Assembly Instructions
Maintenance
• Periodically tighten all hardware
• Lubricate the slides twice a year
• Lubricate the lock with graphite annually
• Use a damp Microfibre cloth to clean all surfaces
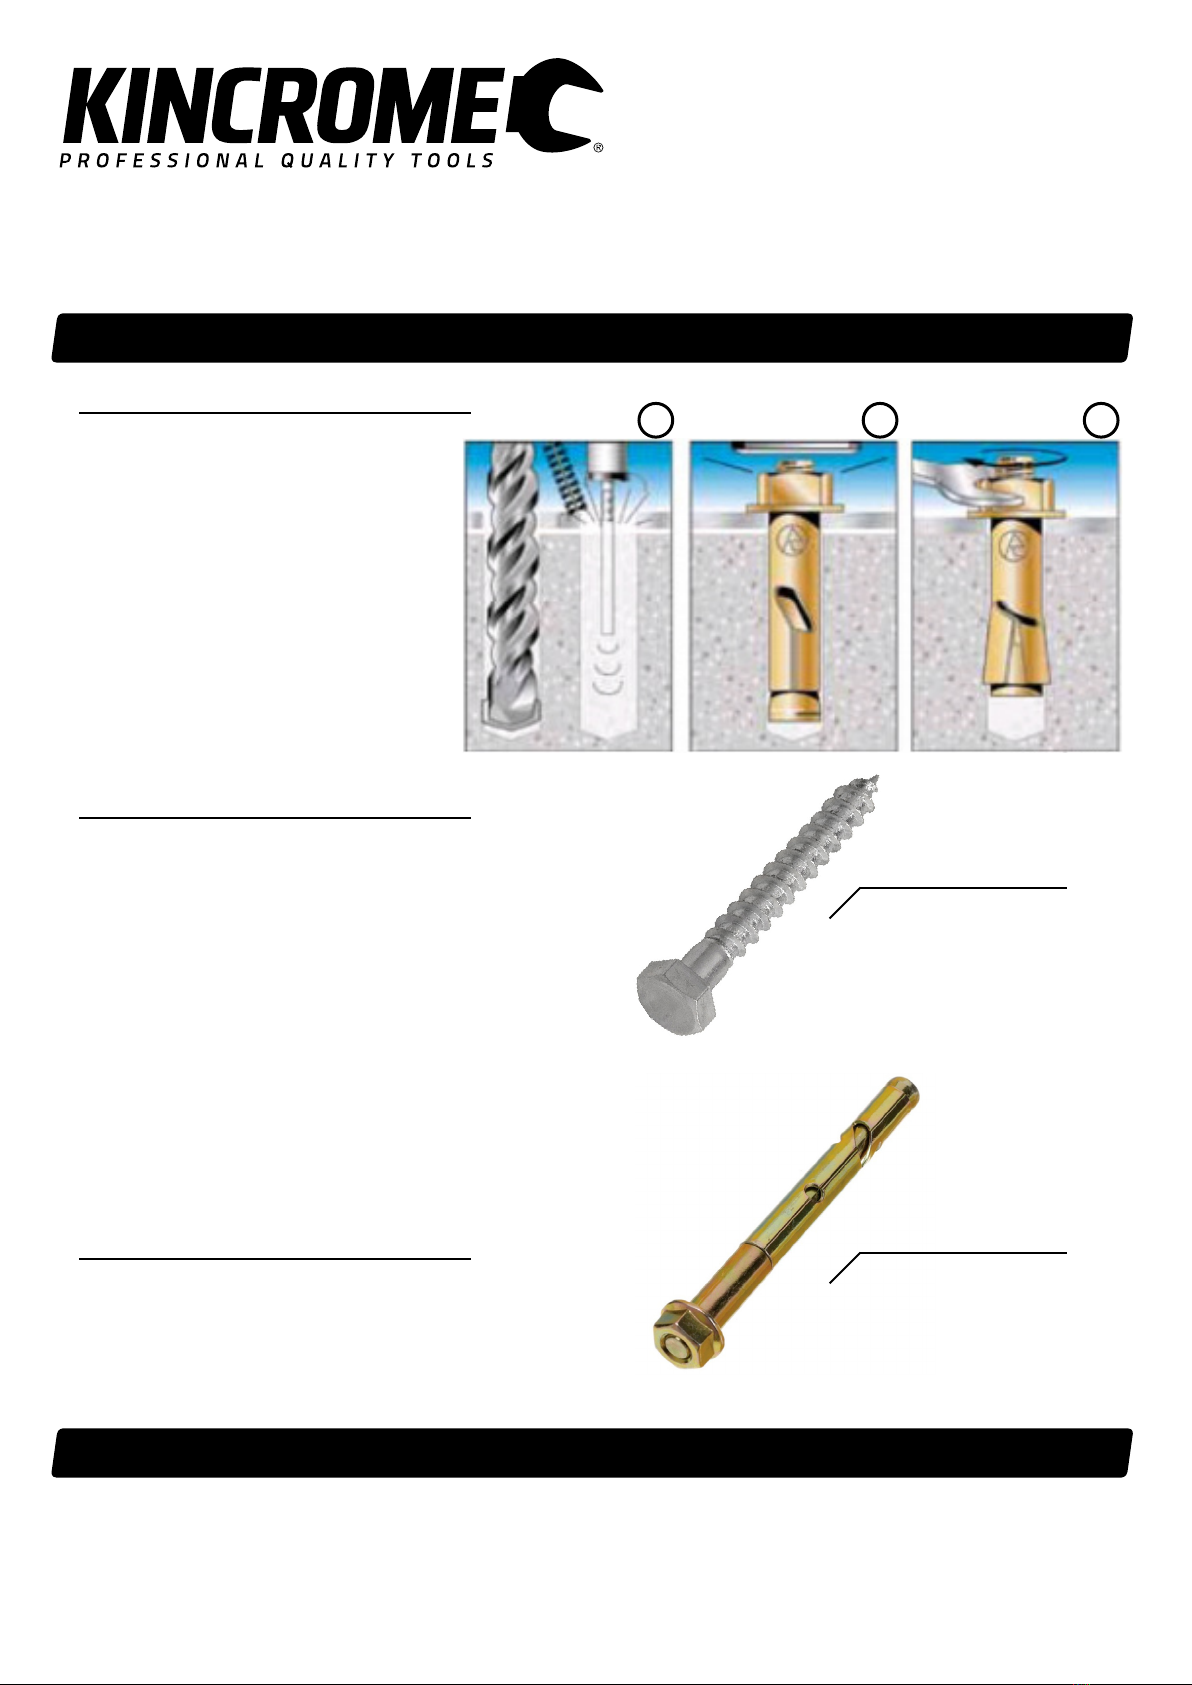
Installation - Brick & Concrete
Installation - Wood
1. Drill or core a hole to the recommended
diameter and depth using the fixture as a
template. Clean the hole thoroughly with
a hole cleaning brush. Remove the debris
with a hand pump, compressed air, or
vacuum.
2. Insert the Concrete/Masonary Anchors
(Dynabolt) through the fixture and drive
with a hammer until the washer contacts
the fixture.
3. Thighten the Concrete/Masonary
Anchors (Dynabolt), allowing the sleeve to
twist and pull down the fixture firmly onto
the substrate. For optimum performance,
a torque wrench should be used.
1. All coach screws require a pilot hole, using
a general purpose drill bit such as a Twist
Drill Bit, before they are screwed into place,
preventing the wood from splitting.
2. Drill the hole to the required diameter and
depth to the coach screw.
3. Once the pilot hole has been drilled, the
coach screw can be driven directly into the
wood. When using coach screws on timber
it is advisable to use a washer to avoid
embedding the screw head into the wood on
impact.
4. Place the fixture in position on the timber/
wall in place first.
5. Drive the screw into the timber/wall until
secure and tight.
Important information
When tightening or loosening a coach screw it
is important to use the correct size spanner,
wrench or impacts socket to avoid damaging
the head of the screw. The size you require
can be determined by measuring across the
flat edges of the head and not point to point.
51065
Wall Cabinet 2 Drawer
750mm
1 2 3
Coach Screw
Dynabolt


