Positioning water filtration system and
water connection:
Water filter should be mounted upright on a vertical
surface without obstructions.
– Locate an installation location that is near the
equipment it will be supplying with water. Ensure
the location is clear from possible damage from
day-to-day operations.
– Ensure there is a minimum of 4 inches of clearance
below filter cartridge to enable filter change-outs
as needed.
– Turn o water supply and ensure faucets are
turned on or open. This is to remove pressure
from the system.
– Cut inlet and outlet water supply lines.
NOTE: If hard copper plumbing is present, use only
lead-free solder and protect filter housing from
heat. Do not solder within 12" of plastic parts.
– Remove existing filtration system if present.
Terminate both ends of plumbing with
appropriate fittings.
– Insert the appropriate plumbing connection
fittings into the filter head. It is recommended to
use ⅜" fittings or larger to allow for optimal
performance.
– Do not over tighten fittings into plastic parts!
Warranty will be voided if parts are cracked and/or
broken due to misuse and/or over tightening!
Connect water filter inlet to COLD WATER SUPPLY
ONLY. Use approved flexible beverage tubing
where possible with correct sized tube clamps.
If hard plumbing is necessary, then use only lead-free
solder and protect filter housing from excessive
heat. Do not solder within 12" of plastic parts.
From outlet of water filter use no less than ¼" ID tub-
ing to all specified equipment. Teeing the tubing should
be done appropriately, for example ½" x ½" x ½".
Mounting
1. Measure mounting holes of filter system
and mark hole locations on wall.
a. Ensure marks are level. Drill holes for
anchors, if required. Anchors must be properly
sized to allow for the wet weight of the
filter system.
b. Secure backplate to the wall.
Connect Plumbing
Connect supply line to filter system inlet and connect
outlet fitting to existing plumbing.
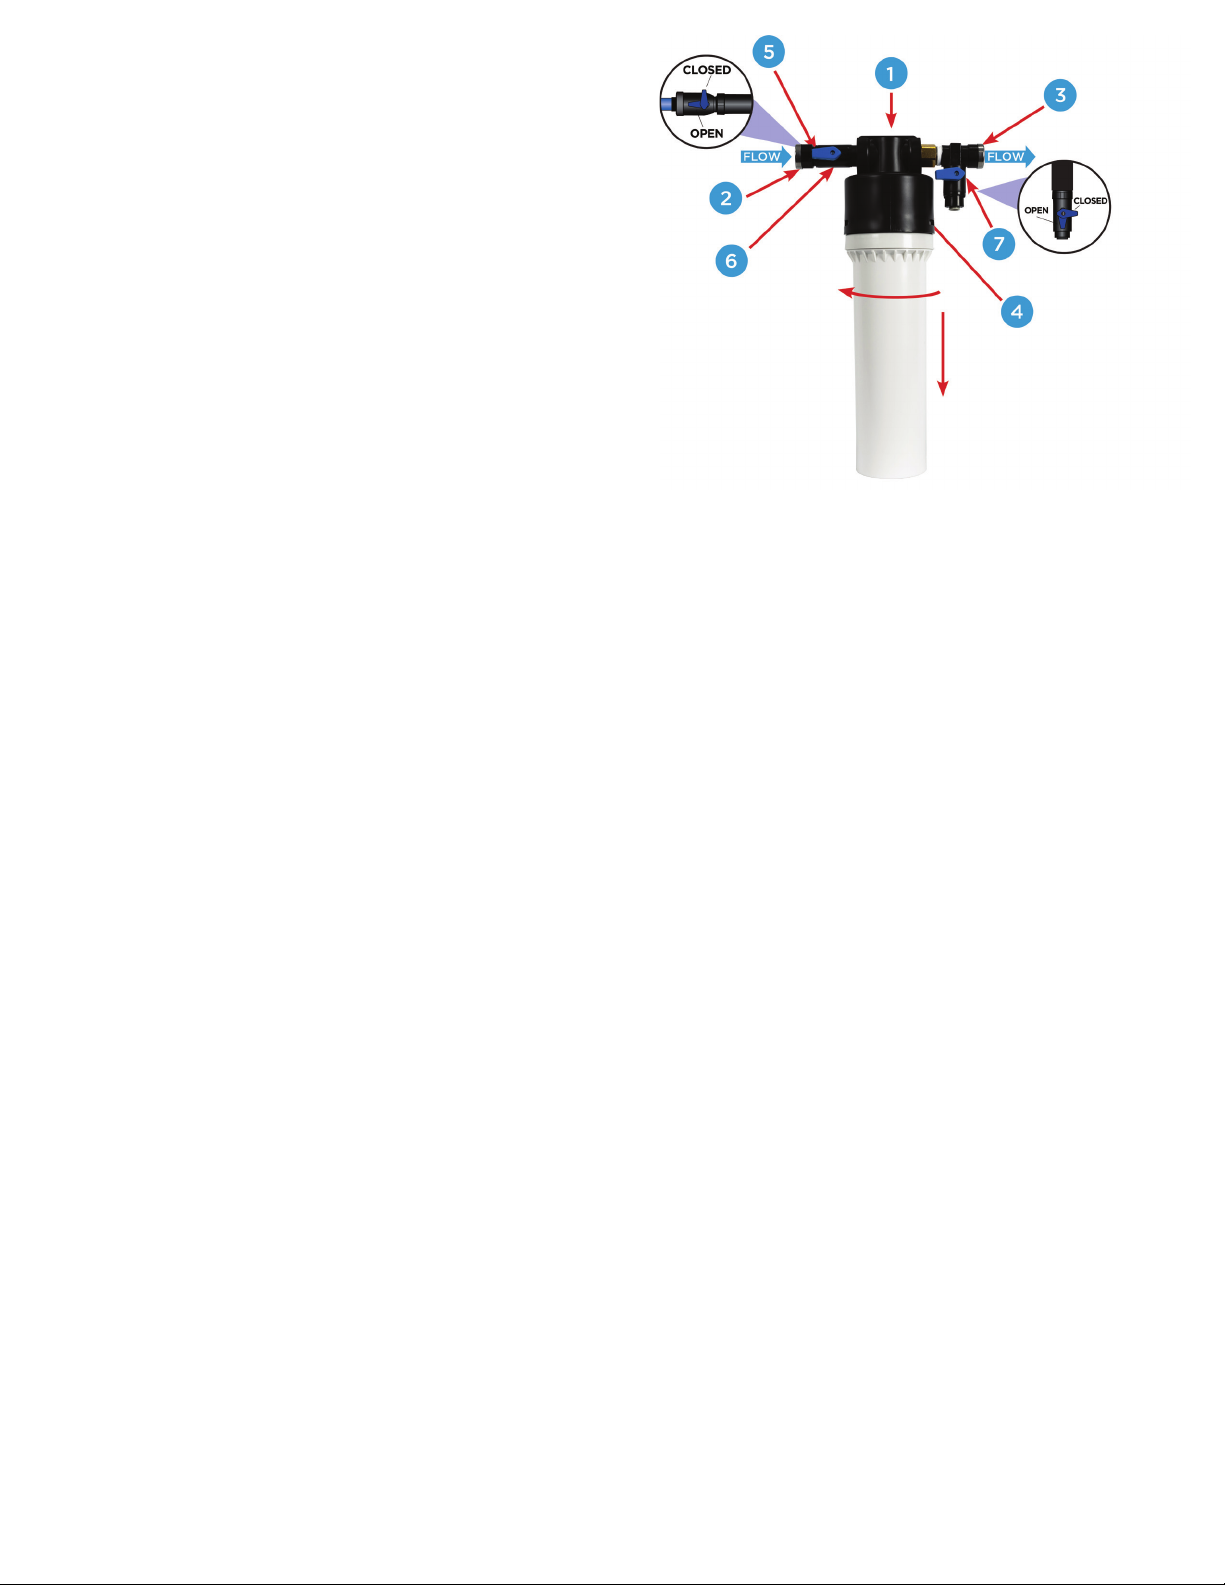
Figure A
Install Cartridge
1. Generously lubricate outer O-ring using food
grade lubrication provided.
2. Align cartridge tabs as indicated on head and
insert cartridge. Push upwards and twist to lock
into place.
Initializing Water Filter
1. Turn on water at the source.
2. Flush the system by flowing water through the
flush valve to a drain for 5 minutes.
3. Purge all air from the plumbing system by
opening a water valve at the point of use for
approximately 1 minute, or until no air found
in lines and water flowing freely.
4. System is now operational. Close faucet.
Reverse Flow:
As shipped from the factory, flow is from left to
right. To reverse the flow, follow these steps:
1. Unscrew 2 screws located on top of the head.
2. Rotate head upwards until it disengages from
bracket.
3. Spin head 180 degrees.
4. Reengage head into bracket and rotate downwards
(label will now be on the back of the head, facing
the wall).
5. Reinsert the 2 screws on top of the head.
Cartridge Change Schedule
1. When the line pressure downstream of the filter
housing drops to 30 psi or below during system
operation, the cartridge(s) needs to be replaced.
Occasional dips below 30 psi and back are normal.
2. See filter head for replacement cartridge
ordering information.