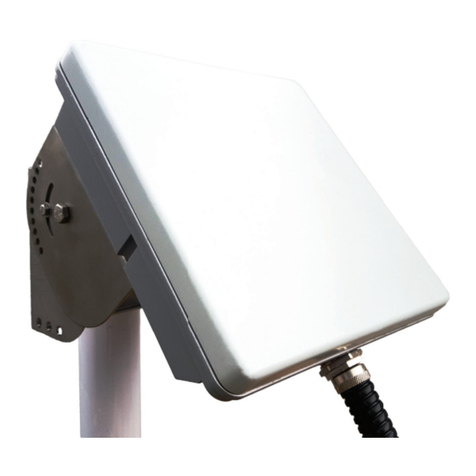
King Controls 1200-KU User manual

11200 Hampshire Avenue South, Bloomington, MN 55438-2453
Phone: (800) 982-9920 Fax: (952) 922-8424
www.kingcontrols.com
20430 REV C
Satellite Solutions for Mobile Markets
MEMBER
®
®
15” Marine Satellite System
with built-in DVB for positive satellite identification
Model 1200-KU
Installation and Operating Instructions


Page 1
TABLE OF CONTENTS
Section Contents Page
1. INTRODUCTION............................................................................................................2
2. DEFINITION OF TERMS...............................................................................................3
3. INSTALLATION.........................................................................................................4-24
Tools and Materials Required, Kit Contents . . . . . . . . . . . . . . . . . . . . . . . . . . . . .4
Remove Shipping Restraints . . . . . . . . . . . . . . . . . . . . . . . . . . . . . . . . . . . . . . . . .5
Dome Location . . . . . . . . . . . . . . . . . . . . . . . . . . . . . . . . . . . . . . . . . . . . . . . . . .6-7
Coax Requirements . . . . . . . . . . . . . . . . . . . . . . . . . . . . . . . . . . . . . . . . . . . . . . . .7
Pre-Installation Hookup for Initial Search . . . . . . . . . . . . . . . . . . . . . . . . . . . . . . .8
Wiring Schematics . . . . . . . . . . . . . . . . . . . . . . . . . . . . . . . . . . . . . . . . . . . . . .9-10
Satellite Configuration . . . . . . . . . . . . . . . . . . . . . . . . . . . . . . . . . . . . . . . . . .12-19
DISH Network - ExpressVu Check Switch Procedure . . . . . . . . . . . . . . . . . .20-21
Dome Installation and External Wiring . . . . . . . . . . . . . . . . . . . . . . . . . . . . . .22-23
Internal Wiring . . . . . . . . . . . . . . . . . . . . . . . . . . . . . . . . . . . . . . . . . . . . . . . . . . .24
4. OPERATION...........................................................................................................26-27
5. TROUBLESHOOTING............................................................................................28-29
6. MAINTENANCE...........................................................................................................30
7. LIMITED WARRANTY .................................................................................................31
DIRECTV®is a registered trademark of DIRECTV, Inc.
Dish NetworkTM is an official trademark of Echostar Communications Corporation.
Bell ExpressVu is an official trademark of Bell Canada.
DVB is a trademark of the DVB Digital Video Broadcast Project (1991-1996)
IMPORTANT!
The satellite TV market is expanding and changing. The information in this manual was accurate at the
time of printing. If your Sea-King does not operate as outlined in this manual please call King Controls
at (800) 982-9920 or visit our website at www.kingcontrols.com.
Please read this entire manual before beginning the installation.
This Sea-King will not receive channels broadcast from DIRECTV®’s Ka band satellites at 99° and 103°.
DISH NETWORKTM - EXPRESSVU: If you plan to use the Sea-King with Dish Network or Bell ExpressVu
programming, your receiver must be configured. During the configuration, the antenna must be on the
ground, dock or motionless platform with no movement (see Installation Section for complete details).
The Sea-King 1200-KU Marine Satellite System includes 2 main components (Fig. 1).
Dome (Antenna) Unit Mounted on the vessel. The dish is covered by a protective
dome that keeps operational components free from the
elements.
Controller Located in the vessel. Activates the search mode and provides
limited diagnostic functions using the status light.
SECTION 1 INTRODUCTION
Page 2
Fig. 1
Note: A TV, satellite receiver, and program subscription are also required for satellite TV viewing.
(Sold separately.)
Note: Overview only. See Installation Section for complete wiring schematic.

SIGNAL STRENGTH: Intensity of electronic signal received from the satellite transmission.
SECTION 2 DEFINITION OF TERMS
Fig. 3
ELEVATION: Angle in degrees measured from a level plane (Fig. 3).
Page 3
Fig. 2
AZIMUTH: Circular rotation around the vessel. Using a clock as reference, the bow of the
vessel is 12:00 o’clock, and the stern is 6:00 o’clock (Fig. 2).

KIT CONTENTS
1. Unpack and identify all components (Fig. 4).
Page 4
SECTION 3 INSTALLATION
TOOLS AND MATERIALS REQUIRED
• drill and drill bit set
• tape measure
• 7/16” open end wrench (coax connections)
• 5/32” allen wrench, channel lock or pliers (to remove shipping bolt)
• phillips screw driver (to remove dome cover)
• appropriate fasteners and tools to install all components and wiring
• adhesive sealant, compatible with vessel material
• #1844 King Controls Installation and Diagnostic Keypad
(may be obtained from an authorized dealer or King Controls)
Fig. 4
#1844
Diagnostic Keypad

Page 5
1. Remove and save the dome cover screws. (Fig. 5).
2. Carefully remove the dome cover. Do not allow dome cover to catch on internal
components or wiring. DO NOT SET THE DOME COVER UPSIDE DOWN.
3. Remove and discard the shipping bolt.
Fig. 5
REMOVE SHIPPING RESTRAINTS
IMPORTANT!
The shipping bolt must be
removed prior to installation.
IMPORTANT!
CAREFULLY remove the
dome cover. Do not allow
dome cover to catch on
internal components or
wiring.
EXTREMELY IMPORTANT!
NEVER lift the unit by the LNB assembly, Wave Guide assembly, or the dish.
Lift the unit by the base ONLY.

Page 6
DOME LOCATION
1. Select an area on the vessel for the dome unit, keeping in mind that most times the wiring
will enter the vessel through the surface directly beneath the dome unit (see Fig. 7 for
typical installations). Use the following criteria:
a) The shortest distance between the dome unit and the main satellite receiver is most
desirable.
b) The dome unit requires a 16.5“ diameter
mounting area on the vessel surface.
You may also use an industry standard mount.
(Call King Controls or visit www.kingcontrols.com
for more information.) Exact hole spacing is
shown at right. Distances are to centers of
holes.
c) The dome unit should never be mounted so that it is tilted more than two degrees
in any direction.
d) Keep the dome unit as far away from the radar as possible, and if possible above
the level of the radar.
e) The dome unit should be mounted as close as possible to the center of the vessel
(fore-aft and side to side).
f) The mounting surface must be strong enough not to flex under the weight of the
unit or from vessel vibrations.
g) There must be no “line of sight” obstructions from this location. Items such as
masts or radar antennas that are too close to the dome unit may prevent the
satellite signal from reaching the dish (Fig. 6).
Fig. 6

Page 7
COAX REQUIREMENTS
1200-KU TYPICAL INSTALLATIONS
Fig. 7
IMPORTANT! USE ONLYTHE COAX CABLE SUPPLIED WITH THE SEA-KING.
COIL AND STORE EXCESS CABLE IN THE CABINET WITH THE COMPONENTS.
DO NOT CUT COAX.
If coax cable other than that supplied with the Sea-King is used, the following guidelines
must be followed:
1) Ends must be terminated with SNAP-N-SEAL®connectors (Fig. 8).
DO NOT USE TWIST-ON OR HEX-CRIMPED CONNECTORS.
2) Cable must be RG6 and rated at 2.2 GHz or higher.
Fig. 8

2. Choose your desired wiring configuration:
Dish Network / ExpressVu / DIRECTV
(single satellite or auto switching from master receiver only) Fig. 10, Page 9
DIRECTV
(auto switching from any receiver) Fig. 11, Page 10
3. TEMPORARILYconnect system as outlined. MAKE SURE TO CONNECT POWER
LAST.
4. Continue with SATELLITE CONFIGURATION on page 12.
Page 8
PRE-INSTALLATION HOOKUP FOR INITIAL SEARCH
Note: For the temporary hookup and initial testing, plug in the Diagnostic Keypad, not the wall mount controller.
To verify proper operation of the components, temporarily connect the unit and perform an initial
search as follows:
1. Place the dome unit in its mounting location
and temporarily secure the unit from falling.
Depending on the location, you may have to
use the supplied right angle F-connectors to
avoid bending the coax too sharply during the
temporary hookup described below (Fig. 9).
IMPORTANT! IF CONFIGURING THE RECEIVER FOR MULTIPLE SATELLITE
SWITCHING WITH DISH NETWORK OR EXPRESSVU, Y0U MUST DO THE
PRE-INSTALLATION CHECK ON A MOTIONLESS PLATFORM SUCH AS THE DOCK
OR GROUND.
Fig. 9

Page 9
Dish Network / ExpressVu / DIRECTV
Sea-King Model 1200-KU
Single satellite (or) multi-satellite with auto-switching from master receiver only
Fig. 10
Note: HDTV receivers require HDMI or component video/audio cable connection to TV.

Page 10
DIRECTV
Sea-King Model 1200-KU
Multi-satellite with auto-switching from any receiver
Fig. 11
IMPORTANT!
Main coax cable must be
connected to 18V input on
multi-switch.
Note: To automatically switch between satellites using any receiver, tune all
other receivers to channel 202 on the 101 satellite.
Note: HDTV receivers require HDMI or component video/audio cable connection to TV.

This page intentionally left blank.
Page 11

Page 12
SATELLITE CONFIGURATION
The Sea-King is factory pre-set for DIRECTV standard digital programming broadcast from the
101° W satellite.
If you also receive your local channels from DIRECTV’s 119 satellite or if you subscribe to Dish
Network or ExpressVu programming, you must use the Diagnostic Keypad to re-configure the
antenna to work with your satellite service. Doing this will allow the Sea-King to lock on the
correct satellites to receive your programming and also enable automatic satellite switching via
the receiver’s remote control for multi-satellite service.
Antenna configuration is a one time procedure that MUST BE COMPLETED before using your
Sea-King antenna.
Choose your desired option on pages 14-15 and then follow the instructions below.
DIRECTV SINGLE SATELLITE 101: The system is factory pre-set for basic DIRECTV service
broadcast from the 101° W satellite.
If you have this service, make sure your receiver is set for round dish-1 satellite (do this through
the receiver’s satellite set-up menu screens). and then go to page 18.
YOU MUST SET YOUR ELEVATION ZONE (PAGE 18) EVEN IF YOU ARE
NOT CHANGING YOUR SWITCHING MODE OR PROVIDER CODE.
FOR ALL OTHER SERVICES: You will need to change the Satellite Switching Mode and
Satellite Provider Code. Determine your SWITCHING MODE and PROVIDER CODE from the
chart on page 13 and then follow the instructions on pages 16-17.
Satellite re-configuration requires a
King Controls Diagnostic Keypad #1844
not supplied with the antenna.
If you do not have a keypad,
contact your local authorized King-Dome dealer
or call King Controls at (800) 982-9920.

HDTV 82/91 82, 91 26 82
Page 13
IMPORTANT: This Sea-King will not receive channels broadcast from DIRECTV’s Ka band satellites at 99°
and 103°.
Switching
Mode Provider
Code
Service
DIRECTV
Single Satellite 101 (Factory Preset)
DIRECTV Plus
Single Satellite 119
Dish 500 (SW21 Switch)
Dish 1000 (SW64 Switch)
Dish 1000a (SW64 Switch)
Standard Digital 91
Dish Network
Bell ExpressVu
101
101, 119
119
110, 119
110, 119, 129
61, 110, 119
91
02 01
16 01
02 19
26 10
62 10
66 10
02 91
Satellites
SWITCHING MODE AND PROVIDER CODE CHART

Page 14
DIRECTV
Single Satellite 101
Receive programming from the DIRECTV 101 satellite only.
DIRECTV Plus: 101, 119
Automatically switch between the 101 and 119 satellites for DIRECTV.
BELL EXPRESSVU (May not be available in all areas due to service provider limitations.)
Standard Digital 91
Receive programming from the 91 satellite only.
HDTV 82/91
Automatically switch between the 82 and 91 satellites for Bell ExpressVu by using the receiver’s
remote control.
SATELLITE SERVICE OPTIONS
IMPORTANT: This Sea-King will not receive channels broadcast from DIRECTV’s Ka band satellites at 99°
and 103°.

Page 15
DISH NETWORK
Single Satellite 119
Receive programming from the 119 satellite only.
Dish 500
Automatically switch between the 110 and 119 satellites for Dish Network by using the receiver’s
remote control.
Dish 1000/1000a
Dish Network HD programming is broadcast from 4 satellites (61,110,119,129). The 61 and 129
satellites broadcast identical programming. The 61 is generally stronger in the eastern U.S. and
the 129 in the western U.S. The map below shows the approximate coverage for each satellite.
The Sea-King antenna can be easily configured to work with two different satellite trios (DISH
1000a: 61,110,119 or DISH 1000: 110,119,129). By choosing the appropriate trio that includes
either the 61 or the 129 satellite based on where you are, you can receive all of your desired
programming.
Note: This map is an
approximation only. Which trio
works best in a given location
may differ from what is indicated
on the map.
SATELLITES 61 AND 129 COVERAGE MAP
SATELLITE SERVICE OPTIONS

Page 16
Perform the programming on these two pages using the codes you determined from the chart on
page 13 (EXCEPT DIRECTV 101 SERVICE - see page 12).
SET SATELLITE SWITCHING MODE
1. The Diagnostic Keypad should be plugged in (page 8). If not, unplug the controller and
plug in the Keypad.
2. Press ON.
3. Press * 46 # to display the current satellite switching mode.
4. To change the satellite switching mode, press * 96 #
* 66 #
* 88 #
5. Press the UP and DOWN arrows (2 and 8 keys) to choose the desired switching mode.
6. Press * 47 # to lock in setting.
7. Turn unit OFF and back ON to save setting.
8. Press * 46 # to display and verify code for new satellite switching mode.
9. Continue with SET SATELLITE PROVIDER CODE on next page.

Page 17
SET SATELLITE PROVIDER CODE
1. Press * 24 # to display the current service provider.
2. To change the current service provider, press * 96 #
* 66 #
* 88 #
3. Press the UP and DOWN arrows (2 and 8 keys) to choose the desired service provider.
4. Press * 25 # to lock in setting.
5. Turn unit OFF and back ON to save setting.
6. Press * 24 # to display and verify code for new service provider selected.
7. DIRECTV Plus: 101, 119
Set your receiver for oval dish-2 satellites (do this through the receiver’s satellite set-up
menu screens), then go to page 18.
Dish Single Satellite 119
Dish 500
Dish 1000/1000a
Bell ExpressVu Standard Digital 91
Bell ExpressVu HDTV 82/91
Go to page 18.

Page 18
DIRECTV: SET ELEVATION ZONE AND PERFORM INITIAL SEARCH
1. Determine your elevation zone from the map on page 19.
2. Press * 96 #
* 66 #
* 88 #
3. Press the UP and DOWN arrows (2 and 8 keys) to display your zone.
4. Press * 44 # to lock in setting.
The unit will automatically begin a search and lock on a satellite. When locked, the
keypad will display a steady 80.
5. Go to Page 22 and continue with the installation.
DISH NETWORK - EXPRESSVU: SET ELEVATION ZONE AND PERFORM
INITIAL SEARCH
1. Determine your elevation zone from the map on page 19.
2. Using the receiver’s remote, go to the signal meter screen on the TV and select the 110
satellite and transponder 11.
3. Press * 96 #
* 66 #
* 88 #
4. Press the UP and DOWN arrows (2 and 8 keys) to display your zone.
5. Press * 40 # to lock in setting.
The unit will automatically begin a search for, locate, and verify the selected satellites.
(When done, the keypad will display a steady 8 for the left hand digit and alternate
between a flashing 0 and flashing 8 for the right hand digit.)
6. Go to page 20 and run the check switch. YOU MUST RUN THE CHECK SWITCH!
IMPORTANT: YOU MUST PROGRAM IN YOUR CURRENT ELEVATION ZONE EVEN IF YOU DO NOT
CHANGE YOUR SWITCHING MODE OR PROVIDER CODE.
IMPORTANT: YOU MUST PROGRAM IN YOUR CURRENT ELEVATION ZONE EVEN IF YOU DO NOT
CHANGE YOUR SWITCHING MODE OR PROVIDER CODE.
Table of contents