manuals.online logo
Brands
  1. Home
  2. •
  3. Brands
  4. •
  5. King Slide
  6. •
  7. Indoor Furnishing
  8. •
  9. King Slide SIMLEAD User manual

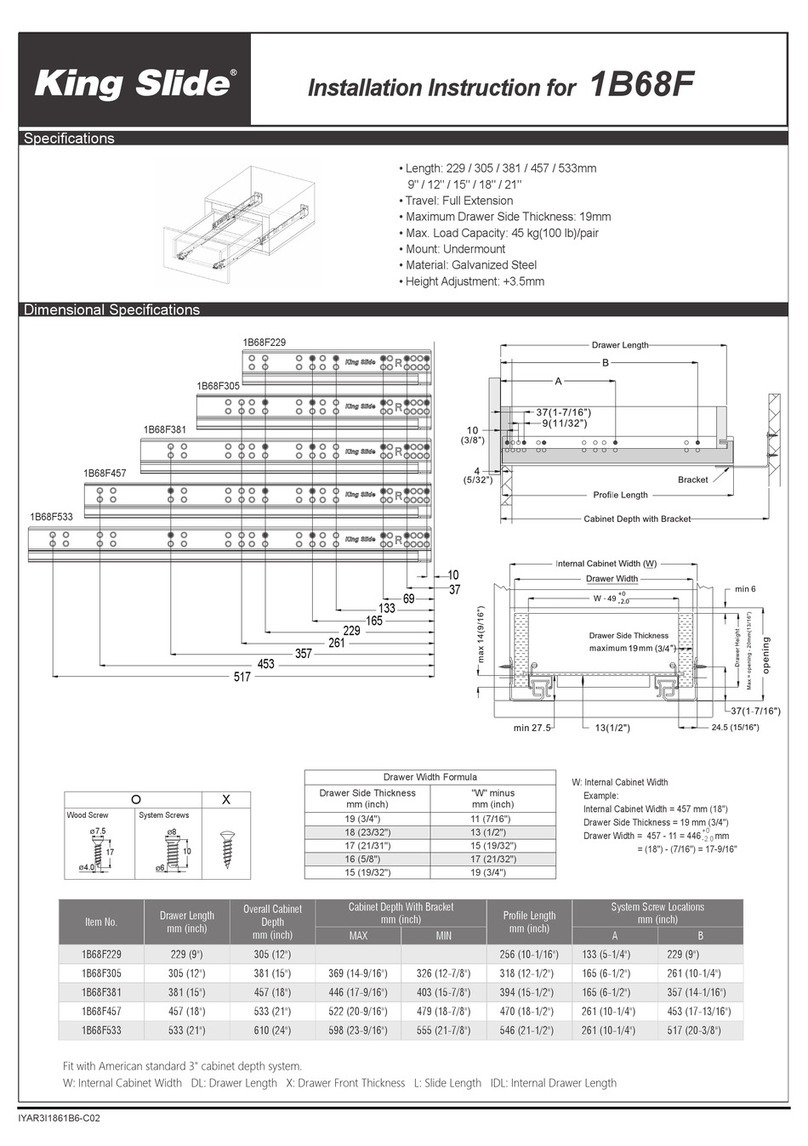
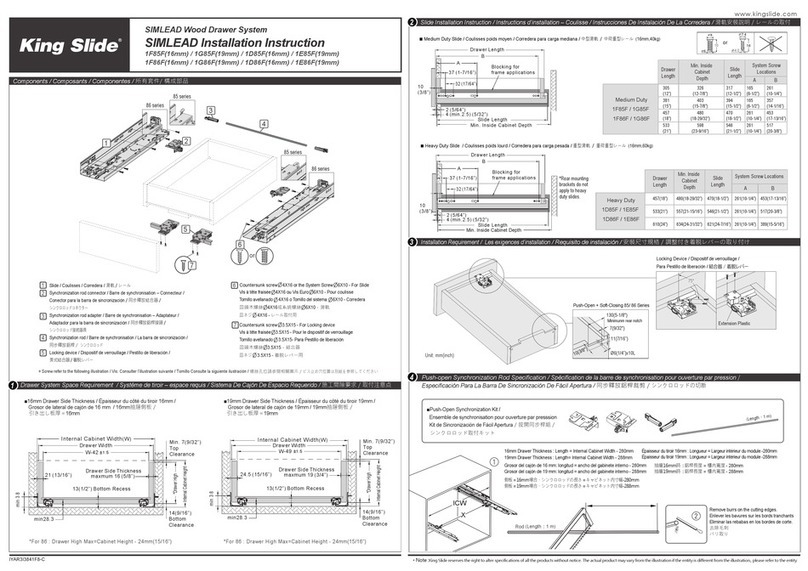
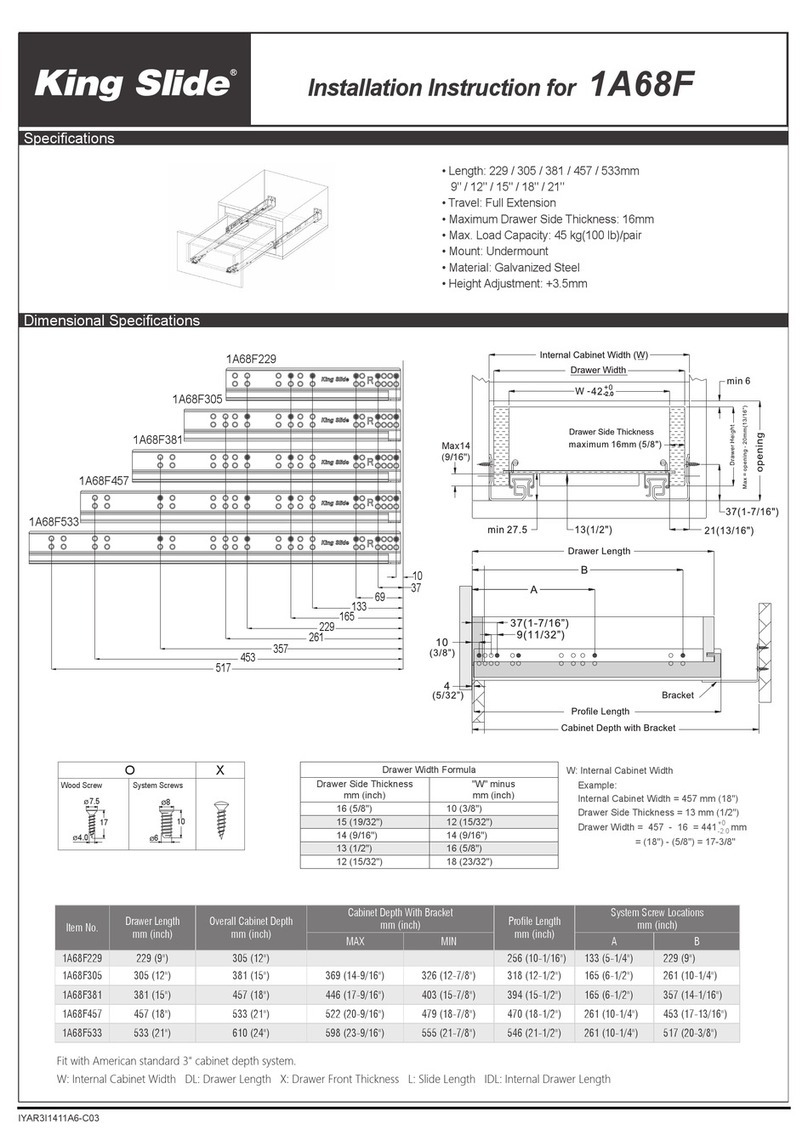
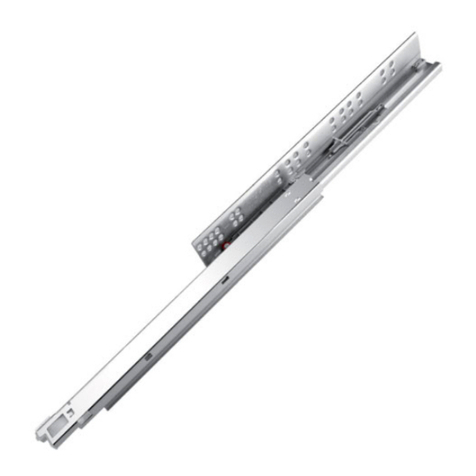
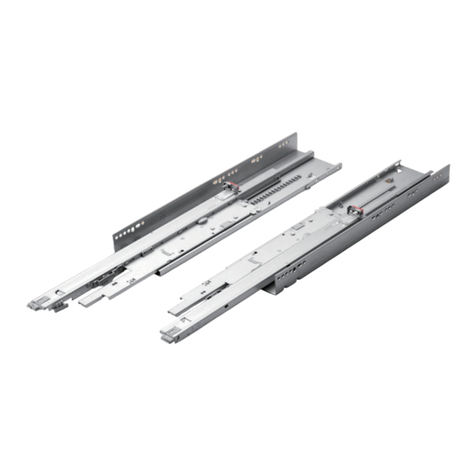
King Slide SIMLEAD User manual

Remove burrs on the cutting edges.
Enlever les bavures sur les bords tranchants
Eliminar las rebabas en los bordes de corte.
␌暵㰬⊋
Φπ␧
ICW
X
2
1RWH.LQJ6OLGHUHVHUYHVWKHULJKWWRDOWHUVSHFLILFDWLRQVRIDOOWKHSURGXFWVZLWKRXWQRWLFH7KHDFWXDOSURGXFWPD\YDU\IURPWKHLOOXVWUDWLRQLIWKHHQWLW\LVGLIIHUHQWIURPWKHLOOXVWUDWLRQSOHDVHUHIHUWRWKHHQWLW\

www.kingslide.com
SIMLEAD Wood Drawer System
1F85(16mm) / 1G85(19mm) / 1D85(16mm) / 1E85(19mm)
1F86(16mm) / 1G86(19mm) / 1D86(16mm) / 1E86(19mm)
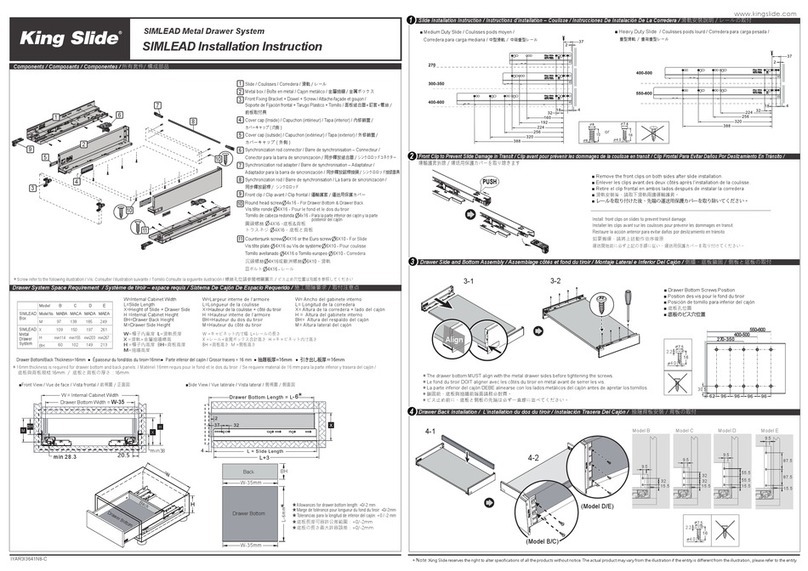
SIMLEAD Installation Instruction
Components / Composants / Componentes / ㊑㝚⦨὇㨜㉡愹┒
IYAR3I3641F8-C
Installation Requirement / Les exigences d’installation
/ Requisito de instalación / ⯚央ⲋⱉ姠㢍嬐㗅Ἡ䞑冂ςΦϒ␧Ἡ
1
3
2
4
ŶHeavy Duty Slide / Coulisses poids lourd / Corredera para carga pesada /
憴❲㺸庳憴卞憴❲ςϒρ
(16mm,60kg)
ŶMedium Duty Slide / Coulisses poids moyen /
Corredera para carga mediana /
Ḕ❲㺸庳Ḕ卞憴❲ςϒρ
(16mm,40kg)
Tornillo avellanado
4X16
o Tornillo del sistema
6X10 -
Corredera
䜐桾㝹堋䷃
4X16
㉧䵌䷂堋䷃
6X10
㼢弝
䜐ΣΎ
4X16 -
ςϒρ␧Ἡ䕹
Slide / Coulisses / Corredera / 㺸庳ςϒρ
Synchronization rod connector / Barre de synchronisation – Connecteur /
Conector para la barra de sincronización⏳㭌憲㔥䴷⏯♏
΍ω΅σσΙΟΉΣ΅Εϒ

Synchronization rod adapter / Barre de synchronisation – Adaptateur /
Adaptador para la barra de sincronización / ⏳㭌憲㔥抨㡦㎌栔
΍ω΅σσΙΟ㎌䶁♏⅞
Synchronization rod / Barre de synchronisation / La barra de sincronización /
⏳㭌憲㔥抨㡦


΍ω΅σσΙΟ
Locking device / Dispositif de verrouillage / Pestillo de liberación /
㬷⻶䴷⏯♏䜧儘ςΦϒ
Countersunk screw 4X16 or the System Screw 6X10 - For Slide
Vis à tête fraisée 4X16 ou Vis Euro 6X10 - Pour coulisse
Tornillo avellanado
3.5X15- Para Pestillo de liberación
䜐桾㝹堋䷃
3.5X15
䶡⑙⚹
䜐ΣΎ
3.5X15 -
䞑冂ςΦϒ䕹
Countersunk screw 3.5X15 - For
Locking device
Vis à tête fraisée 3.5X15 - Pour le dispositif de verrouillage
1
2
3
4
5
6
7
10
4.0
or
Drawer System Space Requirement / Système de tiroir – espace requis / Sistema De Cajón De Espacio Requerido / 㘎⸶旤曪姒㲓␧Ἡ㴹ㅠ䄊
*Screw refer to the following illustration / Vis: Consulter l’illustration suivante / Tornillo Consulte la siguiente ilustración /
堋䷃⮥ᾞ嬜␔昂䝉昭❧䦋
ΩΏ㮳䫅ᾞ便≶䵪␓䆸
Push-open Synchronization Rod Specification /
Spécification de la barre de synchronisation pour ouverture par pression
Especificación Para La Barra De Sincronización De Fácil Apertura /
⑝㮶戜㖏挒㣐夒⊻
΍ω΅σσΙΟ≘㗾
3
ŶPP'UDZHU6LGH7KLFNQHVVeSDLVVHXUGXF{WpGXWLURLUPP
Grosor de lateral de cajón de 16 mm / 16mm
㌎ⲭ⃅㟐
⽦≋㟐⏫熓
16mm
ŶPP'UDZHU6LGH7KLFNQHVVeSDLVVHXUGXF{WpGXWLURLUPP
*URVRUGHODWHUDOGHFDMyQGHPPPP
㌎ⲭ⃅㟐
⽦≋㟐⏫熓
PP
maxmum 16 (5/8”)
Drawer Side Thickness
21 (13/16”)
Min. /32”
Top
Clearance
Internal Cabinet Width(W)
W-42
min 28.3
Min. 38
Max. 13
±1.5
)
maxmum 1(3/4”)
Drawer Side Thickness
Internal Cabinet Width(W)
24.5
W-
min28.3
Min. /32”)
Top
Clearance
Min. 38
Max. 13
±1.5
Z=X+2+4
DL=L-10
IDL=L-10+X
10
10
L
L
min3
min3
32
2
4PLQ
Y=X+37+4
37
Overlay
installation
Inset
installation
W=Internal Cabinet Width
L=Slide Length
X=Height of Slide + Drawer Side
H =Internal Cabinet Height
BH=Drawer Back Height
M=Drawer Side Height
W=Largeur interne de l’armoire
L=Longueur de la coulisse
X=+DXWHXUGHODFRXOLVVHF{WpGXWLURLU
H =Hauteur interne de l’armoire
BH=Hauteur du dos du tiroir
0 +DXWHXUGXF{WpGXWLURLU
W= Ancho del gabinete interno
L= Longitud de la corredera
X= Altura de la corredera + lado del cajón
H = Altura del gabinete interno
BH= Altura del respaldo del cajón
M= Altura lateral del cajón
: 㬔⮡↸ⰽ⻷/ 㼢弝旈⻷
; 㼢弝戢ⲽ㌎䊗于欩
+ 㬔⮡↸欩⻷%+ 儝㟐欩⻷
0 ㌎䊗欩⻷
: ΃ιΩΣΙΞ⇖ⱉ⺖/ ςϒρ旈
; ςϒρ戢ⲯβΙ΅Ώ⑙婙欩+ ΃ιΩΣΙΞ⇖ⱉ欩
%+ 儝㟐欩0 ⃅㟐欩
37
2

18
32
224
256
300
320
388
300-350
400-600
18
160
2
224
256
320
388
37
2
Unit: mm
92
37.5
24
6.5
Locking Device / Dispositif de verrouillage /
Para Pestillo de liberación / 結合器

着脱レバー
75°
Ŷ3XVK2SHQ6RIW&ORVLQJ6HULHV6pULHRXYHUWXUHSDUSUHVVLRQDPRUWLVVHXU
Fácil Apertura + Cierre Suave Series
㍚旜为墮䵌≨
έΙ΍λ΀ϒέωΓΫΞ΅σϒΎωΆ΍πϒΐ
唜㡂⯚央
↶㡂⯚央
7
10 Ø6(1/4”)x10L
11
Minimunm
rear notch: 130mm
㝑Ⱡⲋⱉ奎ᾭ例␴
Gray point: minimum screw required
Point gris: vis minimum requis
Punto gris: mínimo tornillo requerido
䃁漯䄋堋䷃⽋寁㝑Ɫ揧❋ᾞ便
Άςϒ䄊❋⯫䕹䫅˛
16mm Drawer Thickness : Length = Internal Cabinet Width - 280mm
PP'UDZHU7KLFNQHVV/HQJWK ,QWHUQDO&DELQHW:LGWKPP
㊤䈭PP㘩抨㡦敞⺍ 㪪ⅎ⯓⺍- 280mm
㊤䈭PP㘩抨㡦敞⺍ 㪪ⅎ⯓⺍- 288mm
Ŷ3XVK2SHQ6\QFKURQL]DWLRQ.LW
Ensemble de synchronisation pour ouverture par presssion
.LWGH6LQFURQL]DFLyQGH)iFLO$SHUWXUD
㍚旜⑝㮶㣐䶕
΍ω΅σσΙΟ␧Ἡ΃ΙΞ
(Length:1 m)
Rod (LengthƝ1 m)
or
6
1 2
7
3
4
5
85 series
86 series
85 series
86 series
Slide Installation Instruction / Instructions d’installation – Coulisse / Instrucciones De Instalación De La Corredera
/
㼢弝⯚央嫻㙟ςϒρ␧Ἡ
eSDLVVHXUGXWLURLUPP/RQJXHXU /DUJHXULQWpULHXUGXPRGXOHPP
eSDLVVHXUGXWLURLUPP/RQJXHXU /DUJHXULQWpULHXUGXPRGXOHPP
Grosor del cajón de 16 mm: longitud = ancho del gabinete interno - 280mm
*URVRUGHOFDMyQGHPPORQJLWXG DQFKRGHOJDELQHWHLQWHUQRPP
⁛㝦Ơǐǐ⠛⏯˚΍ω΅σσΙΟ敞Ơ΃ιΩΣΙΞⅬ⯟⸬ǐǐ
⁛㝦Ơǐǐ⠛⏯˚΍ω΅σσΙΟ敞Ơ΃ιΩΣΙΞⅬ⯟⸬ǐǐ
+-
1RWH.LQJ6OLGHUHVHUYHVWKHULJKWWRDOWHUVSHFLILFDWLRQVRIDOOWKHSURGXFWVZLWKRXWQRWLFH7KHDFWXDOSURGXFWPD\YDU\IURPWKHLOOXVWUDWLRQLIWKHHQWLW\LVGLIIHUHQWIURPWKHLOOXVWUDWLRQSOHDVHUHIHUWRWKHHQWLW\

www.kingslide.com
IYAR3I3641F8-C
Insert the wood drawer / Insérer le tiroir en métal /
Inserte El Cajón De Metálico /
㌎ⲭ剘㼢弝䶕⑙
⽦≋ΑΙΞ
Ŷ'UDZHUGRHVQRWPRYHVPRRWKO\&KHFNWKHVTXDUHQHVVRIWKHGUDZHUER[
Ŷ/HWLURLUQRXYUHSDVGHIDoRQRSWLPDOHYpULILHUOpTXHUUDJHGXPRGXOH
Ŷ/DVFRUUHGHUDVGHOFDMyQQRIXQFLRQDQVXDYHPHQWH&RPSUXHEHODFXDGUDWXUDGHOFDMyQ
Ŷ㌎ⲭ㌎㌚Ṟ桗嬜㫳㠶㬔欥㚀⑷寛⾳
Ŷ滑らかに動かない場合:キャビネット変形などを確認してください
0~3.5mm
2.5mm
+
-
1.Make sure two sides (Left & Right) are switched to the same mode.
2.Push Open function will be disabled after switch to Soft Close. Please reserve space
for pulling out.
1.Valider que l'interrupteur soit au même mode sur les deux coulisses.
2.L'interrupteur d'ouverture ne fonctionne pas après être changé à la mode d’amortisseur.
Veuillez réserver un espace pour tirer le tiroir.
1.Asegúrate de que dos lados (izquierdo y derecho) estén cambiados al mismo modo.
2.La función de Fácil Apertura se deshabilitará después de cambiar a Cierre Suave.
Por favor reserve espacio para sacar.
1.嬜〉〖䤋嫞⸷⑄↺惛≘㐬䄋⑝ṑ㩲⽠˛
2.≘㐬䄋为墮熂⊘䅲㴦㍚⤤旜▰熂嬜桡䖪婾婙䫋旤˛
1.
⸷⑄⑝θϒΟ≘㝐䤋嫞˛
2.
ΓΫΞ΅σϒΐ≘㝐˚έΙ΍λ΀ϒέω㪰兎≺䕹
熂⎒≗␧ἩΏΰϒΏ䤋󰿏˛
Ŷ5HPRYHWKHV\QFKURQL]DWLRQURGDQGWKHFRQQHFWRUDVVKRZQEHORZ
Ŷ(QOHYHUODEDUUHGHV\QFKURQLVDWLRQHWOHFRQQHFWHXUFRPPHLQGLTXpFLGHVVRXV
Ŷ5HWLUHODEDUUDGHVLQFURQL]DFLyQ\HOFRQHFWRUFRPRVHPXHVWUDHQODFRQWLQXDFLyQ
Ŷ
嬜ⱘ⑝㮶戜㖏㣐䩌暵熂䩌暵䊺὇⧓⑄˛
Ŷシンクロロッドを取り除いてください。取り除く必要部品は右図参照
5
6
Drawer installation / Installation du tiroir / Instalacion de cajon /
ㅻ⬚⩇垛ⷓǼ₸Ȇȝ⊔ȹᶖȀ
Push-Open Synchronization Rod Installation / Installation de la barre de synchronisation pour ouverture par pression /
Instalación Para La Barra De Sincronización De Fácil Apertura /
㇇摉⋊㨣㜽䰂⩇垛奨㓌ɤʠɜʚʚɰɶ⊔ᶖㄉ曄
5-4
Un angle cohérent est requis.
5-4
Se requiere ángulo consistente
5-4墐ⵤ斾Ჾ傲Ʋ
5-4⺃ȉ⋊ȇ墐ⵤȚɨɰɵȆȭȈ
5-4$QJOHVVKRXOGEHWKHVDPH
6RORGLVSRQLEOHHQODVHULH
€昷䳢⇾
΍πϒΐ⯥⿃
2QO\DYDLODEOHLQVHULHV
'LVSRQLEOHXQLTXHPHQWGDQVODVpULH
5-4
5-5
Click
Ŷ3XVK2SHQ6ZLWFK
ŶL’interrupteur pour ouverture par pression
Ŷ,QWHUFDPELRSDUD)iFLO$SHUWXUD
Ŷ
⯚↹㍚旜≘㐬央便
Ŷ
プッシュオープン切替機構
Installation Notices / Avis d’installation / Aviso De Instalación / ⯚央㴹ㅠỜ桖␧Ἡ㚓㴹ㅠ䄊
5-2
5-1
Only soft close
Amortisseur seulement
Sólo Cierre Suave
为墮
ソフトクローズ
Push open+Soft close
Ouverture par pression + Amortisseur
Fácil Apertura + Cierre Suave
㍚旜为墮
プッシュオープン+ソフトクローズ
5-3
Drawer removal / Retrait du tiroir / Retiro del cajón /
㌎ⲭ䩌暵⽦≋⥧㘊
Press the latch inward to release metal drawer from the slide.
Appuyer sur le loquet vers l’intérieur pour libérer le tiroir en métal de la coulisse.
Presione el pestillo hacia adentro para liberar cajones metálicos de la corredera.
↺⃅③↸㍚⤤戜㖏㌎ⲭ䶡⑙⚹
着脱レ バーを押して、引き出しを 取り外します
Drawer Size & Hole Positioning
Taille du tiroir et positionnement des trous
Tamaño del cajón y la posición de agujero de la prueba
ⲋⱉ⮥ᾞ媷䯨
⽦≋䫅ᾞ便ⱉ㴦␧
Troubleshooting
Résolution de problèmes
Solución para las problemas
㖖曭㏣暵
Ξοάρ΍λϒΜ͹ωΆ
Ȋ
Before installation / Avant l’installation / Antes de la instalación

⯚央⊞␧Ἡ⊞
Transport / Transport / Transporte /
悜徉悜恒熐
②
①
Caution /
MISE EN GARDE
/ Precaución
/
㴹ㅠ / 䠶熐

R
L
R
L
Headquarter
7HO_)D[
KingSlide USA, Inc.
7HO_)D[
(PDLOVDOHV#NLQJVOLGHFRP_:(%ZZZNLQJVOLGHFRP
1 .5mm
+
-
Click
8-ways adjustment illustration / Illustration de réglage - 8 façons / Ilustración De Ajuste En 8 Maneras /
⋏好㐲ⷓǼ₸Ȇȝḋ丬好㐲
7
2
3
R
L
Front / Front end / Frente /
⊞䭀ΫσωΞ
Rear / Backend / Posterior /
⿝䭀π͸

Other King Slide Indoor Furnishing manuals

King Slide 1A88 User manual

King Slide

King Slide 1A88 User manual

King Slide 1B89F User manual

King Slide

King Slide 1B89F User manual

King Slide 3301 User manual

King Slide

King Slide 3301 User manual

King Slide 1A68F User manual

King Slide

King Slide 1A68F User manual

King Slide SIMLEAD 1F85F User manual

King Slide

King Slide SIMLEAD 1F85F User manual

King Slide SIMPLEX 1A68 User manual

King Slide

King Slide SIMPLEX 1A68 User manual

King Slide 1A88F Series User manual

King Slide

King Slide 1A88F Series User manual

King Slide SIMLEAD User manual

King Slide

King Slide SIMLEAD User manual

King Slide 1A89F User manual

King Slide

King Slide 1A89F User manual

King Slide 1B68F User manual

King Slide

King Slide 1B68F User manual

King Slide SIMLEAD 1F85 User manual

King Slide

King Slide SIMLEAD 1F85 User manual

Popular Indoor Furnishing manuals by other brands

beaux meubles BE 38 Assembly instructions

beaux meubles

beaux meubles BE 38 Assembly instructions

Canyon ARGAMA CND-SGCH4AO manual

Canyon

Canyon ARGAMA CND-SGCH4AO manual

Aqualine VEGA VG185 Assembly instructions

Aqualine

Aqualine VEGA VG185 Assembly instructions

Cooper Lighting nooray 23ADIW Specification sheet

Cooper Lighting

Cooper Lighting nooray 23ADIW Specification sheet

U-Line H-5168 quick start guide

U-Line

U-Line H-5168 quick start guide

Homelegance Ameillia 586-82 Assembly instruction

Homelegance

Homelegance Ameillia 586-82 Assembly instruction

nvent SCHROFF 11990-190 quick start guide

nvent

nvent SCHROFF 11990-190 quick start guide

Elle Decor HB1000015 Assembly instructions

Elle Decor

Elle Decor HB1000015 Assembly instructions

Furniture of America CM-BK922T Assembly instructions

Furniture of America

Furniture of America CM-BK922T Assembly instructions

JWA Aetna 70832 Assembly instruction

JWA

JWA Aetna 70832 Assembly instruction

THB Air 2P 60CM Gourmet Kitchen Assembly instructions

THB

THB Air 2P 60CM Gourmet Kitchen Assembly instructions

Ebac DECOKIT 140x190 Assembly instructions

Ebac

Ebac DECOKIT 140x190 Assembly instructions

IKEA HEMNES manual

IKEA

IKEA HEMNES manual

Walker Edison KOCL8K Assembly instructions

Walker Edison

Walker Edison KOCL8K Assembly instructions

Enwork Sawhorse installation guide

Enwork

Enwork Sawhorse installation guide

Great Little Trading Paddington Midsleeper Assembly instructions

Great Little Trading

Great Little Trading Paddington Midsleeper Assembly instructions

VAS HT5203 Assembly instructions

VAS

VAS HT5203 Assembly instructions

Furniture of America CM3001T-5PK Assembly instructions

Furniture of America

Furniture of America CM3001T-5PK Assembly instructions

manuals.online logo
manuals.online logoBrands
  • About & Mission
  • Contact us
  • Privacy Policy
  • Terms and Conditions

Copyright 2025 Manuals.Online. All Rights Reserved.