9
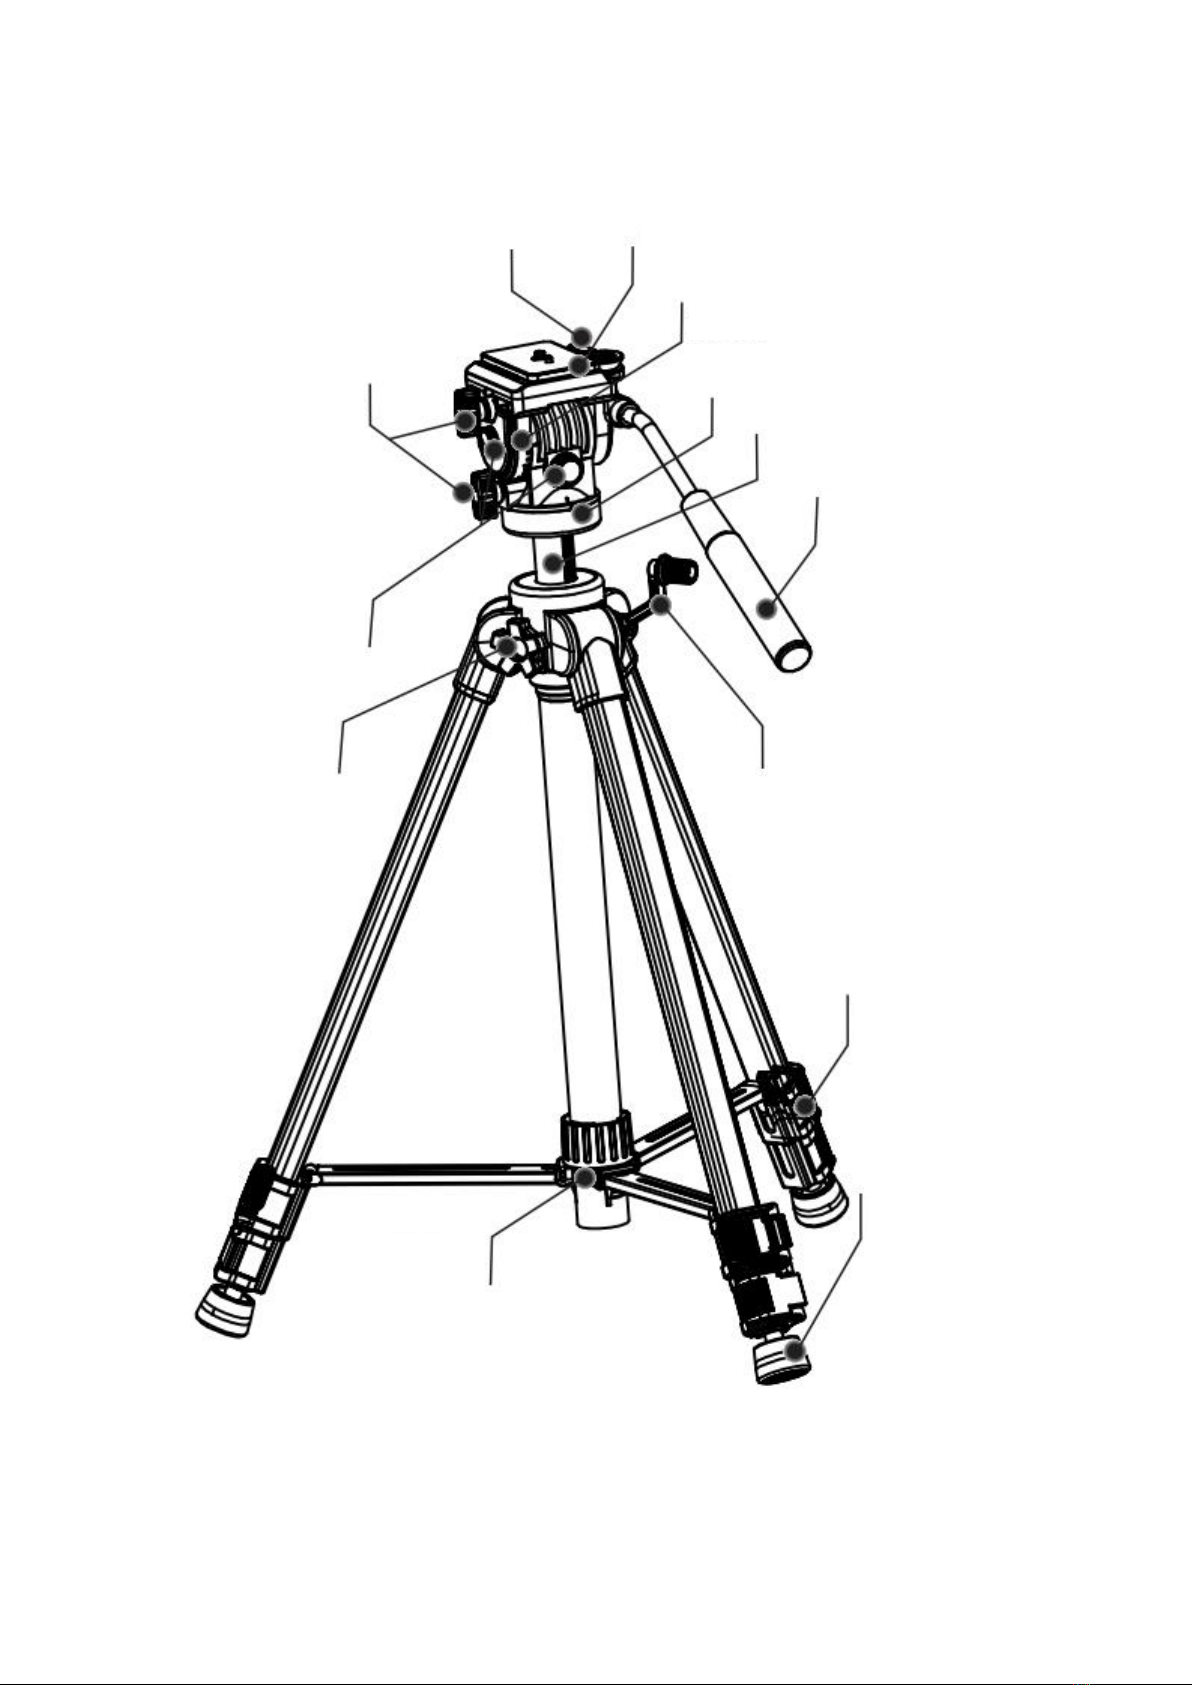
1. (Illustration 1) Key Features
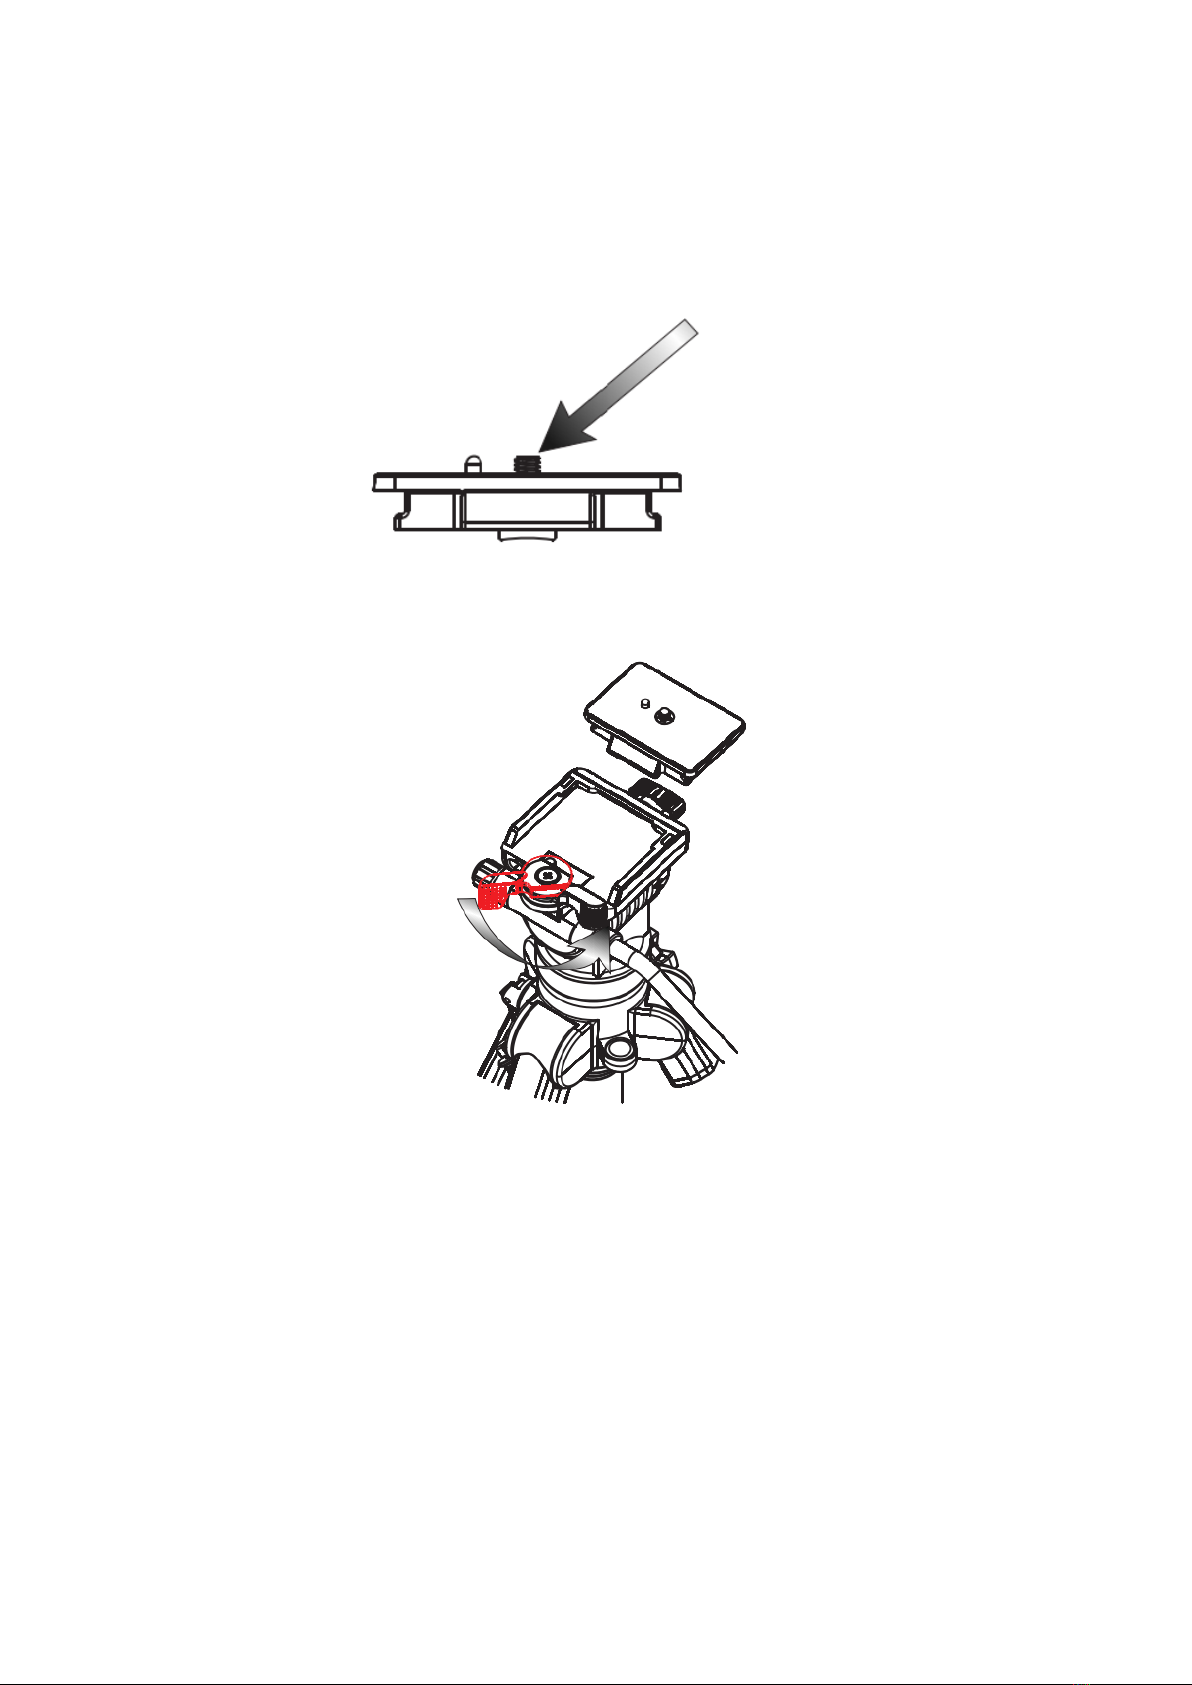
2. Mount Camera to Plate
(Illustration 2) Attach the quick-relase plate to the threaded hole on the base of your
camera.
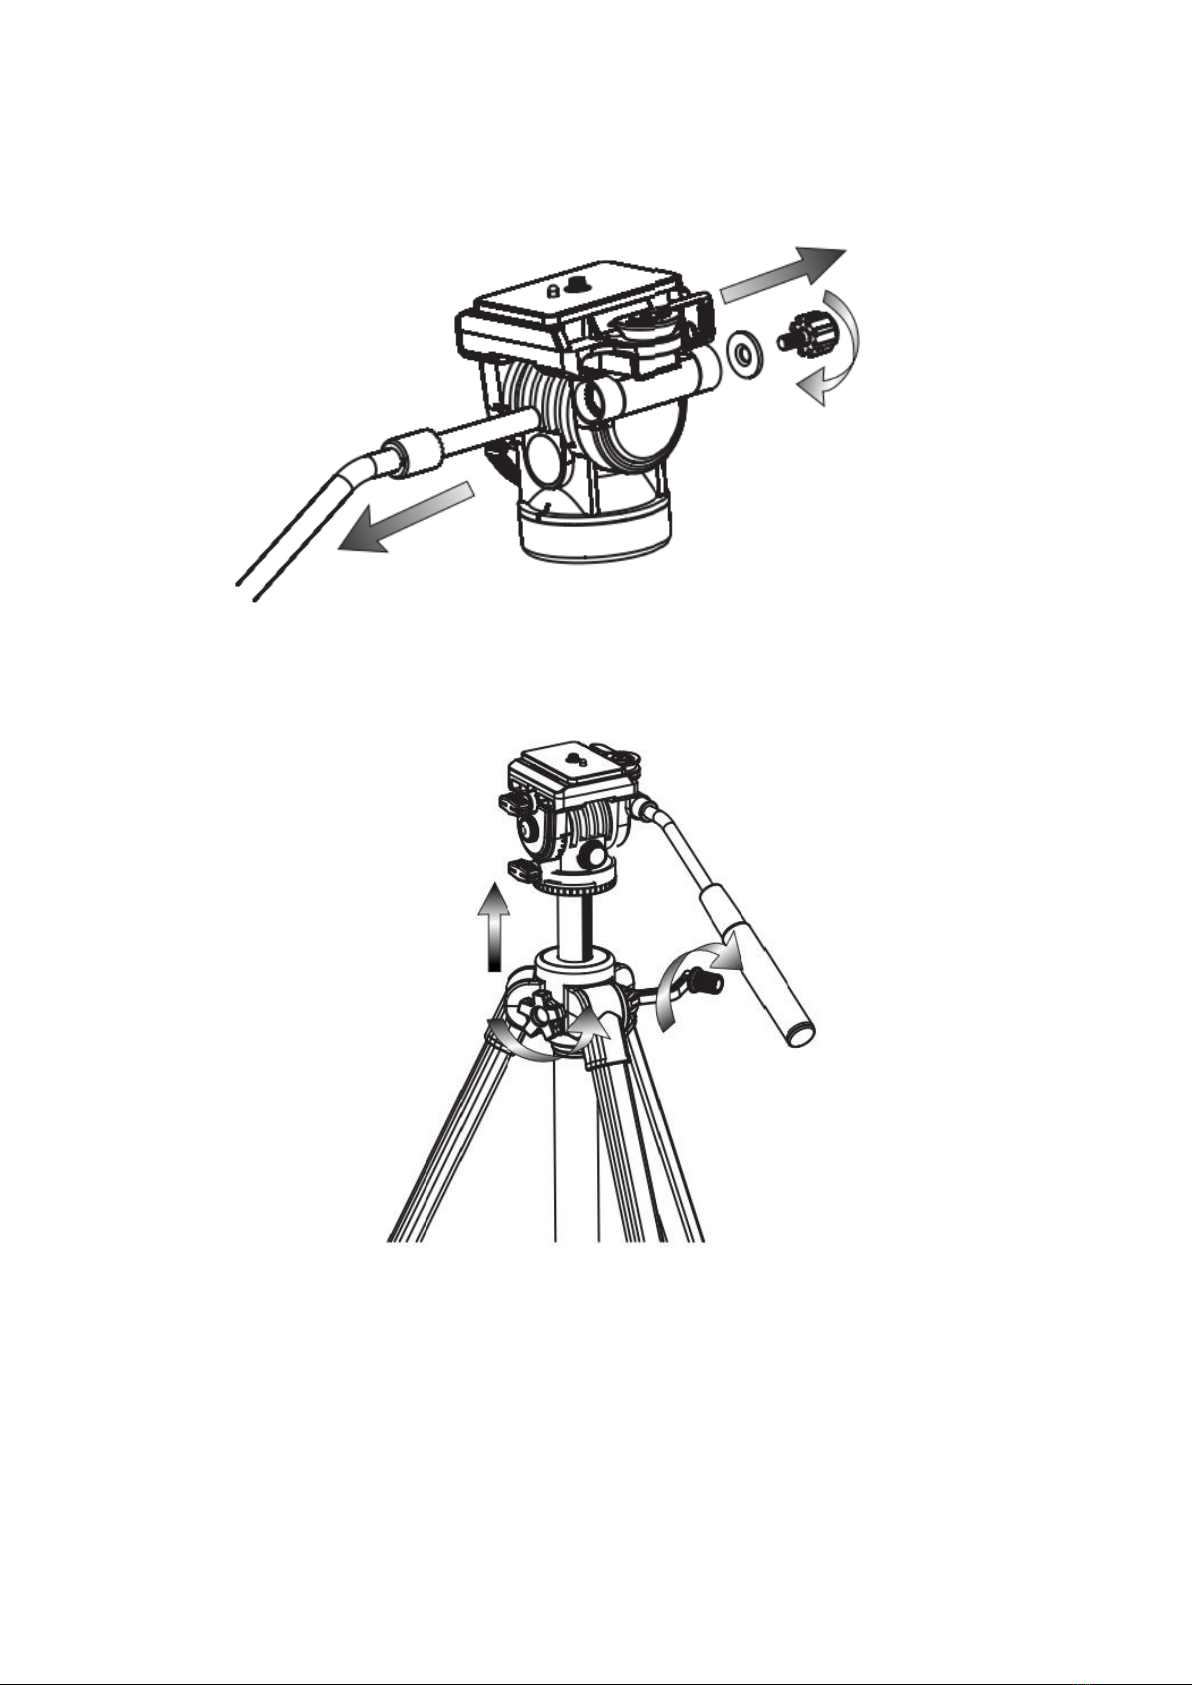
3. Mount and Remove Quick-Relase Plate
(Illustration 3) To mount or remove mounting plate by turning the plate capture release
as illustrated.
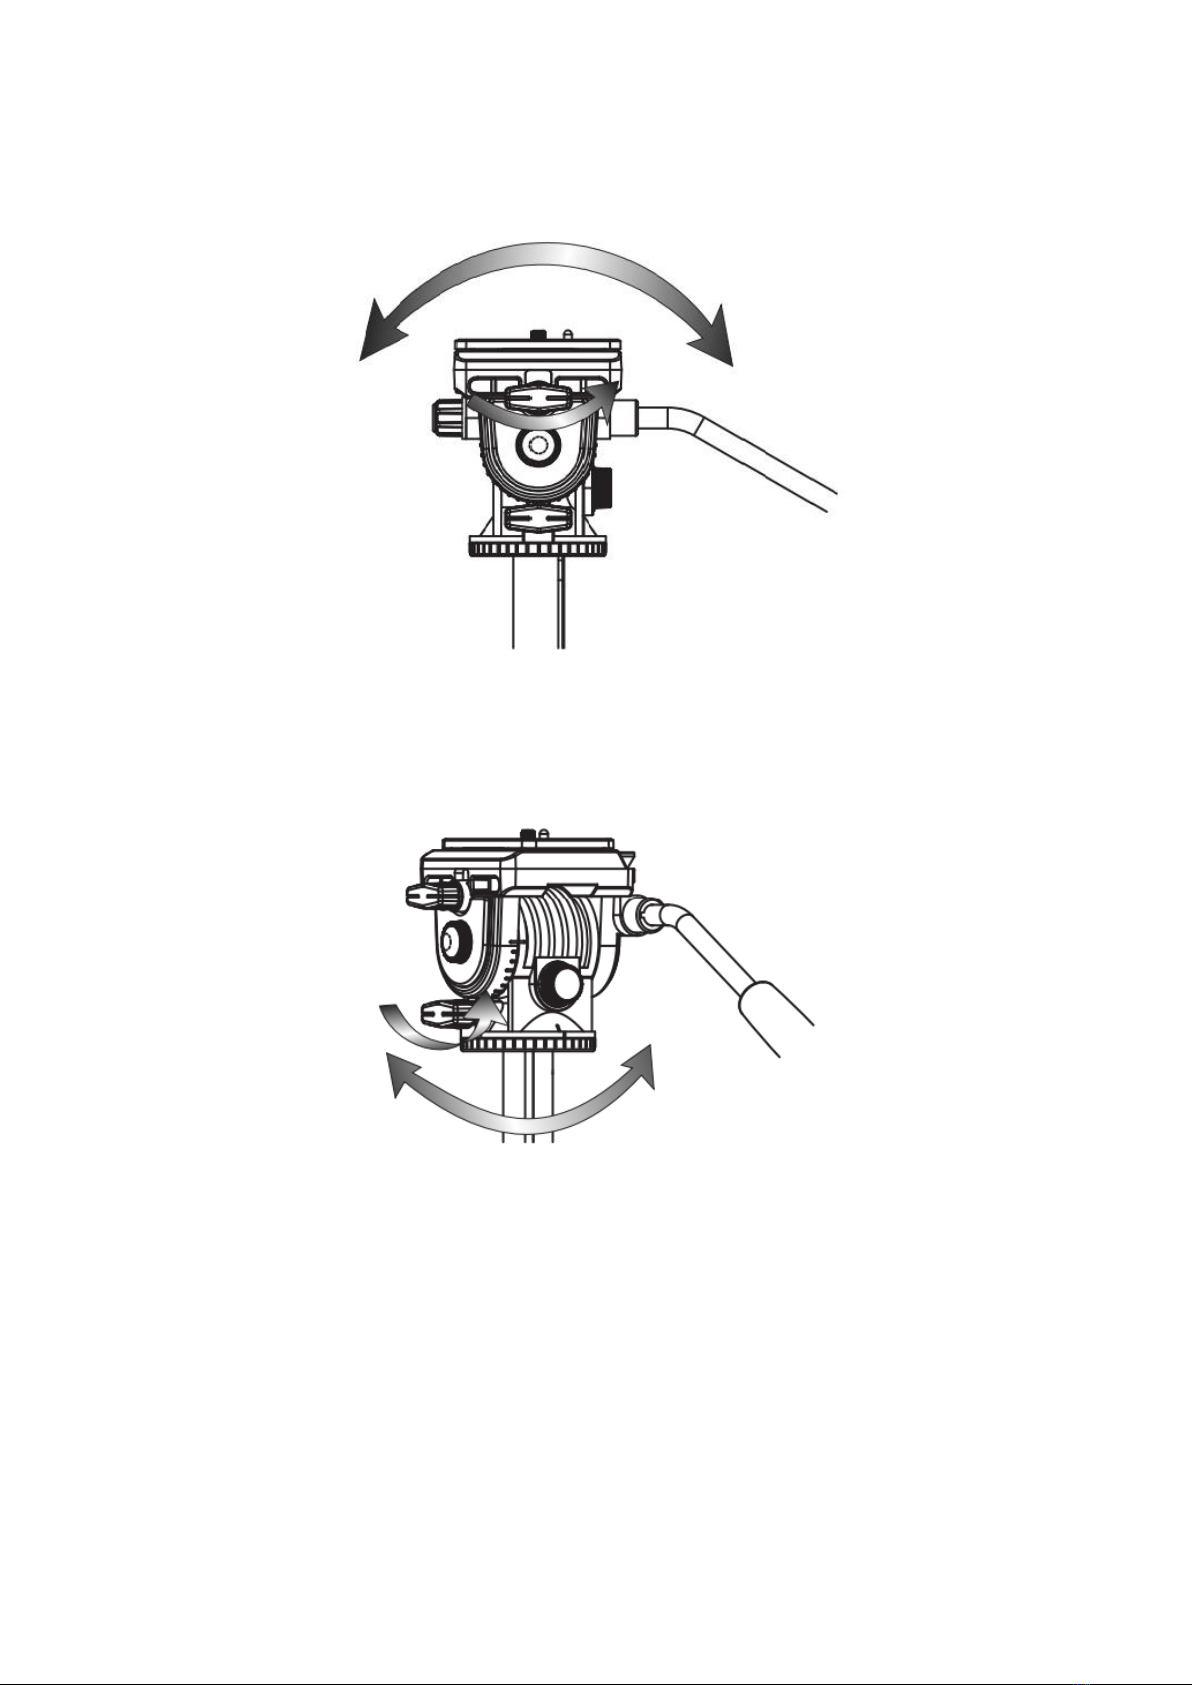
4. Tilt
(Illustration 4) Release the tilt lock knob. Using the pan/tilt bar, move the camera up or
down to tilt. There is a tension knob below the straight twist knob, the tension knob can
be adjusted the friction of turning of the rotating base.
5. Pan
(Illustration 5) Release the pan lock knob. Using the pan/tilt bar, move the camera left or
right to pan. Above the base there is a tension knob which can be adjusted the friction
or turning of the rotating base.
6. Change the Direction of Bar
(Illustration 6) To remove the tilt bar by turning the bar locking knob as illustrated. And
then mount the bar on the opposite direction by locking the knob tightly.
7. Raise Center Column
(Illustration 7) To unlock the center column by turning the locking knob
counterclockwise. Use the head crank to raise or lower the head platform and the relock
center column.
8. Extended Legs
(Illustration 8) Pull each flip-lock and extended the leg to its desired height and relock
the flip-locks)
9. Mid-Lever Spreader
(Illustration 9) To rotate the center column locking knob as pic shows, extend the leg
tube till the desired angle, then turn the center column locking knob counterclockwise to
fix the tripod. We suggest to extend the angle, the tripod can reach the best stability
performance.
10. Rubber Feet
(Illustration 10) As shooting locations and conditions change, this rubber feet play an
important role in rugged ground.