Kirk 4020 User manual

KIRK 4020 and KIRK 4040 1.9 GHz
User s Guide
KIRK telecom A/S
Langmarksvej 34
DK-8700 Horsens
Tel. +45 7560 2850
Fax +45 7560 2851
www.kirktelecom.com
1414 31-HD . ED1, R&T 75 50 26 66

Congratulations on your new KIRK handset
Your new handset from KIRK telecom will provide you with the greatest possible degree of flexibility and mobility
due to high battery cap acity , low weight, practical size and design.
Contents:
1. Construction ........................................................................... 4
2. Battery inst allation .................................................................. 5
3. Charging ................................................................................. 6
4. Key functions .......................................................................... 7
5. T urning the handset ON/OFF ................................................. 9
6. Making a call ......................................................................... 10
6.1 Receiving calls ................................................................ 12
6.2 During conversation ....................................................... 13
6.2.1 V olume regulation ................................................. 13
6.2.2 Microphone mute .................................................. 13
6.2.3 T ransferring the call to another handset ............... 13
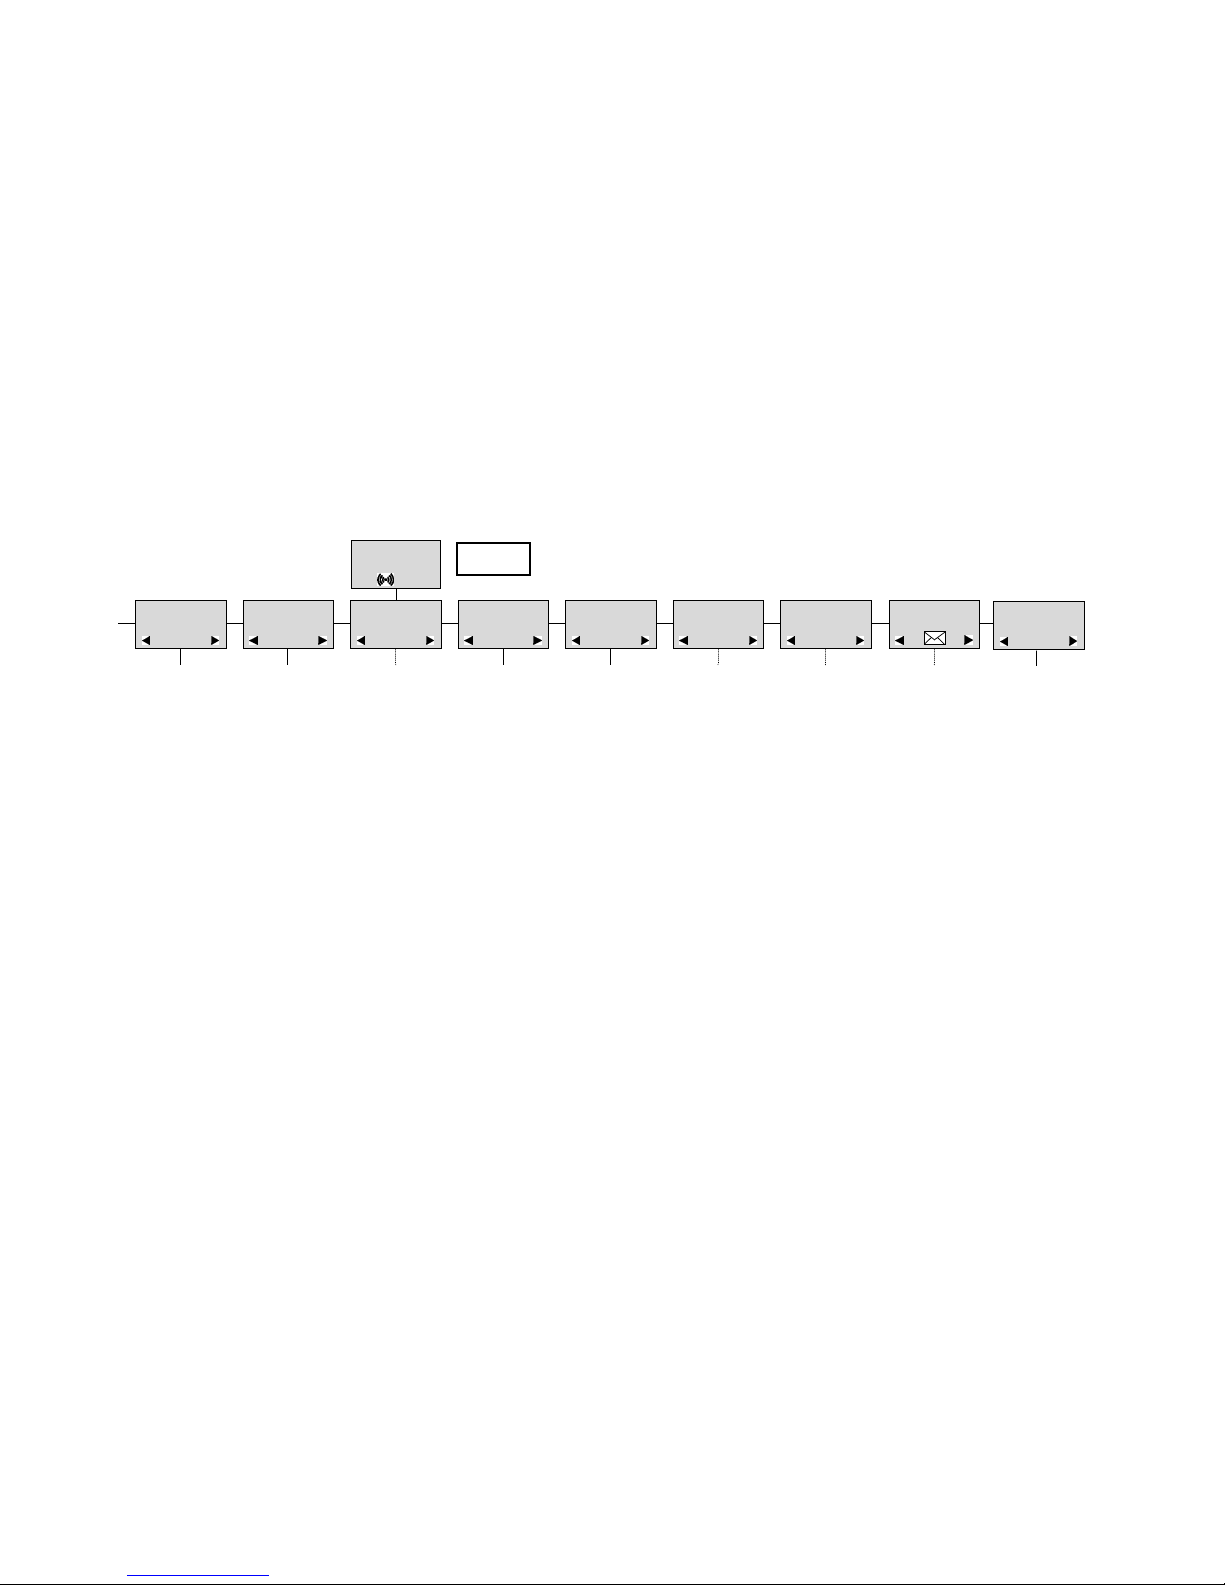
7. Menu structure ..................................................................... 14
7.1 Using the alphanumeric keyboard ................................. 15
7.2 The key functions ........................................................... 16
7.3 Profile set up .................................................................. 17
7.4 Profile functions .............................................................. 19
7.5 Menu subscription and login .......................................... 21
7.5.1 Create subscription ............................................... 22
7.5.2 Login 23 3
7.5.3 Auto login ................................................................ 24
7.5.4 Remove subscription .............................................. 26
7.5.5 Change startup text ................................................ 26
7.6 Battery cap acity ................................................................ 27
7.7 Redial ............................................................................... 28
7.8 Book ................................................................................. 30
7.9 External services .............................................................. 32
7.10 MSF Functions ............................................................... 33
7.1 1 Mail/Textmessages ......................................................... 34
7.12 S peed dial ...................................................................... 38
8. Date and Time function 39
9. Language 40
10. Advanced settings 41
11. Shortcut s ............................................................................... 44
12. Information ............................................................................ 45
12.1 Error tree ........................................................................ 45
12.2 Error information ............................................................ 46
12.3 W arranty ......................................................................... 46
12.4 Technical information ...................................................... 47
12.5 Import ant safety instructions and product information ... 48

1. Construction
2. Battery inst allation
The battery is connected to the handset when it is shipped from the factory. T o change the battery you must uns -
crew the plate on the rear of the handset to access the battery comp artment.
4
5
Key for internal calls
(not used on KIRK W ireless Server)
Loud speaking (only KIRK 4040)
Keyboard LOCK
(Menu*)
MENU key
Display with backlight
Recall key
(MAIL key)
SILENT (Menu#)
ON/OFF HOOK key-
also used as turn ONkey
CONFIRMATION key -
MUTE microphone.
MUTE ringer when ringing.
Long key press turns OFF.
Right arrow key, save number.
Phone book Menu from stand-
by text
Lef t arrow key, Redial Menu
from st andby text
Volume up/down
LED
Alarm key
Headset Connector
(only KIRK 4040)
To remove the battery cover , use a normal screw driver.
Insert it into the small crack behind the blind cover and
break to open the handset.
Please note: The product label, including the CE logo, can be found in
the battery comp artment.

3. Charging
During normal operation, it t akes approximately 3 1/2 hours to charge the handset from fully discharged to it s full
capacity . Place the handset in the charger . When the handset is turned on, the display shows the charging st atus
in line 3. For correct charging be sure the room temperature is between 0C and 25C. Do not place the handset in
direct sunlight. The battery has a built-in heat sensor which will stop charging if the battery temperature is too high.
It is necessary to recharge the battery when the display shows BATTERY LOW, or if it can not be turned on. The
LED flashes at a low frequency while charging and light s const antly when the charging is finished. The display
goes back to normal mode when fully charged.
When the handset is placed in the charger it will not vibrate, and B-answer is inactive. If the battery is fully dischar -
ged, up to 10 min. may p ass before charging begins and the handset can be turned on. When the charger begins
the charging, st atus is shown in the 3rd line of the display and the LED flashes slowly .
6
7
KIRK telecom
zzzzzzzzz . . . .
4. Key Functions
The handset has 21 keys:
Two keys are placed at the right side for volume control. Press upper or lower key to change the volume. Each
key-press turns volume one step up/down.
MENU - Go to menu structure or exit s the menu structure. (Escape or NO)
< , REDIAL - Menu: lef t, Cursor lef t, af ter a digit: delete last digit. Long press: delete all
From st andby text: Redial Menu
> , BOOK - Menu: right, Cursor right, Af ter a digit: S tore number in telephone book
From st andby text: T elephone book read
3, MUTE - Confirmation (YES) or jump to next level in the menu. In of f hook: Mute microphone
In on hook: Mute ringer. Long key press turns the handset OFF

8
9
INT - If residential systems: Internal calls of f hook
(not used on KIRK W ireless Server)
T urns loudspeaking on and of f (only KIRK 4040)
R - If of f hook: Recall. If on hook: Read or write message
- On hook/of f hook and turn ON
* - * (Change from pulse to DTMF on KIRK W ireless Server), Long = p ause (-), extra long: change
from pulse to DTMF (a T appears in the display, GAP st andard)
0-9 - Digit s or letters in alphanumeric mode (names and messages)
* - *, Choose uppercase or lowercase letters in alphanumeric mode
5. T urning the handset ON/OFF
ON: Press -key for 1/2 second.
When the handset is turned on the symbol is shown in the lower lef t corner of the display , if the handset is
subscribed to a system. (For subscription, see Chap. 7.5.1)
OFF: Press the 3-key (MUTE) for 3 seconds
Please note: When the handset has been out side the coverage area, it can t ake up to 30 seconds before the
handset is back on the system af ter re-entering the coverage area.

10
11
Redial:
Redial / CLIP (CLIP = Calling Line Identification Present ation) st ack:
Press the < -key (REDIAL) to enter the redial/CLIP st ack.
Search for the number by using the < or > -keys, redial numbers are marked with REDIAL or name and clip num -
bers are marked either with CLIP or the name of the person who called and the LED is on.
Press the -key, the -icon will flash until the connection is est ablished.
Using the handset in residential systems: (not on KIRK W ireless Server)
Internal call post-dial:
Press the INT-key, the -icon in the display will flash.
Dial the number of another handset on the base st ation, the -icon will flash until the connection is est ablished.
Internal call pre-dial: (not on KIRK W ireless Server)
Press the number of another handset on the base st ation.
Press the INT-key, the -icon will flash until the connection is est ablished.
6. Making a call
For making or receiving calls the handset has to be subscribed to a system ( shown in display) (see Chap. 7.5.1).
Press the -key, the -icon in the display will flash until connection is est ablished.
Dial the number.
Pre-dial:
Press the number to dial (long press on *will make a p ause, if necessary).
Press the -key, the -icon will flash until the connection is est ablished.
T elephone book:
Press the > -key (BOOK) to enter the telephone book.
Search for the number either by using the < or > -keys or by pressing the first letter in the name by using the digit s 1
9 (see Chap. 7.2).
Press the -key, the -icon will flash until the connection is est ablished.

Please note: If the Date and T ime function is supported, then date and time of the incoming or outgoing call is
shown in the CLIP/Redial st ack on the 4th line of the display . See Chap. 8 for more information.
Speed dial:
See Chap. 7.12 and Chap. 10 for more information about speed dialing.
6.1. Receiving calls
If the phone rings, the call can be answered by pressing the -key.
When ringing the LED flashes fast, and the display shows the CLIP (if presented). If it is an external call (or if no
CLIP) the display shows INCOMING CALL.
It is possible to stop the ring signal without answering the call. Press MUTE ( 3 ) and the ring signal is muted.
Display shows: RINGER MUTED.
6.2 During conversation
6.2.1 Volume regulation:
Use the two keys placed at the right side of the handset for volume control.
6.2.2 Microphone mute:
Press the 3 -key (MUTE), MIC. MUTED is showed in the display.
Press the 3 -key (MUTE) to enable the microphone again.
6.2.3 T ransferring the call to another handset:
Press the R-key, and dial new number.
Press the -key and the call is transferred to the other handset.
12
13

14
15
7. Menu structure
Pressing the MENU-key, enters or exit s the menu structure. It has to be used if a NO or CLEAR is wanted in the
menu structure.
Pressing the 3 -key , jump s to a lower level in the menu. When the lowest menu level is reached, it will store the set -
ting and jump to a higher level. It has to be used if a YES is wanted.
The Phone book Menu, Redial Menu and Mail Menu can be accessed directly. The Phone book Menu by pressing
the > -key (BOOK), the Redial Menu by pressing the < -key (REDIAL), and the Mail Menu by pressing the R-key
(MAIL).
MENU
LOGIN
MENU
MSF FUNCTION
PROFILE
SET-UP
MENU
EXT. SERVICE
MENU
BATTERY
MENU
PHONE BOOK
MENU
REDIAL
MENU
MAIL
KIRK telecom MENU
7.1 Using the alphanumeric keyboard
The normal dialling keys (0-9) are used for writing the name to be placed in the telephone book. By pressing the
keys a cert ain number of times the related letters or digit s will appear in the display. S p aces are made by using the
0-key. Key *changes between uppercase and lowercase letters. The arrows will move the cursor. Lef t arrow is
also used for deleting (hold for 1 sec.) = delete. New letters can be inserted.
Change of key press and p auses lasting more than 1 second automatically moves the cursor to next position.
Please note: 4th line of the display shows the possible alphanumeric keys.
MENU
SPEED DIAL

16
17
7.2 The key functions
Key Capit al letter Small letter
1? ! 1 - + * / = & ( ) % ¿ ¡ ? ! 1 - + * / = & ( ) % ¿ ¡
2 A B C 2 ˜ ¯ ` ˆ ˘ ˙ a b c 2 Æ ª
3D E F 3 ¨ ˚ ¸ d e f 3 Ł Ø Œ º
4G H I 4 ˝ ˛ ˇ g h i 4
5J K L 5 j k l 5
6M N O 6 m n o 6 æ ı ł
7 P Q R S 7 p q r s 7
8 T U V 8 t u v 8 ø œ ß
9W X Y Z 9 w x y z 9
0[S p ace] , . 0 : ; _ [S p ace] , . 0 : ; _
*A a A a
## @ E $ £ ¥ § < > { | } [ \ ] # @ E $ £ ¥ § < > { | } [ \ ]
7.3 Profile set-up
To set-up the handset press M ENU. Y ou are now able to switch between the dif ferent settings. Press 3 when you
find the setting you wish to change (or see). Change the setting according to your needs, confirm with 3 and you
automatically go to the next setting. Press MENU to finalize the setup.

18
19
Profile set-up (fig)
KIRK telecom
SET PROFILE
ADVANCED
SET PROFILE
RINGER TONE
SET PROFILE
RINGER VOL
SET PROFILE
KEY CLICK
SET PROFILE
VIBRATOR
SET PROFILE
B-ANSWER
SET PROFILE
START VOLUME
SET PROFILE
OUT OF RANGE
ADVANCED RINGER TONE
1,2.........
RINGER VOL
zzzzz
KEY CLICK
zzzzz - - -
VIBRATOR
ON/OFF
B-ANSWER
ON/OFF
START VOLUME
zzzzz
OUT OF RANGE
TONE ON/OFF
PROFILE
SET UP
SET PROFILE
AUTO KEYLOCK
AUTO KEYLOCK
ON/OFF
SET PROFILE
LANGUAGE
SELECT
LANGUAGE
ENGLISH
7.4 Profile functions
RINGERTONE:Scroll through the 9 dif ferent ringertones using < and >. Confirm with 3 .
RINGER VOL:Turn the volume up and down using < and >. Confirm with 3 .
KEY CLICK:Turn the volume up and down using < and >. Confirm with 3.
VIBRATOR:Can be turned on/of f using < and >. Confirm with 3 (vibrator only works on KIRK 4040).
B- ANSWER:Can be turned on/of f using < and >. Confirm with 3 . When turned on, the telephone automatically goes of f
hook when ringing. If subscribed to a KIRK solution it automatically goes on hook when calls are terminated. B-answ-
er is inactive when handset is placed in the charger .
REMARK:Automatic on-hook is only reliable under defined conditions related to the interface settings between the
KIRK Wireless Server and the PBX.
ST ART VOL:Start volume can be adjusted using < and >. Confirm with 3 .
SET PROFILE
BACKLIGHT
BACKLIGHT
ON/OFF

20
21
7.5 Menu subscription and login
Password is factory set at 0000
SELECT LOGIN
SYSTEM 1
123456789015
CREATE
SEARCH ID:
123456789012
CREATE
SYSTEM 2
MENU
LOGIN
MENU
SELECT LOGIN
SUBSCRIPTION
CREATE
SUBSCRIPTION
REMOVE
REMOVE?
PASSWORD
_ _ _ _ _
SUBSCRIPTION
REMOVE
REMOVE
SYSTEM 2
SUBSCRIPTION
REMOVE
OUT OF RANGE:The out of range indication can be turned on/of f using < and >. Confirm with 3 . W ith the out of
range indicator turned on, a beep will appear when the telephone is moving out of range of the base st ation, and
OUT OF RANGE will appear in the display.
AUTO KEYLOCK:The auto keylock function can be turned on/of f using < and >. Confirm with 3 . W ith auto keylock tur -
ned on the handset will automatically lock the keys af ter 30 seconds. Press MENU *to activate the keys again.
LANGUAGE:see Chap. 9.
BACKLIGHT:Can be turned on/of f using < and >. Confirm with 3 .
ADVANCED: see Chap. 10.

23
22
7.5.2 Login
The handset can be subscribed to 10 dif ferent systems enabling you to use the same handset on 10 dif ferent systems.
If you would like to change to another system, use the Login Menu to connect to another system number.
The actual chosen system is marked with a *
.
To change to another system use < or > and press 3 to confirm.
To be able to log on to a system, subscription to the system has to be est ablished (See Chap. 7.5.1).
Under LOGIN/SELECT LOGIN only subscriptions will be shown. Free positions will not be shown.
MENU
SELECT LOGIN
SUBSCRIPTION
CREATE
SUBSCRIPTION
REMOVE
SELECT LOGIN
SYSTEM 1
123456789015
SELECT LOGIN
SYSTEM 2A
123456789012
SELECT LOGIN
SYSTEM 3
123456789013
SELECT LOGIN
SYSTEM 4
123456789014
SELECT LOGIN
AUTO A
SELECT LOGIN
AUTO B
7.5.1 Create subscription
To make subscriptions, the system must allow subscriptions to be made. Some systems also require an Access
Code (AC). If more than one system currently permit s subscription, you will need to know the ID of the system to
which you wish to subscribe. Access Codes and system IDs will be provided by the system administrator.
Choose the SUBSCRIPTION CREATE function to subscribe to a new system (see Chap. 7.5/7.5.4).
Use the < and > keys to scroll between the ID s of the dif ferent systems available.
During subscription the handset will search for free positions and perform subscription on the first free position.
An alternative position can be choosen using < or >. Enter the AC (if required) using the keyboard, and press 3 .
If the subscription was successful, the st artup text will be replaced by the st andby text given into the system by the
system administrator and is shown in the display. If not, the subscription has failed and the procedure must be
retried.
If the handset is already subscribed to 10 systems, you will have to remove a subscription before creating a new
subscription (see Chap. 7.5.3).

If a handset is subscribed to two systems only, you can use Auto Login B to change between the two systems
automatically. The selected system is marked with a B.
Please note: Auto login B can be used in sep arate systems which are overlapping each other. As soon as the
handset has measured a low radio signal 5 times in succession, it will st art up the Auto login B procedure and
change to an alternative system if available. Changing between two systems can only t ake place while on hook.
Any call will be dropped when changing to an alternative system.
24
25
7.5.3 Auto login
The handset can be subscribed to 10 dif ferent systems.
If a handset is subscribed to two or more systems, you can use Auto Login A to change between the systems auto -
matically . The selected system is marked with an A.
Please note: Auto login A should only be used in sep arate systems without overlap s. If a handset looses signal
from the system (the display showing OUT OF RANGE), then af ter 20 seconds the handset will st art searching
for an alternative system available from the Login list and automatically change to this system. Changing between
systems can only t ake place while on hook. Any call will be dropped when changing to an alternative system.

7.5.4 Remove subscription
Subscriptions can be removed from the system in use and from the 9 other systems (if connected). Removing a
subscription requires a p assword. Password is factory set at 0000. If the system in use is removed, it is necessary
either to select one of the remaining systems or to subscribe to a new one. If one of the systems not chosen is
removed, the handset remains connected to the system in use.
7.5.5 Change startup text
The st artup text is predefined as e.g. KIRK telecom as factory default. This can be changed by using the following
procedure: Press **** , BOOK, 3 and enter the new st artup text using the keyboard followed by 3 . It is possi -
ble to insert 24 characters.
26
27
7.6 Battery capacity
In the Battery Menu it is possible to see the remaining battery cap acity . For reading the correct cap acity , the hand -
set has to be removed from the charger for at least one hour. Press MENU and use the < or > keys to reach the
Battery Menu. Press 3 to enter the menu, and you can see the current st atus of the battery cap acity . Press 3 to
return to the menu system or press MENU to quit.
The indication on the display is not necessarily an exact reflection on the remaining speech time, but only an indi -
cation of the volt age on the battery. KIRK telecom
MENU
BATTERY
BATTERY
CAPACITY
zzzzz

28
29
7.7 Redial
The handset has maximum 10 redial numbers and 10 Caller IDs placed in the same st ack. Each number is only
represented once. Enter the Redial Menu by pressing the < -key (REDIAL) from the st andby text. Repeated pres -
ses at the < -key turn backward through the dialled numbers and CLIP numbers (from newest to the oldest). The >
-key moves in the opposite direction. It is also possible to reach the Redial Menu in the main menu. Numbers are
named REDIAL, CLIP or with the name.
The LED will flash slowly if a new number (unanswered call) has arrived in the CLIP st ack. If no number (no clip) is
represented by a call only the LED will flash slow af terwards.
If you want to delete a CLIP or a REDIAL you scroll to the name/number and press 3 twice.
The name/number is now deleted. If number is stored, it is moved to the telephone book. Y ou can also delete all
name/numbers using the DELETE ALL? function.
It is possible to edit the CLIP or REDIAL numbers. Find the number you wish to edit and press the digit s you want
to add to the number, e.g. prefix = O.
The Redial and CLIP st ack Menu (fig)
KIRK telecom
REDIAL
75602850
CLIP
898
DELETE?
899
STORE NO.?
899
DELETE ALL?
NAME:
BILL GATES
899
<

30
31
7.8 Book
Storing a number (max. 24 digit s) in the telephone book is done by pressing the number to be stored (in on hook),
then press the > -key followed by the 3 -key . The book can store up to 200 numbers with name. Typing of the name
and a confirmation is required. Af ter storing the telephone will go back to st andby mode. If the display shows
MEMORY FULL, it is necessary to delete one or
more numbers from the telephone book.
(See menu structure p age 31)
NAME:
KIRK TELECOM
STORE NO.?
75602850
75602850
KIRK telecom
>
75602850
BOOK
Read BOOK numbers: The telephone book is entered by pressing > (BOOK). For quick-search: press the first let -
ter of the name (using 1-9)(see Chap. 7.2). Call the displayed person by pressing the key. It is also possible to
reach the Phone book Menu in the main menu. Viewing and editing the telephone book can also be done while in
conversation.
KIRK telecom
BILL JENSEN
899
CARL NIELSEN
7561XXXX
PHILIP
HANSEN
8614XXXX
CLAUS
PEDERSEN
134
DELETE?
7561XXXX
EDIT NO.?
7561XXXX
EDIT NAME?
CARL NIELSEN
>
BOOK

32
33
7.9 External services
External services are features placed in the main system, and only available if the handset is subscribed to a KIRK
solution. Under External services can be found; V iew Clip S tack, Delete Clip S tack and Local Phone Book. The
Local Phone Book is a common phone book for all handset s subscribed to the actual system, and all handset s
subscribed to the system are listed in the phone book. Additional numbers can be added to the phone book by the
system administrator.
7.10 MSF Functions
MSF Functions are special functions, which are based on MSF (Message Service Function). The functions require
special sof tware in the main system.

34
35
7.1 1 Mail/Text Messages
Available in systems configured with the possibility of sending text messages
At the reception of a text message the envelope icon appears in the display. The envelope icon is indicating
one or more unread messages.
The text message is shown in the display, and when the message is read the envelope icon will disappear.
If the message cont ains a call-back number , this will be displayed on the bottom line of the display . As long as the
call-back number is in the display, it is possible to activate the number by pressing the -key .
1st letter in the display , in front of the timest amp, shows the message status: read (R), unread (N) or locked (L).
Mails include a maximum of 72 letters or digit s (2 display screens of 36 each). Call-back number is max. 24 digit s
(or letters for E-mail).
14 messages can be stored in the handset. When receiving a new message, the oldest unlocked will be deleted.
Locked messages will not automatically be overwritten, but can manually be deleted. Maximum 7 messages can
be locked.
Read a mail
Press the R-key (MAIL) followed by the 3 -key or enter the Mail Menu (in on hook condition).
If the message includes more than 36 letters or digit s, the message will run over 2 display screens.
Use the > -key to scroll. T o see the sender of the mail, press the 3 -key . T o leave the mail, press the MENU-key.
Reply a mail
Open the mail by pressing the R-key followed by the 3 -key, press the 3 -key again and use the < > -keys to find the
reply feature, press the 3 -key and you are then able to reply the mail. Af ter writing your reply press the 3 -key to
confirm.
Forward a mail
Open the mail by pressing the R-key followed by the 3 -key, press the 3 -key again and use the < > -keys to find the
forward feature, press the 3 -key twice and you are then able to write the number on the receiver . Confirm with the
3 -key.
Delete all mail
Open the mail st ack by pressing the R-key followed by the 3 -key, press the 3 -key again and use the < > -keys to
find the delete feature, press the 3 -key and all mails are deleted.

36
37
Delete a mail
Open the mail by pressing the R-key followed by the 3 -key, press the 3 -key again and use the < > -keys to find the
delete feature, press the 3 -key and the mail is deleted.
Lock/unlock a mail
Open the mail by pressing the R-key followed by the 3 -key, press the 3 -key again and use the < > -keys to find the
lock/unlock feature, press the 3 -key and the mail is locked/unlocked.
Write a mail
To write a new mail press the R- key (MAIL), confirm with the 3 -key and write your message. To send the mail
press the 3 -key, type the number of the receiver and confirm with the 3 -key.
If one or more mails are stored do as followed: Press the R-key (MAIL) followed by the > -key confirm with the 3 -
key and write your message. Press the 3-key, type the number of the receiver and confirm with the 3 -key. The
message is sent.
Note
In case a sent message is not received, the sender will get a message in the display.
N25-01 04.38
308
Temp 45 ..
L26-01 14.32
319
Hello, it s me..
N28-01 15.46
236
FIRE ALARM..
WRITE NEW
MAIL?
›19-01 09.56
htj@kirktelec
I am working..
›20-01 10.13
319
Call me..
N
206
Meet me at 9 ..
Hello it s me.
Y o can meet me
at 15
oclock if you
want to.
DELETE
MAIL?
SENDER:
319
(UN)LOCK
MAIL?
REPLY
MAIL?
FORW ARD
MAIL?
- - - -
PHONENO:
236
E-MAIL:
KIRK telecom
MAIL
The Mail Menu (fig)
DELETE ALL
MAIL?

38
7.12 S peed dial
Please note: To use the speed dial function it is necessary to set LONG KEY to SPEED DIAL (see Chap 10).
The speed dial list has maximum 11 speed dial numbers. Calling a number from the speed dial list is done by
pressing the 0,1,2...9 key with a long key press or by pressing the alarm button key. If no number is assigned to
the key it is possible to enter a new number . The number is added to the speed dial list automatically.
To store a number (max. 23 digit s) in the speed dial list press MENU and use the < or > keys to reach the S peed
dial Menu. Press 3 to enter the menu. Use the < or > keys to scroll between the list numbers, enter the number
and then confirm with 3 . Af ter storing, the telephone will go back to st andby mode.
To delete or change a number in the speed dial list press MENU and use the < or > keys to reach the Speed dial
Menu. Press 3 to enter the menu. Use the < or > keys to scroll between the list numbers, press 3 to select the
number in question and then use the < key to delete the existing number. Confirm with 3 or enter a new number
and then confirm with 3 .
8. Date and T ime Function
The Date and T ime function requires the use of a KIRK W ireless Server and special sof tware in the main system.
If the Date and T ime function is supported, a clock is shown in the 2nd line of the display. The clock shows the time
with an accuracy of +/- 1 minute.
If the Date and T ime function is supported, then date and time of the incoming or outgoing call is also shown in the
CLIP/Redial st ack on the 4th line of the display. An icon + date and time shows the st atus of the call.
If the call is missed, the date and time is displayed: 29/03 20:28
If the incoming call is received, the date and time is displayed: 29/03 20:28
If the outgoing call is made, the date and time is displayed: 29/03 20:28
39
Other manuals for 4020
1
This manual suits for next models
1
Table of contents
Other Kirk Handset manuals