manuals.online logo
Brands
  1. Home
  2. •
  3. Brands
  4. •
  5. Klein Tools
  6. •
  7. Measuring Instrument
  8. •
  9. Klein Tools MM5000 User manual

Klein Tools MM5000 User manual

GRAPHICS DRAWING NAME: MM5000 Manual ENG.indd
GRAPHICS PART NUMBER: XXXXXX ECN NUMBER.: 00000
PACKAGING DWG. REF.: VENDOR SUPPLIED Revision: A 1-25-13
ENGLISH
www.kleintools.com
Instruction
Manual
For Professionals...Since 1857
®
ENGLISH
MM5000
• TRUERMS
• BACKLITDISPLAY
• BARGRAPH
• LEADSTORAGE
• MAX/MIN
• 3-3/4DIGIT
4000COUNTLCD
• AUTO/MANUAL
RANGE
• AUTOHOLD
HOLD
Apo
AUTO
RANGE
TRMS
A-HOLD
4007036
ELECTRICALSPECIFICATIONS
DCVoltageMeasurement
Range Resolution Accuracy
400.0mV 0.1mV
± (0.3% + 5 digits)
4V ~ 400V 1mV ~ 0.1V
1000V 1V ± (0.8% + 10 digits)
OverloadProtection: 1000V InputImpedance(Nominal): >10MΩ, <100pF
InputImpedance(LOWZ): >3kΩ, <200pF, up to 600V RMS
ACVoltageMeasurement
Range Resolution Accuracy
40Hz ~ 400Hz
Accuracy
400Hz ~ 2kHz
400mV 0.1mV
± (0.75% + 5 digits)
± (2.5% +10 digits)
4V ~ 400V 1mV ~ 0.1V ± (2.0% +8 digits)
1000V 1V ± (0.75% + 8 digits) ± (2.0% +8 digits)*
OverloadProtection: 1000V RMS InputImpedance(Nominal):>10MΩ, <100pF
InputImpedance(LOWZ): >3kΩ, <200pF, up to 600V RMS
FrequencyRange: 40 to 2kHz Response: True RMS
*Accuracy for 400Hz ~ 1kHz range only.
DCCurrentMeasurement
Range Resolution Accuracy
400.0µA 0.1µA
± (1.0% + 5 digits)
2000µA 1µA
OverloadProtection: 600V RMS
ACCurrentMeasurement
Range Resolution Accuracy
400.0µA 0.1µA
± (1.5% + 5 digits)
2000µA 1µA
OverloadProtection: 600V RMS
Frequency: 40Hz to 2kHz Response: True RMS
ResistanceMeasurement
Range Resolution Accuracy
400Ω˜4MΩ0.1Ω˜1kΩ± (1.0% + 5 digits)
40MΩ0.01MΩ± (1.5% + 10 digits)
OverloadProtection: 600V RMS
DiodeTest
OverloadProtection Range TestCurrent OpenCircuitVoltage
600V RMS 4.0V DC Appx. 0.25mA <1.8V DC (typ.)
ContinuityTest
OverloadProtection OpenCircuitVoltage Threshold(Appx.)
600V RMS Appx. 0.44V Appx. < 40Ω
Specicationssubjecttochange.

WARRANTY
This product is warranted to be free from defects in materials and workmanship
for a period of two years from the date of purchase. During this warranty period,
Klein Tools has the option to repair or replace or refund the purchase price of
any unit which fails to conform to this warranty under normal use and service.
This warranty does not cover damage which occurs in shipment or failure which
results from alteration, tampering, accident, misuse, abuse, neglect, or improper
maintenance. Batteries and damage resulting from failed batteries are not
covered by warranty. A purchase receipt or other proof of original purchase date
will be required before warranty repairs will be rendered.
Any implied warranties, including but not limited to implied warranties of
merchantability and fitness for a particular purpose, are limited to the express
warranty. Klein Tools shall not be liable for loss of use of the instrument or other
incidental or consequential damages, expenses, or economic loss, or for any
claim or claims for such damage, expenses or economic loss.
Some states or countries laws vary, so the above limitations or exclusions may
not apply to you. This warranty gives you specific legal rights, and you may also
have other rights which vary from state to state. If your Klein product requires
repair or for information on how to exercise your rights under the terms of this
warranty, please contact Klein Tools at 1-877-775-5346.
CLEANING
Turn instrument off and disconnect test leads. Clean the instrument by using a
damp cloth. Do not use abrasive cleaners or solvents.
STORAGE
Remove the batteries when instrument is not in use for a prolonged period
of time. Do not expose to high temperatures or humidity. After a period of
storage in extreme conditions exceeding the limits mentioned in the General
Specifications section, allow the instrument to return to normal operating
conditions before using it.
DISPOSAL/RECYCLE
Caution:This symbol indicates that equipment and its accessories
shall be subject to a separate collection and correct disposal.
CUSTOMERSERVICE
KLEINTOOLS,INC.
450 Bond Street
Lincolnshire, IL 60069
1-877-775-5346
www.kleintools.com
Rev A 2/13 139749
7. LowImpedance(LOWZ):<600V
 DONOTuse(LOWZ)modeatvoltagesgreaterthan600V.
• Press SELECT to choose AC or DC Voltage.
• Use Low Impedance (LOW Z) mode to reduce ghost voltages.
• See AC/DC Voltage instructions.
6. Continuity
Features:
HOLD
MAX/MIN
• Display shows resistance.
• Buzzer sounds if less than 40Ω.
5. DiodeTest
Features:
HOLD
MAX/MIN
Display shows:
• Forward voltage drop if forward biased.
• “O.L” if reverse biased.
4. AC/DCCurrent(small):<2000µA
Features:
HOLD
AUTOHOLD
RANGE
MAX/MIN
 DONOTattempttomeasuremorethan400mA.
• Attach RED lead to “µA” input.
• Break circuit to be measured.
• Attach RED lead to "µA" input, BLACK lead to COM.
• Connect RED lead to one side of break and BLACK lead to the
other (meter in series).
• Select AC or DC current source.
ENGLISH
4007036
FEATUREDETAILS
MM5000
InstructionManual
GENERALSPECIFICATIONS
The Klein Tools MM5000 is an auto-ranging multimeter. It measures AC/DC
voltage, low impedance voltage, AC/DC current and resistance. It can also
test diodes and continuity.
• OperatingAltitude:6562 ft / 2000 m
• RelativeHumidity:<75%
• OperatingTemperature:O°C/32°F to 45°C/113°F
• StorageTemperature:-20°C/ -4°F to 60°C/140°F <80% R.H.
• AccuracyTemperature:18°C/64°F to 28°C/82°F
• TemperatureCoefcient: 0.1*(specified accuracy)/ °C
• SamplingFrequency:3 samples per second
• Dimensions: 7” x 3.5” x 1.875”
• Weight:14 oz.
• BatteryLife:160 Hours
• Calibration:Accurate for one year
• Accuracy:± (% of reading + # of least significant digits)
• CATRating:CAT III 1000V, CAT IV 600V
• Certications:Conforms to UL Stds 61010-1 & 61010-2-030.
Certified to CAN/CSA C22.2 No.61010-1, 61010-2-030,
IEC 61010-2-030:2010 MOD, ANSI/ISA-61010-2-030 (82.02.03).
• PolutionDegree:2
• CountryofOrigin:USA (of US and imported parts)
WARNINGS
To ensure safe operation and service of the tester, follow these instructions.
Failure to observe these warnings can result in severe injury or death.
• Before each use, verify meter operation by measuring a known
voltage or current.
• Never use the meter on a circuit with voltages that exceed the
category based rating of this meter.
• Do not use the meter during electrical storms or in wet weather.
• Do not use the meter or test leads if they appear to be damaged.
• Ensure meter leads are fully seated, and keep fingers away from the
metal probe contacts when making measurements.
• Do not open the meter to replace batteries or fuses while the probes
are connected.
• Use caution when working with voltages above 60V DC or 25V AC
RMS. Such voltages pose a shock hazard.
• To avoid false readings that can lead to electrical shock, replace
batteries if a low battery indicator appears.
• Unless measuring voltage or current, shut off and lock out power
before measuring resistance or capacitance.
• Always adhere to local and national safety codes. Use individual
protective equipment to prevent shock and arc blast injury where
hazardous live conductors are exposed.
SYMBOLS
~
ACAlternatingCurrent WarningorCaution
DCDirectCurrent DangerousLevels
DC/ACVoltageorCurrent DoubleInsulatedClassII
Ground ACSource
A. DONOTattempttomeasuremorethan1000V.
B. DONOTattempttomeasuremorethan600Von(LOWZ)setting.
C. SelectFunctionalityButton
• Switch between AC and DC.
• Wake meter during Auto Power Off.
D. AutoHold
• Hold captures the current displayed value.
• Auto Hold captures the first stable displayed value, until a new
stable value is measured. The meter will then capture the new value
and emit a beep (V, Ohm and Amp functions).
• Press to hold current input on the display.
• Press again to enter Auto-Hold to capture stable values.
• Press again to return to normal operation.
E. Auto/ManualRange
• Press repeatedly to cycle through manual ranges.
• Press for 2 seconds to return to auto ranging mode.
• AT is displayed on LCD only during auto ranging mode.
F. Max/Min
• Press to enter Max/Min mode; the largest and smallest values will
be saved while in this mode.
• Press repeatedly to alternate between the maximum and minimum
readings.
• Press for 2 seconds to return to live reading and clear the stored
maximum and minimum values.
G. AutoPower-Off(Apo)
• Device will power off after 30 minutes non-use.
• Press the select button to wake.
• Disabled during Max/Min function.
• Holding Select button while turning on disables Auto Power-Off.
H,I. Battery/FuseReplacement
• When indicator is displayed on the LCD, batteries must be
replaced.
• Remove rubber boot, back screw and replace 2 x AAA batteries.
J. Backlight
• Press to activate display backlight.
• Using lights drains the battery significantly.
K. BarGraph
• The bar graph shows an approximate analog representation
of a measurement.
• The bar graph responds much faster than the digital display.
• The scale of the bar graph is zero to the maximum reading of
the selected range.
L. MagneticHangerAccessory(optional, sold separately) (69190)
• Slide magnetic adapter into protective rubber boot.
• Attach instruments to metal for hands-free use.
FUNCTIONINSTRUCTIONS
1. ACVoltage:<1000V.(LOWZ)<600V
Features:
HOLD
AUTOHOLD
RANGE
MAX/MIN
 DONOTattempttomeasuremorethan1000V.
 DONOTuse(LOWZ)modeatvoltagesgreaterthan600V.
• Use Low Impedance (LOW Z) mode to reduce ghost voltages.
• Rotate selector to "AC" Voltage position.
• Attach RED lead to “V” input.
3. Resistance
Features:
HOLD
AUTOHOLD
RANGE
MAX/MIN
 DONOTattempttomeasuremorethan1000V.
 DONOTuse(LOWZ)modeatvoltagesgreaterthan600V.
• Use Low Impedance (LOW Z) mode to reduce ghost voltages.
• Rotate selector to "DC" Voltage position.
• Attach RED lead to “V” input.
A
B
C
D
E
F
G
H
I
K
L
J
3
14
5
7
2
6
DONOT measure resistance on a live circuit.
• Ω= < 40MΩ.
SYMBOLSUSEDONLCD
~
ACMeasurement DCMeasurement
-
NegativeDCValue
AT
AutoRangeActive
O
.L.
Overload:RangeExceeded Apo
AutoPower-OffActive
LowBattery
HOLD
HoldActive
MIN
MinimumReading
M
AX
MaximumReading
V
VoltageMeasurement
A
CurrentinAmps
Ω
ResistanceinOhms DiodeTest
ContinuityTest
n
Nano10
-9
µ
Micro10
-6
m
Milli10
-3
k
Kilo10
3
M
Mega10
6
A- HOLD
Auto-HoldActive
LOW
Z
LowImpedance
2. DCVoltage:<1000V.(LOWZ)<600V
Features:
HOLD
AUTOHOLD
RANGE
MAX/MIN
Other Klein Tools Measuring Instrument manuals

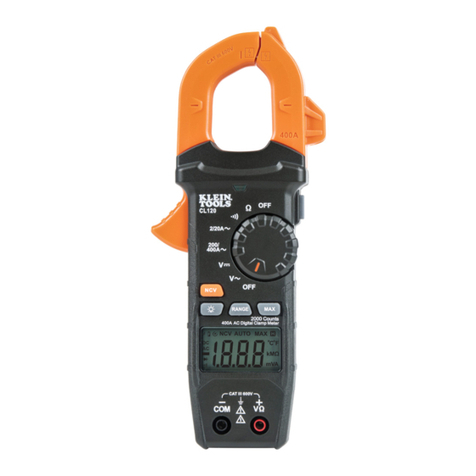
Klein Tools CL120 User manual

Klein Tools

Klein Tools CL120 User manual

Klein Tools IR2000A User manual

Klein Tools

Klein Tools IR2000A User manual

Klein Tools 501-915 User manual

Klein Tools

Klein Tools 501-915 User manual

Klein Tools CL700 User manual

Klein Tools

Klein Tools CL700 User manual

Klein Tools CL390 User manual

Klein Tools

Klein Tools CL390 User manual

Klein Tools Toner-Pro VDV500-123 User manual

Klein Tools

Klein Tools Toner-Pro VDV500-123 User manual

Klein Tools CL120 User manual

Klein Tools

Klein Tools CL120 User manual

Klein Tools CL3200 User manual

Klein Tools

Klein Tools CL3200 User manual

Klein Tools 935DAF User manual

Klein Tools

Klein Tools 935DAF User manual

Klein Tools CL2200 User manual

Klein Tools

Klein Tools CL2200 User manual

Klein Tools CL360 User manual

Klein Tools

Klein Tools CL360 User manual

Klein Tools CL310 User manual

Klein Tools

Klein Tools CL310 User manual

Klein Tools ET140 User manual

Klein Tools

Klein Tools ET140 User manual

Klein Tools CL450 User manual

Klein Tools

Klein Tools CL450 User manual

Klein Tools ET900 User manual

Klein Tools

Klein Tools ET900 User manual

Klein Tools CL3200 User manual

Klein Tools

Klein Tools CL3200 User manual

Klein Tools MM2000 User manual

Klein Tools

Klein Tools MM2000 User manual

Klein Tools CL330 User manual

Klein Tools

Klein Tools CL330 User manual

Klein Tools CL390 User manual

Klein Tools

Klein Tools CL390 User manual

Klein Tools CL360 User manual

Klein Tools

Klein Tools CL360 User manual

Klein Tools ET140 User manual

Klein Tools

Klein Tools ET140 User manual

Klein Tools VDV512-110 User manual

Klein Tools

Klein Tools VDV512-110 User manual

Klein Tools 935DAA User manual

Klein Tools

Klein Tools 935DAA User manual

Klein Tools CL445 User manual

Klein Tools

Klein Tools CL445 User manual

Popular Measuring Instrument manuals by other brands

Aquaread LeveLine Series instruction manual

Aquaread

Aquaread LeveLine Series instruction manual

Tektronix TDP1000TDP1500 Quick start user manual

Tektronix

Tektronix TDP1000TDP1500 Quick start user manual

vision microsystems VM1000C pilot's guide

vision microsystems

vision microsystems VM1000C pilot's guide

Gates FS 94 operating manual

Gates

Gates FS 94 operating manual

Vega VEGABAR 81 operating instructions

Vega

Vega VEGABAR 81 operating instructions

Honeywell UDA2182 user guide

Honeywell

Honeywell UDA2182 user guide

P3 International Kill A Watt user manual

P3 International

P3 International Kill A Watt user manual

ZURN ZEMS6000AV Installation, operation, maintenance and parts manual
ZURN

ZURN ZEMS6000AV Installation, operation, maintenance and parts manual

Proline Promag L 400 technical information

Proline

Proline Promag L 400 technical information

LaserLiner CompactLine-Laser G360 manual

LaserLiner

LaserLiner CompactLine-Laser G360 manual

Kolida KL-15 user manual

Kolida

Kolida KL-15 user manual

Meco 4500 user manual

Meco

Meco 4500 user manual

Radio Shack 22-811 owner's manual

Radio Shack

Radio Shack 22-811 owner's manual

Lutron Electronics CD-4318SD Operation manual

Lutron Electronics

Lutron Electronics CD-4318SD Operation manual

Makita LD060P instruction manual

Makita

Makita LD060P instruction manual

Panasonic MKG1500-DE installation instructions

Panasonic

Panasonic MKG1500-DE installation instructions

Agilent Technologies 8752C Service guide

Agilent Technologies

Agilent Technologies 8752C Service guide

PCB Piezotronics J357B11 Installation and operating manual

PCB Piezotronics

PCB Piezotronics J357B11 Installation and operating manual

manuals.online logo
manuals.online logoBrands
  • About & Mission
  • Contact us
  • Privacy Policy
  • Terms and Conditions

Copyright 2025 Manuals.Online. All Rights Reserved.