EN
The wine cabinet’s power lead has a plug, to be plugged into a standard earthed outlet to prevent
any risk of electric shock.
Visit your usual EuroCave stockist to change the power lead if it is damaged. It must be replaced
by a EuroCave genuine manufacturer’s part.
For your safety, the wine cabinet must
be correctly earthed.
Ensure that the socket outlet is
correctly earthed and that your
installation is protected by a circuit
breaker (30 mA*).
*not applicable to some countries.
2 - POWER SUPPLY
Disposing of packaging
The packaging used by EuroCave is made from
recyclable material (except for the two wedges in
high density expanded polystyrene and the cabinet’s
protective plastic in low density polyethylene). After
unpacking your cabinet, take the packaging to a refuse
GSPPIGXMSRTSMRX*SVXLIQSWXTEVXMX[MPPFIVIG]GPIH
Recycling: a caring gesture
Electrical and electronic equipment is potentially harmful to the
environment and human health owing to the presence of hazardous
substances.Therefore, you should never dispose of electrical or electronic
equipment waste with unsorted municipal waste. When you buy a new
EuroCave product, you can entrust the recycling of your old appliance to
your EuroCave stockist. Contact your EuroCave stockist, he will explain
the removal and collection procedures in place within the EuroCave
network.
In compliance with legislation on protecting the environment, your wine
GEFMRIXHSIWRSXGSRXEMR'*'WSV,'*'W
To save energy
•Install your cabinet in a suitable place (see next page) and observe the
temperature ranges provided.
•Keep the door open for as short a time as possible.
•Ensure that the door seal is in good condition and is not damaged. If it
is, contact your EuroCave stockist.
Disable unusable appliances by unplugging them and removing the power
lead.
3 - PROTECTING THE ENVIRONMENT AND ENERGY SAVING
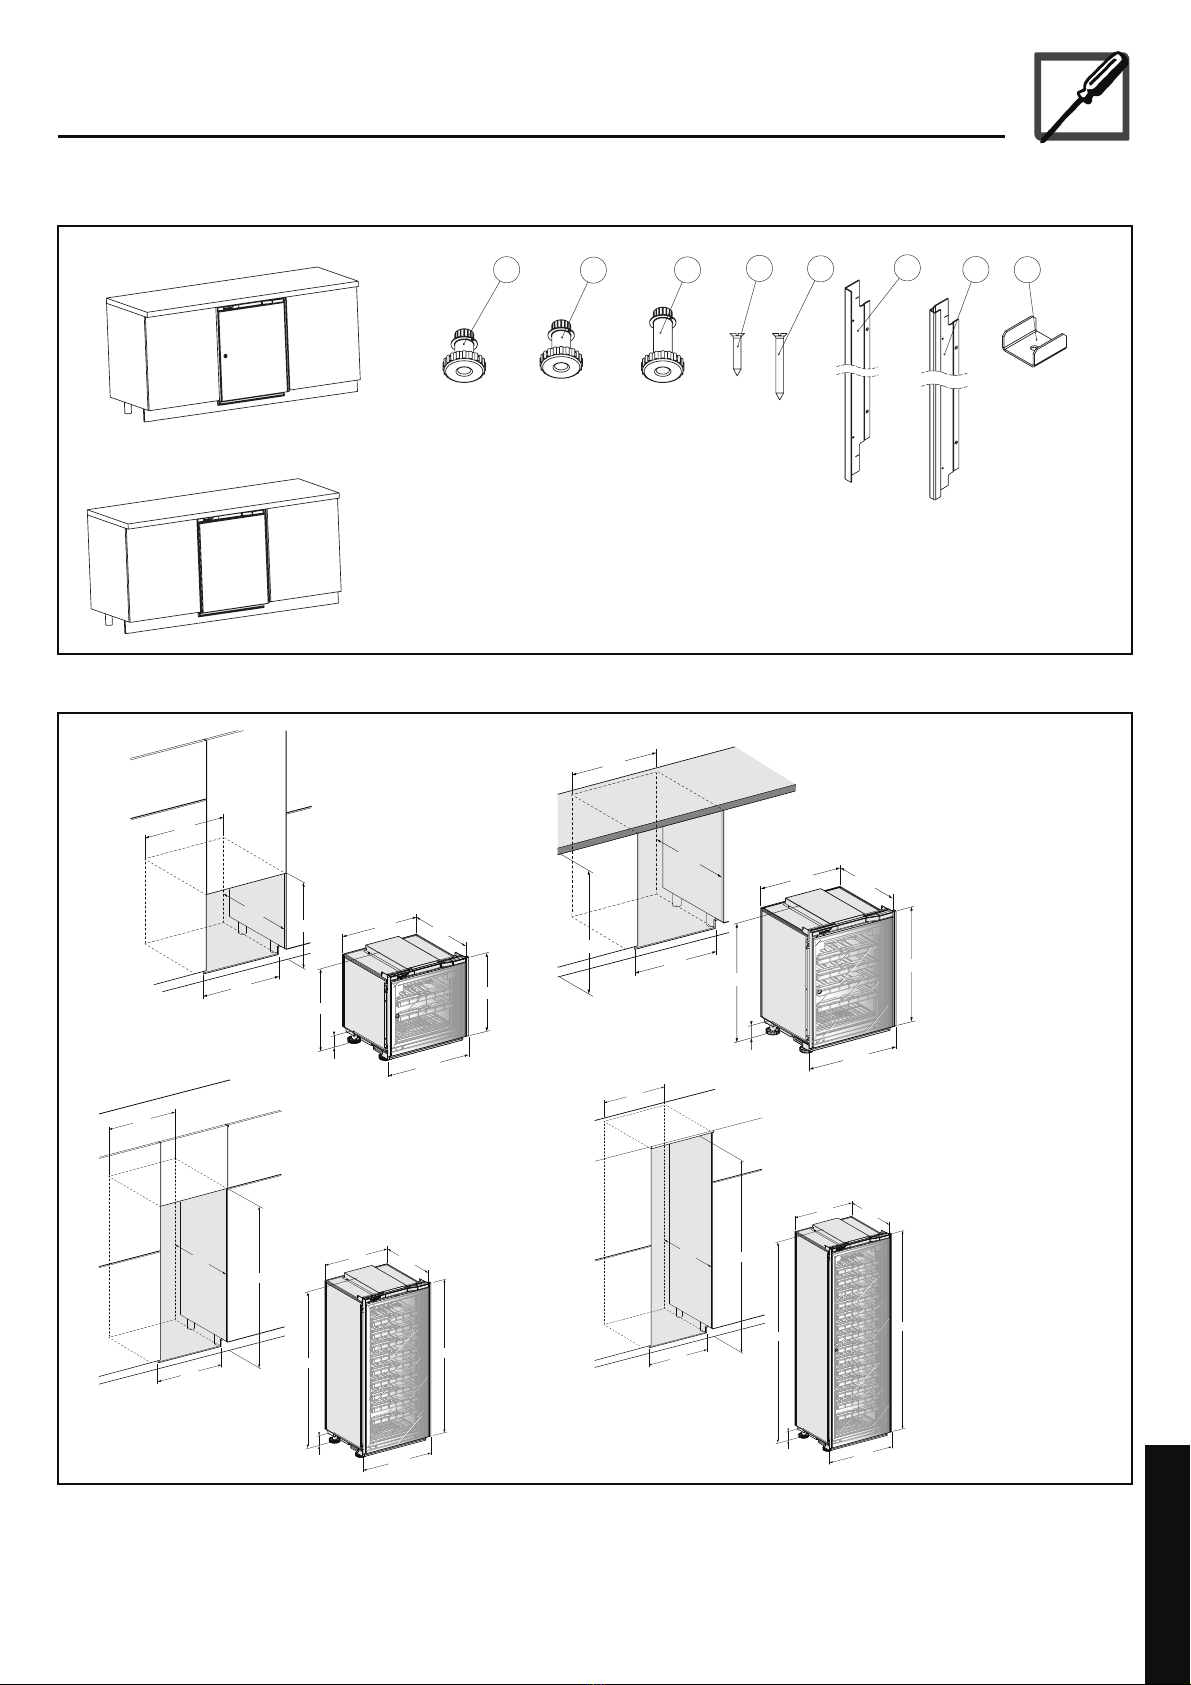
4 - INSTALLING YOUR WINE CABINET
Unpacking
•When your cabinet is delivered, check the outside for signs of damage
(impact, warping...).
•3TIRXLIHSSVERHGLIGOXLEXXLIIPIQIRXWMRWMHI]SYVETTPMERGIEVI
intact (walls, Main du Sommelier supports, hinges...).
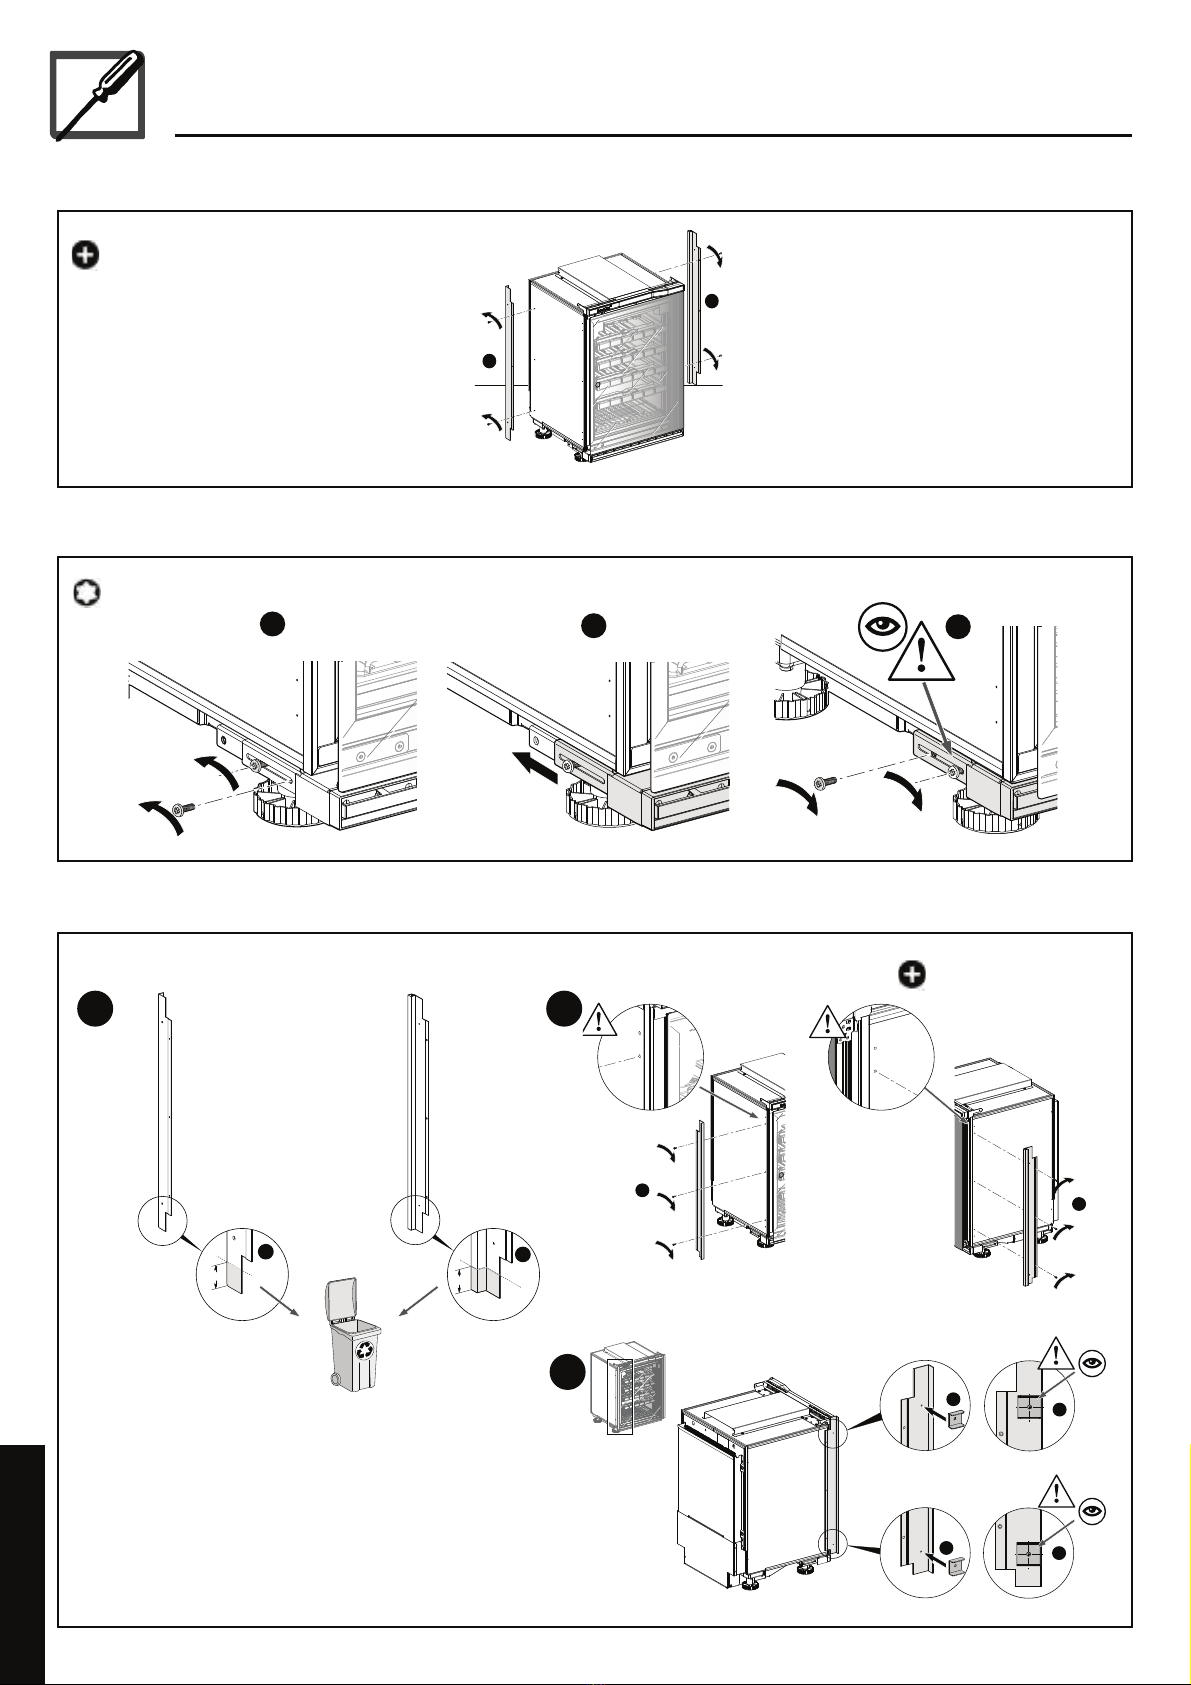
•6IQSZIXLITVSXIGXMZIGSQTSRIRXWMRWMHI]SYVGEFMRIX
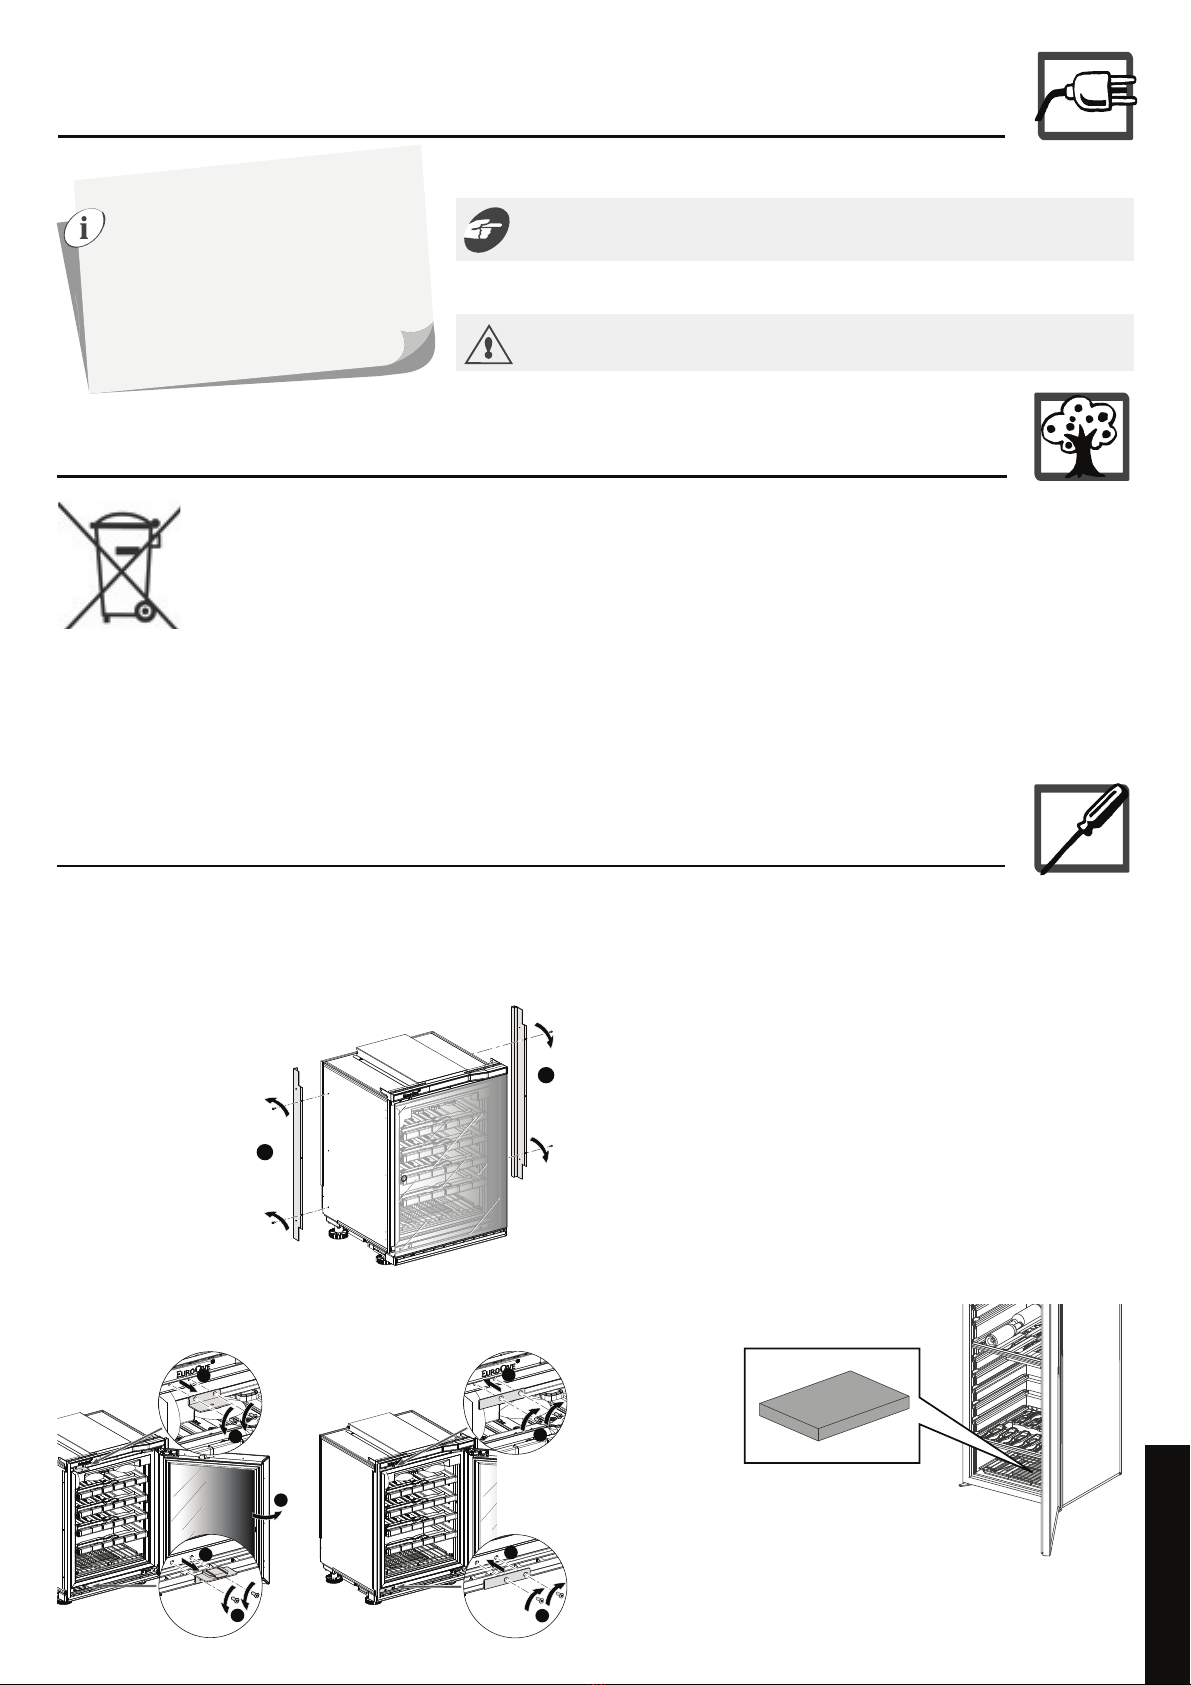
•Unscrew the filler strips located at the
back of the cabinet body.
(see below)
•6IQSZIXLI WGVI[WSJ XLI X[STVSXIGXMZITPEXIWYWMRK ER%PPIR OI]
(not supplied) and replace with the two aesthetic plates, fastened by the
4 black M5 countersunk screws.
(We recommend that you retain the protective plates you removed in case
you need to transport your cabinet in the future).
Precautions
•Do not place your cabinet in an area likely to flood.
•Do not expose your cabinet to direct sunlight.
•Ensure that the entire back and top of the appliance are not subject to
splashes of water.
•In order to secure your cabinet, full glass and glass with stainless steel
doors
have a lock.
•Unwind the power lead so that it is accessible and does not come into
contact with any of the appliance’s components.
•*SVWMRKPIXIQTIVEXYVIQSHIPWSRP]TPEGIXLILYQMHMX]GEVXVMHKI[LMGL
you will find in your cabinet’s “accessories” box) at the bottom of the
cabinet, underneath the rack, in the tray provided (see diagram below).
When using for the first time, fully immerse your cartridge in water for
a few minutes to ensure it is saturated with water, then drain well.
1
2
3