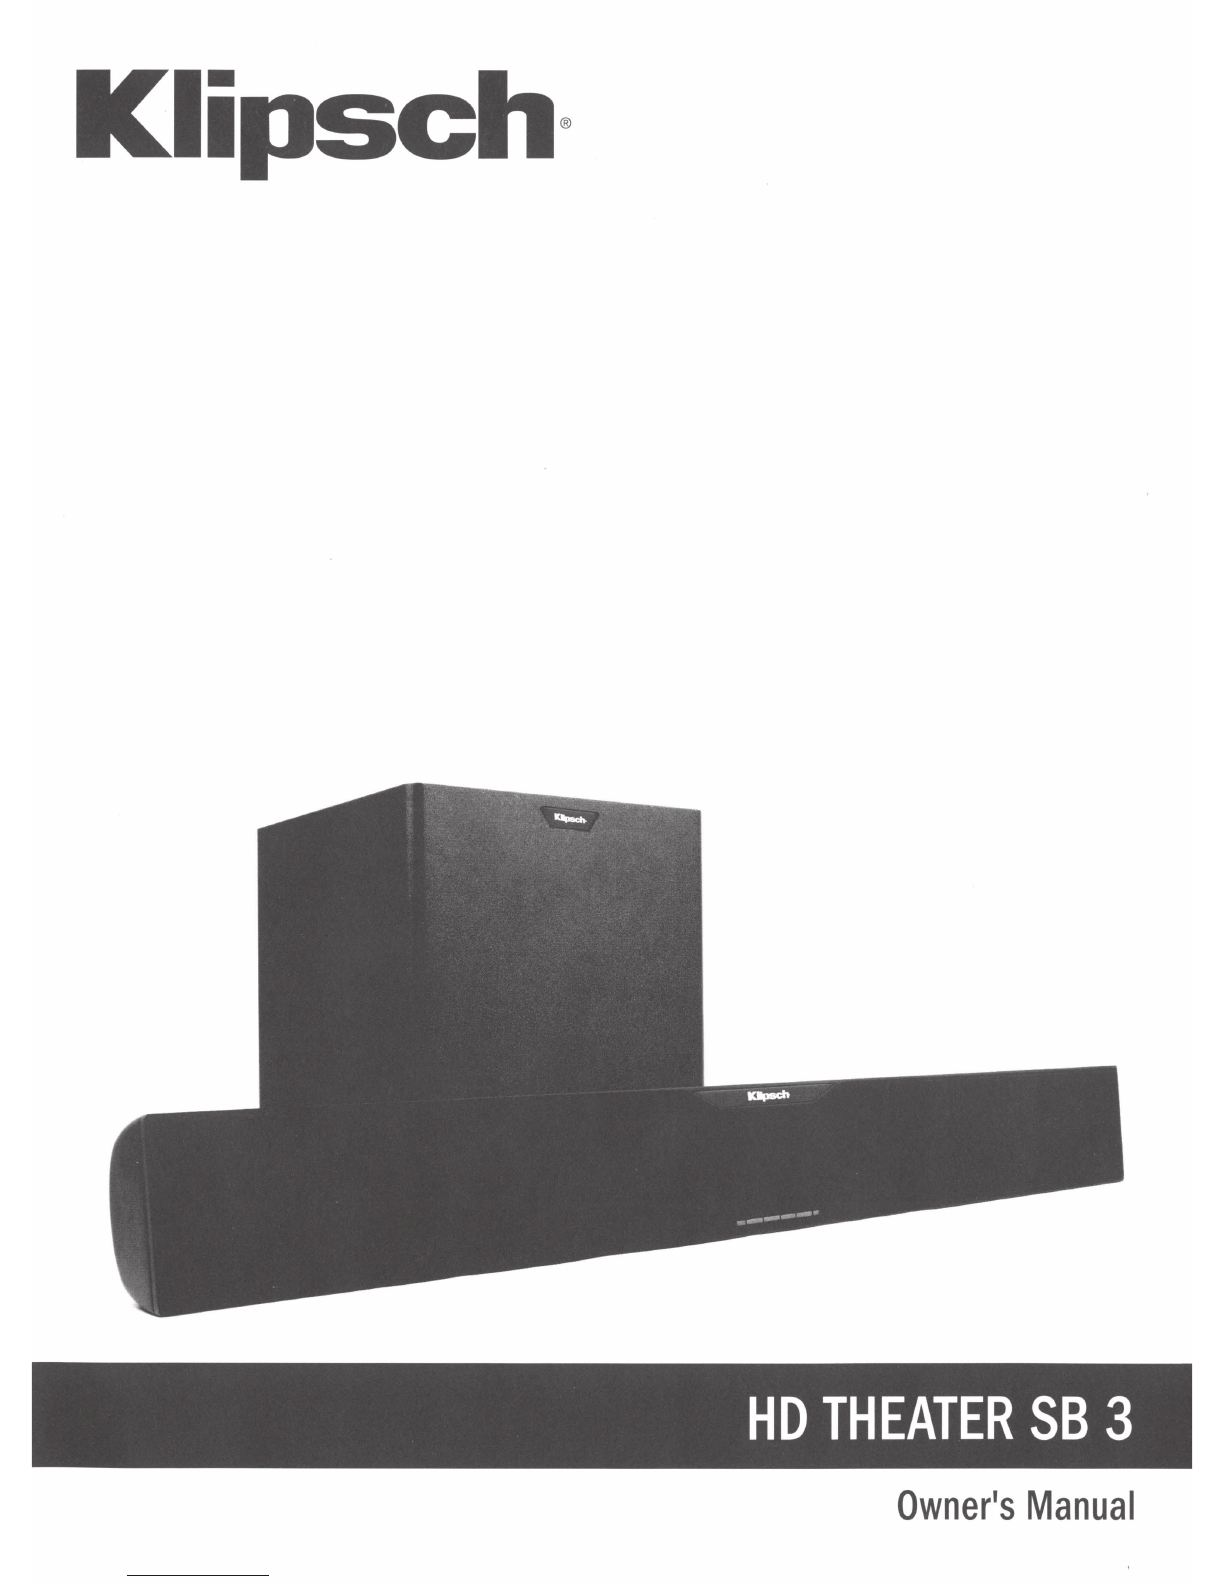
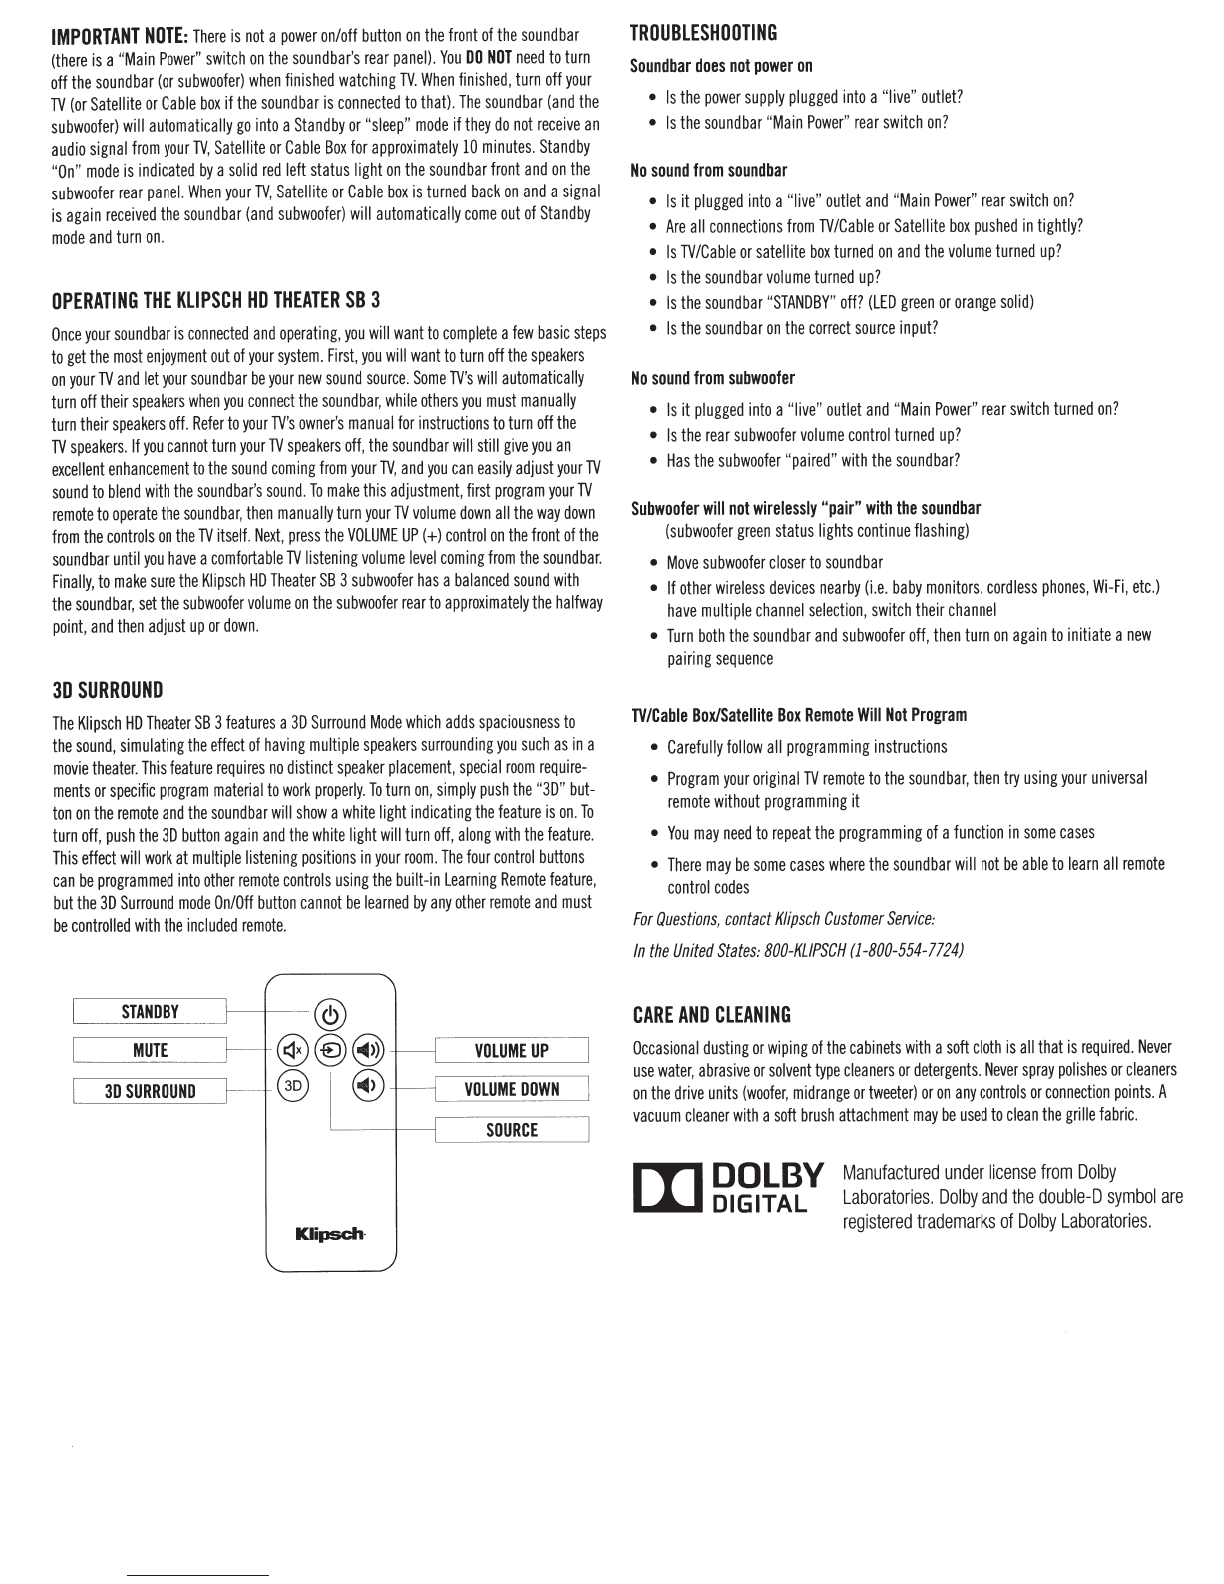
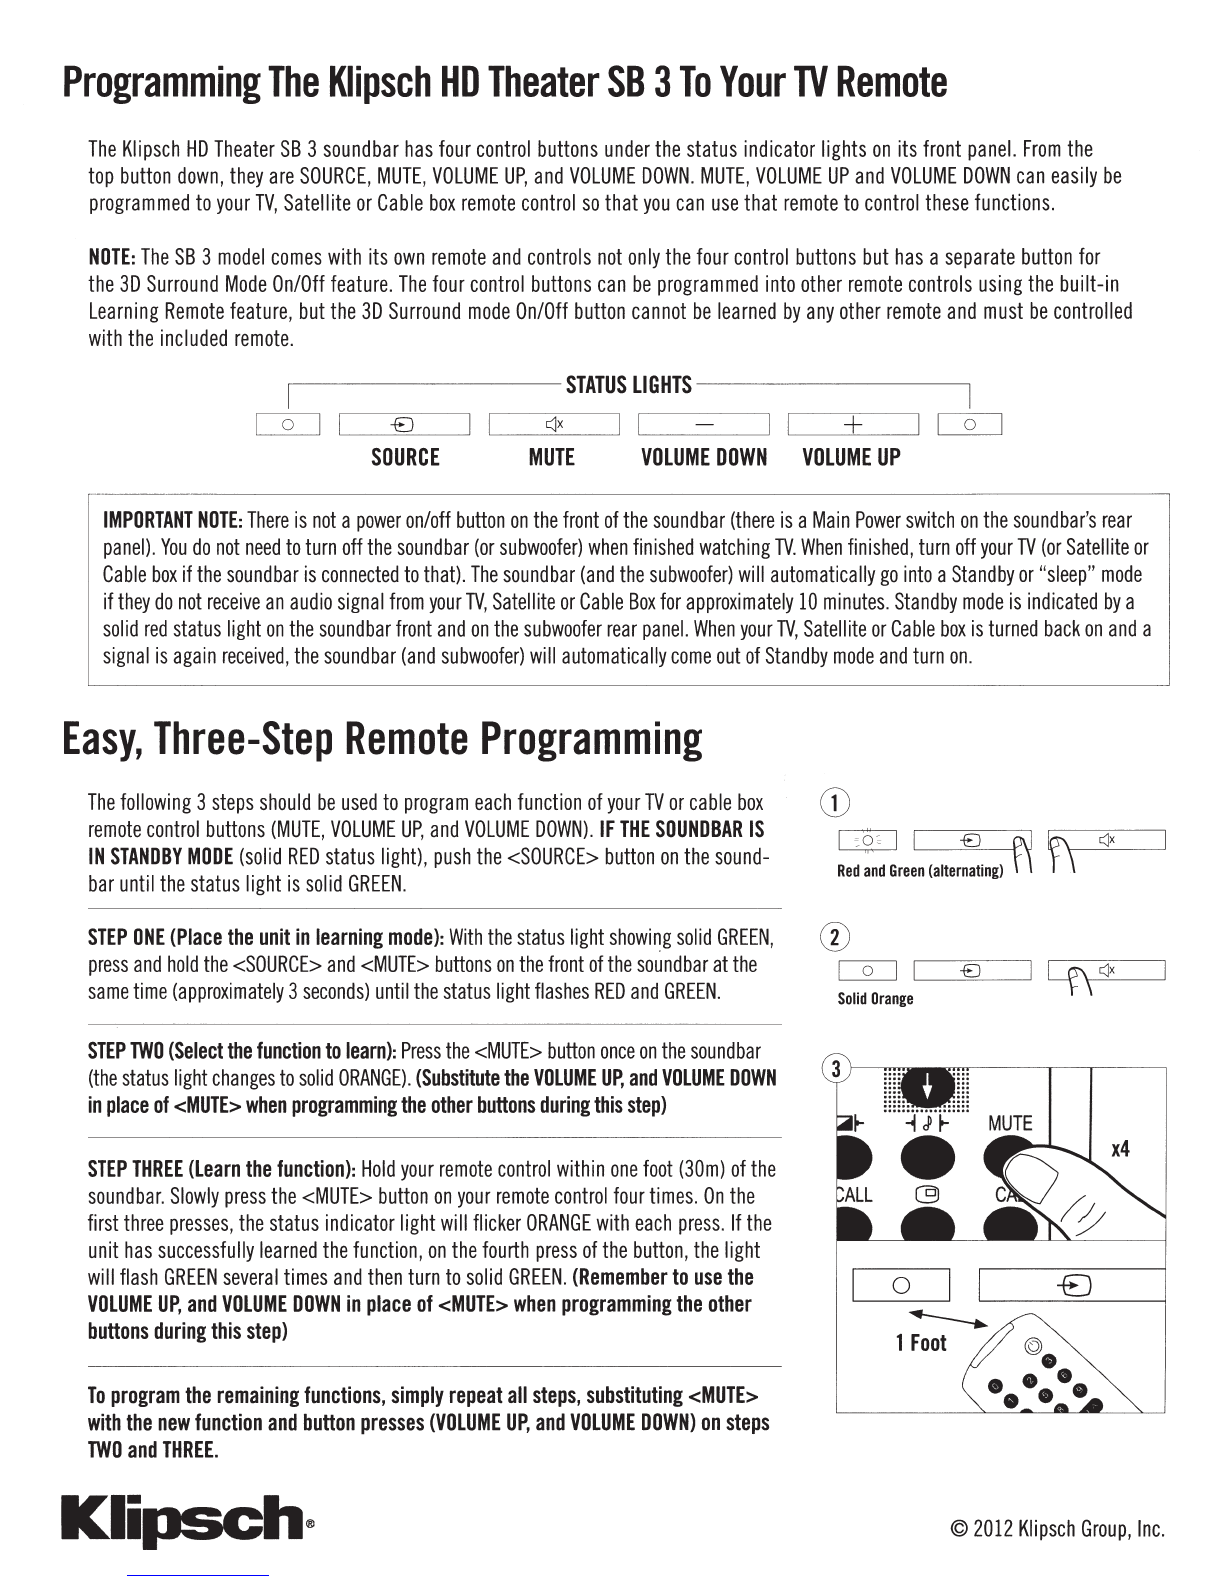
Klipsch HD THEATER SB 3 User manual
Other Klipsch Stereo System manuals

Klipsch
Klipsch LightSpeaker User manual

Klipsch
Klipsch STADIUM User manual

Klipsch
Klipsch SB 120 User manual

Klipsch
Klipsch R-28PF Service manual

Klipsch
Klipsch Gig User manual

Klipsch
Klipsch KMC2 User manual

Klipsch
Klipsch STADIUM User manual

Klipsch
Klipsch Wisa RW-51M User manual

Klipsch
Klipsch Reference Premiere RP-280F User manual

Klipsch
Klipsch SB 120 User manual

Klipsch
Klipsch The Capitol Three Special Edition User manual

Klipsch
Klipsch KMC 3 User manual

Klipsch
Klipsch STADIUM User manual

Klipsch
Klipsch GIG User manual

Klipsch
Klipsch RP-440WF User manual

Klipsch
Klipsch kmc1 User manual

Klipsch
Klipsch kmc1 User manual

Klipsch
Klipsch Reference Premiere RP-504C User manual