Fig.1 Fig.2
Fig.4
Fig.3
ASSEMBLY INSTRUCTIONS
THIS TREE IS FOR INDOOR USE ONLY!
Retain carton and instruction sheet for storage and further purposes.
Each carton contains three tree sections ABC and one metalstand D.
1. Choose a location where the tree is to be displayed.It should be on a levelsurface.
Make sure finalassembly stable enough to hold the tree upright.
2. Take out the metalstand and assemble as below figures shown.
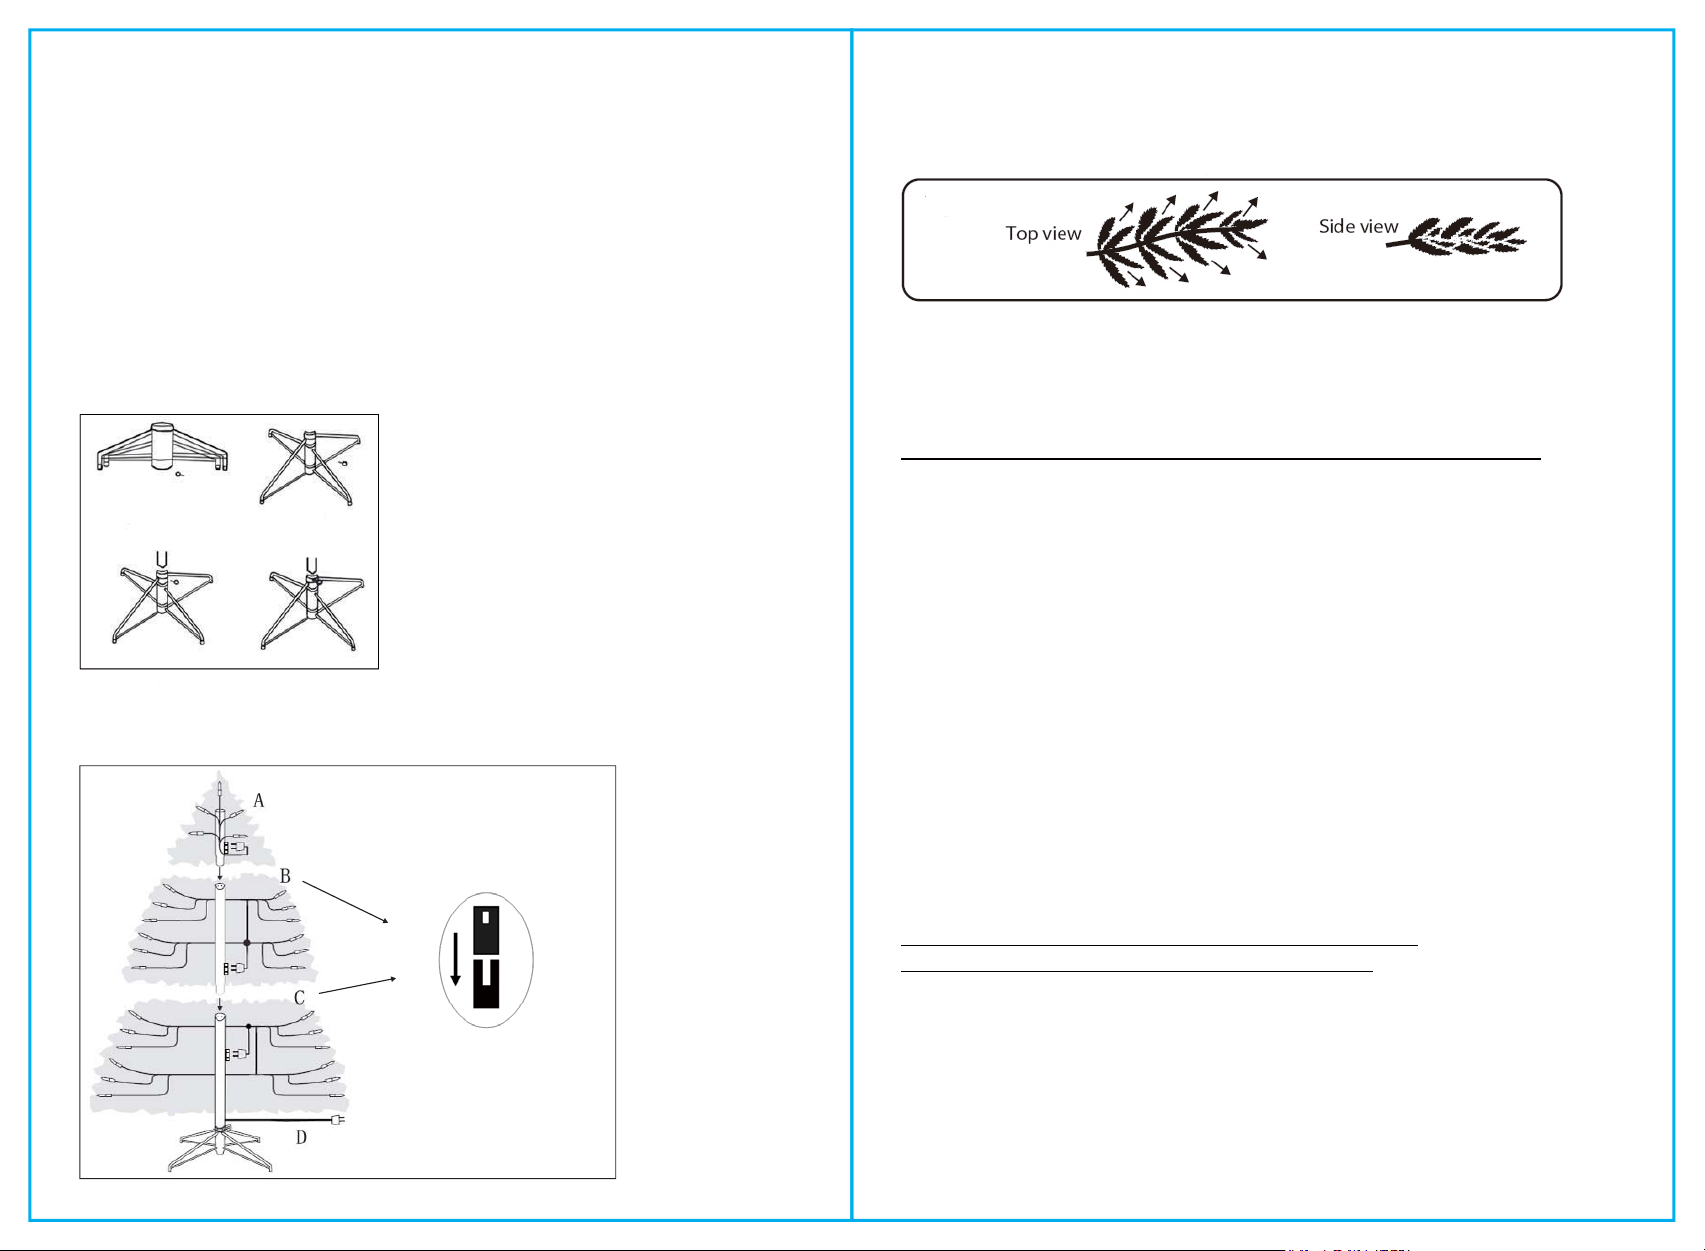
1) Tree stand consists ofa metalstand and a single eye bolt as Fig.1.
2) Open the stand to a 90 degree angle untilthe hole lines up withthe hole on the tube as Fig.2.
3) Insert the tree bottomCinto the hole as Fig.3.
4) Screw the eye bolt to tighten the tree bottom.
3. After tighten the tree bottom C into metal stand D,insert the middle section Binto tree bottomC,
then insert tree top Ainto middle section B as Fig.5.
When assemble, you should insert the pole as Figure direction.
4. Open all hinged branches easily, allow the branches to fall into place or gently pullbranches
up and out,then shape the branches. Starting withtips closest to the pole,shape one tip to the
right,one to the left and one at the center of the main steam. Repeat pattern for each
branch as Fig.6.
5. You can add holiday decorations to beautify this tree.
6. The tree is pre-strung and has powered tree pole,you can connect the plug to the wall outlet
directly without extra light connection. All lights should illuminate completing the assembly of
your tree! Enjoy your holiday!
Please note this tree is LYTE SYSTEMTM ("Light YourTree Easy" System)
STORAGE
First unplug the power cord fromthe wall outlet.
Remove all holiday decorations,disassemble the three tree sections and secure themin place.
Alltree parts canbe replaced in its originalcarton and should be stored in a cooland dryplace.
WARNING FOR SAFETY USE
1. Never allow any part ofthe tree to contact a source ofheat or flames.
2. Caution: Artificialtrees have small parts which may pose a choking hazard ifdetached
TROUBLE SHOOTING TIPS
For pre-lit trees, if the tree does not illuminate:
1. Please check to make sure that the power cord is plugged into the walloutlet.
2. Please check for loose,broken or missing light bulbs and replace as needed.
3. Please check the plug fuse and replace as needed.
4. This tree is powered pole, ifthe powered pole connection is loose,
please emailus for solution.We can replace one extention cord.
SPARE PARTS
For pre-lit tree, plug fuses and bulbs are included.
Please check attached manual for replacement guide.
Ifextra parts are needed, please contact our customer service center.
Email:customerservice@winnersarts.comor Calltoll-free:1-844 946 8733
Fig.6
4. Always fully insert electrical plugs into a receptacle.
fromthe branches.
3. Always position your tree light string cord or any extension cord so that they will not be a
hazard to the elderly,children and pets.
Powered Pole Assembly Direction
Fig.5


