KNOVA KN HG-1500 User manual

KN 7402-10P
Digital
heat gun
1,500
WATTS
Pistola de calor digital
KN HG-1500

SPECIFICATIONS
INTRODUCTION
• This tool is intended for the removal of paint, the forming and welding of plastic,
and the warming of heat-shrinkable tubing. The tool is also suitable for soldering
and tinning, loosening adhesive joints and defrosting water pipes
• Read and save this instruction manual.
1. Button for
increasing temp.
2. Button for
decreasing temp.
3. LCD screen.
TECHNICAL DATA
Power
Voltage/frecuency
Consumption
KN HG-1500
1,500 Watts
120 volts / 60 Hz
12.5 A
Adjustable temp .
Air ow volume
Cord with plug (long)
Net/gross weight
50º C ~
550º C
200-450 L/min
2 m
2/2.17 kg
TOOL ELEMENTS
12
11
10
9
8
7
1
23
4
5
6
6
7
4. Button for
increasing
the air ow.
5. Button for
decreasing
the air ow.
6. Supports.
7. Switch.
8. Heat insulating
sleeve.
9. Soft grip.
10. Output heat
air ow.
11. Cable Sleeve.
12. Handle.

1) WORK AREA SAFETY
a) Keep work area clean and well lit.
Cluttered or dark areas invite
accidents.
b) Do not operate power tools in
explosive atmospheres, such as in the
presence of ammable liquids, gases
or dust. Power tools create sparks
which may ignite the dust or fumes.
c) Keep children and bystanders away
while operating a power tool.
Distractions can cause you to lose
control.
2) ELECTRICAL SAFETY
a) Power tool plugs must match the
outlet. Never modify the plug in any
way. Do not use any adapter plugs
with earthed (grounded) power tools.
Unmodied plugs and matching
outlets will reduce risk of electric
shock.
b) Avoid body contact with earthed or
grounded surfaces such as pipes,
radiators, ranges and refrigerators.
There is an increased risk of electric
shock if your body is earthed or
grounded.
c) Do not expose power tools to rain
or wet conditions.
Water entering a power tool will
increase the risk of electric shock.
d)
Do not abuse the cord. Never use the
c
ord for carrying, pulling or unplugging
the power tool. Keep cord away from
heat, oil, sharp edges or moving parts.
Damaged or entangled cords increase
the risk of electric shock.
A re may result if the appliance is not
used with care, therefore
– be careful when using the appliance in
places where there are combustible
materials;
– do not apply to the same place
for a long time;
– do not use in presence of an
explosive atmosphere;
PARTICULAR REQUIREMENTS FOR PORTABLE HEATING TOOLS
SAFETY
– be aware that heat may be conducted
to combustible materials that are
out of sight;
– place the appliance on its stand after
use and allow it to cool down before
storage;
– do not leave the appliance
unattended when it is switched on.
WARNING! Read all safety
warnings and all instructions.
Failure to follow the warnings and
instructions may result in electric
shock, re and/or serious injury. Save
all warnings and instructions for future
reference. The term “power tool” in the
warnings refers to your mains-operated
(corded) power tool.
e) When operating a power tool
outdoors, use an extension cord
suitable for outdoor use. Use of a
cord suitable for outdoor use reduces
the risk of electric shock.
f) If operating a power tool in a damp
location is unavoidable, use an earth
leakage circuit breaker. Use of an
earth leakage circuit breaker reduces
the risk of electric shock.
3) PERSONAL SAFETY
a) Stay alert, watch what you are doing
and use common sense when
operating a power tool. Do not use a
power tool while you are tired or
under the inuence of drugs, alcohol
or medication. A moment of inattention
while operating power tools may
result in serious personal injury.
b) Use personal protective equipment.
Always wear eye protection.
Protective equipment such as dust
mask, non-skid safety shoes, hard hat,
or hearing protection used for
appropriate conditions will reduce
personal injuries.
c)
Prevent unintentional starting. Ensure
t
he switch is in the off-position before
connecting to power source, picking
up or carrying the tool. Carrying
power tools with your nger on the
switch or energizing power tools that
have the switch on invites accidents.
d) Remove any adjusting key or wrench
before turning the power tool on. A
wrench or a key left attached to a
rotating part of the power tool may
result in personal injury.
e) Do not overreach. Keep proper
footing and balance at all times. This
enables better control of the power
tool in unexpected situations.
f) Dress properly. Do not wear loose
clothing or jewellery. Keep your hair,
clothing and gloves away from moving
parts. Loose clothes, jewellery or long
hair can be caught in moving parts.
SAFETY
SAFETY INSTRUCTIONS FOR HEAT GUNS
g) If devices are provided for the
connection of dust extraction and
collection facilities, ensure these are
connected and properly used. Use
of dust collection can reduce
dust-related hazards.
4) POWER TOOL USE AND CARE
a) Do not force the power tool. Use the
correct power tool for your
application. The correct power tool
will do the job better and safer at the
rate for which it was designed.
b) Do not use the power tool if the
switch does not turn it on and off.
Any power tool that cannot be
controlled with the switch is
dangerous and must be repaired.
c) Disconnect the plug from the power
source before making any adjustments,
c
hanging accessories, or storing power
tools. Such preventive safety
measures reduce the risk of starting
the power tool accidentally.
d) Store idle power tools out of the
reach of children and do not allow
persons unfamiliar with the power tool
or these instructions to operate the
power tool. Power tools are dangerous
in the hands of untrained users.
BEFORE USE:
• Check the functioning of the tool before
each use and, in case of a defect, have it
repaired immediately by a qualied
person; never open the tool yourself.
• Inspect tool cord and plug before each
use and, if damaged, have them replaced
by a qualied person.
•
Use completely unrolled and safe extension
cords with a capacity of 16 Amps.
• Inspect the extension cord periodically
and replace it, if damaged.
• Use the tool and its accessories in
accordance with this instruction manual
and in the manner intended for the tool;
use of the tool for operations, different
from those normally expected to be
performed by the tool, could result in a
hazardous situation.
• This tool should not be used by people
under the age of 16 years.
• This tool is not intended for use by
persons (including children) with reduced
physical, sensory or mental capabilities,
or lack of experience and knowledge,
unless they have been given supervision
or instruction concerning use of the tool
by a person responsible for their safety.
e) Maintain power tools. Check for
misalignment or binding of moving
parts, breakage of parts and any other
condition that may affect the power
tool’s operation. If damaged, have
the power tool repaired before use.
Many accidents are caused by poorly
maintained power tools.
f) Keep cutting tools sharp and clean.
Properly maintained cutting tools with
sharp cutting edges are less likely to
bind and are easier to control.
g) Use the power tool, accessories and
tool bits etc., in accordance with
these instructions, taking into account
the working conditions and the work
to be performed. Use of the power
tool for operations different from
those intended could result in a
hazardous situation.
5) SERVICE
a) Have your power tool serviced by a
qualied repair person using only
identical replacement parts. This will
ensure that the safety of the power
tool is maintained.
• Always check that the supply voltage is
the same as the voltage indicated on the
nameplate of the tool.
• Be sure tool is switched off when
plugging in.
DURING USE:
• Handle the tool with care; prevent re
and burns.
- do not touch the air outlet/nozzle and
the heated object; they become
extremely hot.
- do not hold the air outlet/nozzle too
close to the object to be worked on.
- do not direct the hot air ow towards
the same surface for too long.
- never look down the air outlet/nozzle.
- wear protective gloves and use safety
glasses.
- never direct the hot air ow towards
persons or animals.
- never use the tool for drying hair.
- do not leave the tool unattended.
- never use the tool in the proximity of
inammable gases or combustible
materials (risk of explosion).

ASSEMBLY
USE
- when working with plastic, paint,
varnish and similar materials, inammable
and poisonous gases may be produced;
inform yourself beforehand about the
materials to be worked on
- take into account, that heat. may be
transferred to combustible materials
out of eyesight.
- to be on the safe side, have a bucket of
water or a re extinguisher handy, in
case any material catches re.
• Prevent electrical shock.
- never poke anything down the air
outlet/nozzle.
- avoid body contact with earthed
surfaces (e.g. pipes, radiators, ranges,
refrigerators).
- ensure the tool does not get wet.
- do not use the tool in damp locations.
- when used outdoors, connect the tool
via a fault current (FI) circuit breaker
with a triggering current of 30 mA
maximum, and only use an extension
cord, which is intended for outdoor use
and equipped with a splash proof
coupling-socket.
• Handle the cord with care
- always keep away the cord from the
hot air ow and the air outlet/nozzle.
- keep the cord away from heat, oil and
sharp edges.
- do not carry the tool by the cord, and
do not yank the cord to disconnect it
from the socket.
• On/off switch with 3 air ow settings
! check if switch is in position “0”
before plugging in
- switch on the tool by pushing switch
in desired position:
1 = air ow 200-450litres/minute (50°C)
2 = air ow 200-450 litres/minute
(50-550°C)
3 =
air ow 450 litres/minute (50-550°C)
- when using it for the rst time, some
smoke may emit from the tool; this is
normal and will soon cease
- switch off the tool by pushing switch
in position “0”
• Temperature setting
- set desired target temperature by
pressing button 1 briey.
- do not suspend the tool by the cord.
• Never use the tool in conjunction
with chemical solvents.
• Make sure work area is adequately
ventilated.
• Keep work area clean and well lit.
• Keep children away from work area.
• Ensure that children do not play
with the tool.
• Stay alert; watch what you are doing,
use common sense and do not operate
the tool when you are tired.
• Take a secure stance; do not overreach,
especially on ladders and stages.
• Ensure that the tool is switched off,
before putting it aside.
• In case of electrical or mechanical
malfunction, immediately switch off
the tool and disconnect the plug.
AFTER USE:
•
Switch off the tool and disconnect the plug.
• Allow the tool to cool down for at least
30 minutes before storage.
• Suspend the tool on hanging ring or set
it down on its rear in an upright position;
when doing so, make sure no combustible
materials or inammable gases are in the
proximity.
• Do not store/leave the tool outdoors.
• Store the tool in a dry and locked-up
place, out of reach of children.
- pressing buttons 1/2 constantly
increases/decreases the target
temperature, until the buttons are
released or the maximum/minimum
temperature is reached.
- the target temperature applies for both
air ow when the switch is in position
of 2 and 3.
• General use.
- determine the right temperature by
testing out on an inconspicuous part of
the workpiece; start with a low
temperature setting.
- the temperature falls as the distance
between the air outlet/nozzle and the
workpiece increases.
- the temperature required depends on
the material to be worked on.

USE
APPLICATION ADVICE
• Stationary use 6.
- set the tool down on its rear in an
upright position
- make sure the surface is clean and dust
free; polluted air damages the motor
- make sure the air ow is directed away
from you
- secure the cord to prevent pulling down
the tool
- do not touch the air outlet/nozzle
- make sure nothing drops into the air
outlet/nozzle
- carefully hold the tool with one hand
while switching it off with the other
hand, and then allow it to cool down
NOTES:
- all application examples (except
removing paint next to glass) can be
performed without accessories; however,
• Removing paint/lacquer 0
- use a clean, sharp scraper
- scrape rmly, when the paint softens
- experiment to establish the length of
time necessary to apply the heat for
optimal results
- scrape the softened paint immediately,
or it will harden again
- keep a 30° to 40° angle between the
tool and the workpiece
- remove paint and debris immediately
from the scraper to prevent them from
ignition
- scrape with the grain of the wood,
wherever possible
- do not direct the hot air ow towards
the same surface for too long
- dispose of all paint debris safely
- thoroughly clean the work area after
completing the job
! be careful when removing layers of paint
in old buildings; in the past the building
may
have been painted with paint
containing lead, which is highly poisonous
! exposure to even low levels of lead can
cause serious brain and nervous system
damage; young and unborn children are
particularly vulnerable
!the lead-based paint must be removed by
a professional without using a heat gun.
Not use lead-based soldering wire
using the appropriate accessory simplies
the work and signicantly improves the
quality of the results
! Mount an accessory only when the
air
outlet is cold, when the switch is in position
“0” and when the plug is disconnected
• Constant heat control (overload
protection) Protects heating element
from damage when tool is overloaded
without having to stop it and/or let it
cool down for a period of time
- when the temperature gets too high,
the heating element switches itself off,
while the motor continues to run and
produces cold air
- when the temperature has fallen down
sufciently (taking only a few seconds),
the heating element will be switched
on automatically (“HEAT CONTROL” is
no longer displayed).
! allow the tool to cool down for at least
30 minutes before storage.
• Thawing out frozen water pipes ^
- heat the frozen area evenly
! do no thaw out water pipes made of PVC
! water pipes are often difcult to
distinguish from gas pipes; heating gas pipes
is extremely dangerous – risk of explosion
• Drying
! only dry with a low or medium temperature
setting and with an increased distance
between the tool and the workpiece
- drying of paint, varnish, gypsum,
mortar and plaster
- drying wet timber prior to ling
- drying thickly applied ler or adhesive
quickly
- drying building joints before spraying
insulation or sealant
- drying joints and cracks in boat building
• Cleaning/disinfecting
- disinfecting rabbit hutches, dovecotes,
etc. (remove your pet rst)
- combatting ant colonies
- combatting woodworms and boring
beetles (hold the tool at an adequate
distance from the wood)
- eliminating weeds

ENVIRONMENT
MAINTENANCE / SERVICE
• Always keep tool and cord clean
!disconnect the plug before cleaning
• Never use easy inammable liquids for
cleaning the heat gun in general and the
air outlet/nozzle in particular
• Do not dispose of electric tools,
accessories and packaging together
with household waste material
• If the tool should fail despite the care
taken in manufacturing and testing
procedures, repair should be carried out
by an authorized service center
- send the tool without dismantling
together with proof of purchase to your
dealer
- electric tools that have reached the end
of his life, should be disposed of
separately and move to a recycling
plant compatible with the environment
ELECTRIC DIAGRAM
Speed
regulation
module

1 Heat insulating sleeve 1
2 Wind pipe 1
3 Mica paper 4
4 Ceramic heater 1
5 Screw M2.5X12 1
6 Commutate cover 1
7 Fan 1
8 Screw M2.5X12 1
9 Motor holder 1
10 Motor 1
11 Left housing 1
12 Bar 4
13 Screw ST3x10 1
14 Output control plate 1
15 Screw ST3x8 2
16 Digital display 1
17 Cover 1
18 Rubber pad on cover 6
19 Inductor 1
20 Switch push button 1
21 Rubber pad on housing 1
22 Switch circuit board 1
23 Cable 1
24 Cable Sleeve 1
25 Screw ST4x14 1
26 Cable Plate 1
27 Right housing 1
28 Screw ST3X14 6
29 Cone nozzle 1
30 Glass protection nozzle 1
31 Spoon reector nozzle 1
32 Fish tail surface nozzle 1
33 Steel paint scraper for all applications 1
34 Handle 1
PARTS LIST
Part No. Quantity
Description

EXPLOSIVE DIAGRAM
KN HG-1500
Digital
heat gun
1,500
WATTS
Pistola de calor digital

ESPECIFICACIONES
INTRODUCCION
• Esta herramienta está diseñada para la eliminación de pintura, la formación y soldadura
de plástico y el calentamiento de tubo termo retráctil. La herramienta también es
adecuada para soldar y estañar, aojar uniones adhesivas y descongelación de tuberías
de agua
• Lea y guarde este manual de instrucciones.
1. Botón para
aumentar temp.
2. Botón para
disminuír temp.
3. Pantalla LCD.
INFO TECNICA
Potencia
Voltaje/frecuencia
Consumo
KN HG-1500
1,500 Watts
120 volts / 60 Hz
12.5 A
Temperatura ajust.
Vol. de ujo de aire
Cable con clavija (largo)
Peso neto/bruto
50º C ~
550º C
200-450 L/min
2 m
2/2.17 kg
ELEMENTOS DE LA HERRAMIENTA
12
11
10
9
8
7
1
23
4
5
6
6
7
4. Botón para
aumentar ujo
de aire.
5. Botón para
disminuír ujo
de aire.
6. Soportes.
7. Interruptor.
8. Funda aislante
térmica.
9. Empuñadura
suave.
10. Salida de
aire caliente.
11. Funda de
cable.
12. Mango.

REQUISITOS PARTICULARES PARA HERRAMIENTAS DE CALEFACCIÓN PORTÁTILES
Un incendio puede producirse si el aparato
no se utiliza con cuidado, por lo tanto:
- Tenga cuidado al usar el aparato en
lugares donde hay materiales
combustibles;
- No se aplique en el mismo lugar
durante mucho tiempo;
- No lo utilice en presencia de una
atmósfera explosiva;
- Tenga en cuenta que el calor puede
conducirse a materiales combustibles
que estén fuera de la vista;
- Coloque el aparato en sus soportes
después de su uso y deje que se enfríe
antes de almacenarlo;
- No deje el aparato desatendido cuando
esté encendido.
SEGURIDAD
ADVERTENCIA! Lea todas las
advertencias de peligro e
instrucciones. Si no se siguen las
advertencias e instrucciones puede
provocar descargas eléctricas, incendios
y/o lesiones graves. Guarde todas las
advertencias e instrucciones para futuras
consultas.
El término “herramienta eléctrica”
en las advertencias hace referencia a su
red de alimentación (o cable), de su
herramienta eléctrica.
1) SEGURIDAD EN ÁREA DE TRABAJO
a) Mantenga el área de trabajo limpia y
bien iluminada. Las áreas desordenadas
u oscuras pueden provocar accidentes.
b) No opere herramientas eléctricas en
atmósferas explosivas, como en
presencia de líquidos inamables, gases
o polvo. Las herramientas eléctricas
producen chispas que pueden encender
el polvo o los vapores.
c) Mantenga a niños y espectadores
alejados mientras utiliza una
herramienta eléctrica. Las distracciones
pueden hacer que pierda el control.
2) SEGURIDAD ELECTRICA
a) La clavija de la herramienta eléctrica
d
ebe corresponder a la toma de corriente.
Nunca modique la clavija de ninguna
manera. No utilice clavijas adaptadoras
con conexión a tierra, para herramientas
eléctricas. Las clavijas no modicadas
y los
tomacorrientes coincidentes,
reducirán el riesgo de descarga eléctrica.
b)
Evite el contacto corporal con supercies
conectadas a tierra como tuberías,
radiadores, estufas y refrigeradores.
Existe un mayor riesgo de descarga
eléctrica si su cuerpo tiene contacto
con tierra.
c)
No exponga las herramientas eléctricas
a la lluvia o a condiciones de humedad.
Si entra agua en una herramienta
eléctrica aumentará el riesgo de
descarga eléctrica.
INSTRUCCIONES GENERALES
DE SEGURIDAD d)
No abuse del cable. Nunca utilice el cable
para transportar, tirar o desconectar la
herramienta eléctrica. Mantenga el cable
alejado del calor,aceite, bordes alados
o piezas móviles. Los cables dañados
o enredados aumentan el riesgo de
descarga eléctrica.
e) Al utilizar una herramienta eléctrica
en el exterior, utilice un cable de
extensión adecuado para uso en
exteriores. El uso de un cable adecuado
para uso al aire libre reduce el riesgo
de descarga eléctrica.
f) Si utiliza una herramienta eléctrica
en un lugar húmedo, es necesario
utilizar un interruptor de circuito de
fuga a tierra. El uso de un interruptor
de circuito de fuga a tierra reduce el
riesgo de descarga eléctrica.
3) SEGURIDAD PERSONAL
a) Manténgase alerta, preste atención
a lo que está haciendo y use el sentido
común cuando utilice una herramienta
eléctrica. No utilice una herramienta
eléctrica si está cansado o bajo la
inuencia de drogas, alcohol o
medicamentos. Un momento de
distracción mientras opera una
herramienta eléctrica puede resultar
en lesiones personales graves.
b)
Utilice equipo de protección personal.
Siempre use protección para los ojos.
Equipo especial de protección, tales
como una mascarilla antipolvo, zapatos
de seguridad antideslizantes, casco o
protección auditiva en las condiciones
adecuadas reducirá las lesiones
personales.
c)
Evite un arranque accidental. Asegúrese
que el interruptor esté en la posición
de apagado antes de conectarlo a
la fuente de energía, coger o transportar
l
a herramienta. Transportar herramientas
eléctricas con el dedo en el interruptor
o energizando herramientas eléctricas
con el interruptor encendido, puede
provocar accidentes.

SEGURIDAD
INSTRUCCIONES DE SEGURIDAD PARA PISTOLAS DE CALOR
ANTES DE USAR:
•
Compruebe el funcionamiento de la herramienta
antes de cada uso y, en caso de un defecto,
hágalo reparar inmediatamente por una
persona calicada. Nunca abra la
herramienta usted mismo.
• Inspeccione el cable de la herramienta y la
clavija antes de cada uso y si están dañados,
que sean reemplazados por una persona
calicada.
• Utilice cables de extensión seguros y
completamente desenrollados con una
capacidad de 16 amperios.
• Inspeccione el cable de extensión
periódicamente y sustitúyalo, si está dañado.
• Utilice la herramienta y sus accesorios, de
acuerdo con este manual de instrucciones
y de la manera prevista para la herramienta;
d) Retire cualquier llave de ajuste o de
tuercas antes de encender la herramienta
eléctrica. Una herramienta o llave
colocada en una pieza giratoria de la
herramienta eléctrica puede resultar
en lesiones personales.
e)
No se estire. Mantenga la postura y el
equilibrio en todo momento. Esto permite
un mejor control de la herramienta
eléctrica en situaciones inesperadas.
f) Vístase correctamente. No use ropa
suelta o joyas. Mantenga su cabello,
ropa y guantes alejados de las piezas
móviles. La ropa suelta, las joyas y el
pelo largo pueden quedar atrapados
en las piezas móviles.
g)
Si se proporcionan dispositivos para la
conexión de extracción de polvo e
instalaciones de recolección, asegúrese
que estén conectados y se utilicen
adecuadamente. El uso de recolección
de polvo, puede reducir los peligros
relacionados con el polvo.
4) USO DE HERRAMIENTAS
ELÉCTRICAS Y CUIDADOS
a) No fuerce la herramienta eléctrica.
Utilice la herramienta eléctrica correcta
para su aplicación. La herramienta
eléctrica correcta hará el trabajo mejor
y más seguro a la velocidad para la
que fue diseñada.
b) No utilice la herramienta eléctrica si
el interruptor no la enciende y apaga.
Cualquier herramienta eléctrica que
no pueda controlarse con el interruptor
es peligrosa y debe ser reparada.
c) Desconecte la clavija de la fuente de
alimentación antes de realizar ajustes,
cambiar accesorios o almacenar
herramientas eléctricas. Estas medidas
de seguridad preventivas reducen el
riesgo de encender la herramienta
eléctrica de forma accidental.
d) Guarde las herramientas eléctricas
fuera del alcance de los niños y no
permita que personas no familiarizadas
con
estas instrucciones operen la
herramienta.
Las herramientas eléctricas,
son peligrosas
en manos de personas
inexpertas.
e)
Mantenga las herramientas eléctricas.
Verique la alineación de las piezas
móviles, rotura de piezas y cualquier
otra condición que pueda afectar el
funcionamiento de la herramienta
eléctrica. Si está dañada, repare la
herramienta eléctrica antes de utilizarla.
Muchos accidentes son causados por
herramientas eléctricas mal mantenidas.
f) Mantenga las herramientas de corte
aladas y limpias. Los útiles mantenidos
correctamente con los bordes de corte
alados son menos propensas a
trabarse y son más fáciles de controlar.
g) Utilice las herramientas eléctricas,
accesorios, útiles, etc., de acuerdo con
estas instrucciones, teniendo en cuenta
las condiciones de trabajo y el trabajo
a realizar. Utilizar la herramienta
eléctrica para operaciones diferentes
de las indicadas, podría resultar en una
situación peligrosa.
5) SERVICIO
a)
Haga que su herramienta eléctrica sea
atendida por un experto calicado que
utilice sólo piezas de repuesto idénticas.
Esto asegurará que se mantenga la
seguridad de la herramienta eléctrica.
el uso de la herramienta para operaciones
podría resultar en una situación peligrosa.
• Esta herramienta no debe ser utilizado
por personas menores de 16 años.
• Esta herramienta no está diseñado para ser
utilizado por personas (incluidos niños) con
reducciones físicas, sensoriales o mentales,
o la falta de experiencia y conocimiento, a
menos que sean supervisados o instruidos
acerca del uso de la herramienta por una
persona responsable de su seguridad.
• Compruebe siempre que la tensión de
alimentación sea la misma que la tensión
indicada en la placa de características de
la herramienta.
• Asegúrese que la herramienta esté
apagada cuando la conecte.

INSTRUCCIONES DE SEGURIDAD PARA PISTOLAS DE CALOR
DURANTE SU USO:
• Maneje la herramienta con cuidado;
evite incendios y quemaduras.
- no toque la salida de aire/boquilla y
el objeto caliente; se vuelven
extremadamente calientes.
- no mantenga la salida de aire/boquilla
demasiado cerca del objeto a ser
trabajado.
- no dirija el ujo de aire caliente hacia la
misma supercie durante mucho tiempo.
- nunca mire hacia abajo de la salida de
aire/boquilla.
- use guantes de protección y gafas de
seguridad.
- nunca dirija el ujo de aire caliente
hacia personas o animales.
- nunca utilice la herramienta para el
secado del cabello.
- no deje la herramienta desatendida.
- nunca utilice la herramienta en la
proximidad de gases inamables o
materiales combustibles (riesgo de
explosión).
- cuando trabaje con plásticos, pinturas,
barnices y materiales similares, pueden
producirse gases inamables y
venenosos; infórmese de antemano
sobre los materiales a trabajar.
- tenga en cuenta, que el calor puede ser
transferido a materiales combustibles
fuera de la vista.
- para estar seguro, tenga un cubo de
agua o un extintor de incendios a mano,
en caso que cualquier material
se incendie.
• Evite descargas eléctricas.
- Nunca introduzca nada por la salida de
aire/boquilla.
- evite el contacto del cuerpo con
supercies conectadas a tierra (por
ejemplo: tuberías, radiadores, estufas,
refrigeradores).
-
asegúrese que la herramienta no se moje.
- no utilice la herramienta en lugares
húmedos.
- Cuando se use al aire libre, conecte la
herramienta a través de un interruptor
de corriente de falla (FI) con una
corriente de activación de 30 mA como
máximo y sólo use un cable de extensión,
que esté destinado para uso en exteriores
y equipado con acoplamiento-socket a
prueba de salpicaduras.
• Maneje el cable con cuidado.
- siempre mantenga el cable alejado de
la corriente de aire caliente y la salida
de aire/ boquilla.
- mantenga el cable alejado del calor,
aceite y bordes alados.
- no transporte la herramienta por el
cable y no tire del cable para
desconectarlo del tomacorriente.
-
no suspenda la herramienta por el cable.
• Nunca utilice la herramienta en conjunto
con disolventes químicos.
• Haga el área de trabajo segura,
ventilándola adecuadamente.
• Mantenga el área de trabajo limpia
y bien iluminada.
• Mantenga a los niños lejos del área
de trabajo.
• Asegúrese que los niños no jueguen
con la herramienta.
• Esté alerta; preste atención a lo que
está haciendo, use el sentido común y no
opere la herramienta cuando esté
cansado.
• Tome una posición segura; no se estire
demasiado, sobre todo en escaleras y
escalones.
• Asegúrese que la herramienta esté
apagada, antes de ponerla a un lado.
• En caso de mal funcionamiento eléctrico
o mecánico, apague inmediatamente la
herramienta y desconecte la clavija.
DESPUÉS DE USAR:
• Apague la herramienta y desconecte
la clavija.
• Permita que la herramienta se enfríe
durante al menos 30 minutos antes de
su almacenamiento.
• Suspenda la herramienta colgándola a
un anillo o asiéntela en su parte posterior
en posición vertical; al hacerlo, asegúrese
que no haya materiales inamables o
gases inamables en la proximidad.
• No almacene/deje la herramienta al aire
libre.
•
Guarde la herramienta en un lugar seco y
bajo llave, fuera del alcance de los niños.

USO
• Encendido/apagado con 3 ajustes de
ujo de aire.
! Compruebe que el interruptor esté en la
posición “0” antes de conectar.
- active la herramienta presionando el
interruptor en la posición deseada:
1 = ujo de aire
200-450 litros/minuto (50° C)
2 = ujo de aire
200-450 litros/minuto (50-550° C)
3 = ujo de aire
450 litros/minuto (50-550° C)
- cuando se utiliza por primera vez,
puede emitir un poco de humo desde
la herramienta; esto es normal y
pronto cesará.
- apague la herramienta presionando el
interruptor en la posición “0”.
• Ajuste de temperatura.
- ajuste la temperatura deseada
pulsando el botón 1 brevemente.
- presionando los botones 1/2
constantemente, aumenta/disminuye
la temperatura deseada, hasta que los
botones se liberen o se alcance la
temperatura máxima/mínima.
- la temperatura deseada aplica para el
ujo de aire cuando el interruptor está
en la posición 2 y 3.
• Uso general.
- determine la temperatura correcta
comprobando fuera de una parte
visible de la pieza de trabajo;
comenzando con un ajuste de baja
temperatura.
- la temperatura disminuye a medida
que la distancia entre la salida de
aire/boquilla y la pieza de trabajo
aumenta.
- la temperatura requerida depende del
material que va a ser trabajado.
• Uso estacionario 6.
- apoye la herramienta sobre su parte
posterior, en posición vertical.
- asegúrese que la supercie esté
limpia y libre de polvo; el aire
contaminado daña al motor.
- asegúrese que el ujo de aire sea
dirigido lejos de usted.
- asegure el cable para evitar tirar la
herramienta.
- no toque la salida de aire/boquilla.
- asegúrese que nada caiga en la salida
de aire/boquilla.
- sostenga cuidadosamente la
herramienta con una mano mientras
la apaga con la otra mano, luego
deje que se enfríe.
NOTAS:
- todos los ejemplos de aplicación
(excepto la eliminación de pintura
al lado de vidrios) se pueden realizar
sin accesorios; sin embargo, utilizando
el accesorio apropiado simplica el
trabajo y mejora signicativamente la
calidad de los resultados.
! Monte un accesorio sólo cuando la salida
de aire esté fría, cuando el interruptor
esté en la posición “0” y cuando la clavija
esté desconectada.
• Control de calor constante (protección
de sobrecarga). Protege al elemento
calefactor de daños cuando la
herramienta se sobrecarga, sin tener
que detenerlo y/ o dejar que se enfríe
durante un periodo de tiempo.
- cuando la temperatura se eleva
demasiado, el elemento calefactor se
apaga, mientras el motor sigue
funcionando y produce aire frío.
- cuando la temperatura ha bajado
lo suciente (tomando sólo unos
pocos segundos), el elemento de
calefacción se enciende
automáticamente (“CONTROL DE
CALOR” ya no se muestra).
! Deje que la herramienta se enfríe durante
al menos 30 minutos antes de su
almacenamiento.

CONSEJOS DE APLICACION
MANTENIMIENTO/SERVICIO
• Remoción de pintura/laca.
- utilice un raspador limpio y alado
- raspe con rmeza, cuando la pintura
se ablande
- experimente establecer un periodo
de tiempo necesario para aplicar el
calor y obtener resultados óptimos.
- raspe la pintura ablandada
inmediatamente, o se endurecerá
de nuevo
- mantenga un ángulo de 30° a 40° entre
la herramienta y la pieza de trabajo
- remueva la pintura y los residuos
inmediatamente del raspador, para
evitar incendios
- raspe con las vetas de madera,
siempre que sea posible
- no dirija el ujo de aire caliente hacia
la misma supercie por mucho tiempo
- disponga de todos los residuos de
pintura en forma segura
- limpie bien el área de trabajo después
de terminar el trabajo
! Tenga cuidado al retirar las capas de
pintura en viejos edicios; en el pasado
el edicio pudo haber sido pintado con
pintura que contiene plomo, que es alta-
mente venenoso.
! La exposición e incluso a niveles bajos
de plomo, puede causar daños cerebrales
graves y daños en el sistema nervioso;
niños pequeños y por nacer son
especialmente vulnerables
! la pintura a base de plomo debe ser
removida por un profesional sin necesidad
de utilizar una pistola de calor. No utilice
cable de soldadura a base de plomo
• Descongelar tuberías de agua
- caliente el área congelada
uniformemente
! No descongele tuberías de agua hechas
de PVC
! Las tuberías de agua son a menudo
difíciles de distinguir de las tuberías de
gas; el calentamiento de tuberías de gas
es extremadamente peligroso - riesgo de
explosión
• Secado
! Solamente seque con un ajuste bajo o
medio de temperatura e incrementando la
distancia entre la herramienta y la pieza
de trabajo
- secado de pintura, barniz, yeso,
mortero y yeso
- secado de la madera húmeda antes
de lijar
- secado rápido del resanado o adhesivo
aplicado
- secado de las juntas de construcción
antes de la pulverización de
aislamiento o sellador
- secado de juntas y grietas en la
construcción de barcos
• Limpieza/desinfección
- desinfección de jaulas para
conejos, palomares, etc. (quite sus
mascotas primero)
- combatir colonias de hormigas
- combatir insectos que carcomen la
madera (mantenga la herramienta a
una distancia adecuada de la madera)
- eliminación de maleza
• Mantenga siempre la herramienta y
el cable limpios
! Desconecte la clavija antes de limpiar
• Nunca use líquidos inamables para
limpiar la pistola de calor en general ni
la salida de aire/boquilla en particular
• Si la herramienta falla a pesar de los
esmerados procesos de fabricación y
pruebas, la reparación debe ser
realizada por un centro de servicio
autorizado
- envíe la herramienta sin desmantelar,
junto con el comprobante de compra a
su distribuidor
MEDIO AMBIENTE
•
No deseche las herramientas eléctricas,
accesorios y empaques junto con los
residuos domésticos
- en cumplimiento con la norma sobre
residuos de aparatos eléctricos y
electrónicos y su aplicación de
conformidad con la legislación nacional,
las herramientas eléctricas que
han llegado al nal de su vida, deberán
desecharse por separado y trasladarse
a una planta de reciclado compatible
con el medio ambiente

Modulo
regulador de
velocidad
DIAGRAMA ELECTRICO
1 Casquillo aislante térmico 1
2 Tubo de aire 1
3 Papel mica 4
4 Calentador de cerámica 1
5 Tornillo M2.5X12 1
6 Cubierta de conmutador 1
7 Ventilador 1
8 Tornillo M2.5X12 1
9 Sujetador de motor 1
10 Motor 1
11 Carcasa izquierda 1
12 Barra 4
13 Tornillo ST3x10 1
14 Placa de control de salida 1
15 Tornillo ST3x8 2
16 Pantalla digital 1
17 Cubierta 1
18 Pata de hule de cubierta 6
Descripción
No. part.
LISTA DE PARTES
Descripción
No. part.
19 Inductor 1
20
Botón pulsador de Interruptor
1
21 Pata de hule de carcasa 1
22 Tarjeta de circuito
de interruptor 1
23 Cable 1
24 Manga de cable 1
25 Tornillo ST4x14 1
26 Placa de cable 1
27 Carcasa derecha 1
28 Tornillo ST3X14 6
29 Boquilla de cono 1
30 Boquilla de protección
para vidrio 1
31
Boquilla reectora tipo cuchara
1
32 Boquilla cola de pescado 1
33 Raspador de pintura de
acero para toda aplicación 1
34 Mango 1
Cant. Cant.

DIAGRAMA DE PARTES
KN HG-1500
Digital
heat gun
1,500
WATTS
Pistola de calor digital

NOTES

NOTAS

www.knova.com.mx
Table of contents
Languages:
Other KNOVA Power Tools manuals

KNOVA
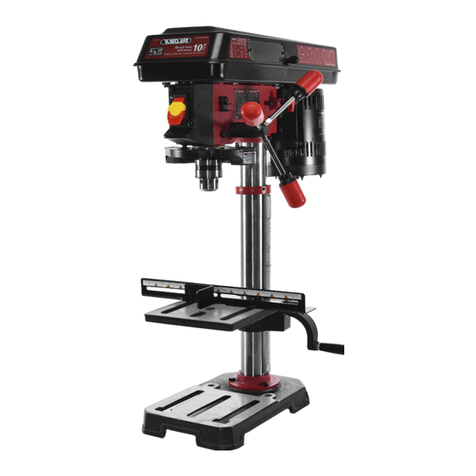
KNOVA KN DP-2500N User manual

KNOVA
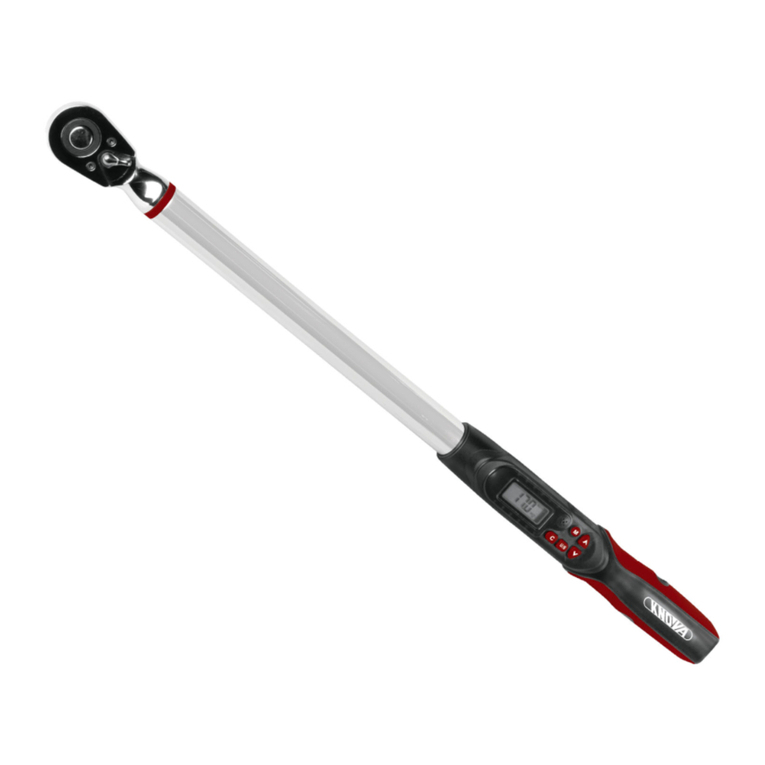
KNOVA KN 7420-12 User manual

KNOVA
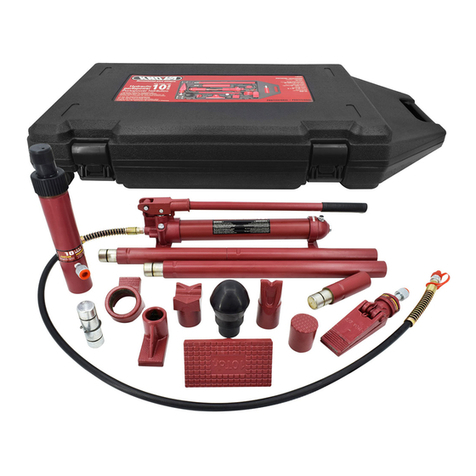
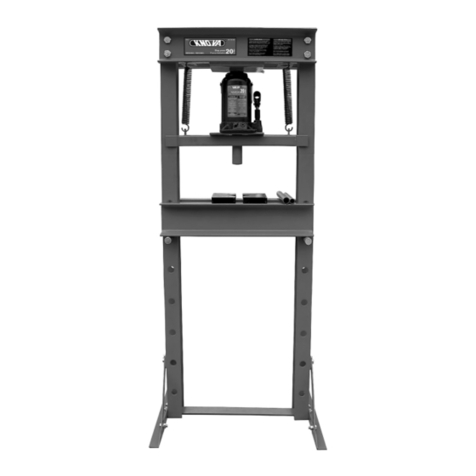
KNOVA KN 5012 User manual

KNOVA
KNOVA N RO-1200 User manual

KNOVA
KNOVA KN 7420-20A User manual

KNOVA
KNOVA KN 5025 User manual

KNOVA
KNOVA KN RO-1321 User manual

KNOVA
KNOVA KN 7428 User manual

KNOVA
KNOVA KN DP-2000N User manual

KNOVA
KNOVA KN 7402-10PA User manual