DEUTSCH ENGLISH FRANÇAIS
Dacobas Unterbauschrank Dacobas pedestal cabinet Caisson inférieur Dacobas
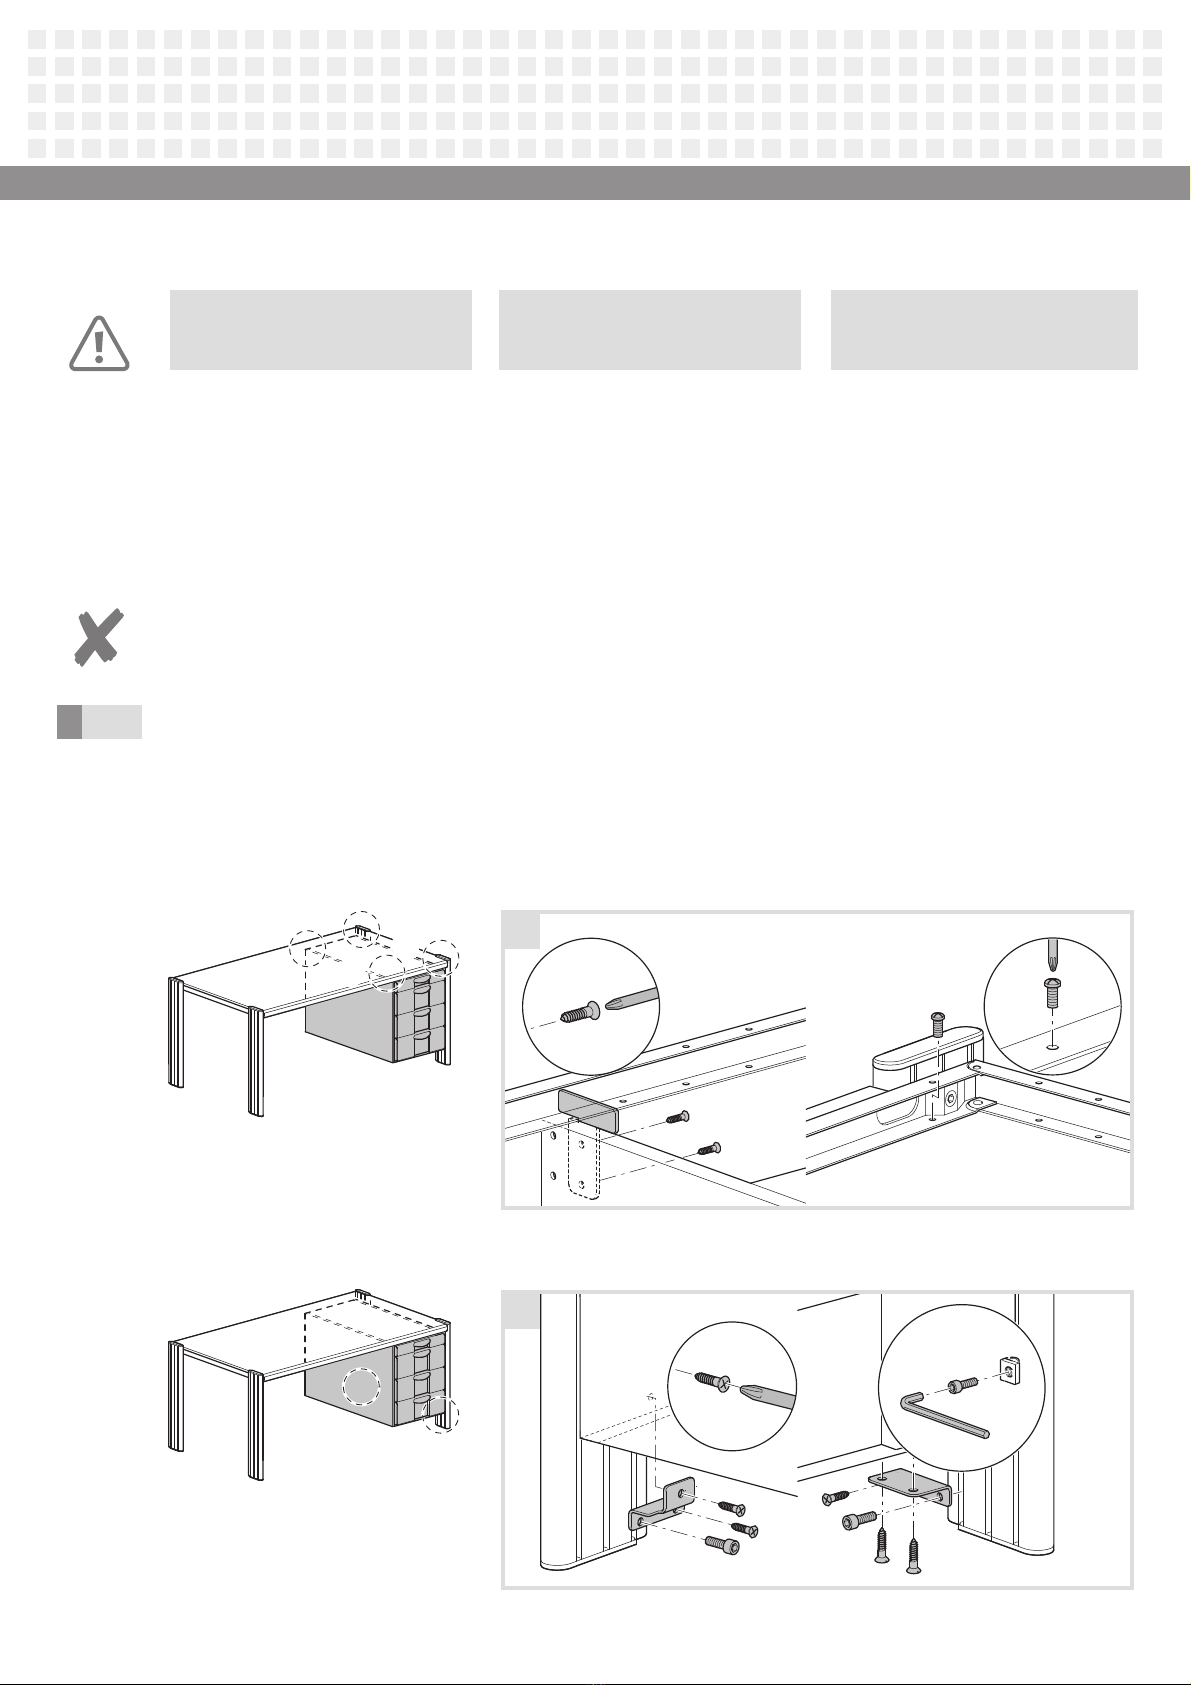
F2
F2
F1
F2
Switching to the other side
Undo screws E–A in the reverse order.•
Fit pedestal extrusion and side panel to•
other side of the pedestal.
Fit pedestal to the other side of the desk.•
Montage sur le côté opposé
Desserrer les raccords vissés E–A en inver-•
sant l'ordre des opérations.
Monter les profilés du caisson inférieur et•
la paroi latérale de l’autre côté du caisson
inférieur.
Monter le caisson inférieur sur le côté•
opposé de la table.
Umbau auf die andere Seite
Verschraubungen E–A in umgekehrter•
Reihenfolge lösen.
Unterbauprofile und Seitenwand auf die•
andere Seite des Unterbaus montieren.
Unterbau auf der anderen Seite des•
Tisches montieren.
Office pedestal
The pedestal is assembled at the factory.
Assembly
Remove worktop.•
F: Attach pedestal to desk frame.•
Caisson inférieur de bureau
Le caisson inférieur est pré-monté en usine.
Montage
Enlever le plateau de table.•
F : Fixer le caisson inférieur au cadre de•
la table.
3Bürounterbau
Der Unterbau ist werkseitig vormontiert.
Montage
Tischplatte abnehmen.•
F: Unterbau an Tischrahmen befestigen.•
F
Hinweis
Obere Verschraubungen auf der anderen
Seite in Federmuttern montieren.
Information
Fit top screws to the other side in spring-
loaded washers.
Nota
Monter les raccords vissés supérieurs de
l’autre côté dans des écrous à ressorts.
Maximum load Charge maximaleMaximale Beladung
Gefahr!
Maximale Beladung des Unterbaus
beachten: 100 kg
Danger!
Do not exceed the maximum load of
the pedestal cabinet : 100 kg
Danger !
Respecter la charge maximale du
caisson inférieur : 100 kg
G
G: Secure the pedestal to the external•
desk sections via an angle bracket.
Fixer le caisson inférieur sur les profilés de•
la table par le biais d’équerres d’appui.
G: Unterbau an den äußeren Tischprofilen•
über Stützwinkel befestigen.
G1
G2
3