Ko Propo EX-1UR User manual

é
Thank you for purchasing EX-1UR (hereafter referred to as this unit). Read this operation manual care-
fully before using this unit in order to understand the explanation. After reading this manual, store it taking
care not to lose it.
For the latest information, see our web site (http://www.kopropo.co.jp).
How to read this manual
"How to Use This Unit" explains the basic method of using the transmitter.
In addition, see the function menu items to master each function.
For added or modified functions in this unit, particularly, see the following items.
Steering motor..........................................................
Throttle motor ...........................................................
Response mode .......................................................
(Advanced high speed response
/Ultrahigh speed response)
Throttle idle up..........................................................
3ch/4ch setting .........................................................
Steering quick reaction.............................................
Throttle quick reaction ..............................................
Notes on application, exportation and modification of the products
1. This unit can be used only for control of models.
The application of this unit is limited to models by the Japanese law.
Applicable models are ground surface and water surface radio control models.
2. (a) If this unit is exported from Japan, the unit cannot be used with a frequency that is not permitted
by the radio law of the country of destination.
Authorization according to the national law of the country of destination may be required.
(b) If this unit is used for an application other than for models, it may be subject to restrictions based
on the Export Trade Control Ordinance.
In this case, procedures according to the law such as submission of export permit may be
required.
3. If this unit is disassembled, adjusted or modified or parts are replaced by a person other than our
company, we are not liable for any problem including repair.
Other notes
It is illegal to reproduce the contents of this manual without permission.
The contents of this manual and the specifications of the product are subject to changes without prior
notice.
Although every effort has been made to ensure the accuracy of the information contained in this
manual, please contact us if you have any questions or if you find any errors. (For contact address,
see the end of this manual.)
We cannot assume any responsibility for any damages arising from its usage.
•
•
•
•
•
•
READ FIRST
(P.15)
(P.23)
(P.9)
(P.32)
(P.38)
(P.20)
(P.28)

éé
CONTENTS
READ FIRST............................................................................................................................... i
CONTENTS................................................................................................................................. ii
SAFETY PRECAUTIONS ........................................................................................................... iv
Chapter 1 How to Use This Unit .................................................................................. 1
NAMES OF PARTS .................................................................................................................... 1
KEY OPERATION AND FUNCTION MENU LIST ...................................................................... 2
Normal screen........................................................................................................................ 2
Function menu screen............................................................................................................ 2
PREPARATION FOR USING THIS UNIT ................................................................................... 5
Setting the batteries ............................................................................................................... 5
Setting the battery pack (sold separately) and charging ........................................................ 5
How to change the frequency range and the frequency (band) (between 27 MHz zone and 40 MHz zone)
... 6
Setting this unit....................................................................................................................... 7
Replacing the color pads........................................................................................................ 8
FEATURES OF THIS UNIT......................................................................................................... 9
Switching the movement mode (response mode).................................................................. 9
Types of mode
................................................................................................................... 9
Response and quick reaction function setting
.................................................................. 10
Switching the mode
........................................................................................................... 10
Response mode support table
.......................................................................................... 11
D.S.C. (Direct Servo Control)................................................................................................. 12
Setting the trim and sub trim .................................................................................................. 13
Purpose of trim adjustment
............................................................................................... 13
Trim (center trim)
............................................................................................................... 13
Sub trim
............................................................................................................................. 13
Method of setting
............................................................................................................... 13
Adjusting the steering angle................................................................................................... 14
Chapter 2 Function Menu Setting ............................................................................... 15
STEERING RELATED SETTING................................................................................................ 15
Displaying the steering amount (S:MONIT, Steering monitor) ............................................... 15
Adjusting the neutral position (S:TRM, Steering trim) ............................................................ 15
Adjusting the steering travel (S:TRAVEL, Steering travel) ..................................................... 16
Adjusting individually the right and left rudder angles (S:BALANC, Steering balance).......... 16
Adjusting the ends of movement angle and the neutral position (S:SUBTRM, Steering sub trim)
.... 17
Adjusting the movement amount of one step of trim (S:TRMRAT, Steering trim rate) ........... 18
Switching the movement direction (S:REVERS, Steering reverse) ....................................... 18
Quickening the initial reaction of steering (S:PUNCH, Steering punch)................................. 19
Adjusting the rudder angle and the servo movement angle (S:CURVE, Steering curve) ...... 19
Improving the steering response (S:QuickR, Steering quick reaction)................................... 20
Setting the servo speed according to the rudder angle (S:SPEED, Steering speed) ............ 20
THROTTLE RELATED SETTING............................................................................................... 23
Displaying the throttle trigger operation amount (T:MONIT, Throttle monitor)........................ 23
Adjusting the neutral position (T:TRM, Throttle trim).............................................................. 23
Setting the movement amount in the forwarding side (T:HiPOT, Throttle high point)............. 24

ééé
Setting the movement amount in the brake side (T:BRAKE, Brake) ...................................... 24
Adjusting the ends of movement angle and the neutral position (T:SUBTRM, Throttle sub trim)
..... 25
Adjusting the movement amount of one step of trim (T:TRMRAT, Throttle trim rate)............. 25
Switching the movement direction (T:REVERS, Throttle reverse) ......................................... 26
Quickening the initial reaction (T:PUNCH, Throttle punch) .................................................... 26
Adjusting the throttle trigger operation amount and the servo movement angle (T:CURVE, Throttle curve)
.... 27
Improving the throttle response (T:QuickR, Throttle quick reaction) ...................................... 28
Setting the throttle reaction speed (T:SPEED, Throttle speed) .............................................. 29
Moving the throttle servo to a set position (T:IDLEUP, Throttle idle up) ................................. 32
Setting ABS (T:ABS, ABS)...................................................................................................... 33
Pumping width (ABS:WID) and pumping start position (ABS:POS)
.................................. 35
Exciting the throttle (T:ACCEL, Throttle acceleration)............................................................ 35
Swing width (ACC:WID) and throttle trigger position (ACC:POSL, ACC:POSH)
.............. 36
Keeping the throttle amount constant at startup (T:AUTO.S, Auto start)................................ 37
3CH/4CH SETTING .................................................................................................................... 38
Displaying the movement amount (3chMONIT, 3ch monitor) (4chMONIT, 4ch monitor) ....... 38
Setting the output amount at each position (3chSETUP, 3ch setup) (4chSETUP, 4ch setup)
..... 38
OTHER SETTING ....................................................................................................................... 40
Setting the number of output channels (#CHSELCT, Channel select)................................... 40
Setting the output frame (#RESPONS, Response)................................................................ 40
Assigning function to button (#SETUP, Setup)....................................................................... 41
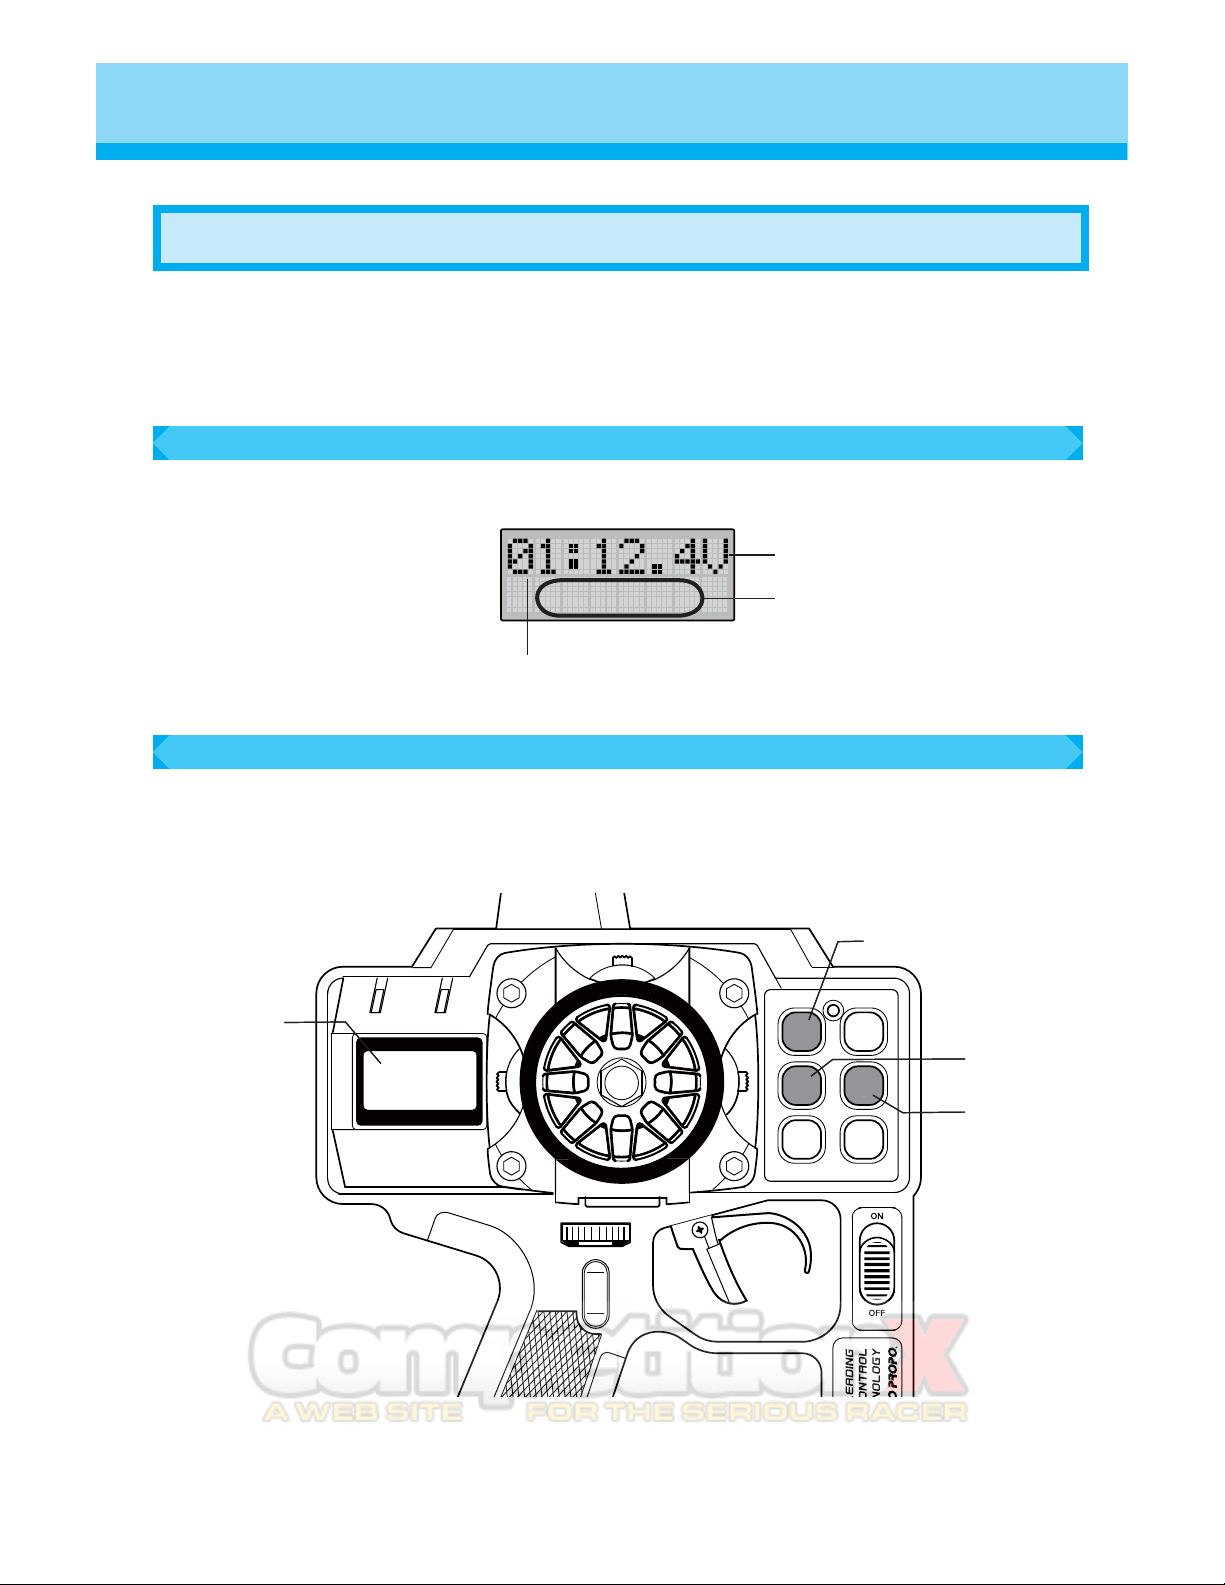
Stop watch (#S.WATCH, Stop watch) .................................................................................... 42
Lap time display
............................................................................................................... 43
Down timer (#DOWN.T, Down timer) ..................................................................................... 44
Updating the used variable resistor (#ADJVOL, Adjust variable resistor) .............................. 45
Adjusting the LCD contrast (#CONTRST, Contrast) .............................................................. 46
Method of lighting backlight for LCD (#B.LIGHT, Backlight)................................................... 47
Adjusting the tone for buzzer sound (#BUZZER, Buzzer)...................................................... 47
Continuous stroke speed in holding down a key (#KeyREPT, Key repeat)............................ 48
Resetting the setting contents (#RESET, Reset) ................................................................... 48
Copying model memory (#M.COPY, Model copy).................................................................. 49
Naming model memory (#M.NAME, Model name) ................................................................ 49
Switching model memory (#M.SELCT, Model select) ............................................................ 50
Chapter 3 Installation of Receiver.............................................................................. 51
NAMES OF PARTS OF RECEIVER ........................................................................................... 51
Example of connection to receiver ......................................................................................... 51
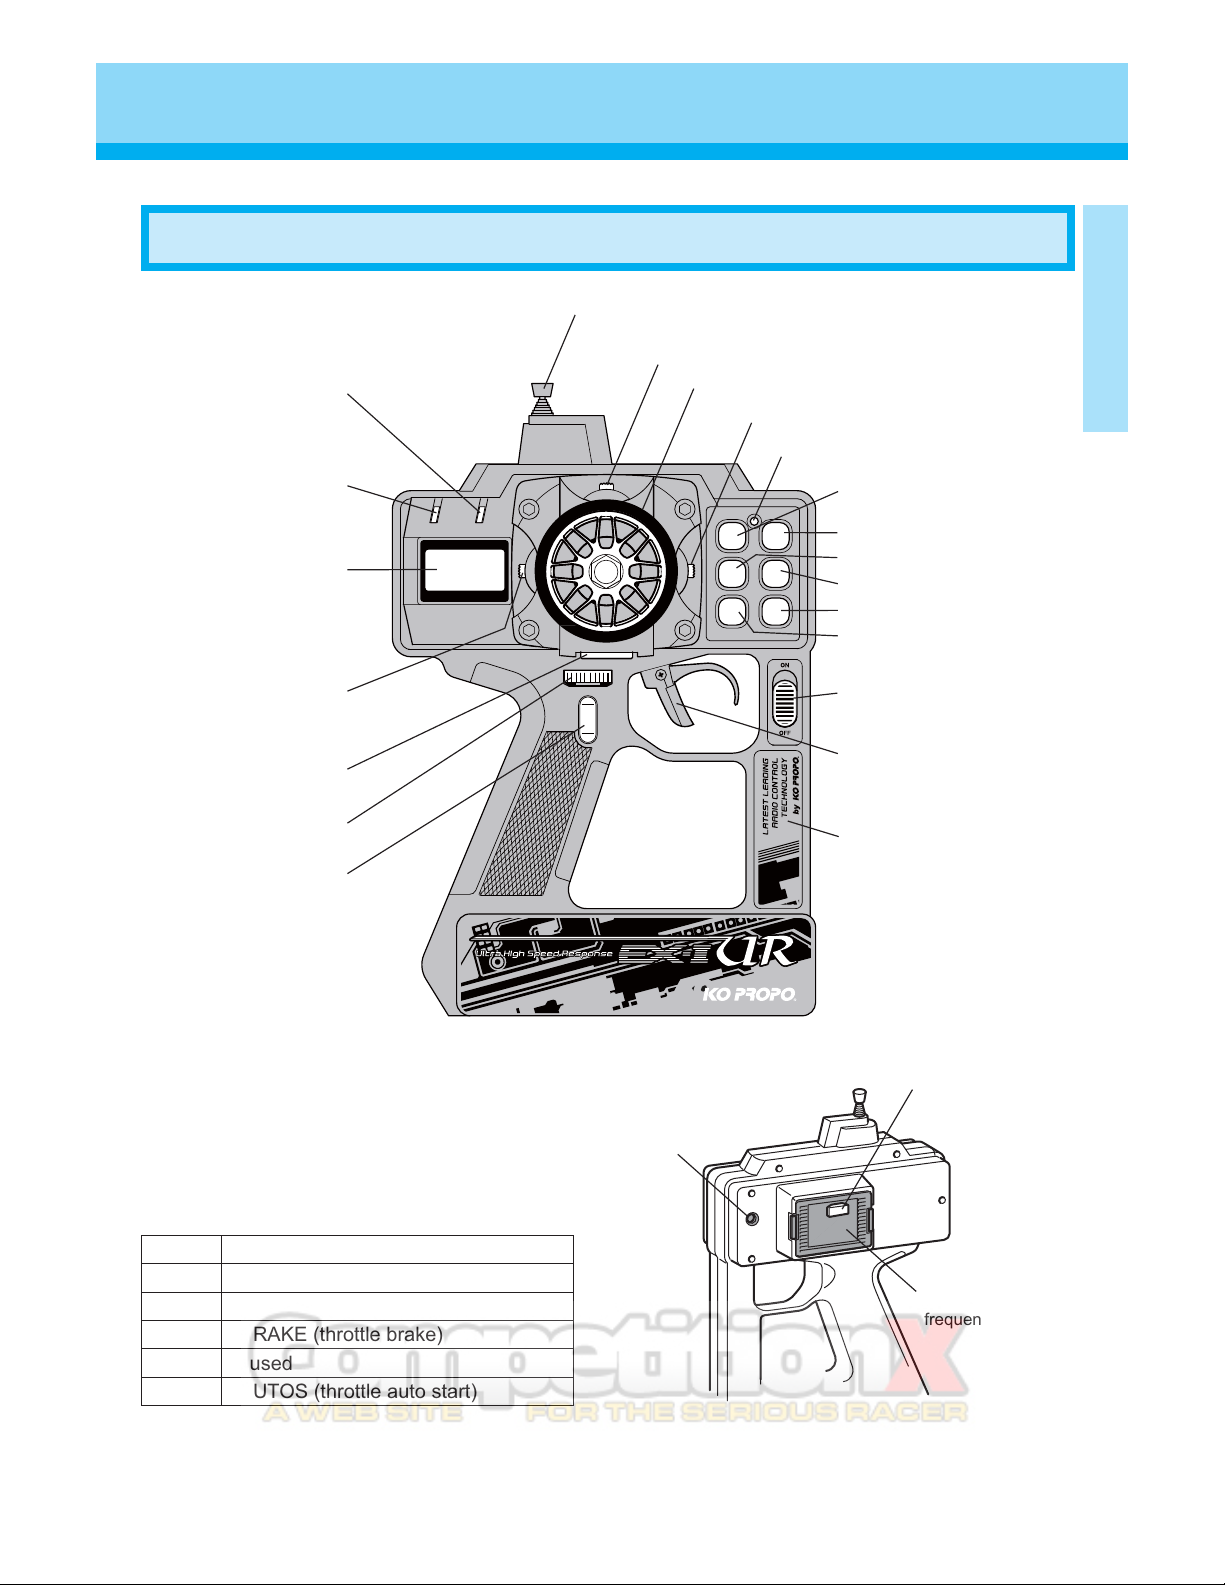
Frequency and frequency range ............................................................................................ 52
NOTES ON INSTALLATION....................................................................................................... 53
Chapter 4 Appendix ............................................................................................................ 55
SPECIFICATIONS ...................................................................................................................... 55
TERMINOLOGY.......................................................................................................................... 56
INDEX ......................................................................................................................................... 59
FOR REQUESTING REPAIR...................................................................................................... 63

éö
With the nature of radio controlled models, misoperation will result in danger. In order to avoid these cir-
cumstances and to use this unit safely, please read the following safety precautions thoroughly.
Explanation of warnings and signs
Failure to observe the matter discussed in such an item poses a serious
threat of death or severe injury.
Failure to observe the matter discussed in such an item poses a possibility of death
or severe injury, and a great likelihood of damage to the equipment or property.
Failure to observe the matter discussed in such an item poses a possibility
of injury or damage to the equipment or property.
Meaning of picture indications
Prohibited matters
Not allowed to do.
Enforcement matters
Must carry out!
Notes in assembly of mechanism before use
Warning!
For replacement type crystals, be certain
to use only KO Propo genuine crystal sets
(transmitter and receiver).
Other crystals may vary in frequency or cause
reduction of output, which could lead to loss of
control.
Prevent metal or carbon parts from touch-
ing the body of the model (car or boat) due
to vibration.
Noise may be generated to deteriorate the receiv-
ing performance, which could lead to malfunction
or loss of control.
This product is only designed for ground
surface or water surface radio control mod-
els. Do not use for any other purposes.
If a nicad battery pack is used in the trans-
mitter or the receiver, be sure to use the
genuine products. Charge the batteries
properly before use.
If batteries are exhausted during traveling, the
model may run out of control.
Be sure to insert the connectors of receiver,
servo, switch, and so on securely.
If a connector is removed because of vibration in
traveling, the model may run out of control.
Be sure to secure a receiver with thicker
double-sided tape to prevent direct transfer
of vibration.
Vibration may cause damage to internal parts.
Do not cut or bundle the aerial wire of receiver.
It may result in decreasing the sensitivity of a re-
ceiver and may result in the model running out of
control.
After installing a servo, check the operation
and ensure that no undue force is applied.
Undue force may cause a servo failure or voltage
drop, which could lead to loss of control.
Be sure to use rubber grommets for mounting
a servo. Also prevent the servo from touching
any chassis directly.
Direct transfer of vibration to the servo may cause
a failure, resulting in the model running out of con-
trol.
Danger!
Warning!
Caution!
SAFETY PRECAUTIONS

ö
Before turning on the power switch of the
transmitter, ensure that the frequency band
is available.
Models using the same frequency may run out of
control.
Do not run the model when there is lightning.
There is a possibility of lightning striking the an-
tenna.
Do not run the model in the rain or in a location
where there is a puddle.
The unit may become wet, which could lead to
loss of control.
Do not run the model in the following places.
•
Near to other radio control car circuits
(within 3 km)
• Near to people or on the road
• Surface of water where there are actual
boats
A model running out of control because of radio
interference or trouble is very dangerous.
Do not run the model when you experience
difficulties in concentration due to tiredness,
alcohol or medication.
Misjudgment may result in accidents.
Check for looseness of the antenna of the
transmitter and extend it to full length.
Incorrect emission of radio wave may cause the
model to run out of control.
Do not allow any plastic parts to come in
contact with fuel and exhaust of engine.
Fuel and exhaust affect the plastic and may dam-
age it.
Be sure to confirm that the model memory
matches the models currently running.
Not doing so may cause the model to run out of
control.
When you make functional changes, be sure
to stop the engine (disconnect the motor
lead wire).
Caution!
Be careful not to reverse the polarity of bat-
tery of the transmitter and the receiver.
Reverse polarity could damage the unit.
Be sure to use genuine KO Propo products
when combining transmitter, receiver, servo,
ESC and other optional parts.
We cannot assume any responsibility for use of
other companies' products with this unit.
Notes on driving (sailing)
Warning!
Caution!
Always turn on the switch on the transmitter
first, followed by the receiver. When turning
off the switch, always turn off the receiver
first, followed by the transmitter.
If you do not follow the correct order, the receiver
may get interference, which could lead to loss of
control.
Be sure to attach a band plate.
Display your frequency clearly to other people.
After traveling, do not touch the engine, mo-
tor or ESC where heat is generated.
Doing so may result in a burn.
Do not touch the antenna of transmitter.
Since the transmitter emits high-frequency energy
from the antenna, if you touch the antenna, you
may be shocked.

öé
Notes after driving (sailing)
Warning!
In the case of an electric-powered car, be
sure to disconnect the nicad battery after
completing driving.
A fire may occur or the model may run out of con-
trol if the switch is turned on by mistake.
When storing the transmitter, batteries, and
models, be sure to keep them out of the reach
of children.
Damage and/or injury from the chemicals may oc-
cur.
Be sure to disconnect the battery from the
transmitter when not using the transmitter
for a long time.
The transmitter may be damaged because of liq-
uid leaking if you leave the battery in the transmit-
ter for a long time.
Caution!
Do not store the transmitter or the receiver
in the following places.
• Extremely hot or cold places (+40 degrees
or higher, –10 degrees or lower)
• Places exposed to direct sunshine
• Places with high humidity
• Places with much vibration
• Dusty places
Storing the unit under these circumstances may
result in deformation of the case or a failure of the
unit.
Notes on handling and charging nicad battery (sold separately)
Danger!
Never short-circuit the battery terminals.
It is dangerous because it may cause the outbreak
of fire or explosion.
Do not incinerate the batteries.
It is very dangerous because they may explode.
Be sure to use a KO Propo charger for charg-
ing and to use correct charging current (1A or
less).
Incorrect charging current may cause explosion of
battery, excessive heat build-up and liquid leaking.
If other company's chargers are used, there is a
possibility that the auto cut-off function will fail to
operate.
In the case of liquid leaking from battery, be
sure to avoid eye contact with the liquid.
Blindness may occur. If the liquid enters your eye,
apply large amounts of water to wash and contact
a doctor immediately for treatment.
Do not apply a big shock to the batteries.
It may damage the battery and result in a short
circuit and excessive heat build-up.
Do not dismantle or modify the battery.
Dismantling the battery may cause liquid to leak
out.
Do not wet batteries and do not charge wet
batteries.
Éôíáù ãáõóååøãåóóéöå èåáôâõéìäõð áîä
äáíáçå®
Do not charge dry cell batteries.
Primary batteries such as dry cell batteries cannot
be charged. Doing so may cause explosion or fire.
When handling a charger or connecting a
charger to an AC outlet, do not touch it with
wet hands.
Doing so may cause electric shock.
Please support recycling.
Nicad and nickel-metal hydride batteries are recyclable. Careless disposal may cause environmental
contamination.

±
How to Use This Unit
Chapter
1 How to Use This Unit
Charging jack
<Factory default setting>
ET1 S:TRM (steering trim)
ET2 T:TRM (throttle trim)
ET3 S:TRAVEL (steering travel)
ET4 T:BRAKE (throttle brake)
ET5 Unused
BT1 T:AUTOS (throttle auto start)
Antenna
ET1 lever
Steering wheel
ET4 lever
Power indicator (POWER LED)
Lights up when the power is on.
Back (function) key
(BACK/FUNC)
Enter key (ENTER)
Down key (DOWN)
Up key (UP)
Plus (start) key (+)
Minus (stop) key (–)
Power switch (POWER SW)
Throttle trigger
Driver holder
ET5 lever
ET3 dial
BT1 button
ET2 lever
LCD
Throttle speed indicator
(red)
Lights up when the "T:
SPEED" function is set.
Throttle A.B.S. indicator
(green)
Lights up when the "T:
ABS" function is set.
RF module (high-
frequency module)
Crystal
NAMES OF PARTS
(See page 33.)
(See page 29.)

²
If the up key or the down key is pressed, the setting menu (function menu) of this unit is displayed on the
LCD. For the details of setting contents and the method of setting of each menu, refer to each reference
page.
Normal screen
When the power is turned on, the following screen is displayed on the LCD.
Ãõòòåîôìùóåìåãôåäíïäåìíåíïòù
Âáôôåòùöïìôáçå
Íïäåìîáíåéóäéóðìáùåä
èåòåéæéôéóóåô®
KEY OPERATION AND FUNCTION MENU LIST
Function menu screen
Pressing the up key or the down key switches the screen to be displayed on the LCD. Set the functions
of this unit on each screen. (Pressing the up key switches the screen sequentially from the upper item in
the table, and pressing the down key switches the screen sequentially from the lower item.)
Back (function) key
Down key
Up key
LCD
Back (function) key
Down key
Up key
LCD

³
How to Use This Unit
Setting category
Screen display name
Function menu name
Reference page
Steering related S:MONIT Steering monitor
S:TRM Steering trim
S:TRAVEL Steering travel
S:BALANC Steering balance
S:SUBTRM Steering sub trim
S:TRMRAT Steering trim rate
S:REVERS Steering reverse
S:PUNCH Steering punch
S:CURVE Steering curve
S:QuickR Steering quick reaction
S:SPEED Steering speed
Throttle related T:MONIT Throttle monitor
T:TRM Throttle trim
T:HiPOT High point
T:BRAKE Brake
T:SUBTRM Throttle sub trim
T:TRMRAT Throttle trim rate
T:REVERS Throttle reverse
T:PUNCH Throttle punch
T:CURVE Throttle curve
T:QuickR Throttle quick reaction
T:SPEED Throttle speed
T:IDLEUP Throttle idle up
T:ABS ABS
T:ACCEL Throttle acceleration
T:AUTO.S Auto start
3ch setting 3chMONIT 3ch monitor
3chSETUP 3ch setting
4ch setting 4chMONIT 4ch monitor
4chSETUP 4ch setting
Other functions #CHSELCT Channel select
#RESPONS Response
#SETUP Setup
#S.WATCH Stop watch
#DOWN.T Down timer
#ADJVOL Adjust variable resistor
#CONTRST Contrast
#B.LIGHT Backlight
#BUZZER Buzzer
#KeyREPT Key repeat
#RESET Reset
#M.COPY Model copy
#M.NAME Model name
#M.SELCT Model select
Page 15
Page 15
Page 16
Page 16
Page 17
Page 18
Page 20
Page 23
Page 24
Page 25
Page 26
Page 27
Page 28
Page 29
Page 32
Page 33
Page 35
Page 37
Page 38
Page 40
Page 40
Page 41
Page 42
Page 44
Page 45
Page 46
Page 47
Page 48
Page 49
Page 49
Page 50
Page 18
Page 19
Page 19
Page 20
Page 23
Page 24
Page 25
Page 26
Page 38
Page 38
Page 38
Page 47
Page 48

´
By pressing the back (function) key, you can jump to the initial screen of each setting category.
Category Function menu name
(screen display) Function menu name Reference
page
Steering related S:MONIT Steering monitor
Throttle related T:MONIT Throttle monitor
3ch related (*) 3chMONIT 3ch monitor
4ch related (*) 4chMONIT 4ch monitor
Other functions #CHSELCT Channel select
* Can be selected only if "ch3" or "ch4" is selected at "#CHSELCT" (channel select).
If the method of returning to the normal screen is not known, pressing the back (function) key several
times leads to the normal screen from any screen.
Page 15
Page 23
Page 38
Page 38
Page 40
(See page 40.)

µ
How to Use This Unit
Insert the batteries into this unit. Replace the RF module and the crystal as required.
Then, change the setting of this unit as required.
Setting the batteries
Warning!
Do not use nicad AA batteries or nickel-
metal hydride AA batteries.
If these are charged, gas is generated, resulting in
corrosion in this unit.
1Remove the battery cover.
2Insert eight AA size dry cell batteries into the
battery box.
3
Reattach the battery cover to its original position.
1) Press the two locations.
2) Slide the cover
to remove it.
1) Insert the batteries into the battery box taking
care of + and – (plus and minus) of the batteries.
2) Set the battery box taking care of the direction
of contact of the battery box and this unit.
Setting the battery pack (sold separately)
and charging
Warning!
If dry cell batteries are set in this unit, never
charge them.
Doing so may cause liquid leak or explosion, re-
sulting in damage to this unit.
Be sure to use KO Propo battery charger.
If not, liquid leak or explosion of batteries may oc-
cur, resulting in damage to this unit.
1Insert the battery pack into the main body in a
similar way to the battery box.
2Attach the included sponge to the back side of
battery cover to avoid movement of the battery
pack in the main body.
3After inserting the battery pack all the way,
reattach the battery cover to its original
position.
Take care not to trap the cord.
Take care of
the orientation
of the connec-
tor.
PREPARATION FOR USING THIS UNIT
Battery (+): Pin on the back side
Battery (–): Pin at the center


4Connect the AC mains charger or the DC 12V
fast charger to the charging jack on the back
side of the main body and carry out charging.
When using the AC mains charger, charge
the batteries for 14 to 16 hours (standard
time from discharged state).
The battery pack cannot be discharged
through the charging jack. For discharging,
remove the battery pack from the main
body.
Never connect the connector of the battery
pack to the connector for receiver.
Warning! Caution on charger
The 8N5N charger is equipped with two
connectors, one for transmitter batteries and the
other for receiver batteries. The connector
shown in the photo is the connector of nicad
battery charger for receiver.
Connection with the nicad battery for transmitter
may cause explosion of batteries or fire because
of different polarity. Never connect it.
Connection prohibited
How to change the frequency range and the frequency
(band) (between 27 MHz zone and 40 MHz zone)
To change the frequency range, replace the RF
module.
To change the frequency (band), replace the crystal.
Warning!
Be sure to use only KO Propo genuine crystal
sets (transmitter and receiver).
Crystals from other manufacturers may operate
at slightly different frequencies, resulting in loss of
control.
Caution!
Use only the RF Module for EX-1UR.
1Turn off the power of this unit.
Be sure to turn off the power of this
unit.
2Remove the RF module and the crystal and
replace them as required.
The 40 MHz zone transmitter and receiver are
products that passed the recommended stan-
dard compatibility certification test of Japan Ra-
dio Control Safety Association.
Do not remove the certification label pasted on
the RF module.
The 27 MHz zone transmitter is a product that
passes the recommended standard of Japan
Radio Controlled Model Industry Association.
Do not remove the test label pasted on the RF module.
Charging jack AC mains charger
DC 12V fast charger
When removing the RF
module, push the right
and left claws.
Insert the crystal
all the way.

·
How to Use This Unit
Setting this unit
Change the setting of this unit as required.
Frequently used setting items are listed here. For
details of setting, see reference pages.
When operating only this unit, removal of
the RF module or the crystal suppresses
emission of radio wave, resulting in reduction
of power consumption and a longer life of
batteries.
1Turn off the power of this unit.
2Press the up key or the down key to switch the
function menu.
(See "Function menu screen" on page 2.)
3See the reference page of each item according
to your desired operation.
To change the setting of display and sound
Making higher/lower contrast of LCD
Adjust it at "#CONTRST" (contrast).
................................................
Turning on/off the backlight of LCD
Change the setting at "#B.LIGHT." The
factory default setting is AUTO (automatic
setting). .....................................
Changing the buzzer tone issued when a key
or a button is operated
Adjust the tone at "#BUZZER."
................................................
To change the setting for movement
Changing the movement mode (response
mode)
Select the mode at "#RESPONS." Also set
the number of channels at "#CHSELCT."
................................................
Changing the functions assigned to ET levers
and BT buttons
Set the functions at "#SETUP."
................................................
To use optional functions sold separately
Setting without emission of radio wave from
this unit
By setting D.S.C. (direct servo control) in
this unit to connect this unit with e receiver,
you can operate without emission of radio
wave. ........................................
•
•
•
•
•
•
Turn the power switch
to the ON side.
The power indicator
lights up.
Down key
Up key
Page 46
Page 47
Page 47
Page 40
Page 41
Page 12

¸
Replacing the color pads
You can remove the color pads at the front and
the rear of the grip and replace them with pads
sold separately.
Remove the pads by inserting your fingernail into
the edge of pad to peel off the pad.
When attaching a pad, insert the pad into the slit
of the main body from the claw at the bottom side.
If the claw is not properly inserted, use a flat-
blade screwdriver to press the claw into the slit.

¹
How to Use This Unit
Switching the movement mode (response
mode)
In this unit, the response speed (response mode)
of the signal can be switched among three stages.
By selecting a higher speed mode, the response to
operation of steering or throttle can be improved.
Types of mode
The response mode can be selected at "#RE-
SPONS" in the function menu.
Normal Response
This mode is compatible to the existing equipment.
This mode can be used even with a receiver or a
servo that is not supported.
The receiver means here a device that
supports the modulation method (FM/AM) of
RF module of the transmitter side.
Receivers and servos that support advanced
high speed or super high speed can be used
in the normal mode.
Super High Speed
Response
This mode can be used if 2ch or 3ch is selected at
"#CHSELCT" in the function menu.
For using this mode, a receiver and a servo
that support super high speed or advanced
high speed are required.
Advanced High Speed
Response
This mode can be used if 2ch is selected at
"#CHSELCT" in the function menu. The fastest
response that exceeds the normal and super high
speed modes can be obtained.
For using this mode, a receiver and a servo
that support advanced high speed response
are required.
䎦䏋䏄䏑䏑䏈䏏
䎩䏕䏄䏐䏈
䎱䏒䏕䏐䏄䏏䎃䎵䏈䏖䏓䏒䏑䏖䏈
䎶䏘䏓䏈䏕䎃䎫䏌䏊䏋䎃䎶䏓䏈䏈䏇䎃
䎵䏈䏖䏓䏒䏑䏖䏈
䎤䏇䏙䏄䏑䏆䏈䏇䎃䎫䏌䏊䏋䎃䎶䏓䏈䏈䏇䎃
䎵䏈䏖䏓䏒䏑䏖䏈
䯾䰯䰴
䯿䰯䰴
䰀䰯䰴
䧎
䧎
䧎
䧎
䧎
䐙
䧎
䐙
䐙
䎋*䎌
*In the case of advanced high speed response,
3ch of receiver cannot be used. If 3ch is used,
signals out of movement range of servo are
output, which could cause damage.
FEATURES OF THIS UNIT

±°
Response and quick reaction function setting
By setting "S:QuickR" (steering quick reaction)
and "T:QuickR" (throttle quick reaction), the re-
sponse can be further improved. (See "Improving
the steering response" on page 20 and "Improving
the throttle response" on page 28.)
䎆䎵䎨䎶䎳䎲䎱䎶䰉䰚䰛䰞䰙
䎎䎃䏕䏈䏖䏓䏒䏑䏖䏈䎃䏖䏈䏗䏗䏌䏑䏊
0% 120%
䎱䏒䏕䏐䏄䏏䎃䏕䏈䏖䏓䏒䏑䏖䏈
ᵱᶎᶃᶃᶂ
䎆䎵䎨䎶䎳䎲䎱䎶䰉䰔䰕䰓䰔
䎎䎃䏕䏈䏖䏓䏒䏑䏖䏈䎃䏖䏈䏗䏗䏌䏑䏊
䎶䏘䏓䏈䏕䎃䏋䏌䏊䏋䎃䏖䏓䏈䏈䏇䎃
䏕䏈䏖䏓䏒䏑䏖䏈
䎆䎵䎨䎶䎳䎲䎱䎶䎠䰍䰐䰢
䎎䎃䏕䏈䏖䏓䏒䏑䏖䏈䎃䏖䏈䏗䏗䏌䏑䏊
䎤䏇䏙䏄䏑䏆䏈䏇䎃䏋䏌䏊䏋䎃䏖䏓䏈䏈䏇䎃
䏕䏈䏖䏓䏒䏑䏖䏈
ᵰᶃᶑᶎᶍᶌᶑᶃᴾᶄᶓᶌᶁᶒᶇᶍᶌᴾᶑᶃᶒᴾ
ᶔᵿᶊᶓᶃ
ᵆᵱᵘᵯᶓᶇᶁᶉᵰᵇ
50%
䎸䏏䏗䏕䏄䏋䏌䏊䏋䎃䏖䏓䏈䏈䏇䎃
䏕䏈䏖䏓䏒䏑䏖䏈
Receivers that support ultrahigh speed
response are only KR-302FS.
Switching the mode
Before starting work, ensure that the
receiver and the servo to be used
support the desired response mode.
(See "Response mode support table" on
page 11.)
1
Select the response mode of transmitter at
"#RESPONS" in the function menu of the main
body.
(See "Setting the output frame" on page
40
.)
2Also at "#CHSELCT" in the function menu,
similarly, set the channels that can be used in
the response mode that has been set in step 1.
(See "Setting the number of output channels" on
page 40.)
3In addition, set "S:QuickR" and "T:QuickR" as
required.
(See "Improving the steering response" on page 20
and "Improving the throttle response" on page 28.)

±±
How to Use This Unit
Response mode support table
○ Supported × Not supported
Normal Super High
Speed
Advanced
High Speed
Receiver KR-297FZ
(Production finished)
○××
KR-301F/FS
(Production finished)
○○×
KR-302F/FS/FSC ○ ○ ○
Analog servo PS-401 ○ × ×
PS-712FET
(Production finished)
○××
PS-713FET
(Production finished)
○××
PS-2173FET
(Production finished)
○○×
PS-2174FET
(Production finished)
○○×
PS-2113FET
(Production finished)
○○×
PS-2133FET
(Production finished)
○○×
Digital servo PDS-947ICS
(Production finished)
○○○
PDS-949ICS ○ ○ ○
PDS-763ICS ○ ○ ○
PDS-764ICS ○ ○ ○
PDS-2123FET
(Production finished)
○○○
PDS-2143FET
(Production finished)
○○○
PDS-2144FET
(Production finished)
○○○
PDS-2343FET ○ ○ ○
PDS-2344FET ○ ○ ○
PDS-2363ICS ○ ○ ○
PDS-2364ICS ○ ○ ○
PDS-2367ICS ○ ○ ○
PDS-2368ICS ○ ○ ○
PDS-2386ICS ○ ○ ○
PDS-2413ICS ○ ○ ○
PDS-3014ICS
(Production finished)
○○○
PDS-8044ICS ○ ○ ○
ESC EZ-1000
(Production finished)
○○○
KSC-1000FR
(Production finished)
○○○
KSC-1100FR
(Production finished)
○○○
KSC-1200F
(Production finished)
○○○
VFS-2000/J
(Production finished)
○○○
VFS-1PRO/J ○ ○ ○
VFS-2 ○ ○ ○
VFS-FR ○ ○ ○
VFS-1PRO Competition
(Production finished)
○○○
VFS-1PRO C2 ○ ○ ○
Others Fail-safe adapter (FSA-1)
(Production finished)
○○×

±²
D.S.C. (Direct Servo Control)
By using D.S.C. sold separately to connect this
unit with a receiver, you can check the setting
without emission of radio wave on the course (pit).
D.S.C. sold separately (No. 1581 DSC (for
EX-1)) is required.
Not only the receiver supplied with this unit
but also the following receivers that support
D.S.C. can be used.
KR-297FZ (production finished)
KR-301F (production finished)
KR-302F/FS/FSC
When using a receiver other than the
supplied receiver, take care of the response
mode. (See "Switching the movement mode
(response mode)" on page 9.)
1Turn off the power of this unit.
2Remove the RF module and attach the D.S.C.
(sold separately).
3Remove the crystal from the receiver.
Be sure to remove the crystal from
the receiver. If not, a malfunction may
occur during the setting.
D.S.C
4Connect the white connector of D.S.C. cable
to the battery channel of receiver.
To avoid running out of control, remove
the wiring of motor during the setting.
When checking the setting with the
motor connected, be sure to raise the
tires from the ground. If not, the motor
may operate, which could lead to loss
of control.
5After turning on the power of this unit, turn on
the power of receiver.
6After completing the setting, turn off the power
of receiver and then turn off the power of this
unit.
7Remove the D.S.C. from this unit and the
receiver.
Before removing the D.S.C. from this
unit, be sure to turn off the power of
receiver.
Receiver
White connector
Red connector
Receiver power supply
Receiver
switch

±³
How to Use This Unit
Setting the trim and sub trim
Purpose of trim adjustment
"Trim" is a function of adjusting the servo neu-
tral position. When you try driving after loading a
steering servo, if the model does not run straight,
the steering trim must be adjusted. Also for the
throttle of engine car, the carburetor neutral posi-
tion must be corrected after loading the servo.
Adjustment of the neutral position is required not
only immediately after loading the servo but also
for adapting to change in driving such as wear of
tire and torsion of the chassis.
This unit provides two types of function menu for
this function: "Trim" (center trim) that adjusts only
the neutral position with the ends of operating
angle unchanged and "Sub trim" that moves the
ends of movement angle and the neutral position
together.
Trim (center trim)
When adjusting the neutral position during
driving, change the setting.
The steering trim can be set at "S:TRM" in the
function menu. (See page 15.)
The throttle trim can be set at "T:TRM" in the
function menu. (See page 23.)
Large movement may cause break of right and
left balance. If this case, readjust the sub trim
so that the trim becomes 0.
In the default state, "S:TRM" is assigned to the
ET1 over and "T:TRM" is assigned to the ET2
lever.
•
•
•
•
•
Sub trim
Adjust the sub trim when loading a servo or
carrying out test driving.
The steering sub trim can be set at "S:SUBTRM"
in the function menu. (See page 17.)
The throttle sub trim can be set at "T:SUBTRM"
in the function menu. (See page 25.)
Load a servo so that the set value of sub trim
does not become large.
Method of setting
1
Before loading a servo, adjust the center position.
2To center the trim with a servo loaded, adjust
"S:SUBTRM" and "T:SUBTRM."
3Carry out test driving to check the neutral
state.
If correction is required, adjust the sub trim.
4When the neutral position is fixed, use "S:
BALANC" to adjust the steering balance so
that the turning radius is the same for the right
and left. (See page 16.)
5Use "S:TRAVEL" to adjust the overall steering
angle. (See page 16.)
6During practice driving or a race, adjust the
trim at "S:TRM" and "T:TRM."
If the adjustment value becomes large,
readjust the sub trim so that the trim becomes
0.
•
•
•
•
The ends of movement
angle do not move.
Only the neutral position
moves.
Both the ends of move-
ment angle and the
neutral position move
simultaneously.

±´
Adjusting the steering angle
Use a hexagon socket wrench (2 mm).
1Remove the sponge from the steering wheel.
2Insert the hexagonal socket wrench (2 mm)
into the two holes of steering wheel and
tighten the hexagon socket head screws.
Tighten evenly the right and left bolts.
3Attach the sponge to the steering wheel.
To return to the initial state, adjust the
hexagon socket head screw so that the tip
does not protrude from the tapped hole by a
small distance.
4Referring to page 45, set "#ADJVOL" (adjust
variable resistor).
Steering wheel
Hexagon socket
head screw
Hexagon socket
wrench (2 mm) Hole
Decrement angle
spacer
Table of contents
Popular Motorized Toy Car manuals by other brands

Playskool
Playskool Mr. Potato Head Tumblin' Tatermobile user manual

Carrera
Carrera RC Power Speedfighter Assembly and operating instructions

REVELL
REVELL KIT 1564 Assembly manual

Hobbytech
Hobbytech CRX RTR SURVIVAL instruction manual

Hobbytech
Hobbytech LC70 Assembly instructions

REVELL
REVELL Ferrari 599 GTO Assembly manual