Kolbe Foodtec MW32-120 User manual

D
Paul KOLBE GmbH • FOODTEC
Gewerbestraße 5 • D - 89275 Elchingen
Telefon +49 (0) 73 08 / 96 10 - 0
Telefax +49 (0) 73 08 / 96 10 - 98
www.kolbe-foodtec.com
MEAT MINCERS
MW52-120 / MW130-120
GB
OPERATING MANUAL
English
MW32-120 / MW114-120
Machine No. 128 _ _ _ _
Machine No. 127 _ _ _ _


3
Table of Contents:
1. Safety instructions
2. List of hazards
3. Machine data
4. Delivery of the machine
5. Installation of the machine
6. Commissioning
7. Cleaning the machine
8. Warranty
9. Machine type plate
10. Maintenance and inspection
11. Measures in the event of operating malfunction
12. Technical data
13. EC Declaration of Conformity

4
1. Safety instructions!
Prior to commissioning, the Operating Manual
and safety instructions must be carefully read
and complied with! Pass on all safety instruc-
tions to other users, as well!
• Any person assigned by the operating company
to a function involving the assembly, disassembly,
commissioning, operation or maintenance (inspection,
maintenance, repair) of KOLBE butcher shop machinery
must have read completely and thoroughly understood
the respective Operating Manual and, especially, the
safety instructions. It is recommended that the operating
company establish an appropriate written verification
requirement.
• KOLBE butcher shop machines have been manufactured
and are operationally safe according to the latest standards
of technology. However, hazards can be associated with
the machines if they are operated by untrained persons
in an improper manner or in applications, for which they
were not intended.
• The KOLBE butcher shop machines (meat mincers,
bandsaws, portioning units, conveyors, lift/tilt equipment)
have been manufactured exclusively for the processing of
meat and fish products. Any other usage is deemed to be
utilisation not in accordance with the intended purpose.
The manufacturer is not liable for damages resulting from
such utilisation! The user bears sole responsibility for this
risk.
• Utilisation according to the intended purpose also
includes compliance with the manufacturer‘s prescribed
operating, service and maintenance requirements.
• The KOLBE butcher shop machines (meat mincers,
bandsaws, portioning units, conveyors, lift/tilt equipment)
must be operated, serviced or maintained only by
authorised persons who have been properly trained and
appropriately briefed. These persons must have received
special instruction on the potential hazards involved.
• From a safety perspective, the responsibilities for assembly,
disassembly, service, commissioning, maintenance and
operation must be clearly stipulated in order to avoid
confusion with regard to competencies.
• Prior to beginning work, the operator should be familiar
with all machine equipment and actuating controls, as
well as with their function! During work, time is no longer
available for this and it is too late!
• The shutdown procedures prescribed in the Operating
Manual must be observed during all work associated
with assembly, disassembly, service, commissioning,
maintenance and operation.
• All forms of work that could potentially impair the safety
of the machine are prohibited.
• The operator must at all times ensure that unauthorised
persons are restricted from working on the machine.
• The operator is responsible to ensure that any unforeseen
changes, which could potentially impair the safety of the
machine, are reported immediately to the supervisor.
• The user is responsible at all times to ensure that the
machine is operated only in a fault-free condition.
• Through appropriate instructions and controls, the user
must ensure the cleanliness and clear layout of the
workplace on and around the machine.
• Arbitrary modifications to, or conversions of the machine
are not permitted and exclude any manufacturer liability
for damages resulting from such actions.
• Do not reach into the inlet / outlet areas or into operating
tooling (e.g. bandsaw blade, mincer feed screw, cross
knife, lifting blade, etc.).
• Do not undertake any setting changes to the machine
while it is running, but always wait until the machine has
come to a standstill.
• Do not remove any electrical or mechanical safety
equipment.
• Prior to performing troubleshooting, maintenance or
repair activities, disconnect the electrical supply. This work
must be carried out only by an authorised specialist (post
warning signs on or around the machine as necessary).
• Prior to re-commissioning following machine maintenance
or repair, check to ensure that all safety equipment has
been re-installed.
• The generally valid occupational safety and accident
prevention regulations, as well as other generally accepted
safety-related rules, must be complied with.
2. List of hazards (residual dangers)
Be particularly aware of the following danger
areas on the machine!
2.1 Mechanical hazards
• Risk of injury on the cutting edges of the cross knife.
Do not reach into the outlet to access the rotating cross
knife behind the perforated disc (e.g. cuts and abrasions
on hands or fingers, or shearing-o of a finger). When
removing the knife, cut-resistant gloves must be worn.
• The risk exists of crushing or shearing-o of a finger, hand
or lower arm at the intake area of the working screw.
• The risk exists of cutting-o, shearing-o, cutting,
catching, tangling, being drawn in or trapped by the
rotating working screw, feed screw, mixing arm, loosening
shaft or rotating knife behind the perforated disc.
!
!

5
• The risk exists of crushing, shearing-o and jamming
of fingers, hands, feet or other body parts when .... or
between .... :
-Assembling or disassembling cutting set parts
-Assembling or disassembling the locking nut, mincer feed
screw, mincer housing, splatter guard, housing outlet
protective cover, feeder screw, mixing arm, loosening
shaft, as well as all removable parts
-Working with the combination hook wrench
-Closing the hopper cover or hopper attachment
-The batching trolley and the lift/tilt pylon
-The batching trolley and a wall or other objects
-Releasing the locking devices on mobile models
-Plugging or unplugging CEE plug connections
-Disassembled parts falling or toppling
-All moveable and stationary parts
• The risk of jamming or crushing exists due to machine
toppling, in particular on the mobile models.
• The risk of crushing exists between the mobile machine
and walls or other objects, as well as between the floor
and the castors.
• The risk of being drawn in, crushing or shearing-o of
fingers or hands exists during maintenance and inspection
work at the machine drive component intake areas with
opened inspection covers.
2.2 Hazard due to instability
• The risk exists to bodily parts due to impact or crushing,
in particular when the machine is mobile or topples.
Always bear in mind the need for a secure foundation
and stable flooring when installing the machine!
2.3 Electrical hazards
• The risk of injury exists due to direct or indirect contact
with electricity.
• The risk of injury exists due to defective electrical
components or malfunction.
2.4 Noise hazards
Risk of hearing loss due to noise emissions greater than
80 dB(A). With the meat mincers MW32-120 / MW114-
120 and MW52-120 / MW130-120 the noise level at idle /
sound pressure level has been determined according to EN
ISO 3746:2011 (constant K=4 dB) to be 68 dB(A), and this
results in a sound power level of 80 dB(A).
The values set forth are emission values and do not
necessarily represent safe values for the workplace. Although
there is a correlation between emission and immission
levels, a reliable conclusion as to whether additional safety
precautions are necessary according to EN ISO 11690-
1/-2 cannot be drawn. Factors present at the workplace,
which would influence immission levels, could relate to the
peculiarities of the workshop, itself, and other noise sources,
such as the number of machines and neighbouring work
processes, as well as non-standard operating conditions.
The allowable levels at the workplace can vary from country
to country. Nonetheless, this information should help the
user to better estimate the hazards and risks involved.
With a noise level of > 80 dB(A), the operator must take
appropriate precautions for hearing protection, such as
mandating the use of earplugs or other hearing protection
devices.
2.5 Hazards to health
The risk of harm to human health exists due to low ambient
temperatures. Thermal protective clothing should be worn
at ambient temperatures < 7 °C.
2.6 Hazards due to neglect of
hygienic principles and cleaning instructions:
• The risk of harm to human health and unacceptable
change in the foodstus being processed, such as:
-Spoilage of foodstus (food poisoning!)
-Internal chemical burns suered by the consumer due to
cleaning and disinfectant agent residue in the foodstus
-Internal injuries to the consumer due to a foreign object
-(e.g. machine parts or parts from other origins)
2.7 Predictable operator error
• Non-compliance with installation instructions
• Non-adherence to operator instructions
• Non-observance of danger notices
• Non-compliance with shutdown procedures
• Non-observance of operating instructions
• Non-observance of cleaning instructions
• Non-compliance with maintenance intervals
• Non-adherence to utilisation according to intended
purpose

6
3. Machine data
3.1 Manufacturer Paul KOLBE GmbH
FOODTEC
Gewerbestraße 5
D-89275 Elchingen
3.2 Designation Mixer mincer machine with En-
terprise or Unger cutting system
3.3 Product number Models MW32-120 / MW114-120
Models MW52-120 / MW130-120
3.4 Performance data
Models MW32-120
Cutting system Enterprise E32
Perforated disc diameter 100 mm
Hopper volume 120 Ltr
Output capacity with 3 mm perforated
disc approx.
1700 Kg/h
Main drive motor / IP55 5,5 kW
Mixer drive motor / IP55 1,1 kW
Models MW114-120
Cutting system Unger D114
Perforated disc diameter 114 mm
Hopper volume 120 Ltr
Output capacity with 3 mm perforated
disc approx.
1700 Kg/h
Main drive motor / IP55 5,5 kW
Mixer drive motor / IP55 1,1 kW
Models MW52-120
Cutting system Enterpise E52
Perforated disc diameter 130 mm
Hopper volume 120 Ltr
Output capacity with 3 mm perforated
disc approx.
2000 Kg/h
Main drive motor / IP55 7,5 kW
Mixer drive motor / IP55 1,1 kW
Models MW130-120
Cutting system Unger E130
Perforated disc diameter 130 mm
Hopper volume 120 Ltr
Output capacity with 3 mm perforated
disc approx.
2000 Kg/h
Main drive motor / IP55 10,0 kW
Mixer drive motor / IP55 1,1 kW
Each KOLBE product is subject to a thorough acceptance
test run prior to shipping, whereby all functions and
safety equipment are checked and documented.
4. Delivery
For delivery, the machine will be bolted onto a wood
pallet and shrink-wrapped in polyethylene protective film.
Machine accessories, such as adjustable machine feet, fixed
and steering castors, combination hook wrench, splatter
guard, KOLBE mincer plunger, Operating Manual, etc., are
delivered in an accompanying carton.
(We use reusable and recyclable packaging exclusively.)
Please inform us or the delivery company immediately if the
delivered contents do not agree with the packing list.
In the event of transport damage, contact the transport
company immediately for claims assessment.
5. Installation of the machine
5.1 Installation instructions
Remove the shrink-wrapped foil and dismantle the machine
from the shipping pallet by removing the four bolts. Carefully
lift the machine with a forklift or crane apparatus and
remove the wood pallet. Bolt the four adjustable machine
feet (69) supplied to the threaded holes in the machine
legs or, depending on the mobile machine model, mount
the two rear fixed castors (8) and the two forward steering
castors (9). The adjustable machine feet are set accordingly
by means of the screw threads to compensate for uneven
floor surfaces.
The installation site must be selected based on load bearing
capacity of the foundation or floor covering with respect to
the weight of the machine.
Kolbe meat processing machinery are to a certain extent
dangerous machines, and may therefore only be installed
and operated in areas not accessible to the general public.
Moreover, these machines are intended only for artisanal
and industrial use.
Kolbe meat processing machinery are not suitable for use in
potentially explosive environments.
For hygienic reasons, the machine should be installed in
a cooled or air conditioned room. Besides the floor space
required for the machine, additional space must be provided
for user needs equating to at least 1 m x 1.5 m dependent
on operator orientation (front or side).
The machine must be operated only in a room with a
minimum illumination of 500 Lux.
All components for assembly or disassembly weigh less than
20 kg so that height-compensating transport equipment is
not necessary.
5.2 Connection of the machine
Compare motor voltage (see rating plate) with the supply
voltage. Connection must be made by an authorised

7
electrician. (Observe local regulations!)
According to EN 60204, the machine is either to be
connected to a plug connection or a mains switch is to be
installed in the fixed supply line.
5.3 The electrical circuit diagrams for the respective
machine configurations are listed as follows:
5,5 kW + 1,1 kW - drive motors
Nr. 4SB532/55-4775N 400/24 VAC (3Ph/N/PE)
Nr. 4SB532/55-4775N-230V 230/24 VAC (3Ph/N/PE)
Nr. 4SB532/55-4777FUI-N 400/24 VAC (3Ph/N/PE)
Nr. 4SB532/55-4777FUI-N-RA 400/24 VAC (3Ph/N/PE)
Nr. 4SB532/55-4778N-FUI 400/24 VAC (3Ph/N/PE)
Nr. 4SB532/55-4771N-FUI 230/24 VAC (3Ph/N/PE)
7,5 kW + 1,1 kW - drive motors
Nr. 4SB532/55-4774N 400/24 VAC (3Ph/N/PE)
Nr. 4SB532/55-4774N-RA 400/24 VAC (3Ph/N/PE)
Nr. 4SB532/55-4777FUI-N 400/24 VAC (3Ph/N/PE)
Nr. 4SB532/55-4777FUI-N-RA 400/24 VAC (3Ph/N/PE)
10 kW + 1,1 kW or 1,5 kW - drive motors
Nr. 4SB532/55-4776N 400/24 VAC (3Ph/N/PE)
Nr. 4SB532/55-4776N-RA 400/24 VAC (3Ph/N/PE)
Nr. 4SB532/55-4779FUI-N 400/24 VAC (3Ph/N/PE)
Nr. 4SB532/55-4779FUI-N-RA 400/24 VAC (3Ph/N/PE)
Connection cable 5 x 6.0 mm²
(3 phase + protective earthing conductor, yellow/green +
neutral conductor, blue)
When installing the electrical connection, check
the direction of mincer feed screw rotation.
When facing the mincer, the mincer feed screw
should rotate in a counter-clockwise direction.
6. Commissioning
Prior to commissioning the machine, thoroughly
read the Operating Manual. Please also refer to
the pictures on pages 14 to 25.
6.1 General
KOLBE mixer mincers with Enterprise or Unger cutting
systems are designed for the production of minced meat
products and sausages. The solid and functional machine
construction also allows for the processing of coarsely
ground output product, although the hopper thereby should
be filled only to a maximum of two-thirds its holding capacity.
The separately switchable mixer unit serves the raw product
blending of dierent meat types, as well as the mixing of
herbs and spices prior to mincing. The mixing blade, the
mincer feed screw and the mincer housing are designed in
such a manner that the meat is fed quickly and gently to the
cutting set, where it minced to the desired granulation.
The standard mobile models are particularly suited to
applications in cold storage rooms.
KOLBE mixer mincers fulfil the highest requirements for
hygiene, cleanliness, operating safety and practice-oriented
detailed solutions, while also meeting demands for user-
friendliness.
6.2 Authorised intended use
KOLBE mixer mincers are to be deployed only in food pro-
cessing facilities for the production of fresh or slightly frozen
minced meat products. Any other application, incorrect han-
dling, overloading or deficient servicing and maintenance is
considered to be improper usage and represents a hazard to
persons and property.
Included in the KOLBE bandsaw standard scope of deliv-
ery is a universally combinable bandsaw blade with 6.0
mm toothing with hardened tooth tips, which is suitable for
use with meat, fish or bone products in a fresh or frozen
state. On request, fish saw blades can also be supplied with
8.0mm toothing with hardened toot tips for fresh or frozen
fish, as well as wavy edge bandknife blades with a concave
tooth profile for fresh meat without bones.
(see KOLBE price list)
The KOLBE machine (grinders, bandsaws, portioning
solutions, etc) operator must be trained in the butcher‘s
craft (butcher, butcher salesperson etc.), fish processing,
food processing industry or a training of comparable
quality which teaches the proper and safe operation of
the machinery. Work on the KOLBE machines is in some
cases hazardous and can therefore be linked to the risk of
accidents.
To protect young trainees aged between 15 and 18 and
enable them to achieve their training objective, work on
these machines is only allowed under the supervision of a
qualified trainer, ensuring that operating instructions and
warnings about all machine hazards have been given.
Trainees of over 18 years of age may only work on these
machines after having received specialized instructions and
warnings about all hazards (see operating instructions).
Trainees under 15 years are not allowed to work on such
machines.
Basically, people are not permitted to work on such a machine
if it exceeds their physical or psychological capacity!
6.3 Product feed for mincing
The pre-partitioned product must be filled into the meat
mincer hopper, whereby it must be ensured that the hopper
is filled only to a maximum of two-thirds its holding capacity.
Subsequently close the protective cover (5) and switch the
mixing process ON according to (6.4). During mincing, the
mixing blade (62) supplies the mincer feed screw (21,27,36
or 41), which conveys the meat quickly and gently to the
cutting set.
With the Unger cutting system, the meat is cut to the desired
granulation after a one-time cutting passage. With the
Enterprise cutting system, a homogeneous and appetizing
minced meat texture is realised after two cutting passages.
6.4 Switching the machine ON
The machine ON and OFF buttons are located on the left-
front, upper side of the machine stand, while the mains
switch (4) for start-up is located on the rear side of the
!
!

8
6.8 Protective cover
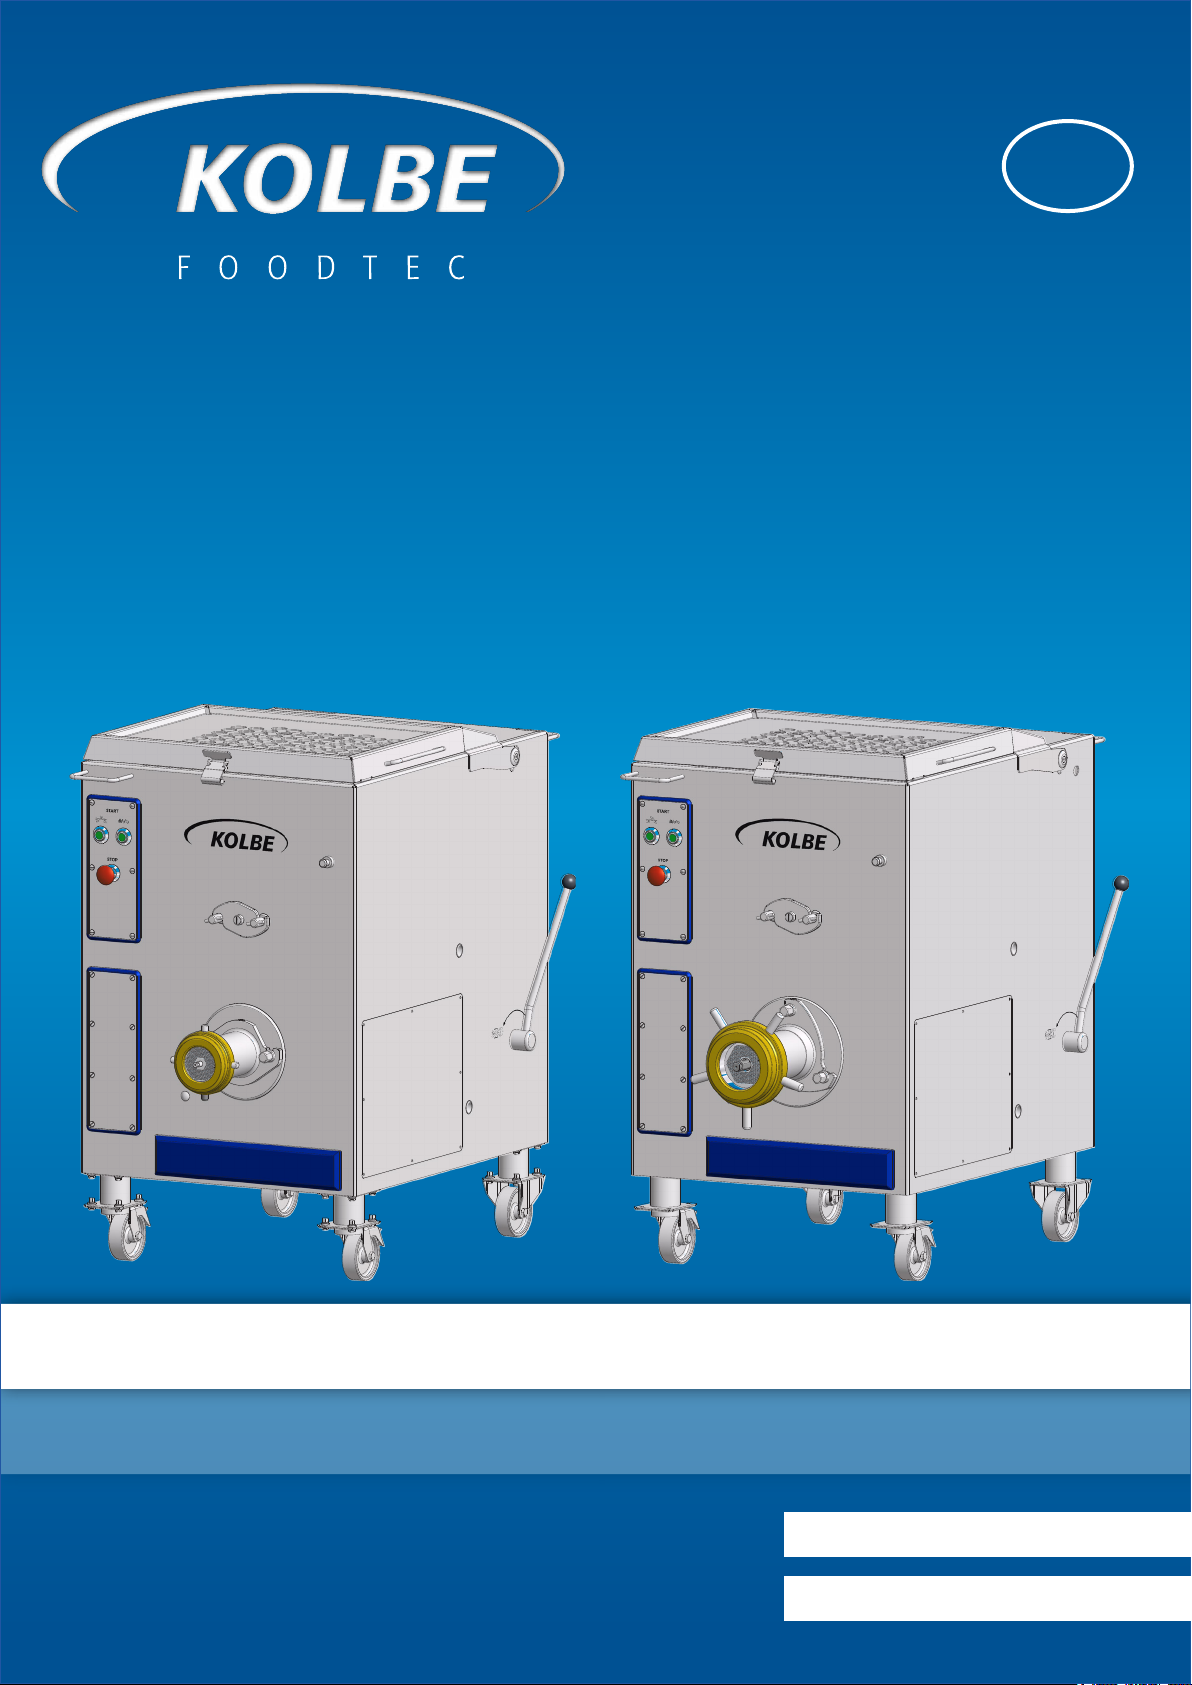
The machine’s upper hopper protective cover (5) is coupled
with a magnetic sensor in accordance with CE safety
regulations so that the meat mincer can be switched ON
only when the cover (5) is closed and, accordingly, will
switch OFF automatically as soon as the cover (5) is opened.
6.9 Disassembly of the working screw
-Switch the machine OFF, wait for standstill and disconnect
the primary electrical power (mains switch)
-Loosen and remove the locking nut (6) using the
combination hook wrench (58, 59, 80 or 81)
-Use the ejector lever (90), if so equipped, to release the
mincer feed screw and cutting set.
-Remove the insert ring for cutting systems D114 / E130
-Loosen the working screw (21, 27, 36 or 41) using the
combination hook wrench (58, 59, 80 or 81)
-Remove the cutting set and working screw
Open the locking nut (6) only with the
combination hook wrench (58, 59, 80 or 81)
supplied. Do not use a hammer or other heavy
object! When working in the vicinity of the cross
knife, cut-resistant gloves should be worn.
6.10 Disassembly of the mincer housing
- Switch the machine OFF, wait for standstill and disconnect
the primary electrical power (mains switch)
- Remove the working screw (21, 27, 36 or 41) as described
in (6.9)
-Loosen all three front attachment bolts (25) using the
combination hook spanner (58, 59, 80 or 81)
- Remove the mincer housing (20, 26, 35 or 40) while rotating
it slightly to the right
- Assembly takes place in the reverse sequence, whereby
the marking “Up/Top” on the mincer housing must be
observed!
During assembly, proper seating of the mincer
housing must be ensured, the marking “Up/Top”
on the mincer housing must be observed and the
mincer housing attachment bolts (25) must be tightened
securely!
6.11 Disassembly of the mixing blade
-Switch the machine OFF, wait for standstill and disconnect
the primary electrical power (mains switch)
-Open the protective cover (5)
-After loosening both front tommy nuts (60), remove the
mixing blade bracket (61) towards the front while rotating
it slightly to the right and while simultaneously holding the
mixing blade (62) firmly with the other hand.
-Pull the mixing blade (62) out of the rear attachment and
remove it by tilting it slightly upwards.
-Installation takes place in the reverse sequence
Ensure the proper assembly and secure
attachment of the mixing blade bracket (61) at
all times!
machine. To initiate mixing, the green ON button (1) must
be actuated, whereby the mixing blade (62) begins blending
the raw product while turning in a clockwise direction.
For subsequent mincing, first actuate the red OFF button (3),
then the green ON button (2). During mincing, the mixing
blade (62) turns in the opposite direction and the mincer feed
screw (21,27,36 or 41) conveys the product being minced.
Mixing = depress green push-button (1)
OFF = depress red mushroom-head button (3)
Mincing = depress green push-button (2)
Operate the meat mincer at all times only in its
filled condition, as otherwise the cutting set
could be damaged due to running dry. Check the
direction of mincer feed screw rotation!
6.5 Mixing interval circuit (optional)
Depending on the controller model, the mixing blade (62)
can be set optionally to rotate to the right and to the left
as it blends the raw product at cyclical intervals during
the mixing process. At the same time, the working screw
(21,27,36 or 41) momentarily rotates in a reverse direction at
cyclical intervals. Start the mincing process with the green
ON button (2) and stop it with the red mushroom-head
button (3).
Mixing = depress green push-button (1)
OFF = depress red mushroom-head button (3)
Mincing = depress green push-button (2)
6.6 Drive speed control (optional)
Depending on the model of the controller, it is possible to
infinitely variably control the speed of both drives (mincer
feed screw and mixing blade) by means of a rotary
potentiometer (11+12 or 15+16) via a frequency converter
controller.
For this, the frequency converter controller is actuated
to the operationally ready status via the ON button (13 or
17) while the mixing and mincing processes are started as
described in point 6.4. Drive speeds are infinitely variably
controlled, independent of each other, via the individual
rotary potentiometers (11+12 or 15+16). The mere Stop-
function is actuated via the red mushroom-head STOP
button (3), while the frequency converter controller, meaning
the system, is switched o via the OFF button (14 or 18).
(FC = frequency converter)
Mincer feed screw = rotary potentiometer (12 or 16)
Mixing blade = rotary potentiometer (11 or 15)
System on (ON) = green illuminated button (13 or 17)
System o (OFF) = red push-button (14 or 18)
6.7 Mixing time control (optional)
The length of the mixing time can be infinitely variably set
via the optional potentiometer (19) from approx. 2 to 30
minutes, meaning that, after expiration of the set time, the
mixing process will switch o automatically.
Possible options are dependent on the machine model and
type of controller.
!
!
!
!

9
6.12 Insertion of the coded cutting set variants
Only outlet-sided perforated discs with a max.
bore hole diameter of 8.0 mm are to be used with
the coded cutting system. For safety reasons,
regrinding of the discs is permissible only to a disc
thickness of 8 mm!
Fault-free operation of the meat mincer is warranted only
when the cutting tools are properly inserted.
(See the pictures on pages 19+20)
Enterprise cutting system, size E 32 / E 52 - coded
-Perforated disc with 4 slots and hub (23) / (38)
-Cross knife (24) / (39)
The locking nut (6) must be tightened firmly using the
combination hook wrench (58) / (80) so the cross knife (24) /
(39) lies securely on the perforated disc (23) / (38). Only then
can a clean-cut of the minced meat be warranted.
Unger cutting system, size D 114 / E 130 - coded
-Pre-cutter (29) / (43)
-Cross knife (32) / (46)
-Perforated disc, coarse incl. 1 slot (30) / (44)
-Cross knife (32) / (46)
-Perforated disc, fine incl. 2 slots (31) / (45)
-Insert ring incl. stub (33 or 34) / (47 or 48)
Tighten the locking nut (6) by hand only so the cross knife
(32) / (46) will lie on the perforated discs (29, 30, 31) / (43,
44, 45) and cut without causing excessive abrasion.
The combination hook wrench (59) / (81) must be used
only for opening the Unger locking nut.
6.13 Insertion of the uncoded cutting set variants
Use of the uncoded cutting system is permitted
only in conjunction with the use of a housing
outlet protective cover (10), meaning that outlet-
sided perforated discs with a max. bore hole diameter
of greater than 8.0 mm may also be used. For safety
reasons, regrinding of the discs is permissible only to a
disc thickness of 8 mm!
Fault-free operation of the meat mincer is warranted only
when the cutting tools are properly inserted.
(See the pictures on pages 17+18)
Enterprise cutting system, size E 32 / E 52
-Perforated disc with 3 slots and hub (23) / (38)
-Cross knife (24) / (39)
The locking nut (6) must be tightened firmly using the
combination hook wrench (58) / (80) so the cross knife (24) /
(39) lies securely on the perforated disc (23) / (38). Only then
can a clean-cut of the minced meat be warranted.
Unger cutting system, size D 114 / E 130
-Pre-cutter (29) / (43)
-Cross knife (32) / (46)
-Perforated disc, coarse (30) / (44)
-Cross knife (32) / (46)
-Perforated disc, fine (31) / (45)
-Insert ring (33 or 34) / (47 or 48)
Tighten the locking nut (6) by hand only so the cross knife
(32) / (46) will lie on the perforated discs (29, 30, 31) / (43,
44, 45) and cut without causing excessive abrasion.
The combination hook wrench (59) / (81) must be used
only for opening the Unger locking nut.
Please note that the perforated discs and cross
knives are parts subject to wear. They will
require regrinding at time intervals determined
by and adapted to the operating conditions. Only sharp
tools provide a good cut while conserving the knife
studs (22,28,37 or 42), as well as the overall machine.
6.14 Housing outlet protective cover (optional)
To comply with applicable safety regulations, the use of a
housing outlet protective cover (10) is absolutely essential
when using outlet-sided perforated discs with bore hole
diameters greater than 8.0 mm. It covers the outlet-sided
perforated disc and thereby prevents direct access to the
perforated disc by fingers or hands. A magnetic sensing
safety device on housing outlet protective cover (10)
switches the meat mincer automatically OFF as soon as it is
opened and prevents it from being switched ON unless the
protective outlet cover is closed.
When opened, the housing outlet protective cover can be
removed for cleaning purposes towards the front.
As safety regulations evolve, it is possible that the use
of housing outlet protective covers overall will become
compulsory at some point.
6.15 Motor protection
The machine contactor control is outfitted with overcurrent
relays. In the event of an overload resulting in an inadmissible
increase in current consumption in the motor windings, the
machine will automatically shutdown.
This is the case, for example, with phase failure, insucient
cooling or machine blockage.
If the automatic overcurrent relays have triggered, they will
reactivate automatically after a cooling-down period.
The machine can then be switched back ON.
If the cause of the overload has not been rectified, however,
the overcurrent relays will trigger once again after a short
period of time.
In the event of frequency converter control of the machine,
an overload can result in a malfunction shutdown. In this
case, the machine must be reset by switching the supply
voltage OFF for 5 minutes via the mains switch.
6.16 Mobile and stationary machine models
When outfitting a stationary machine with four adjustable
feet, it must be ensured that a suitable lifting device (e.g.
lift truck, forklift, crane, etc.) and transport security are
available.
The mains plug on the mobile version, which includes two
!
!
!

10
reasons, the meat mincer should be cleaned on a daily basis
according to a Cleaning plan (see page 12).
Shorter cleaning intervals may need to be adapted to the
type of application and hygiene regulations. Only those
cleaning agents approved for use with food processing may
be used.
7.2 Access openings for cleaning
Meat juices resulting from the mincing process can flow out
via two laterally positioned openings (7) for protection of the
main gearing or the mixing blade gearing in the event of
subsiding shaft sealing. These openings should be cleaned
out with a water hose during daily cleaning activities.
7.3 Cleaning instructions
-Switch the machine OFF, wait for standstill and disconnect
the primary electrical power
-Remove and clean the locking nut (6)
-Remove the cutting set and mincer feed screw (21,27,36
or 41) for cleaning
-Remove and clean the mincer housing (20,26,35 or 40)
-Remove and clean the mixing blade bracket (61) and
mixer blade (62)
-Thoroughly clean the protective cover (5) and hopper
-Rinse the cleaning access openings (7) with a water hose
-Clean and subsequently lightly lubricate the insertion
zones on the mincer housing (20,26,35 or 40) and machine
stand
-Observe the detailed cleaning instructions on page 13.
All KOLBE machines are suited to cleaning with hose
and jet water spraying. However, it must be ensured that
any electrical components and shaft sealing rings on the
rear of the mincer housing, as well as the working screw
attachment openings on the mincer stand, are exposed
only momentarily to the hose water spray.
steering castors (9) with locking devices and two fixed castors
(8), must always be removed prior to moving the machine.
The supply cable, incl. CEE plug, must be protected from
damage during movement. Once moved, always set the
locking devices on the steering or fixed castors by pressing
them downwards.
6.17 Hopper cooling (optional)
As an option, the KOLBE mixer mincer can be supplied with
hopper cooling, incl. protective cover with shock-resistant
viewing glass.
The temperature in the filling hopper is regulated between
2 - 4 ˚C by means of a thermostat.
6.18 Hopper attachment incl. access protection
(optional)
As an option, the KOLBE mixer mincer can be supplied with
a hopper attachment incl. frame shuto (67) in combination
with a KOLBE batching unit (69) with a 200 litre batching
trolley (70). During installation, according to safety
regulations, it must be ensured that the clearance between
the protective outlet cover (10) and the upper edge of the
batching trolley (70) is not greater than 50mm.
As an additional option for the hopper attachment
version, and with consideration given to applicable safety
dimensions, a retractable steel grating step (68) mounted in
the machine’s base frame can also be supplied. This steel
grating step enables better access to the filling hopper for
cleaning when the hopper attachment (67) is folded back.
6.19 Remote operation (optional)
If desired, a remote operation foot switch pedal (76) with
Stop-function can be supplied. This makes possible the
stopping of combined units, for example the mixer mincer
with a portioning unit (74), directly from downstream
packaging equipment (77).
6.20 Separating device (optional)
It is possible to significantly improve the quality of the meat
product by removing tendons and sinews and separating
out cartilage tissue by means of a distinct separating device
in the cutting set. Application of the Turbocut separating
device is pictured on page 20.
7. Cleaning the machine
Prior to performing any cleaning tasks, discon-
nect the primary electrical power (remove the
mains plug; position the mains switch to OFF).
First wait for the mincer feed screw and mixing blade to
come to a standstill before carrying out any work on the
machine. Wear protective goggles. When performing
cleaning tasks in the vicinity of the cross knife, cut-
resistant gloves should be worn.
7.1 Cleaning according to a Cleaning plan
The machine’s non-rusting design simplifies service and
maintenance of the meat mincer. For functional and hygienic
!

11
8. Warranty claims and liability for
defects
8.1 We provide a 24 month warranty on our products
according to German law. Prerequisites for this are
single-shift operations and completion of a machine
service check after 12 months, as calculated from the
date of delivery from the factory, performed by KOLBE
or an authorized service technician.
8.2 The warranty provides for the repair or replacement
through our facilities or specifically authorised repair
workshops, of all products shown to be defective during
the period of the warranty due to verifiable material or
manufacturing defects.
8.3 Excluded from any liability for defects are all parts subject
to natural wear and tear, as well as the consequences
resulting from excessive loading, improper cleaning,
faulty handling and non-compliance with the Operating
Manual.
8.4 We assume absolutely no responsibility for arbitrary
tampering of the object of any kind by the customer or
a third party without our specific order to do so.
8.5 Products manufactured by us are subject to the
provisions of the EC Machinery Directive.
Cleaning instructions
For KOLBE mixer mincer machines
Machine zones requiring special and careful cleaning:
Cleaning zones Cleaning agent Procedure Device Instructions
Removable parts:
• Mincer feed screw, cutting set,
removable mincer housing, feed
screw, mixing blade, locking nut,
loosening device, etc.
• Mincer housing attachment bolts
according to the
Cleaning plan
manually,
mechanically
Scrub brush,
Brush
Disassemble parts and clean
in a tub or dishwasher, thor-
oughly clean out threads with
a scrub brush or brush.
Mincer stand and mincer hopper:
• Housing outlet protective cover
(if available)
• Mincer housing attachment and
transfer housing
• Outer and inner areas of the
mincer bowl or filling hopper
• Mincer base frame and retractable
trays (if available)
• Rear, side inspection access covers
according to the
Cleaning plan
manually,
mechanically
Scrub brush,
Brush
Thoroughly clean outer and in-
ner areas with a scrub brush
or brush. Thoroughly clean the
base frame with a scrub brush
or brush. Thoroughly clean
outer contours and inspection
covers with a scrub brush or
brush.

12
Work steps Cleaning agent Procedure Device Instructions
Coarse cleaning, remove
product residue,
as needed after disassem-
bly of small parts
manually,
mechanically
Putty knife,
Scraper
Begin directly after com-
pletion of production
Thorough alkaline clean-
ing or, as needed, acidic
cleaning instead of alkaline
cleaning
2-5 %, e.g.:
Henkel Hygiene Co.
• P3-topax 19
• P3-topax 66
Goldschmidt Co.
• Somplex grease
solvent
For aluminium parts,
e.g.:
Henkel Hygiene Co.
• 2-5 % P3-topax 12
Goldschmidt Co.
• Somplex F
foaming or manual
Exposure time
approx. 15 minutes
Low pressure
foaming unit
Scrub brush, tub,
Hand-held sprayer
Rinse Water Low pressure less than
30 bar
Temperature 50-60°C
Low pressure unit
Water hose
Check visual cleanliness
Thorough acidic cleaning e.g.:
Henkel Hygiene Co.
• 3-6 % P3-topax 56
Goldschmidt Co.
Somplex acidic foam
manual, foaming
Exposure time
approx. 15 minutes
Low pressure
foaming unit
Hand-held sprayer
Scrub brush for
removing scale
deposits
as needed instead of
alkaline cleaning.
Heed specific instruc-
tions from the manufac-
turer:
Check critical locations
and problem areas
Rinse Water Low pressure less than
30 bar
Temperature 50-60 °C
Low pressure unit,
Water hose
Check visual cleanliness Heed specific instruc-
tions from the manufac-
turer:
Check critical locations
and problem areas
Disinfect according to the
product datasheet
0.5-2 %, e.g.:
Henkel Hygiene Co.
• P3-topax 99
• P3-topax 91
Goldschmidt Co.
• TEGO 2000
• TEGO IMC
spray, foaming
Exposure time ac-
cording to the product
datasheet
Low pressure
foaming unit,
Spray gun
After completion of all
cleaning measures to be
performed in the room
Wash-up Drinking water Low pressure less than
30 bar
Low pressure unit
Water hose
Dry
Service P3 care oil spray Spray gun Outer machine surface
This cleaning plan is valid only for machines comprised primarily of non-rusting materials. The use of other active substances requires
coordination with the respective cleaning agent manufacturer. The information in the cleaning plan is based on single-shift operations.
For multi-shift operations, cleaning intervals must be adapted accordingly.
Cleaning plan
For KOLBE butcher shop machines
Attention: Read and comply with the Operating Manual!

13
10. Maintenance and inspection
Prior to performing any maintenance or
inspection tasks, disconnect the primary
electrical power. Remove the mains plug;
position the mains switch to OFF.
First wait for the mincer feed screw and mixing blade to
come to a standstill before carrying out any work on the
machine. Wear protective goggles. When performing
work in the vicinity of the cross knife, cut-resistant
gloves should be worn.
-Ensure compliance with the safety instructions when
performing maintenance or inspection tasks.
-Along with many other factors, the operational safety and
service life of the machine are dependent upon proper
execution of the maintenance function.
-Operating malfunctions resulting from insucient or
improper maintenance can lead to high repair costs and
lengthy periods of machine downtime. For this reason,
regular maintenance is indispensable.
-The following table contains time, inspection and
maintenance related information and instructions for
normal machine deployments.
-Due to the widely varying operating conditions, however,
a definite schedule for wearing part checks, servicing
or maintenance cannot be established in advance. A
practical inspection schedule should be established based
on the specific on-site operating conditions.
-Our specialists are available and would be pleased to oer
assistance in this area.
!
9. Machine type plate (example)
Motor drive capacities are dependent on machine
configuration.
U = Control transformer short-circuit voltage.
Weight information is dependent on machine configuration,
from - to.
Cutting system according to type of machine
F O O D T E C
Paul KOLBE GmbH • Gewerbestraße 5 • D-89275 Elchingen
Tel. +49(0) 73 08 - 96 10-0 • Fax +49(0) 73 08 - 96 10-98
Made in Germany • www.kolbe-foodtec.com
Typ
Type
Maschinenart
Indentification
Baujahr
Production year
Serien-Nr.
Serial no.
Leistung
Power
Netzspannung
Supply voltage
Frequenz
Frequency
Steuerspannung
Control voltage
Gewicht
Weight
Elektroschaltplan
Wiring diagram
Sägeband
Saw band
Schneidsystem
Cutting system
kW
V
Hz
V
kg
Made in Germany • www.kolbe-foodtec.com
Paul KOLBE GmbH • Gewerbestraße 5 • D-89275 Elchingen
Tel. +49(0) 73 08 - 96 10-0 • Fax +49(0) 73 08 - 96 10-98
Typ
Type
Baujahr
Production year
Serien-Nr.
Serial no.
Elektroschaltplan
Wiring diagram
F O O D T E C
Nennstrom
Rated current A
MW52-120
20XX
XX XXXX
7,5 + 1,1
3 x 400 VAC / N / PE
50
230 / 24 VAC / U
530 - 540
XX.XX.XX
Enterprise E52
- - - - - - - -
15,2 + 2,6
3
2
1
4
3
2
1
4
10.1 Maintenance and inspection list
Inspection interval Inspection points / Service notes
daily • Check cutter sharpness and cutting set wear
• Check safety equipment for function, e.g. check the housing outlet protective cover, remov-
able hand guard, hopper protective cover or attachment, incl. frame protection or light barrier
protection, for shutdown function.
• Clean thoroughly according to Cleaning plan
monthly • Check mincer feed screw knife studs for wear, renew or replace as needed
annually • Check mincer feed screw and mincer housing for wear, renew or replace as needed
• Check gearbox mounting (in the event of bearing damage, replace ball bearing)
• Check motor mounting (in the event of bearing damage, replace ball bearing)
• Check v-belts, renew or replace as needed
every 5 to 6 years • Change gearbox oil

14
11. Measures in the event of operating malfunction
Fault Cause Remedy
Meat mincer cannot be
switched ON
• Mains plug not plugged in
• Mains supply interrupted
• Primary circuit protection has trig-
gered
• Thermal contacts in the motor or
overcurrent relay in the controller have
triggered
• "ON" push-button defective
• Electronic controller defective
• Frequency converter malfunction
shutdown
• Plug in the mains plug
• Commission an electrician
• Renew or replace circuit protection device (com-
mission an electrician)
• Allow motor to cool down, then repeat switch-
ON procedure
• Commission an electrician
• Commission an electrician or customer service
• Switch supply voltage OFF for approx. 5 minutes
via the mains switch, then repeat switch-ON
procedure
Thermal contacts in the
motor or overcurrent relay
in the controller have
triggered, meaning the meat
mincer has switched OFF
• Meat mincer has overloaded
• Meat mincer is blocked
• 2-phase operation (motor humming)
• Allow motor to cool down, then repeat switch-
ON procedure
• Remove blockage from meat mincer, allow mo-
tor to cool down
• Commission an electrician
Mincer feed screw is
blocked and drive motor is
humming
• Mincer feed screw is jammed or
blocked (e.g. cross knife or perforated
disc is broken)
• Shutdown meat mincer immediately and remove
blockage from mincer feed screw
Reduction of cutting quality • Cutting set is dull
• Mincer feed screw has too much play
in the mincer housing (wear)
• Mincer feed screw and mincer hous-
ing have too much play (wear)
• Regrind or replace perforated discs and cross
knife, renew or replace cutting blades as needed
• Renew or replace mincer feed screw
• Renew or replace mincer feed screw and mincer
housing
High degree of wear on
cutting set
• Knife studs worn down (wear)
• Mincer feed screw and mincer hous-
ing have too much play
• Renew or replace knife studs
• Renew or replace mincer feed screw and mincer
housing
Meat mincer emits loud
noises
• Ball bearing or motor bearing defec-
tive
• Mincer housing not secure, meaning it
has come loose
• Motor damage
• Customer service required
• Slide in the mincer housing to the stops and
tighten securely
• Customer service required

15
Mixer mincer machines
MW32-120 / MW52-120
The KOLBE MW32-120 / MW52-120 mixer mincer machine
with Enterprise E32 / E52 cutting system is designed
for the production of large quantities of minced meat for
supermarkets and stores.
The standard mobile models are particularly suited to
applications in cold storage rooms.
The non-rusting design of the machine stand, mincer
hopper, mincer housing, mincer feed screw and locking nut
meets the highest hygiene requirements.
The powerful 5.5 kW / 7,5 kW drive performance and
motor protection features, along with the limit switch
secured protective cover (5), guarantee a high degree of
operational safety.
1 = ON - button for mixing
2 = ON - button for mincing
3 = OFF - mushroom-head STOP button
5 = Protective cover
6 = Locking nut
7 = Access openings for cleaning
8 = Fixed castors
9 = Steerable castors with Allstopp locking devices
5
1
2
3
6
98
7
Mixer mincer machines
MW114-120 / MW130-120
The KOLBE MW114-120 / MW130-120 mixer mincer
machine with Unger D114 / E130 cutting system is designed
for the production of large quantities of meat and sausage
products for trade shop operations.
The standard mobile models are particularly suited to
applications in cold storage rooms.
The non-rusting design of the machine stand, mincer
hopper, mincer housing, mincer feed screw and locking nut
meets the highest hygiene requirements.
The powerful 5.5 or 10.0 kW drive performance and motor
protection features, along with the limit switch secured
protective cover (5), guarantee a high degree of operational
safety.
1 = ON - button for mixing
2 = ON - button for mincing
3 = OFF - mushroom-head STOP button
5 = Protective cover
6 = Locking nut
7 = Access openings for cleaning
8 = Fixed castors
9 = Steerable castors with Allstopp locking devices
5
1
2
3
6
98
7

16
Housing outlet protective cover (optional)
To comply with applicable safety regulations, the use of a
housing outlet protective cover (10) is absolutely essential
when using outlet-sided perforated discs with bore hole
diameters greater than 8 mm.
10 = Housing outlet protective cover
10
Mixer mincer machines mains switch
The mains switch (4) for machine start-up is located on the
rear side of the machine.
4 = Mains switch
4
Operator control panel
Mixing is started by means of ON button (1) while mincing
is started with ON button (2). The Stop function is by means
of the mushroom-head STOP button (3).
1 = ON - button for mixing
2 = ON - button for mincing
3 = OFF - mushroom-head STOP button
1
2
3

17
Operator control panel incl. potentiometer with
KOLBE rotary drive (optional)
Optional drive speed control by means of potentiometers
(15+16), for which the machine must be set to operationally
ready status via the ON illuminated push-button (17).
The system, and consequently the frequency converter
control, is shutdown via the OFF push-button (18).
1 = ON - button for mixing
2 = ON - button for mincing
3 = OFF - mushroom-head STOP button
15 = Potentiometer for mixing blade rotation speed
16 = Potentiometer for mincer feed screw rotation speed
17 = ON - illuminated push-button for system On (ON)
18 = OFF - push-button for system O (OFF)
19 = Potentiometer for mixing time control (optional)
1
15
17
2
16
18
3
19
Potentiometer with KOLBE rotary drive for mixing
time control (optional)
The length of the mixing time can be infinitely variably set
via the optional potentiometer (19) from approx. 2 to 30
minutes, meaning that, after expiration of the set time, the
mixing process will switch o automatically.
Possible options are dependent on the machine model and
type of controller.
19 = Potentiometer for mixing time control (optional)
19
Outlet socket variants (optional)
As an option and depending on the machine configuration
or machine combinations, the front side of the mixer mincer
is outfitted with various outlet socket types.
64 = CEE socket (red) 16A/400V/7Ph - for PM 150
or
64 = CEE socket (blue) 16A/230V/5Ph - for foot switch
65 = CEE socket (red) 16A/400V/5Ph - for MO 1500-K
66 = CEE socket (blue) 16A/230V/3Ph - for PF 110
64
65
66

18
Z
mit Zapfen und Nut
with stub and slot
Enterprise cutting system E 32 / E 52 - coded
Only outlet-sided perforated discs with a max. bore hole
diameter of 8.0 mm are to be used with the coded cutting
system with 2 housing pins.
Enterprise cutting system E 32 / E 52
Use of the uncoded cutting system with 3 housing pins
is permitted only in conjunction with the use of a housing
outlet protective cover (10), meaning that outlet-sided
perforated discs with a max. bore hole diameter of greater
than 8.0 mm may also be used.
Unger cutting system D 114 / E 130
Use of the uncoded cutting system with smooth insert rings
is permitted only in conjunction with the use of a housing
outlet protective cover (10), meaning that outlet-sided
perforated discs with a max. bore hole diameter of greater
than 8.0 mm may also be used.
Unger cutting system D 114 / E 130 - coded
Only outlet-sided perforated discs with a max. bore hole
diameter of 8.0 mm are to be used with the coded cutting
system with insert ring incl. stub and slot.

19
Enterprise cutting system MW52-120
The Enterprise E52 cutting system, comprised of a cross
knife (39) and a perforated disc (38), guarantees the best
and most gentle processing of all minced meat products.
The homogeneous and appetizingly light minced meat
texture is realised after two cutting passages.
35 = Mincer housing MW52-120
36 = Mincer feed screw MW52-120
37 = Knife studs E52
38 = Perforated disc E52 - ø 3 mm
39 = Cross knife E52
37
38
36
35
39
Unger cutting system MW114-120
The Unger D114 cutting system, comprised of two cross
knives (32), a pre-cutter (29), a coarse perforated disc (30),
a fine perforated disc (31) and an insert ring (33 or 34),
guarantees the best and most gentle processing of all meat
products. The meat is cut to the desired granulation after a
one-time cutting passage.
26 = Mincer housing MW114-120
27 = Mincer feed screw MW114-120
28 = Knife studsD114
29 = Pre-cutter D114
30 = Perforated disc D114 – ø 13 mm
31 = Perforated disc D114 – ø 3 mm
32 = Cross knives D114
33 = Insert ring, narrow D114 (not pictured)
34 = Insert ring, wide D114 (not pictured)
Enterprise cutting system MW32-120
The Enterprise E32 cutting system, comprised of a cross
knife (24) and a perforated disc (23), guarantees the best
and most gentle processing of all minced meat products.
The homogeneous and appetizingly light minced meat
texture is realised after two cutting passages.
20 = Mincer housing MW32-120
21 = Mincer feed screw MW32-120
22 = Knife studs E32
23 = Perforated disc E32 - ø 3 mm
24 = Cross knife E32
25 = Mincer housing attachment bolts
22
23
25
21
20
24
32 28
27
26
313029
25
25

20
Unger cutting system MW130-120
The Unger E130 cutting system, comprised of two cross
knives (46), a pre-cutter (43), a coarse perforated disc (44),
a fine perforated disc (45) and an insert ring (47 or 48),
guarantees the best and most gentle processing of all meat
products. The meat is cut to the desired granulation after a
one-time cutting passage.
40 = Mincer housing MW130-120
41 = Mincer feed screw MW130-120
42 = Knife studs E130
43 = Pre-cutter E130
44 = Perforated disc E130 – ø 13 mm
45 = Perforated disc E130 – ø 3 mm
46 = Cross knife E130
47 = Insert ring, narrow E130 (not pictured)
48 = Insert ring, wide E130 (not pictured)
46 42
41
40
454443
Turbocut separating device (optional)
The device, comprised of a five-part cutting set incl.
separating knife (52), separating unit (54-56) and separating
tube (57), removes cartilage tissue, tendons and sinews
from the meat. Functionally, the pieces are stripped o the
fine perforated disc by the separating knife and diverted
through a trough via the separating tube to a receptacle.
49 = Pre-cutter (standard equipment)
Pre-cutter with slide bearing (standard equipment)
50 = Pre-cutter (standard equipment)
51 = Perforated disc, coarse 13 mm (standard equipment)
52 = Separating knife (standard equipment)
53 = Perforated disc, fine 3 mm (standard equipment)
54-56 = Separating unit
57 = Separating tube with bayonet fitting
Separating device comprised of:
54 = Support cross
55 = Diversion tube
56 = Regulator bush
49
50
51
52
53
54
57 56
55
Ejector lever
Use the ejector lever (90) to release the mincer feed screw
and cutting set. Use the centre extraction bore hole in the
combination hook wrench (58, 59, 80 or 81) to pull out the
working screw with the cutting set from the mincer housing.
90 = Ejector lever
90
25
This manual suits for next models
3
Table of contents
Other Kolbe Foodtec Kitchen Appliance manuals