KOMDRUCK IDP-2103 User manual

www.komdruck.de
KOMDRUCK AG
Auf der Binn 7-9
D-64658 Fürth (Odenwald)
Fon: +49 (0)6253 - 20256-0
Fax: +49 (0)6253 - 20256-111
Mail: [email protected]e
IDP-2103 / IDP-2103-S
(Ink-Document-Printer)
Quick Guide

Version: V1.7-2022
Thank you for choosing our product.
We ask you to carry out the installation according to this operating manual.
1. Scope of delivery
Your printer comes in a box with the following contents:
KOMDRUCK IDP-2103 / 2103-S
Extension of document feeder
Power cable with rubber plug
1 Set ink cartridges
Quick Guide
Please keep the packaging. Return of the printer for service or repair purposes only
in the original box.
Please report any damage to KOMDRUCK AG. If the contents of the packaging are not complete,
please contact your dealer or KOMDRUCK AG directly.
2. Setup the printer for use
• Unpack the printer and place the printer in a suitable place, i.e. the printer must be
protected from direct sunlight, heat, cold, moisture and dust.
The footprint must be solid, horizontal and stable.
Output tray is at the back of the printer. So, please make sure that there is enough place
behind the printer for printed paper.
Remove all transport fusing adhesive strips on the front and back of the printer!

Version: V1.7-2022
3. Connect power supply
Connect external power supply to the purple power supply port at the rear side of the printer as
show in the below figure.
Once the external power supply is connected, turn on the printer by pushing the power button
on the front side of the printer, next to the display panel as show in the above figure.
Hold a sheet of white A4 paper ready.
4. Insert ink cartridges
1. Once started, printer will show “missing ink supply cartridge” error. Open the top cover to insert
new cartridges.
2. When the top cover is opened, print-head carriage module moves automatically to the “print-
head/ ink cartridge change position” as shown in the below figure.

Version: V1.7-2022
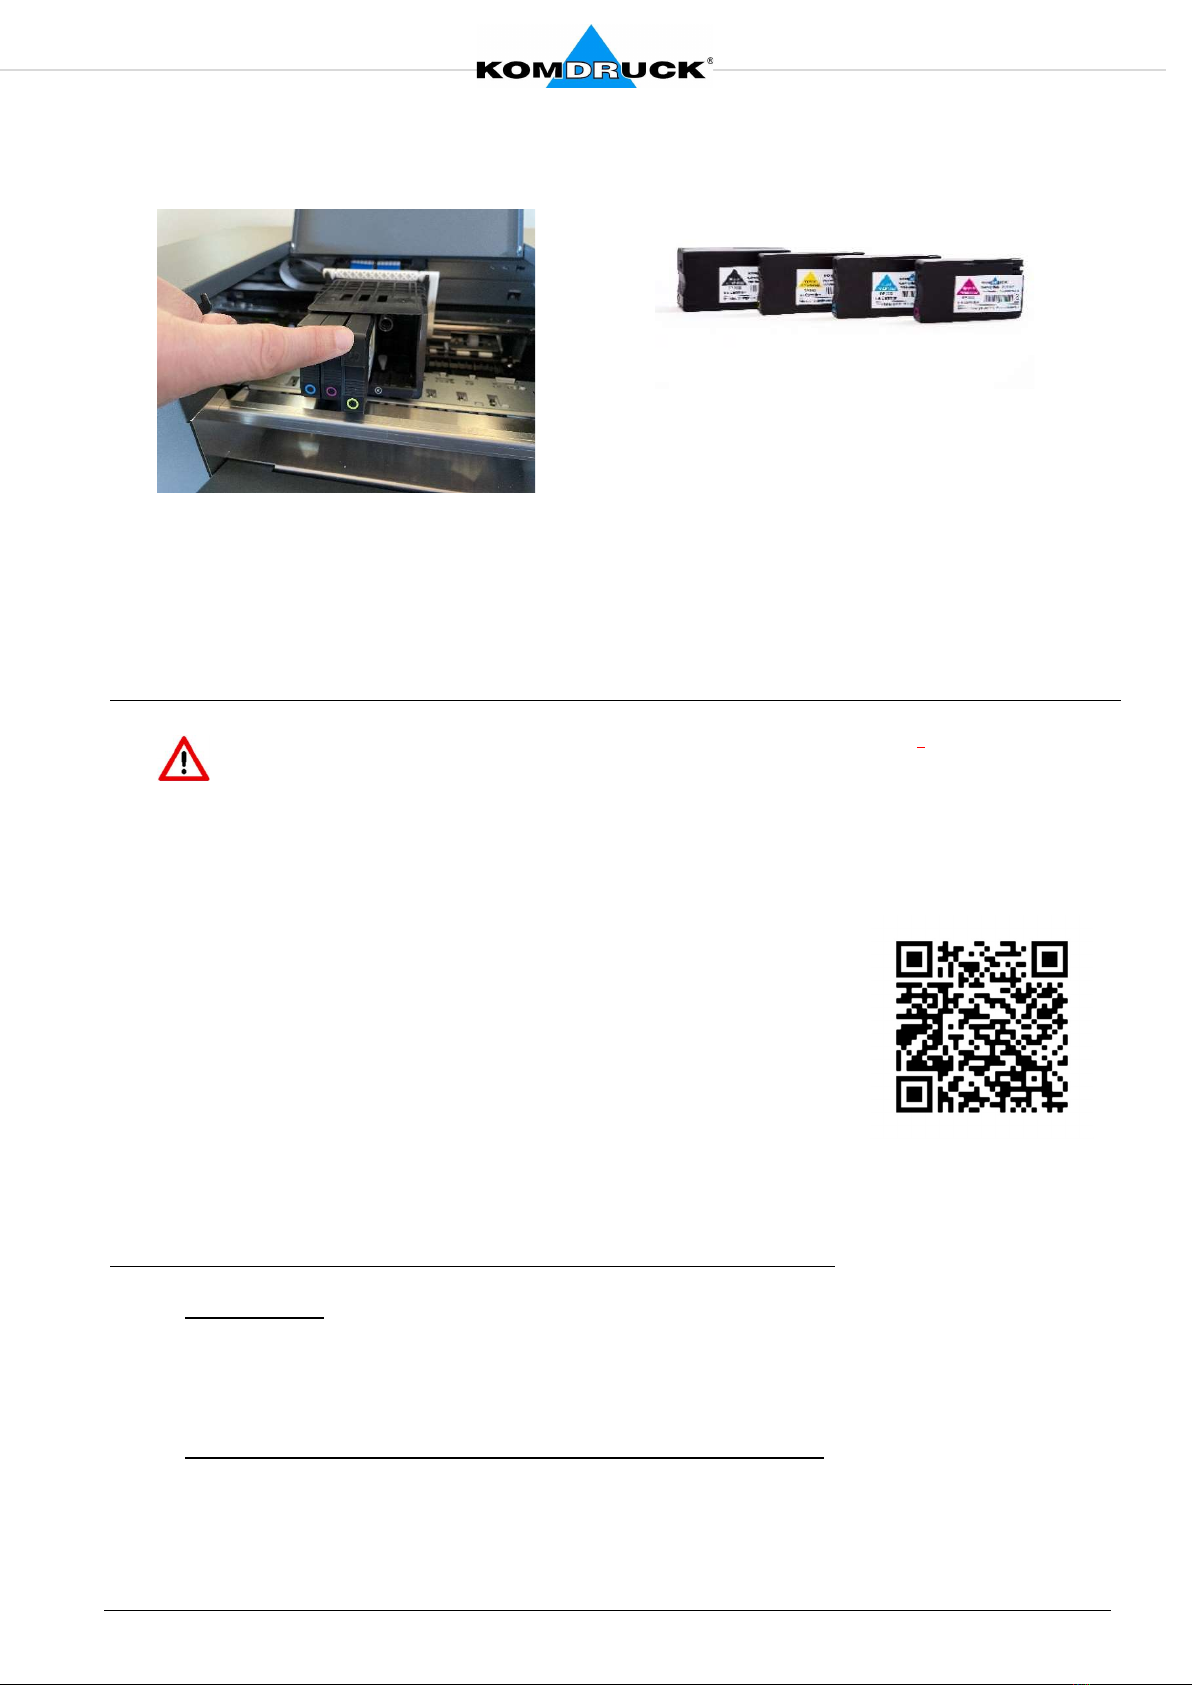
3. Then insert the ink cartridges in the same way as the slots provided for them until you can feel
them "click into place". The slots are color-coded accordingly.
4. Close the cover. Front panel display will ask to insert DIN-A4 paper for print-head alignment.
Please insert an A4 paper in the manual-feed tray and press the ok button. Alternately, alignment
can be performed by choosing this option from the display menu. Printer will automatically print
the alignment plot and do necessary corrections.
5. Driver Installation
Please install the driver first before connecting the printer to the PC.
Install the printer driver as administrator. For digital signature validation, Windows
requires internet connection.
Install both the driver and the associated toolbox (operator panel).
With the toolbox (operator panel) you control all special functions of the printer.
Please download the current KOMDRUCK IDP-2103 / IDP-
2103-S driver for standard applications or the BDR driver for
Bundesdruckerei's documents and VISA on our website
www.komdruck.de under the Service module Download
area.
Now connect the printer to the PC.
Print out the Windows test page. The printer is ready and can be
used.
6. Paper feed / paper alignment
Model 2103:
Manual single sheet-feeder with edge detection and automatic alignment of the documents.
The paper is fed in the front and ejected to the rear.
Model 2103-S with paper tray (capacity: 100 A4 sheets):
1. Manual single sheet-feeder with edge detection and automatic alignment of the
documents. The paper is fed in the front and ejected to the rear.
2. 100 sheets sheet-feeder. The paper is drawn from the sheet-feeder and ejected to the
rear.
direct
-
l
ink
download area

Version: V1.7-2022
7. Control panel
Control panel menu
From the control panel, you can change functionality and printer settings, print reports, view ink
levels, cancel print jobs and restart.
The home screen of the control panel display shows the available features for the printer.
1. Home-Button:
Press the home button to return to the home menu/screen.
2. Back-Button:
Press the back-button to return to the previous menu.
3. Minus – Button:
If paperjam, it will say "Cancel", then tap the "Minus" button to cancel the print job.
4. Arrow-up - Button:
Tap the arrow-up button to scroll up the menu.
5. Arrow-down - Button:
Tap the arrow-down button to scroll down the menu.
6. OK - Button:
Tap the “OK - Button” to confirm the menu option.

Version: V1.7-2022
7. Question mark – Button:
Display of the following printer data
Printer name
Product number
Serial number
Service number
MAC address
Firmware version
8. Status ink-level:
Shows ink-level.
8. Menu: Settings
Settings menu provides the following options:
1. Printer settings:
In this submenu you can select the following printer default settings:
Date and time
Language
Country / region
Display brigntness
Continue button
2. Extras:
You can perform the following service operations from this menu:
Clean the prinhead
Printer calibration
Please insert DIN-A4 paper from printhead calibration and printing reports.

Version: V1.7-2022
3. Print reports
In this submenu you can print the following reports:
print quality report
network configuration page
Please put a sheet of paper in the manual sheet-feeder after the respective application
has been started.
9. Menu: ink-cartridge info
This menu shows ink cartridge related information and settings options:
Ink level
Low warning
Cartridges details
10. Menu: network
This menu shows Ethernet settings and options to print reports:
Ethernet-settings
Print reports
Restore network settings
11. Printhead change
1. Open cover.

Version: V1.7-2022
1. The print-head carriage module automatically moves to the “print-head change” position. Pull
the white lever up to release the module as shown in the below figure.
2. Then remove the old printhead and the ink cartridges.
New print-head (unused) requires new set of ink cartridges to ensure that there is
sufficient ink left in the cartridges to initialize and fill up the print-head.
2. Then insert the new printhead and the new ink cartridges in the slots provided. The slots are
color-coded accordingly.
3. Push the white lever down to securely attach the print-head module.
12. Order information
D-KD-IDP-2103 KOMDRUCK IDP-2103 (Ink-Dokument-Printer)
Full-Pigment
D-KD-IDP-2103-S KOMDRUCK IDP-2103 (Ink-Dokument-Printer) with Sheetfeeder
Full-Pigment
V-KD-IDP2K-PB Ink-Cartridge-Pigment-Black (78ml) for IDP-2103 Series
V-KD-IDP2K-PC Ink-Cartridge-Pigment-Cyan (26ml) for IDP-2103 Series
V-KD-IDP2K-PM Ink-Cartridge-Pigment-Magenta (26ml) for IDP-2103 Series
V-KD-IDP2K-PY Ink-Cartridge-Pigment-Yellow (26ml) for IDP-2103 Series
V-KD-IDP2K-PS Ink-Cartridge-Pigment-Set CMYK for IDP-2100 Series
V-KD-IDP2K-PH Printhead for IDP-2103 Series
V-KD-IDP2K-WIP Ink-Pad-Set for IDP-2100 Series
After a printhead change, the printer must be
calibrated
(refer to : point 8.2 Menu: Setup-> Extras)
This manual suits for next models
2
Table of contents
Other KOMDRUCK Printer manuals