manuals.online logo
Brands
  1. Home
  2. •
  3. Brands
  4. •
  5. Konica Minolta
  6. •
  7. Digital Camera
  8. •
  9. Konica Minolta DiMAGE X31 User manual

Konica Minolta DiMAGE X31 User manual

INSTRUCTION MANUAL
9222-2742-11 NI-A404/0404/109678
E
2BEFORE YOU BEGIN
Thank you for purchasing this product. Please take the time to read through this instruction manual
so you can enjoy all the features of your new digital camera.
Check the packing list before using this product. If any items are missing, immediately contact your
camera dealer.
Konica inolta Di AGE X31 digital camera
AA-size alkaline batteries
Hand strap HS-DG 120
SD emory Card
USB cable USB-500
Di AGE Instruction anuals CD-RO
Quick Reference Guide
International Warranty Certificate
Di AGE Viewer CD-RO
BEFORE YOU BEGIN
Konica inolta is a trademark of Konica inolta Holdings, Inc. Di AGE is a trademark of Konica
inolta Photo Imaging, Inc. Apple, acintosh, and ac OS are registered trademarks of Apple
Computer Inc. icrosoft and Windows are registered trademarks of the icrosoft Corporation. The
official name of Windows is icrosoft Windows Operating System. Pentium is a registered trade-
mark of the Intel Corporation. QuickTime is a trademark used under license. All other trademarks
are the property of their respective owners. All other brand and product names are trademarks or
registered trademarks of their respective owners.
While reasonable efforts have been made to assure the accuracy of this information, Konica inolta
assumes no liability or responsibility for any errors or omissions of this instruction manual.
Read and understand all warnings and cautions be ore using this product.
Using batteries improperly can cause them to leak harm ul solutions, overheat, or explode which
may damage property or cause personal injury. Do not ignore the ollowing warnings.
• Only use the batteries speci ied in this instruction manual.
• Do not install the batteries with the polarity (+/–) reversed.
• Do not use batteries which show wear or damage.
• Do not expose batteries to ire, high temperatures, water, or moisture.
• Do not attempt to short or disassemble batteries.
• Do not store batteries near or in metallic products.
• Do not mix batteries o di erent types, brands, ages, or charge levels.
• Do not charge alkaline batteries.
• When recharging rechargeable batteries, only use the recommended charger.
• Do not use leaking batteries. I luid rom the batteries enters your eye, immediately rinse the eye
with plenty o resh water and contact a doctor. I luid rom the batteries makes contact with your
skin or clothing, wash the area thoroughly with water.
• Tape over battery contacts to avoid short-circuiting during disposal; always ollow local
regulations or battery disposal.
WARNING
FOR PROPER AND SAFE USE
3
4FOR PROPER AND SAFE USE
• Use only the speci ied AC adapter within the voltage range indicated on the adapter unit. An
inappropriate adapter or current may cause damage or injury through ire or electric shock.
• Only use the adapter power cord in the sales region or which it was designed. An inappropriate
current may cause damage or injury through ire or electric shock.
• Do not disassemble this product. Electric shock may cause injury i a high voltage circuit inside
the product is touched.
• Immediately remove the batteries or unplug the AC adapter and discontinue use i the camera is
dropped or subjected to an impact in which the interior, especially the lash unit, is exposed. The
lash has a high voltage circuit which may cause an electric shock resulting in injury. The
continued use o a damaged product or part may cause injuries or ire.
• Keep batteries or small parts that could be swallowed away rom in ants. Contact a doctor
immediately i an object is swallowed.
• Store this product out o reach o children. Be care ul when around children not to harm them with
the product or parts.
• Do not ire the lash directly into the eyes. It may damage eyesight.
• Do not ire the lash at vehicle operators. It may cause a distraction or temporary blindness which
may lead to an accident.
• Do not use the monitor while operating a vehicle or walking. It may result in injury or an accident.
5
• Do not use this product in a humid environment, or operate this product with wet hands. I liquid
enters the product, immediately remove the batteries or unplug the AC adapter and discontinue
use. The continued use o a product exposed to liquids may cause damage or injury through ire
or electric shock.
• Do not use the product near in lammable gases or liquids such as gasoline, benzine, or paint
thinner. Do not use in lammable products such as alcohol, benzine, or paint thinner to clean the
product. The use o in lammable cleaners and solvents may cause an explosion or ire.
• When unplugging the AC adapter, do not pull on the power cord. Hold the plug when removing it
rom an outlet.
• Do not damage, twist, modi y, heat, or place heavy objects on the AC adapter cord. A damaged
cord may cause damage or injury through ire or electric shock.
• I the product emits a strange odor, heat, or smoke, discontinue use. Immediately remove the
batteries taking care not to burn yoursel as the batteries become hot with use. The continued use
o a damaged product or part may cause injuries or ire.
• Take the product to a Konica Minolta service acility when repairs are required.
• Handling the cord on this product will expose you to lead, a chemical known to the States o
Cali ornia to cause cancer, and birth de ects or other reproductive harm. Wash hands a ter
handling.
6FOR PROPER AND SAFE USE
• Do not use or store the product in a hot or humid environment such as the glove compartment or
trunk o a car. It may damage the product and batteries which may result in burns or injuries
caused by heat, ire, explosion, or leaking battery luid.
• I batteries are leaking, discontinue use o the product.
• The camera temperature rises with extended periods o use. Care should be taken to avoid burns.
• Burns may result i the memory card or batteries are removed immediately a ter extended periods
o use. Turn the camera o and wait or it to cool.
• Do not ire the lash while it is in contact with people or objects. The lash unit discharges a large
amount o energy which may cause burns.
• Do not apply pressure to the LCD monitor. A damaged monitor may cause injury, and the liquid
rom the monitor may cause in lammation. I liquid rom the monitor makes contact with skin,
wash the area with resh water. I liquid rom the monitor comes in contact with the eyes,
immediately rinse the eyes with plenty o water and contact a doctor.
• When using the AC adapter, insert the plug securely into the electrical outlet.
• Do not use the electronic trans ormers or travel adapters with the adapter. The use o these
devices may cause a ire or damage the products.
• Do not use i the AC adapter cord is damaged.
• Do not cover the AC adapter. A ire may result.
• Do not obstruct access to the AC adapter; this can hinder the unplugging o the unit in
emergencies.
• Unplug the AC adapter when cleaning or when the product is not in use.
• The subject must not be closer than 1 m when photographing portraits with lash in order to avoid
damage to the eyes.
CAUTION
FCC Compliance Statement
Declaration on Con ormity
Responsible Party: Konica Minolta Photo Imaging U.S.A. Inc.
Address: 725 Darlington Avenue, Mahwah, NJ 07430
This device complies with Part 15 o the FCC Rules. Operation is sub-
ject to the ollowing two conditions: (1) This device may not cause
harm ul inter erence, and (2) this device must accept any inter erence received, including inter er-
ence that may cause undesired operation. Changes or modi ications not approved by the party
responsible or compliance could void the user's authority to operate the equipment. This equip-
ment has been tested and ound to comply with the limits or a Class B digital device, pursuant to
Part 15 o the FCC Rules. These limits are designed to provide reasonable protection against harm-
ul inter erence in a residential installation.
This equipment generates, uses and can radiate radio requency energy and, i not installed and
used in accordance with the instructions, may cause harm ul inter erence to radio communications.
However, there is no guarantee that inter erence will not occur in a particular installation. I this
equipment does cause harm ul inter erence to radio or television reception, which can be deter-
mined by turning the equipment o and on, the user is encouraged to try to correct the inter erence
by one or more o the ollowing measures:
• Reorient or relocate the receiving antenna.
• Increase the separation between the equipment and the receiver.
• Connect the equipment to an outlet on a circuit di erent rom that to which the receiver is
connected.
• Consult the dealer or an experienced radio/TV technician or help.
Do not remove the errite cores rom the cables.
This mark on your camera certi ies that this camera meets the requirements o the
EU (European Union) concerning inter erence causing equipment regulations. CE
stands or Con ormité Européenne (European Con ormity).
Digital Camera:
Tested To Comply
With FCC Standards
FOR HOME OR OFFICE USE
This Class B digital apparatus complies with Canadian ICES-003.
The ollowing marks may be ound on the product:
31
7
8TABLE OF CONTENTS
TABLE OF CONTENTS
Names o parts ....................................................................................................................................12
Getting up and running ........................................................................................................................14
Inserting the batteries .............................................................................................................14
Battery-condition indicator......................................................................................................15
Auto power o .........................................................................................................................15
AC adapter (sold separately)...................................................................................................16
Attaching the strap..................................................................................................................17
Installing and removing a memory card..................................................................................18
About memory cards...............................................................................................................19
Setting the date and time........................................................................................................20
Recording - basic operation ................................................................................................................22
Handling the camera ...............................................................................................................22
Setting the camera to record images......................................................................................22
Using the zoom lens................................................................................................................23
LCD monitor display - basic ...................................................................................................24
Camera-shake warning ...........................................................................................................24
Basic recording operation .......................................................................................................25
Focus lock ...............................................................................................................................26
Focus range.............................................................................................................................26
Focus signals ..........................................................................................................................27
Special ocusing situations .....................................................................................................27
Flash signals............................................................................................................................28
Flash range - automatic operation..........................................................................................29
LCD monitor display - recording mode ..................................................................................30
Sel -portrait mirror...................................................................................................................31
The getting up and running section covers how to prepare the camera or use. It contains important
in ormation about power supplies and memory cards. The basic operation o this camera is covered
in the recording - basic operation section between pages 22 and 31, and the playback - basic oper-
ation section between pages 32 and 35. Read the data-trans er mode section in its entirety be ore
connecting the camera to a computer or printer.
Many o the eatures o this camera are controlled with menus. The menu navigation sections con-
cisely describe how to change menu settings. Descriptions o the settings immediately ollow the
navigation sections.
The appendix contains a troubleshooting section to help answer questions about the operation o
the camera. In ormation covering camera care and storage is also provided. Please store this manu-
al in a sa e place.
9
Playback - basic operation ..................................................................................................................32
Single- rame playback display ................................................................................................32
Viewing images .......................................................................................................................33
Deleting single images ............................................................................................................33
LCD monitor display - playback mode ...................................................................................34
Enlarged playback...................................................................................................................35
Recording - advanced operation .........................................................................................................36
LCD monitor display - advanced ............................................................................................36
Navigating the main recording menu ......................................................................................36
Flash modes........................................................................................................................... 38
Drive modes ............................................................................................................................40
Sel -timer .........................................................................................................................41
Continuous advance........................................................................................................42
Multi rame.......................................................................................................................43
White balance..........................................................................................................................44
Image quality ...........................................................................................................................45
Exposure compensation..........................................................................................................47
Colour modes..........................................................................................................................48
Portrait.....................................................................................................................................49
Special e ects.........................................................................................................................50
Adding a rame or border ................................................................................................50
Creating side-by-side images..........................................................................................51
Navigating the advanced recording menu ..............................................................................52
Controller customization .........................................................................................................54
Auto reset ................................................................................................................................55
Date imprinting ........................................................................................................................56
Digital zoom.............................................................................................................................57
File number (#) memory ..........................................................................................................58
Folder name ............................................................................................................................58
Instant playback ......................................................................................................................59
Movie recording ...................................................................................................................................60
Navigating the main movie recording menu ...........................................................................61
Notes on movie recording.......................................................................................................62
Playback - advanced operation ...........................................................................................................63
Playing back movies ...............................................................................................................63
Navigating the main playback menu.......................................................................................64
Navigating the advanced playback menu...............................................................................65
Frame-selection screen...........................................................................................................67
Deleting image iles .................................................................................................................68
Locking image iles .................................................................................................................69
Adding to Favorites .................................................................................................................70
Viewing Favorites ....................................................................................................................71
Rotate ......................................................................................................................................72
Slide show...............................................................................................................................73
About DPOF ............................................................................................................................74
Creating a DPOF print order ...................................................................................................74
Ordering an index print ...........................................................................................................76
Date printing............................................................................................................................76
E-mail copy .............................................................................................................................77
10 TABLE OF CONTENTS
Setup menu .........................................................................................................................................78
Navigating the setup menu .....................................................................................................78
LCD monitor brightness ..........................................................................................................82
Formatting memory cards.......................................................................................................82
Reset de ault ...........................................................................................................................83
Language.................................................................................................................................84
Audio signals ...........................................................................................................................84
Focus signal ............................................................................................................................85
Shutter signal ..........................................................................................................................85
Auto power o .........................................................................................................................85
Date and time..........................................................................................................................86
Date ormat..............................................................................................................................86
Trans er mode .........................................................................................................................86
Data-trans er mode..............................................................................................................................87
System requirements ..............................................................................................................87
Connecting the camera to a computer ...................................................................................88
Connecting to Windows 98 and 98SE ....................................................................................90
Automatic installation ......................................................................................................90
Manual installation...........................................................................................................91
QuickTime system requirements.............................................................................................93
Auto power o - data-trans er mode ......................................................................................93
Memory card older organization ............................................................................................94
Disconnecting the camera rom the computer .......................................................................96
Windows 98 and 98SE ....................................................................................................96
Windows Me, 2000 Pro essional, and XP .......................................................................96
Macintosh ........................................................................................................................97
Changing the memory card - data-trans er mode..................................................................98
Using PictBridge .....................................................................................................................98
Notes on printing errors ........................................................................................................100
Navigating the PictBridge menu ...........................................................................................100
Batch print .....................................................................................................................102
Index print......................................................................................................................102
Paper size ......................................................................................................................102
Sizes ..............................................................................................................................102
Layout ............................................................................................................................102
Print quality....................................................................................................................102
Data print .......................................................................................................................102
Printing DPOF iles ................................................................................................................103
Appendix .......................................................................................................................................104
Troubleshooting.....................................................................................................................104
Removing the driver so tware - Windows.............................................................................106
Care and storage...................................................................................................................107
Technical speci ications ........................................................................................................110
11
12
NAMES OF PARTS
* This camera is a sophisticated optical instrument. Care should be taken to keep these sur aces
clean. Please read the care and storage instructions in the back o this manual (p. 107).
Flash (p. 28) Lens*
Sel -timer lamp
(p. 41)
Main switch
USB port (p. 88)
Tripod socket
Battery-chamber door (p. 14)
DC terminal (p. 16)
Shutter-release button
NAMES OF PARTS
Sel -portrait
mirror (p. 31)
Card slot (p. 18)
13
Recording-mode switch (p. 22)
Controller
LCD monitor*
Menu button
Strap eyelet (p. 17)
Playback button
(p. 32)
Indicator lamp
14 GETTING UP AND RUNNING
GETTING UP AND RUNNING
INSERTING THE BATTERIES
This digital camera uses two AA-size alkaline batteries or Ni-MH batteries. AA-size Ni-MH batteries
are recommended because o longer li e. Do not use other types o batteries with this camera.
When using Ni-MH batteries, ully recharge them with a battery charger suitable or complex elec-
tronic equipment. Please consult your vendor about an appropriate charger. When replacing the
batteries, the camera should be turned o .
Slide the battery-chamber door toward the ront o the camera to release the sa ety catch (1). Open
the door.
Insert the AA batteries as shown; make sure the positive and
negative battery terminals are oriented correctly (2).
Close the battery-chamber door and slide it toward the back
o the camera to engage the sa ety catch.
A ter installing the batteries, the set-date/time mes-
sage may appear on the monitor. Set the date and
time ollowing the instructions in page 20. The clock
and calendar can also be set in section 3 o the
setup menu. I the camera is not used or several
hours a ter the batteries are taken out, the clock,
calendar, and memory settings are lost.
1
2
15
BATTERY-CONDITION INDICATOR
Full-battery indicator - the battery is ully charged. This is displayed brie ly.
Low-battery warning - battery power is very low. The batteries must be
replaced soon. The LCD monitor will turn o when the lash is charging. This
warning automatically appears and remains on the monitor until the batter-
ies are replaced. I the power level alls below this level when the camera is
on, the battery-exhausted message will appear just be ore the camera shuts
down.
AUTO POWER OFF
To conserve battery power, the camera will shut down i an operation is not made within three min-
utes. To restore power, press the main switch. The length o the auto-power-o period can be
changed in section 2 o the setup menu (p. 85). When the camera is connected to a computer, the
auto-power-o period is set to ten minutes and cannot be changed.
This camera is equipped with an automatic battery-condition indicator displayed on the LCD moni-
tor. The indicator will change rom white to red when battery power is low.
Low-battery indicator - the battery power is low. The batteries should be
replaced as soon as possible. This warning remains on the monitor.
I power is insu icient or camera operation, LCD monitor will be blank and the shutter will not
release. Change the batteries.
The AC adapter allows the camera to be powered rom a household outlet. The AC adapter is rec-
ommended when the camera is inter aced with a computer or during periods o heavy use.
AC adapter model AC-12U is or use in North America and Taiwan, AC-12GB is or use
in United Kingdom and HongKong, AC-12 is or use in Japan, AC-12C is or use in China,
and AC-12E is or use in all other areas.
Never connect the AC adapter to the camera
while the camera is on.
Connect the power cord to the AC adapter unit.
Insert the power cord securely into an electrical
outlet.
Insert the AC adapter’s output plug securely into the
camera’s DC terminal.
16 GETTING UP AND RUNNING
AC ADAPTER (SOLD SEPARATELY)
Always turn o the camera be ore changing between power supplies.
17
ATTACHING THE STRAP
Always keep the strap around your wrist in the event that
the camera is accidentally dropped.
Pass the small loop o the hand strap through the strap
eyelet on the camera body.
Pass the other end o the strap through the small loop
and tighten.
18 GETTING UP AND RUNNING
INSTALLING AND REMOVING A MEMORY CARD
An SD (Secure Digital) Memory card or MultiMediaCard must be inserted or the camera to operate.
I a card has not been inserted, a no-card warning will appear on the LCD monitor; the shutter can
still be released, but no image is recorded.
Always turn o the camera and con irm the indicator lamp is not red and
blinking be ore changing the memory card, otherwise the card may be
damaged, and data lost.
Insert the memory card all the way into the card slot and then
release. The card should catch in the slot.
Insert the card. Make sure the ace o the card is toward the
ront o the camera. Always push the card in straight, never at
an angle. Never orce the card. I the card does not it, check
that it is orientated correctly.
To eject a memory card, press the card into the slot and
release. The card can now be pulled out.
19
The response time during recording and playback is longer with MultiMediaCards compared with
SD Memory Cards. This is not a de ect, but rather due to the speci ications o the cards. When
using large capacity cards, some operations like deletion may take longer.
The SD Memory Card has a write-protect switch to prevent
image data rom being deleted. By sliding the switch to the
bottom o the card, the data will be protected. However, when
the card is protected, images cannot be recorded. I an
attempt is made to record or delete an image with the camera,
the card-locked message will appear and the LED lamp near
the card slot will turn red and blink quickly. For memory card
care and store see page 108.
I the unable-to-use-card message appears, the inserted card
in the camera may need to be ormatted. A card used in
another camera may also have to be ormatted be ore being
used. A card can be ormatted in section 1 o the setup menu
(p. 82). When a card is ormatted, all the data on the card is
permanently erased.
ABOUT MEMORY CARDS
Write-
protect
switch
Lock
posi-
tion
20 GETTING UP AND RUNNING
SETTING THE DATE AND TIME
A ter initially inserting a memory card and charging the battery, the camera’s clock and calendar
must be set. When images are recorded, the image data is saved with the date and time o record-
ing. The date and time may also have to be set when changing batteries i the clock and calendar
reset. Depending on the region, the menu language may also have to be set. To change the lan-
guage, see the camera notes on the ollowing page.
Turn the camera on by pressing the main switch
near the shutter-release button (1).
The set-date-and-time message appears on
the LCD monitor. Select “Yes” by pressing
the controller.
Controller
Set date and time.
No
Yes
1

Other manuals for DiMAGE X31

3

Other Konica Minolta Digital Camera manuals

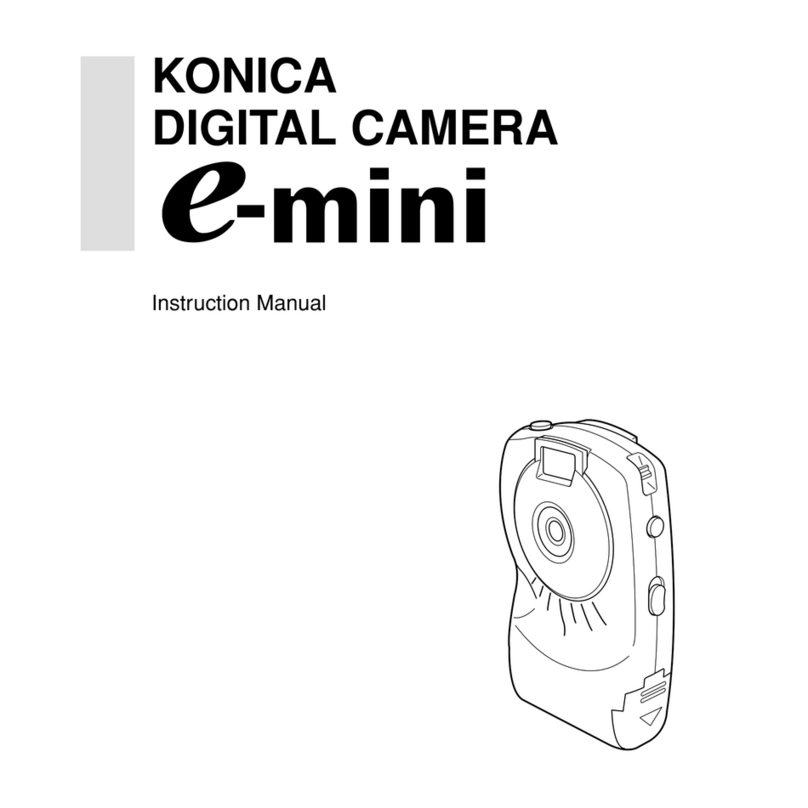
Konica Minolta E-Mini-M E-Mini-Multi-Media Camera User manual

Konica Minolta

Konica Minolta E-Mini-M E-Mini-Multi-Media Camera User manual

Konica Minolta DiMAGE X60 User manual

Konica Minolta

Konica Minolta DiMAGE X60 User manual

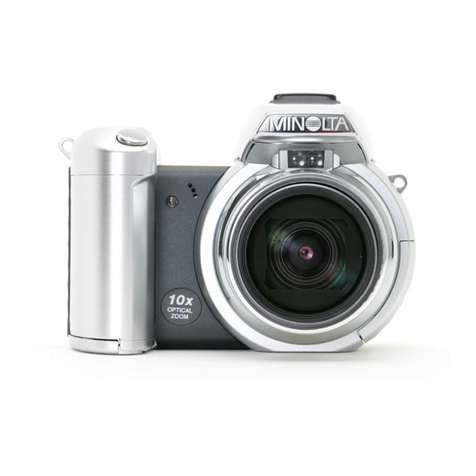
Konica Minolta DiMAGE Z10 User manual

Konica Minolta

Konica Minolta DiMAGE Z10 User manual

Konica Minolta DYNAX 30 User manual

Konica Minolta

Konica Minolta DYNAX 30 User manual

Konica Minolta DiMAGE X50 User manual

Konica Minolta

Konica Minolta DiMAGE X50 User manual

Konica Minolta KD-310Z User manual

Konica Minolta

Konica Minolta KD-310Z User manual

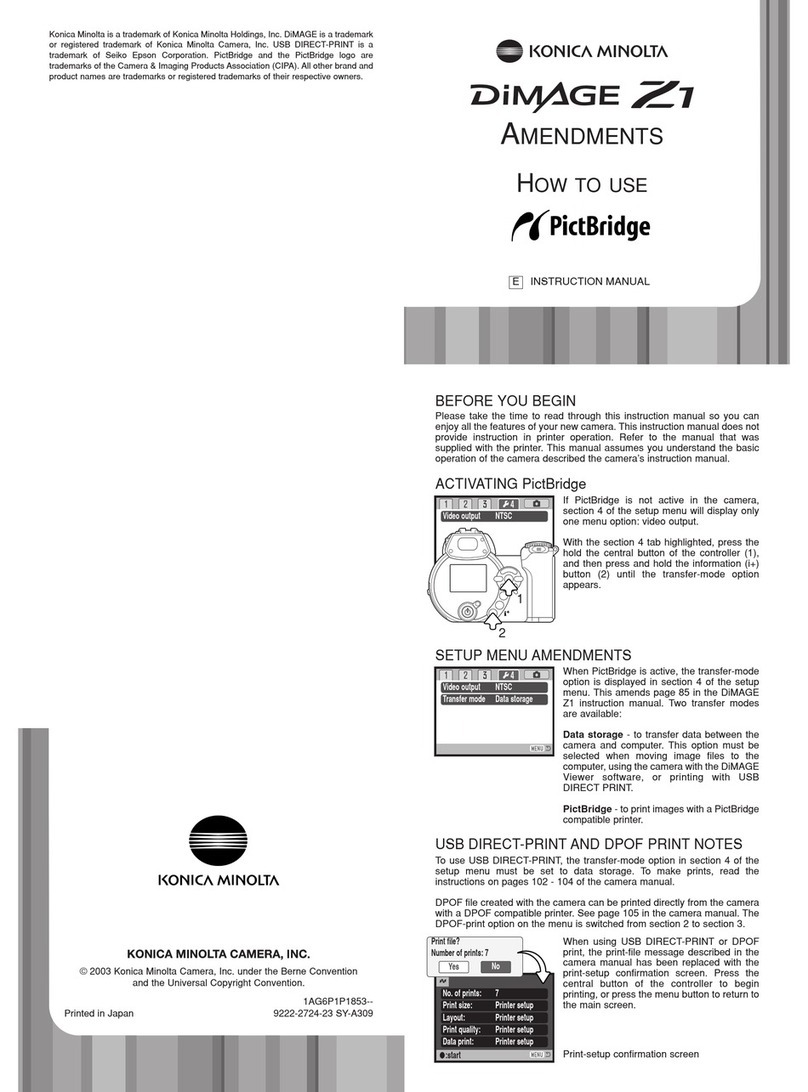
Konica Minolta DiMAGE Z1 User manual

Konica Minolta

Konica Minolta DiMAGE Z1 User manual

Konica Minolta DiMAGE Xg User manual

Konica Minolta

Konica Minolta DiMAGE Xg User manual

Konica Minolta Dinax 7D User manual

Konica Minolta

Konica Minolta Dinax 7D User manual

Konica Minolta Digital Revio KD-500Z User manual

Konica Minolta

Konica Minolta Digital Revio KD-500Z User manual

Konica Minolta Q-mini K-QM-3501E User manual

Konica Minolta

Konica Minolta Q-mini K-QM-3501E User manual

Konica Minolta MAXXUM 5D User manual

Konica Minolta

Konica Minolta MAXXUM 5D User manual

Konica Minolta DYNAX DYNAX7D User manual

Konica Minolta

Konica Minolta DYNAX DYNAX7D User manual

Konica Minolta Revio C2 User manual

Konica Minolta

Konica Minolta Revio C2 User manual

Konica Minolta Konica Digital Revio KD-200Z User manual

Konica Minolta

Konica Minolta Konica Digital Revio KD-200Z User manual

Konica Minolta DiMAGE Z2 User manual

Konica Minolta

Konica Minolta DiMAGE Z2 User manual

Konica Minolta S3 User manual

Konica Minolta

Konica Minolta S3 User manual

Konica Minolta MAXXUM 5D User manual

Konica Minolta

Konica Minolta MAXXUM 5D User manual

Konica Minolta DiMAGE Z6 User manual

Konica Minolta

Konica Minolta DiMAGE Z6 User manual

Konica Minolta Q-EZ User manual

Konica Minolta

Konica Minolta Q-EZ User manual

Konica Minolta DiMAGE Z10 User manual

Konica Minolta

Konica Minolta DiMAGE Z10 User manual

Konica Minolta Q-Mini User manual

Konica Minolta

Konica Minolta Q-Mini User manual

Konica Minolta KD-20M User manual

Konica Minolta

Konica Minolta KD-20M User manual

Konica Minolta DiMAGE X31 User manual

Konica Minolta

Konica Minolta DiMAGE X31 User manual

Popular Digital Camera manuals by other brands

Concord Camera Eye-Q Easy Eye-Q Easy Digital Camera user guide

Concord Camera

Concord Camera Eye-Q Easy Eye-Q Easy Digital Camera user guide

Kodak PRINTOMATIC user manual

Kodak

Kodak PRINTOMATIC user manual

Pentax Optio WG2 GPS Guide

Pentax

Pentax Optio WG2 GPS Guide

Kodak EasyShare C195 user guide

Kodak

Kodak EasyShare C195 user guide

Furrion Vision S instruction manual

Furrion

Furrion Vision S instruction manual

Olympus C-5000Zoom Basic Manual

Olympus

Olympus C-5000Zoom Basic Manual

Schäfter+Kirchhoff SK1024GSH-4 instruction manual

Schäfter+Kirchhoff

Schäfter+Kirchhoff SK1024GSH-4 instruction manual

FujiFilm instax SQUARE SQ20 Users guide, trouble shooting, safety precautions

FujiFilm

FujiFilm instax SQUARE SQ20 Users guide, trouble shooting, safety precautions

Sony DSC-T300/B - Cyber-shot Digital Still Camera Specifications

Sony

Sony DSC-T300/B - Cyber-shot Digital Still Camera Specifications

Panasonic Lumix DMC-TZ5P Service manual

Panasonic

Panasonic Lumix DMC-TZ5P Service manual

Minolta DIMAGE 7I - SOFTWARE instruction manual

Minolta

Minolta DIMAGE 7I - SOFTWARE instruction manual

Nikon Coolpix L10 Repair manual

Nikon

Nikon Coolpix L10 Repair manual

Vimar ELVOX 46322.003 Installation and operation manual

Vimar

Vimar ELVOX 46322.003 Installation and operation manual

Canon EOS REBEL T6iW instruction manual

Canon

Canon EOS REBEL T6iW instruction manual

Samsung S1050 - Digital Camera - Compact user manual

Samsung

Samsung S1050 - Digital Camera - Compact user manual

Dalsa Linea Color CL user manual

Dalsa

Dalsa Linea Color CL user manual

Hasselblad Digital Camera Handbook

Hasselblad

Hasselblad Digital Camera Handbook

Sakar 28290 owner's manual

Sakar

Sakar 28290 owner's manual

manuals.online logo
manuals.online logoBrands
  • About & Mission
  • Contact us
  • Privacy Policy
  • Terms and Conditions

Copyright 2025 Manuals.Online. All Rights Reserved.