Korg Prophecy User guide

Prophecy
SOLO
SYNTHESIZER
Players I Basic Guide
Multi
Oscillator Synthesis System
KORG

IMPORTANT SAFETY
INSTRUCTIONS
WARNING-
When
using electrical products, basic precautions should
be
followed, including
the
following:
1.
Read
all
the instructions before using
the
product.
2.
Do not use this product near water -for
example, near a bathtub, washbowl, kitchen
sink,
in
a wet basement, or near a swimming
pool,
or
the
like.
3. This product should
be
used only
with
the
cart or
stand that
is
recommended
by
the
manufacturer.
4.
This product, either alone or
in
combination
with
an
amplifier
and
headphones or
speakers,
may
cause permanent hearing
loss.
Do
not operate
for a long period
of
time
at
a
high
volume
level or
at a level that
is
uncomfortable. If
you
experience
any hearing loss or ringing
in
the
ears,
you
should consult
an
audiologist.
5.
The
product should
be
located
so
that
its
location
or position does not interfere
with
its
proper
ventilation.
6.
The
product should
be
located away from heat
sources
such
as
radiators, heat registers, or
other products that produce
heat.
7.
The
product should
be
connected
to
a power
supply
of
the
type described
in
the operating
instructions or
as
marked
on
the
product.
SAVE THESE INSTRUCTIONS
RISK
OF
ELECTRIC
SHOCK
DO
NOT
OPEN e
CAUTION: TO REDUCE THE RISK
OF
ELECTRIC SHOCK, DO NOT REMOVE
COVER (OR
BACK).
NO USER-SERVICEABLE
PARTS INSIDE. REFER SERVICING
TO
QUALIFIED SERVICE PERSONNEL.
GROUNDING INSTRUCTIONS
8.
The
power-supply cord
of
the
product should
be
unplugged
from
the outlet
when
left unused for a
long period of time.
9.
Care should
be
taken so that objects do not fall
and
liquids
are
not spilled into the enclosure
through openings.
10.
The product should
be
serviced
by
qualified
personnel
when:
A.
The power-supply
cord
or the
plug
has
been
damaged; or
B.
Objects have fallen, or liquid
has
been
spilled
into
the
product; or
C.
The product
has
been
exposed
to
rain; or
D.
The product does not appear to operate
normally or exhibits a marked change
in
performance; or
E.
The
product has been dropped, or the
enclosure damaged.
11
.
Do
not attempt
to
service the product beyond
that described
in
the
user-maintenance
instructions.
All
other servicing should
be
referred to qualified service personnel.
The lightning flash with the arrowhead symbol
within
an
equilateral triangle,
is
intended to alert
the user to the presence of uninsulated
"dangerous voltage" within the product's
enclosure that may
be
of sufficient magnitude to
constitute a risk of electric shock.
The exclamation point within
an
equilateral
triangle
is
intended to alert the user to the
presence of important operating and maintenance
(servicing) instructions
in
the literature
accompanying the product.
This product must be grounded (earthed). If it should malfunction
or
breakdown,
grounding a path
of
least resistance for electric current to reduce the risk
of
electric shock. This product is equipped with a cord having an
equipment-grounding
conductor and a grounding plug.
The
plug must be
plugged into an appropriate outlet that is properly installed
and
grounded in
accordance with the local codes and ordinances.
DANGER -
Improper
connection
of
the equipment-grounding conductor can
result in a risk
of
electric shock.
Check
with a qualified electrician
or
serviceman
if you are in doubt
as
to whether the product is properly grounded. Do not modify
the plug provided with the
product-
if it will not fit the outlet, have a proper outlet
fitted.

THE FCC REGULATION WARNING
This equipment generates and uses radio frequency energy and if not installed and used properly, that is, in strict accordance with the
manufacturer's instructions, may cause interference to radio and television reception. It has been type tested and found to comply with
the limits for a Class B computing device in accordance with the specifications in Subpart J of Part 15 FCC Rules, which are designed to
provide reasonable protection against such interference
in
a residential installation. However, there is no guarantee that the interference
will not occur in a particular installation. If this equipment does cause interference to radio and television reception, which can be
determined by turning the equipment off and
on,
the user is encouraged to try to correct the interference by one or more of the following
measures:
Reorientate the receiving antenna.
Relocate the equipment with respect to the receiver.
Move the equipment away from the receiver.
Plug the equipment into a different outlet so that equipment and receiver are
on
different branch circuits.
If necessary, the user should consult the dealer or
an
experienced radio/television technician for additional suggestions. The user may
find the following booklet prepared by the Federal Communications Commission helpful: "How to Identify and Resolve Radio-TV
Interference Problems". This booklet is available from the U.S. Government Printing Office, Washington, D.C. 20402, Stock
No.
004-000-
00345-4.
CANADA
THIS APPARATUS DOES NOT EXCEED THE "CLASS
B"
LIMITS
FOR
RADIO NOISE EMISSIONS FROM DIGITAL APPARATUS SET
OUT
IN
THE RADIO INTERFERENCE REGULATION OF THE CANADIAN DEPARTMENT OF COMMUNICATIONS.
LE
PRESENT APPAREIL NUMERIQUE N'EMET PAS
DE
BRUITS RADIOELECTRIQUES DEPASSANT LES LIMITES APPLICABLES
AUX
APPAREILS
NUMERIQUES
DE LA
"CLASSE
B"
PRESCRITES
DANS
LE
REGLEMENT
SUR
LE
BROUILLAGE
RADIOELECTRIQUE EDICTE
PARLE
MINISTERE DES COMMUNICATIONS
DU
CANADA.
CE mark for European Harmonized Standards
CE mark which is attached to our company's products of
AC
mains operated apparatus until December 31, 1996 means it conforms to
EMC Directive (89/336/EEC) and CE mark Directive (93/68/EEC).
And, CE mark which is attached after January
1,
1997 means it conforms to EMC Directive (89/336/EEC), CE mark Directive (93/68/
EEC) and Low Voltage Directive (73/23/EEC).
Also, CE mark which is attached to our company's products of Battery operated apparatus means it conforms to EMC Directive (89/336/
EEC) and
CE
mark Directive (93/68/EEC).
Precautions
Location
Using the unit
in
the following location can result in malfunction.
•In direct sunlight
•Locations of extreme temperature or humidity
•Excessively dusty or dirty locations
•Locations of excessive vibration
Power supply
Please connect the AC
power
cable to an AC outlet of the
correct voltage. Do not connect it to
an
AC outlet of voltage
other than for which your unit is intended.
Interference with other electrical devices
This unit contains a microcomputer. Radios and televisions
placed nearby may experience reception interference. Operate
this unit
at
a suitable distance from radios and televisions.
The Backup Battery
The Prophecy SOLO SYNTHESIZER contains a battery
that
preserves its memory settings when the power is turned off. When
the display indicates "*INTERNAL BATTERY IS LOW.", please
Memory Card RAM
The RAM card (SRC-512) requires battery power in order to
preserve data in memory. The included lithium battery (type
CR2016) should be put in place before use.
Installing the battery
Turn the card over to the side without the terminal. You will find a
slot in the battery holder.
Install the lithium battery
in
the holder with
the"+"
side up.
Write Protect Switch
No data can
be
written
on
the card when this switch is set
to
"ON".
To preserve data, set this switch to ON, except when writing new
data.
Replacing Lithium Battery
Power from the lithium battery is used to protect data held in
memory. The battery should
be
replaced once a year. However,
Handling
To avoid breakage, do not apply excessive force to the switches
or controls.
Care
If the exterior becomes dirty, wipe it with a clean, dry cloth.
Do
not use liquid cleaners such as benzene or thinner, or cleaning
compounds or flammable polishes.
Keep
this
manual
After reading this manual, please keep
it
for later reference.
contact your dealer or a nearby Korg service center to have the
battery replaced.
battery life is shortened if kept at temperatures exceeding 40
degrees centigrade. (104 Fahrenheit)
Always use a CR2016 type lithium battery.
When replacing the battery, leave the card in the unit with unit
power ON. This will preserve the contents of the memory. If the
card is removed before battery replacement, memory contents will
be lost.
*The
names of the Programs, Combinations, Multisounds, etc.
appearing
in
the displays given as examples
in
this manual do not
necessarily correspond to any internal data.
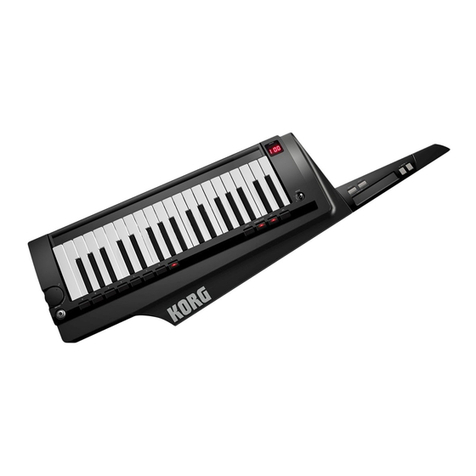
SOLO
SYNTHESIZER
OCT
Q
==============
Main
features
of
the
Prophecy
1
The Prophecy is a 37 note monophonic synthe-
sizer
featuring
a
newly
developed
sys~em
of
tone
generation;
MOSS
(Multi
Oscillator
Synthesis
System).
Seven
different
synthesis
techniques
are
supported,
ranging from analog synthesizer oscillators to physical
models
such
as
sax
or
bass
guitar.
The
Prophecy
provides
an
unprecedented
degree
of
expressiiveness.
2
Bank A
and
bank
B each
provide
64
programs
(a
total
of
128).
Programs that
you e
edit can also
be stored
in
these banks.
An
optional SRC-512
RAM
memory
card
can
be
used
to
store
an
additional
64
programs
for instant access.
3
Keyboard dynamics, wheel controllers
1/2/3,
the
ribbon
controller,
and
an
optional
foot
pedal
can
be
used
for realtime control of filter
cutoff, resonance,
and
effect
parameters,
etc.
for
heightened
performance expression. These settings
are memorized for each program, allowing
you
to select
performance
techniques
as
appropriate
for
your
style
and
the selected sound.
ii
4
The
Performance
Editor
function
lets
you
assign parameters to each of the five knobs. for
realtime
control.
Four
Performance
Editor
sets
are
provided.
For
each
set,
any
of
the
more
than
200
program
parameters
can be assigned to a
knob, meaning
that
up
to 4
parameters
can be assigned
for control
by
one knob. Performance Editor settings are
also stored
independently
for each program.
5
The
powerful
arpeggiator
function
auto-
matically arpeggiates the notes
in
a
chord
you
press.
Five
preset
patterns
and
five
user
patterns
are
provided.
User
patterns
allow
you
to create
and
store
your
own
arpeggiation
pattern
of
up
to
24
steps.
Preset
patterns
also
allow
you
to
modify
and
store
the
spacing
between
steps,
and
the
velocity
of
each
step, etc.
When
an
optional
SRC-512
RAM
memory
card
is
used,
an
additional
5
preset
patterns
and
5 user patterns will
be
available. Arpeggio
playback can
be
synchronized to MIDI clock messages.

Thank
you
for
purchasing
the
Korg
Prophecy
Solo
Synthesizer.
In
order
to
enjoy
many
years
of trouble-free
use,
please
read
this
manual
carefully
and
use
the
unit
correctly.
: w
Q
6
Portamento
and
Octave Up
/Down
functions
are
provided,
and
can
be
switched
on/
off
from the front panel
or
using
an
optional
ECS
external controller. These controllers can also
be
used
to
switch
effects
or
the
arpeggiator
on/
off,
allowing
you
to concentrate
on
your
keyboard playing.
7
The
Prophecy
provides
not
only
equal
tem-
perament,
but
also
a
variety
of
unconven-
tional
tunings
such
as
Pythagorean
and
Werckmeister,
and
scales
used
in
Arabian
and
Indonesian
music. These can be specified for each
program, allowing you to cover a
wide
range of musical
genres. You
are
also free to create
and
use
your
own
original scales.
8
In
the
MOSS
(Multi
Oscillator
Syntnesis
System)
tone
generator
of
the
Prophecy,
the
basic
sound
created
by
the
two
sets
of oscillator,
sub
oscillator,
and
noise
generator
is
passed
through
the Wave Shape, Mixer, Filter,
Amp,
and
Effect
blocks
to
shape
the
sound.
In
each
of
these
blocks,
general
purposes
EGs
and
LFOs
can
be
used
as
modulation
sources. While the
Prophecy
is a
cutting-
Multi
Oscillator Synthesis
System
edge
digital synthesizer
that
uses the very latest
in
DSP
technology, it also provides the possibilities for detailed
manipulation
that
were
characteristic
of
analog
synthesizers,
letting
you
turn
your
imagination
into
sound.
9
The Oscillator block provides
seven
types of
oscillators,
such
as
Analog,
VPM,
and
Physical Modeling,
and
also contains a Sub
Oscillator
and
Noise Generator. The
Wave
Shape block
can
be set to either Clip
or
Resonant
wave
shaping,
and
determines
how
the
waveform
is
shaped
and
the
balance
at
which
it
is mixed
with
the original
waveform.
The Mixer Block
determines
the
levels
at
which
the
two
systems
of Oscillator,
Sub
Oscillator,
Noise
Generator,
and
Feedback
are
sent
to
the
Filter
block. The Filter block
provides
two multi-mode filters
(switchable
between
LPF
/HPF
/BPF /BRF),
and
can
be
placed
in
either series
or
parallel to control the
output.
The
Amp
block lets
you
independently control the level
of each
output
signal. The Effect block
provides
seven
types
of
effect;
Distortion,
Wah,
Chorus/Flanger+
Delay,
Reverb,
and
Dual
Parametric
EQ. (You
may
select either
Chorus/Flanger+Delay
or
Reverb.)
Ill

Contents
Important Safety Instructions
The Backup Battery ........................................................................... i
Memory Card RAM ............................................................................. i
Main features of the Prophecy ........................................................ ii
1. Front and rear panel .................................................................................................. 2
1.1
Front panel .................................................................................. 2
1.2 Rear panel ................................................................................... 4
2.
Basic operation ......................................................................................................... 4
iv
This
chapter
explains
the
basic
operation
you
need
to
know
to use
the
Prophecy,
such
as
selecting
programs,
using
controllers,
and
using the arpeggiator.
Settings
which
will affect the
way
in
which the Prophecy is
operated
are
marked
by
an
asterisk
"*".
Before changing
such
settings,
we
recommend
that
you
read
this
chapter
and
master
the
basics
of
operation.
2.1
Setup ............................................................................................ 4
Basic connections .............................................................................. 4
Connecting pedals, etc. .................................................................... 4
Connections
with
MIDI devices ..................................................... 5
2.2 Turning the power on/off ............................................................ 6
Turning
on
the
power
...................................................................... 6
Turning off the
power
...................................................................... 6
2.3 Adjusting the volume .................................................................. 6
2.4 Listening to the demo playback ................................................ 7
2.5 Playing a program ....................................................................... 8
About the Performance
mode
display .......................................... 8
Selecting a
program
.......................................................................... 8
Using the EC5 to select
programs
................................................
10
Using MIDI to select
programs
................................................... 10
The PORTAMENTO effect ............................................................
10
OCTAVE UP
/DOWN
....................................................................
10
2.6 Performance editor(PE) ............................................................
11
Selecting a performance editor .....................................................
11
About the performance editor display .......................................
11
Saving a
sound
that
was
modified
by
the performance editor .............................................................
11
2.7 Various playing techniques ..................................................... 12
Control from the keyboard ...........................................................
12
Control from WHEEL
1/2/3,
the RIBBON controller,
or
the
pedal
volume .......................................................................
12
Control from a
pedal
switch
or
EC5 ............................................ 14
2.8 A Using the arpeggiator ........................................................... 15
Arpeggiator functions ....................................................................
15
Selecting the arpeggiation
pattern
............................... ...............
15
Basic arpeggiator operation ..........................................................
16
2.9 Other settings (Performance) .................................................. 17
Specifying the
order
in
which notes are
sounded
.................... 17
Making the note sustain ................................................................ 17
Using key velocity to affect
modulation
..................................... 17
Using different scales ..................................................................... 17
Tuning the Prophecy to other instruments ................................ 17
Transposing the pitch .................................................................... 17
Changing the velocity
and
aftertouch curves ............................ 17

3. How the Prophecy is organized ............................................................................. 18
This
chapter
explains
concepts
that
you
need
to
know
to take full
advantage
of all the functions of
the Prophecy;
how
it is organized
into
modes,
how
to
move
between
modes,
sections
and
pages,
and
how
to set
parameter
values.
Refer
to
this
chapter
when
making
settings for the functions
marked
"*"
in
"2.
Basic
operation".
3.1
About modes ............................................................................. 18
Performance
mode
oooo
18
Edit mode
18
Pattern Define
mode
...
oooooooooooooooo
18
3.2 Moving between modes ............................................................ 19
3.3 Moving through the sections of Edit mode ............................ 20
3.4 Moving between pages of Performance Editor Define,
Pattern Define mode, and Edit mode ...................................... 20
3.5 Moving the cursor
in
Performance Editor Define,
Pattern Define mode, and Edit mode ......................................
21
3.6 Setting values
in
Performance Editor Define,
Pattern Define mode, and Edit mode ......................................
21
3.
7 About the screen display .........................................................
21
Performance
mode
.oo
oo
21
Performance Editor Define, Pattern Define mode,
Edit mode .........................................................................................
22
4.
Edit ........................................................................................................................... 23
This
chapter
explains
how
each
program
of
the
Prophecy
is
organized,
and
uses
examples
to
explain
the
process
of
editing
a
program,
assigning
performance
edit
parameters,
and
setting
the
arpeggiator pattern.
For a
more
detailed
explanation
of
the
parameters
or
the
parameters
not
explained
in this
section,
please
refer
to
the
separate
"Parameter
Guide".
4.1
How a program is organized .................................................... 23
OSC (Oscillator) section
23
Wave Shape section .....
23
Mixer section
..
24
Filter section
.oo
........
24
AMP (Amplifier) section
.oo
oooooooooo
oo
24
Effect section
..
oo.
oo oo
.oo
oo
.............
.oo
oo.
oooo
............
oo oo
24
EG
section
..
oo
..........
oo
................
oooo
............
24
LFO section
oo oo oo
.oo.
oo.oooo
.oo
24
Common section
...
oo oo
.oo
oo oo oo
.oo .oo
oooo
24
Global section
oo
..........
oo
.oo
oo oo
24
Oscillator types ...............................................................................
25
Oscillator Sets
oooo
.......
oo
.oo.
oooo
oo
.oo .oo
.oooo
oo
.oo.
25
4.2 Editing a program ..................................................................... 26
Initializing a
program
...
oooooooooooo
oooooooooo
26
Oscillator settings
26
Filter settings .............
oo
.oooooooo
oo
oo
.oooo
oo
oo
oo
27
Amp
settings
.oo
oooo
............
oo oo oo
.............
oo.
28
Using effects .............
..........
oo.oo
...........
28
Setting
and
using
controllers
oo oo oo
............
oo
oooo
29
4.3 Saving a program ...................................................................... 30
Memory protect .......
oo oo oo
............
oo
ooo.oo
........
oo. oo.
30
Rename .............................................................................................
30
Writing
procedure
31
4.4 Compare .....................................................................................
31
4.5 Performance Editor assignments
(Performance Editor Define) .................................................... 32
4.6 Arpeggio Pattern settings (Pattern Define) ............................ 33
4.7 Creating Pattern parameters (Pattern Define) ........................ 34
v

4.8 Other settings (Edit) .................................................................
35
Loading preset
data
........................................................................
35
Saving
data
......................................................................................
35
Initializing, Copying, or Exchanging
data
within
a section of the same
program
......................................................
35
Initializing ........................................................................................
35
Adjusting the controllers ...............................................................
35
5.
MIDI applications ..................................................................................................... 36
This
section
explains
how
to
connect the
Prophecy
to external
MIDI
devices
so
that
they
can
control each other.
!5.1
MIDI channels ............................................................................
36
!5.2
Note On/Off ................................................................................
36
!5.3
Selecting programs ................................................................... 36
5.4
Bank Select ................................................................................
37
5.5
Applying attertouch ..................................................................
37
5.6
Applying pitch bend ................................................................. 37
!5.7
Damper (Hold) pedal ................................................................ 37
!5.8
Adjusting the volume ............................................................... 37
5.9
Applying vibrato (pitch modulation) ...................................... 38
5.10
Control the stereo location (pan) .......................................... 38
:5.11
If the sound does not
stop
.....................................................
38
5.12 Stopping the sound from an external MIDI device .............
38
5.13 To reset all controllers on a given channel ......................... 38
5.14
About MIDI System Exclusive messages ............................ 39
5.15
Transmitting sound program data (Data Dump) ................. 39
5.16
Editing sound programs, etc .................................................
39
5.17 The Performance Editor .........................................................
40
5.18
Synchronizing the arpeggiator .............................................
40
5.19
Arpeggiator velocity and gate ...............................................
40
MIDI Implementation Chart .........................................................................................
41
Voice Name
List
..................•........................................................................................ 42
Specifications .............................................................................................................. 44
Options
......................................................................................................................... 44
vi


•PAGE
LEFT
key,
PAGE
RIGHT
key
In
Performance
mode,
these
keys
allow
you
to
select
programs
by
category.--> p.9
These keys
switch
between
the
pages
that
appear
in
the
display in Define
and
Edit modes. Press the PAGE RIGHT
key to move to the page to the right. Press the PAGE LEFT
key to move to the page to the left.
-->
p.20
1.1
Front panel
•Display
In Performance mode, this 40 character x 2 line
LCD
display
shows
the
name
of
the
currently
selected
sound
or
performance
editor
settings.
In
Define
and
Edit
modes
it
displays
para-
meters.
-->
p.8,
11,
21,
22
•Knobs
1-5
In
Performance
mode,
these
knobs
adjust
the
value
of
the
parameter
assigned to each knob, allowing you to
control the
sound
as you play.
-->
p.ll
In Define
and
Edit modes, these knobs
move
the cursor
and
modify
parameter
values.
-->
p.21
•CURSOR <key, CURSOR>
key-------------...,
In
Performance
mode,
simultaneously
pressing
both
of
these keys will enter Demonstratin Playback mode.
-->
p.7
These keys select from
up
to 5
parameters
or
menu
items
that
appear
in each page in Define
and
Edit modes.--> p.21
ARPEGGIATOR
•ARPEGGIO ON/OFF
key
.PATTERN DEFINE
key
•OCTAVE
key
•LATCH/KEY SYNC
key
•SPEED
These are the controls for the arpeggiator;
on/
off, etc.
-->
p.15
•VOLUME
This
knob
adjusts
the
overall
volume
of
the
Prophecy.
This
simultaneously
adjusts
the
volume
from
the
OUTPUT jacks
(rear
panel)
and
from the PHONES jack.
-->
p.6
•WHEEL
3
HOLD
key
Pressing this key while
operating
WHEEL 3 will hold the
effect
where
it is at
that
moment. The effect will
be
held
even
if
you
return
WHEEL 3 to its original position.
An
LED will light while the
Hold
function is on. Press the key
again to
turn
it off.
If
Hold
is
on
and
you move WHEEL 3
through
the location
where
the HOLD key
was
pressed,
Hold
will be defeated automatically.--> p.13
•PORTAMENTO
key
This key
turns
portamento.
on/
off.
When Portamento is on, the switch LED will light.--> p.10
•OCTAVE
UP
key
•OCTAVE
DOWN
key
These
keys
shift
the
range
of
the
keyboard
in 1-octave
increments.--> p.IO
2
The operations
and
functions of the Prophecy such as selecting a
Program
or
editing
a Performance, Arpeggiator setting,
or
Edit
Program
are
grouped
broadly
into modes; Performance mode,
the
Define
modes
(Performance
Editor
Define
and
Pattern
Define),
and
Edit mode. For details refer to
page
18.
•RIBBON
(ribbon controller)
This is a
multi-assignable
controller.
By
moving
your
finger
on
the
con-
troller to the left or right,
or
by pressing
down,
you
can control assigned
para-
meters
such
as
pitch
or
modulation.
-->
p.13
•PHONES jack
A
set
of
headphones
can
be
connected to this stereo mini-jack.
•WHEEL
1,
WHEEL2, WHEEL3
(control wheel1 ,2,3)
These
are
assignable
wheel
controllers.
By
rotating
the
wheel
you
can
control
assigned
parameters
such as pitch
or
modulation.
-->
p.12,
13

•VALUE-
key,
VALUE+
key
In
Performance
mode,
these
keys select
the
program
to
play. --7 p.9
When
writing
a
program,
these
keys select
the
writing
destination program. --7 p.31
n Define
and
Edit modes, these keys modify the value of the
parameter where the cursor is located.
-->
p.21
•EXIT
key
This key is used to exit the
current
mode
or function; such
as
moving
from
Performance
Editor
Define
or
Pattern
Define modes back to the
previous
mode,
moving
in
Edit
mode
to an
upper
level,
or
canceling
an
operation or setting
that you are being asked to confirm.
•PERFORMANCE/EDIT Select
key
This key switches the function of the keys located to its right,
alternating
between
the
Performance
mode
functions
(the
upper
LED
will light)
and
the Edit
mode
functions (the lower
LED will blink).
•A/OSC
key
•CARD/MIXER
key
•CARD
PAT/AMP
key
•PE2/EG
key
•PE4/COMMON
key
•B/W.SHAPE
key
•IN
PAT/FILTER
key
•PE1/EFFECT
key
•PE3/LFO
key
•PE
DEFINE/GLOBAL
key
These
keys
access
the
function
selected
by
the
PERFOR-
MANCE/EDIT Select key.
When the LED above the PERFORMANCE/EDIT Select
key
is lit (Performance mode),
these keys select the
Program
Bank (A,B,Card),
the
Arpeggiator Pattern Bank (IN PAT, CARD PAT),
turn
on/off
the Performance Editor (PEl, PE2, PE3, PE4),
and
enter Performance Edit mode.
When
the LED below the PERFORMANCE/EDIT Select key
is blinking (Edit mode),
o these keys access the
various
section
of
Edit
mode
(OSC, W.SHAPE, MIXER, FILTER, AMP, EFFECT,
EG,
LFO, COMMON, GLOBAL).
Pattern/Program
Select
key
•WRITE
key
This
key
writes
the
settings
of
the
currently
selected program. p.31
If
the
program
is
protected,
a
message
will
appear
and
the operation will be canceled.
•COMPARE
key
When
editing
program
parameters,
this
key
allows
you
to call
up
the original
values
of
the
program.
Alternatively,
if
you
have
not
yet
written
your
edits,
this
key
allows
you
to
audition
other
programs
without
losing
your
edits
(For example, to find
an
alternate
writing
destination). p.31
•ENTER
key
This
key
is
used
to
finalize
the
input
from
the
numeric keys, to confirm
when
writing
a
program
or
executing
a
utility
function.
When
you
have
made
a
change
that
requires
confirmation
or
execution, the
LED
will blink. p.21
This key is also used to finalize a selection in a
menu
page. (In this case the
LED
will not blink.)
--7 p.20
This key switches the function of the keys located to its right;
they
will
either
select
performance
mode
arpeggio
patterns
(the
upper
LED will blink)
or
act as
numeric
keys to select
programs (when the lower
LED
is lit).
When
Performance
Editor
Define,
Pattern
Define
mode,
or
Edit
mode
are selected, both will go off. In this case, the
keys act as
+I-
input
keys for the parameter value.
Both
LEDs
will also
be
off
when
waiting for a Program Write
operation to be executed. (In this case the keys located to the
right will not function
at
all.)
P/0
key
•ALT
1/2
key
•RANDOM/4
key
•PAT2/6
key
DOWN/1
key
•ALT
2/3
key
•PAT115
key
•PAT3/7
key
PAT4/8
key
•PAT5/9
key
These keys access
the
function selected
by
the
PATTERN I
PROGRAM Select key.
When the
LED
above the PATTERN/PROGRAM Select key is
blinking,
These keys select arpeggiator
patterns
(UP, DOWN,
ALT
1,
ALT
2,
RANDOM, PAT 1, PAT
2,
PAT 3, PAT
When
the
LED
below the PATTERN/PROGRAM Select
key
is lit,
The keys will act as numeric keys to select programs
9).
When both of the PATTERN/PROGRAM Select LEOs are off,
These
keys will
act
as
numeric
keys for
entering
parameter
values in Define
and
Edit modes.
3

2
Basic
operation
•MEMORY CARD
1.2 Rear panel
•ECS
jack
Connect
an
ECS
External
Controller
(sold separately) to this
jack.
By
pressing the switch,
you
can
turn
on/
off
the
assigned
function. p.14
•MIDI
connectors (IN,
OUT,
THRU)
External MIDI devices
can
be connected to these connectors.
MIDI
IN
receives
messages
from
an
external
MIDI device.
MIDI
OUT
transmits
messages
from
the
Prophecy
to
external MIDI devices. MIDI THRU
re-transmits
messages
that
were
received
at
MIDI IN. p.36
An
optional
card
containing
(or for storing)
programs
and
arpeggiator
patterns
can be inserted here.
~-----------------------------------------------------
•POWER(power switch)
This switch
turns
the
power
on/off.
p.6
•Ac
power inlet
Connect the included AC cable to this inlet.
After
connecting
the
AC
cable
here,
connect the
other
end
to
an
AC outlet.
2.1
Setup
Cable
To
AC
Outlet
Prophecy
SOLO
SYNTHESIZER
MIDI Cable
Be
sure
that
the
power
is
turned
OFF
when
making
any
connections.
Basic connections
4
Connect
the
power
cable.
Connect the
audio
cables.
In
order
to
take
full
advantage
of
the
high
quality
sound
of
the
Prophecy,
we
recommend
that
you
use
a
stereo
system
if
possible.
If
you
are
connecting
it
in
mono,
use
the
L/MONO
jack.
In
order
to
faithfully
reproduce
the
sound
of
the
Prophecy,
we
recommend
that
you
use
a
powered
monitor
(a
powered
speaker
such
as
the
PM-15 [sold
separately]).
If
you
use
the
amp
of
your
stereo
audio
system
or
a
portable
cassette-radio
with
an
external
input,
connect
the
audio
cable from
the
Prophecy
to
the jack
marked
LINE IN,
AUXIN,
or
External
Input,
etc.
Please
be
aware
that
if
you
play
the
Prophecy
through
your
stereo
system
or
a cassette-radio,
you
should
keep the
volume
down,
since excessive volume
can
damage
your
speakers.
If
you
are
using
headphones,
connect
them
to
the
PHONES jack located at the left front
of
the Prophecy.
Connecting pedals, etc.
By
connecting
a
pedal
volume,
pedal
switch,
and
an
ECS
external
controller,
you
can
enjoy
an
even
wider
range
of
performance possibilities. Connect these devices as desired.
Connect
the
pedal
volume
(EXP-2, XVP-10 etc.
[sold
separately]) to
the
rear
panel
FOOT PEDAL connector.
The polarity
of
the
pedal
volume
(the
Max./Min
status)
is
determined
by
the Global section
page
GLB-4 [Sens &
Polar] Foot Pedal Polarity setting.
Connect
the
pedal
switch
(PS-1/2,
DS-1/2
etc.
[sold
separately]) to
the
rear
panel
FOOT SWITCH connector.
The polarity
of
the
pedal
switch
(the
ON/OFF
status) is
set
by
the
Global section
page
GLB-4 [Sens & Polar] Foot
SW Polarity setting.
Connect the
ECS
external controller [sold separately] to
the rear panel
ECS
connector.

•FOOT
PEDAL
jack
A
pedal
volume
such
as the EXP-2
or
XVP-10
(sold separately)
can
be
connected to this jack.
By
pressing
(or
releasing)
the
pedal
you
can
modify
the
value
of
the
assigned
parameter.
•RIBBON SENSE
(ribbon controller sensitivity)
This allows fine adjustment of the ribbon controller
sensitivity.
will
lower
the
sensitivity,
and
will
increase the sensitivity.
KORG
5 External
Controller
(EC5)
3 Pedal
Volume
(Such
as
EXP-2,
XVP-10)
Connections with MIDI devices
By
connecting
MIDI cables to
the
MIDI
connectors
of
the
Prophecy,
you
can
use
external
MIDI
devices
to
play
the
Prophecy,
or
use
the
keyboard
of
the
Prophecy
to
play
external MIDI devices.
If
you are using the Prophecy by itself, there
is
no need to make
the following connections.
If
you wish to use another MIDI keyboard or a computer
or
sequencer to control the Prophecy, use a MIDI cable to
connect
the
MIDI
OUT
connector
of
the
other
MIDI
device to the MIDI IN connector of the Prophecy.
If
you
wish
to
use
the
keyboard
and
controllers of the
Prophecy
to
play
another
MIDI
tone
generator
or
to
record into a
computer
or sequencer, use a MIDI cable to
connect the MIDI OUT connector of the Prophecy to the
MIDI IN connector of the other MIDI device.
By
using
MIDI
THRU
connectors, you can connect two or more
MIDI
devices,
but
to prevent problems, we recommend that
you connect no more than 2 or 3 devices using
MIDI
THRU.
If
you wish to connect more
MIDI
devices than this, use a
MIDI
patch bay.
•FOOT
SW
jack
A pedal switch such as the
FS-1
or
2 (sold separately) can
be
connected to this jack. This allows
you
to
turn
on/
off
the assigned
function.~
p.14
OUTPUT
jacks (UMONO,
R)
These
are
the
output
jacks. Your
power
amp,
stereo
amp,
mixer,
or
multi-track
recorder
etc.
can
be
connected here.
If
you are listening in mono, use the
L/
MONO jack.
2
Powered Monitor
(Such
as
PM-15)
«When
connecting
a
computer/sequencer»
If
you
will
be
using
the
keyboard
of
the
Prophecy
to
record into the computer
or
sequencer,
and
also using the
Prophecy as a tone generator (i.e.,
when
the Prophecy is
used
both
as the MIDI keyboard for
input
and
also as a
MIDI
tone
generator),
connect
the
Prophecy
and
the
computer
I sequencer to their respective MIDI OUT
and
MIDI IN
connectors.
In
this
setup,
if
the
computer
1
sequencer's
Echo Back
setting
is
turned
ON
(so
that
messages received
at
its MIDI
IN
will be re-transmitted
from
MIDI
OUT),
notes
played
on
the
Prophecy's
keyboard
will
be
played
(echoed)
once
again
by
the
message
being
re-transmitted
from
the
computer
I
sequencer.
To
prevent this from
happening
in such cases,
set
the
Prophecy
to Local OFF (to
break
the
internal
connection
between
the
keyboard
section
and
the tone
generator section). The Local OFF setting is
made
in the
Global section
page
GLB-8 [MIDI] Local.
If
Local is
OFF,
the Prophecy will not produce sound by
itself; i.e., playing the keyboard will not produce sound.
If
you are using the Prophecy by itself,
tum
Local
ON.
To
connect the Prophecy to a computer, you will need a
MIDI
interface.
5

6
2.2
Turning
the
power
on/off
Turning on the power
1
When
all necessary connections are complete,
press
the POWER
switch
to
turn
on
the
power
of the Prophecy.
2
Turn
on
the
power
for
your
powered speakers or stereo amp.
When the Prophecy's power is turned on, the opening screen will be displayed for several seconds,
and
then the Performance
mode
page will appear.
Immediately after power-on,
you
will always
be
in this mode.
Program
ADO
(*1)
will be selected,
and
the arpeggio
pattern
that
was last selected
when
the
power
was
turned
off will be selected.
*1.
If
the Global section
page
GLB-21
Page Memory setting is
turned
ON, the
program
that
was
selected
when
the
power
was
turned off will
be
selected.
Example of the Performance mode display
.....
..
,::
....
i.'
..
''.
EG
Turning off the power
Press the POWER switch once again, and the Prophecy's
power
will go off.
Turn
off the
power
to
your
powered
speakers or stereo
amp
before turning off the Prophecy.
2.3
Adjusting
the
volume
Rotate the VOLUME knob to set
an
appropriate volume.
This knob also sets the
headphone
volume.
«Getting back into Performance mode»
VOlUME
The Prophecy allows
you
to
move
easily
between
the various
modes
and
operations
such
as
Program
Write or Demo Playback. This means that until
you
become accustomed to operating the Prophecy,
you
may
inadvertently move to some other mode or to
an
unfamiliar display.
If
you
ever need to get back to
Performance mode, use the following procedure.
If
the Performance
mode
display
shown
above does
not
appear
in the LCD, check the following points.
1.
Turn
on
the Performance (upper)
LED
for the PERFORMANCE/EDIT select key.
If
the Edit (lower)
LED is blinking, press the PERFORMANCE/EDIT Select key to make the
upper
LED
light.
VALUE
+
ENTER
EXIT
EXITkey
PERFORMANCE LED is lit
Select key
FitTER
EG
If
pressing the PERFORMANCE/EDIT Select key does
not
switch the LED,
you
have
entered
Pattern
Define
mode
or Program Write from Edit mode. Repeatedly press the
EXIT
key until the screen display
no longer changes. Then press the PERFORMANCE/EDIT Select key to make the
upper
LED light.
2.
If
the
upper
LED
of the PERFORMANCE/EDIT Select key is lit
and
the display is different
than
that
shown
above, press the
EXIT
key until the display no longer changes.

2.4 Listening to the demo playback
The Prophecy contains 16
demo
songs
that
demonstrate
its capabilities.
1
Make sure
that
you
are
in
Performance mode.
For details refer to
page
6.
2
Simultaneously press the CURSOR <
and
CURSOR> keys to enter Demonstration mode.
(The ENTER key LED will blink.)
LEFT
Example of screen display
in
Demonstration mode
..
,
....
,
3
Either rotate
knob
1
or
use the value
+I-
keys to select the
demo
song.
The
name
of
used
program
is indicated.
Select one of the demo songs.
ENTER
4
To begin playback,
press
the ENTER key.
The
demo
songs are refrained from the selected song.
VALUE
+
Q Example of screen display during demo playback
Press the ENTER key to begin playback.
5
If
you
wish
to stop playback, press the EXIT key. (The ENTER key LED will blink.)
If
you
wish
to listen to the playback again after
stopping
repeat step
3
.
VALUE
+
ENTER
EXIT
During playback, press the EXIT key to stop playback.
Pressing the EXIT key while not playing back will exit Demonstration mode.
6
To
exit Demonstration mode, press the
EXIT
key while playback is
stopped.
7

8
2.5
Playing
a
program
There are
128
programs in internal memory (00-63 in
bank
A,
and
00-63 in
bank
B).
If
an optional card
is inserted, you can select from
an
additional
64
programs (00-63 in the Card bank).
About the Performance mode display
In Performance
mode,
the
display
will
be
as
shown
below. The selected
bank
key
and
Performance
Editor (PE) key LEDs will light.
Program bank
Program number
Program name
Program category (see page 9)
Arpeggiator pattern narne (see page 15)
PE1
PE2 PE3 PE4 PE5
Performance editor (see page 11)
Q
..
A
CARD
INT
PAT
CARD
PAT
PEl
PE2
PE3 PE4
PE
DEFINE
WRITE
Q
~
OSC
W
SHAPE
MIXER
FILTER
AMP
EFFECT
EG
LFO
COMMON GLOBAl
00@<)0(i)000000
Program bank Pattern bank Performance editor
• Selecting a prouram
Press the
m
Select
key
to
enter
Performance
mode
(see
page
'6)
Programs are selected in Performance mode.
Selecting the program bank
You
can
select from
bank
A,
bank
B,
and
(if a
card
is
inserted)
the
Card
bank.
Use
the
following
procedure
to select the bank.
Press the desired
bank
key (the A key for
bank
A, the B key for
bank
B,
or the CARD key
for the
Card
bank (*1)) to reserve the bank.
The
LED
of the
bank
key that you pressed
and
the ENTER key LED will begin blinking. At this point
the
bank
has
not yet been changed. The LED of the currently selected
bank
key is lit.
CARD
osc
W.SHAPE
HIXER
Et>UfR
e
~If
()
~-~
I:'=·
-1
~
~::;:.
-~'
1111
If a
card
is
not
inserted,
pressing
the
CARD
key
will
produce
an
error
message,
and
the
bank
will
not
change.
•
Inserting
or
removing
a
card
should
be
done
while
the
power
is
turned
off.
Use one of the following methods to finalize the
bank
you
reserved in step
[]}
.
•
Once
again
press
the
bank
key
you
pressed
in
step
[]),or
press
the
ENTER key.
The
program
number
will remain the same,
and
only the
bank
will change.
• Use the
numeric
keys
(and the ENTER key) to select a
program
number
(refer to
the
following
explanation
of
"Selecting a
program
number",
"Numeric
key
input".)
The
bank
and
program
number
will change.
Use one
of
the fo1llowing methods
to
cancel the reservation you
m~de
in step
[j)
.
• Press the EXIT
kt~y
or
the
currently
selected (lit)
bank
key.
The blinking will stop,
and
you
will
return
to the condition before step
[j}.
• Press a
bank
key
which
is
not
lit
or
blinking.
That
bank
key wiH begin blinking
and
enter the (reserved) status
of
step
[!J .
• Press the VALUE key.
You will
return
to the currently selected bank,
and
the
program
number
will change.

Selecting the program number
Each
bank
contains
64
programs
(00-63). You
can
use
one
of
the
following five
ways
to
select a
program.
,..
III
Using the VALUE+
and
VALUE- keys
Pressing
the
VALUE+ key will select the
next
higher
program
number,
and
pressing
the
VALUE-
key
will
select the next lower
program
number.
If
you
press
the
VALUE+
key
when
program
A63 is
selected,
program
BOO
will be selected.
If
you
press
the
VALUE+ key
when
program
B63
is selected,
program
COO
will be selected if the
Card
bank is available (i.e.,
if
a
t
The program number will
increment each time you
vALuE
press the key.
+
00
I The program number will decrement
f each time you press the key.
card
is inserted).
If
not,
program
AOO
will
be
selected.
If
program
C63 is selected,
pressing
the
VALUE+ key will select program
AOO.
The VALUE- key will have the opposite effect.
Using.
the
numeric
keys
Press the PATTERN/PROGRAM Select key to make the
LED
light as
shown
below. Each time you
press
the
key, the
upper
and
lower LEOs will alternate.
PATTERN/PROGRAM Select key
I
00000000000
Q
~
UP
DOWN
All
l All 2
RANDOM
PAll
PAT2
PAll
PAT-4
PAT5
f
~1-1
3
lit specify the Program number .
.-
[iJ
Two-digit
entry
using
the
numeric
keys
Use the numeric keys to specify a two-digit number. To select a
program
0-9,
press 0 first,
and
then
press the desired number.
If
you enter a
number
above
63,
program
63
will be selected .
.-
[!I
Numeric
keys+
ENTER key (lO's Hold: OFF)
The lO's place will
be
fixed
at
0,
and the numeric keys will enter the value of the 1 's place .
.-
liJ
Numeric keys + ENTER
key
(lO's Hold: ON)
The lO's place will be fixed
at
its current value,
and
the numeric keys will enter the value of the
l's
place.
*Methods
@)
and
~
are selected by the setting in Edit
mode
Global section page
GLB-21
[Page
Memory & lO's Hold]. With the factory settings, this is OFF.
Example: If program 58 is selected, the following operations will select ...
Two-digit entry using
the numeric keys
5s-Q~~>O-o3
Numeric keys +
ENTER key
(10's Hold: OFF)
Numeric keys +
ENTER key
(10's Hold: ON)
58
58
-
-
UP
0
0
ALT2
0
ALT2
3
AU 2
3
ENTER
..
0
ENTER
..
0
,..
[§l Selecting
programs
by
Program Category
-
03
-53
You
can
search for
and
select
programs
that
have
the
same
category
as the
currently
selected
program.
Press the PAGE RIGHT key to select higher-numbered programs,
and
press the PAGE
LEFT
key to
select lower-numbered programs. The Program number that have
t
the same category will increment
PAGE
each time you press the key.
LEFT
RIGHT
00
~
The Program number thai have
the same category will decrement
each time you press the key.
9

10
• Using the
ECS
to select programs
If
an
external controller
(ECS
[sold separately]) is connected to the
ECS
jack,
you
can select
programs
from the
ECS.
The Prophecy allows you to assign various control functions to the
ECS.
*
These
settings
are
made
in
Edit
mode
Global
section,
page
GLB-7
[ECS
Function].
• Using MIDI to
sel~ect
programs
You can select
programs
by
transmitting a
Program
Change
message from
an
external MIDI device to
the Prophecy (see
page
36).
•The
PORTAMENTO effect
Portamento is
an
effect
that
produces
a
smooth
change in pitch
between
two
notes
that
you
play. This
effect will be active
when
the PORTAMENTO key
has
been
pressed to
turn
portamento
ON
(the LED is
lit). Pressing the key will alternately switch the effect
on/
off.
0 8
()
0
WHEEL
3
PORT
AMENTO
DOWI'-1
UP
HOLD
'-----'
OCTAVE
The Portamento
ON/OFF
setting can
be
stored for each
program.
For the writing procedure, refer to
page
31.
*
If
the Edit
mode
page
OSC-cmn6 [Portamento] Portamento Time parameter
is
set
to
0,
switching the
PORTAMENTO
key
ON will
produce
no
effect.
*
The
Edit
mode
OSC
section
page
OSC-cmn6
[Portamento]
Fingered
Mode
parameter
allows
you
to
select
one
of
the
following
two
types
of
portamento.
NORMAL
Portamento will always apply, regardless of
how
you
play.
FINGERED
Portamento will be applied
only
when you
play
the next note before releasing the
previous
note.
•OCTAVE
UP/DO'WN
These
buttons
shift
the
pitch
of the
keyboard
in
1-octave steps. Press the OCTAVE UP
or
OCTAVE
DOWN
key to
turn
on
the effect (LED lit
or
blinking).
When
the
LED is unlit, the
keyboard
is in its
normal pitch range.
*
The
Edit
mode
Global
section
page
GLB-4
[Sens
&
Polar]
Octave
SW
Mode
parameter
allows
you
to
select
one
of
the
following settings.
LA T (latched) (factory setting)
When
you
press
the
UP
key
or
the
DOWN
key, the LED will light
and
the
keyboard
pitch
will
be
shifted 1 octave.
When
the UP key LED is lit, pressing the UP key once again will
make
the UP key
LED begin blinking,
and
the pitch will rise to 2 octaves above the initial pitch range.
Conversely,
when
the
UP key LED is lit
or
blinking,
pressing
the UP key will alternate
between
2
octaves
up
and
1 octave up. When the UP key LED is lit,
pressing
the
DOWN
key will
return
the
keyboard to the initial pitch range. When the UP key LED is blinking, pressing the
DOWN
key will
return the keyboard to 1 octave above its normal range. The same applies
in
the
downward
direction.
ULAT (unlatched)
The
keyboard
will be
shifted
1 octave
up
or
down
only
while
the
OCTAVE UP
key
or
OCTAVE
DOWN key is being pressed.

2.6 Performance Editor (PE)
Modifications to the
sound
of a
program
are
done
in Edit mode.
However
in Performance mode,
you
can also assign any desired parameter ( *
1)
to knobs
1-5,
allowing you to adjust volume
or
brightness
of the sound, envelope
speed
(the time
over
which the
sound
rises or decays), or effect settings. This
capability is referred to as the Performance Editor (PE) function. Each program has four
PE
sets.
If
two
or more
PE
sets are turned on, one knob can modify
up
to 4 different parameters at once.
*1 Parameters are assigned to the Performance Editor in Performance Editor Define (see
page
32).
•
Selecting
a
Performance
Editor
When one of the PE1-4 keys are pressed to make the LED light,
that
Performance Editor is
turned
on.
The previously selected
PE
will be turned off. Pressing the key of a currently-on
PE
will also
turn
it off.
If
you
wish to
turn
on
two or more Performance Editors, press the desired
PE
keys simultaneously.
PE
keys that were not pressed will be turned off.
To
turn
off
PE
keys that are on, individually press the
PE
keys that are on.
With a
PE
turned on, rotate knob
1-5
to modify the value of the parameters assigned to them,
and
listen
to the tone change.
H~::~~~i:~
Pr·or::·\···p::;··\:
..
ic.
~::;t;:::·F·~::.
~ ~
;.:,j:
·:•r
F~rr~:
UP
tii!!!!!~!!!!!!!!!!!i::i'
UZF'i·lc'd
I
Ci;;:,Fbk
l!!!i!!i!!!!!!!!!!H!!::::il
D l
:!Fbk
•
About
the
Performance
Editor display
Rotate a knob,
and
the value will change.
PEl
EfFECT
PE3
PE-6
I
PE2
EG
lFO
If
after rotating a knob
you
then select
another
program
(or if
you
enter Define or Edit mode, rotate a
knob,
and
then return to Performance mode), an arrow will
appear
in the display as
shown
below. This
indicates that the physical position of the knob differs from the value memorized in the program. Rotate
the knob in the direction of the arrow until it reaches the location of the program setting,
and
from that
point
the knob will once again control its assigned parameter(s).
Rotate the knob to modify the level.
1!!:::::::::::::::::::::::!!
li!!~!!!!!!!!!::::il
-0
Rotate the knob
in
the direction of the arrow. Control
will resume when the memorized value is reached.
I
i!<~::::::::::::::J
I
!1:::::::::::::->::J
When PE1-4 are
turned
on, the display will show
an
abbreviated name for the parameters assigned to
each knob.
•
Saving
a
sound
that
was
modified
by
the
Performance
Editor
Changes you make to a
sound
in Performance
mode
by
operating the Performance Editor can be saved.
For the Write procedure, refer to "4.3 Saving a
program"
(page
30).
1 1

12
2.7
Various
pllaying
techniques
By
operating the Performance Editor
and
controllers (WHEEL
1-3,
the ribbon controller, a connected
foot
switch
etc.),
and
by
varying the
way
that
you
play
the
keyboard,
you
can
modify
the
volume,
brightness, envelope speed (the length of the attack or decay),
and
effect settings,
and
in this
way
add
expressiveness to
your
playing.
• Control from the keyboard
Various control functions
(*1)
can be assigned within each program, allowing
your
playing to be more
expressive.
*1
In
Edit
mode,
you
can
independently specify
the
amount of control for
the
oscillator, filter,
and
effect
parameters,
and
use
one
cf
the
following
control
functions
as
a modulation
source.
Velocity
This provides control
bas<~d
on
the force with which you play a note.
After Touch
This provides control
bas,~d
on pressure applied to the keyboard after playing a note.
PORTAMENTO
This
button
controls the F'ortamento effect to create
smooth
pitch change between
two
notes.
Note Number
The note
number
of the key you press can affect a parameter in the
way
that you specify, for example
by
increasing the effect as
you
play higher on the keyboard.
•control
from WfsdgsEL 1/2/3, the RIBBON controller,
or the pedal volume
Various control functions
(*2)
can be assigned
within
each program, allowing
your
playing to be more
expressive.
*2
To
assign
a
controller
to
a
parameter,
make
settings
in
Edit
mode
Common
section
pages
CMN-5-9.
The
depth
of
the
change
can
be
set for
the
modulation
source
for
each
parameter.
For
details
on
these
settings,
refer
to
"Setting
and
using controllers"
(page
29).
WHEEL1
Rotating the wheel
away
from or toward yourself will
apply
the effect. This controller is normally used
for Pitch Bending. For programs whose OSC type is Brass (Reed), the pitch
bender
will
produce
a Mode
Jump
effect characteristic of brass (reed) instruments.
PBend+-
Here's what happens when Edit mode Common section
page CMN-5 Control Wheel 1
is
set to PBend+-.
The example is for when the C4 key
is
played and OSC
section page OSC-cmn5 PB Intensity (+X) is set to +02
and
PB
Intensity
(-X)
is
set
to
-o2.
*3 Setting
the
Edit
mode
Common
section
page
CMN-5 Control
Wheel
1 controller function
to
PBend+-
will
result
in
a
pitch
bend
of 0
when
WHEEL
1
is
in
the
center
position,
and
+1-
pitch
bend
when
the
wheel
is
moved
away
from
or
toward
yourself.
With settings
such
as
PBend+,
Atouch,
or
CChg
#00-95,
the
center
position
of
the
wheel
will
produce
0
and
moving
the
wheel
away
from
yourself I
toward
yourself will
produce
a
+I+
effect.
A setting of
PBend-
will
produce
a
-1-
effect.
The
+I-
polarity of
the
resulting
effect
will
depend
on
the
parameter
setting.
Other manuals for Prophecy
1
Table of contents
Other Korg Synthesizer manuals
Popular Synthesizer manuals by other brands

CORNFIELD ELECTRONICS
CORNFIELD ELECTRONICS Mantra manual

Erica Synths
Erica Synths GraphicVco user manual

Oberheim
Oberheim Two Voice instruction manual

Roland
Roland JX-10 owner's manual

Freedom Enterprise
Freedom Enterprise Inter Continental Capacitive Ballistic Synth owner's manual

Kurzweil
Kurzweil K2500 Appendix