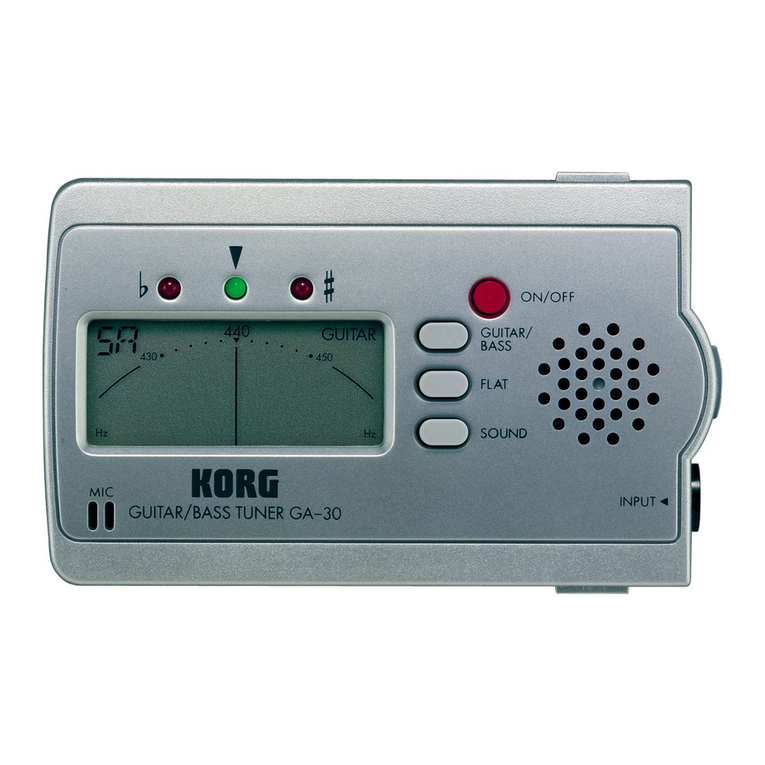
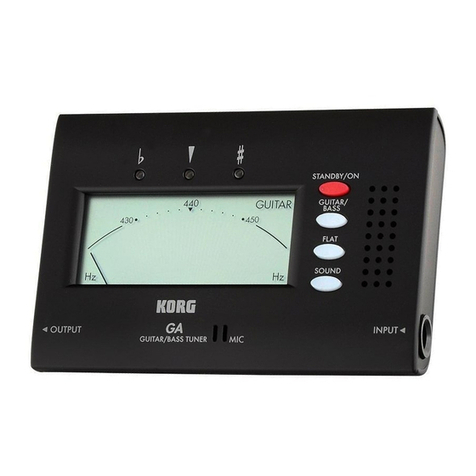
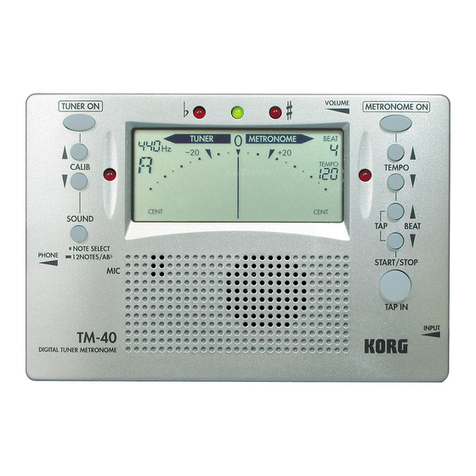
Korg GA-50 User manual

保証規定(必ずお読みください)
本保証書は、保証期間中に本製品を保証するもので、付属品類
(ヘッドホンなど)は保証の対象になりません。保証期間内に本
製品が故障した場合は、保証規定によって無償修理いたします。
1.本保証書の有効期間はお買い上げ日より1か年です。
2.
次の修理等は保証期間内であっても有償修理となります。
・消耗部品(電池など)の交換。 ・お取扱い方法が不適当のため
に生じた故障。 ・天災(火災、浸水等)によって生じた故障。
・故障の原因が本製品以外の他の機器にある場合。 ・不当な改
造、調整、部品交換などにより生じた故障または損傷。 ・保証
書にお買い上げ日、販売店名が未記入の場合、または字句が書
き替えられている場合。 ・本保証書の提示がない場合。尚、当
社が修理した部分が再度故障した場合は、保証期間外であって
も、修理した日より3か月以内に限り無償修理いたします。
3.本保証書は日本国内においてのみ有効です。
ThiswarrantyisvalidonlyinJapan.
4.お客様が保証期間中に移転された場合でも、保証は引き続きお
使いいただけます。詳しくは、お客様相談窓口までお問い合わ
せください。
5.修理、運送費用が製品の価格より高くなることもありますの
で、あらかじめお客様相談窓口へご相談ください。発送にかか
る費用は、お客様の負担とさせていただきます。
6.修理中の代替品、商品の貸し出し等は、いかなる場合において
も一切行っておりません。
本製品の故障、または使用上生じたお客様の直接、間接の損害に
つきましては、弊社は一切の責任を負いかねますのでご了承くだ
さい。本保証書は、保証規定により無償修理をお約束するための
もので、これによりお客様の法律上の権利を制限するものではあ
りません。
■お願い
1.
保証書に販売年月日等の記入がない場合は無効となります。記入
できないときは、お買い上げ年月日を証明できる領収書等と一緒
に保管してください。
2.
保証書は再発行致しませんので、紛失しないように大切に保管し
てください。
コルグ GA-50 保証書
本保証書は、保証規定により無償修理をお約束するも
のです。
お買い上げ日 年 月 日
販売店名
アフターサービス
修理および商品のお取り扱いについてのご質問、ご相談は、
お客様相談窓口へお問い合わせください。
お客様相談窓口
PHS等一部の電話ではご利用できません。固定電話または
携帯電話からおかけください。
受付時間
月曜~金曜10:00 ~ 17:00(祝祭日、窓口休業日を除く)
●
サービス・センター:
〒168-0073東京都杉並区下高井戸1-18-16 2F
English
Installing the batteries (Fig.1)
1. Slide the battery cover o of the GA-50. 2. Insert the batteries,
making sure the polarity is correct. 3. Slide the battery cover
closed.
Connections (Fig.2)
If you’re using the internal mic (a), don’t connect anything. If you’re
using the INPUT jack (b), connect your instrument with a mono ca-
ble, or connect the separately sold contact mic. Connect an amp to
the OUTPUT jack (c) using a mono cable. Never disconnect the
plug from the INPUT jack while the OUTPUT jack is connected.
Tuning (Fig.2)
1. Press the power button (d) to turn on the GA-50. 2. Press the
GUITAR/BASS button (e) to select the instrument that you want to
tune. 3. Play a single note on your instrument. 4. Tune your instru-
ment so that the desired note name appears on the display (f),
and the meter indication (g) is at “ ” at the center. The meter indi-
cation moves to the left if the pitch is at, and to the right if the
pitch is sharp.
Specifications (Overview)
Power supply: two AAA batteries 3V. Battery life: Approximately 135 hours
(using zinc-carbon batteries). Auto power-o: Approximately 20 minutes.
Dimensions: 100mm(W) x 67mm(D) x 17mm(H) / 3.94” x 2.64” x 0.67”.
Weight: 81g / 2.86 oz (including the batteries). Included items: Quick Start
Guide, two AAA batteries.
*
Specication and appearance are subject to change without notice for improvement.
Please download and read the Owner’s Manual for this tuner from the Korg
website, in order to make the best use of this tuner and to ensure long use.
www.korg.com
Français
Mise en place des piles (Fig.1)
1. Retirez le couvercle du compartiment des piles du GA-50 en le
glissant. 2. Placez les piles dans leur compartiment, en veillant à
respecter les indications de polarité. 3. Refermez le couvercle du
compartiment des piles.
Raccordements (Fig.2)
Si vous utilisez le micro incorporé (a), ne branchez rien. Si vous
utilisez la prise INPUT (b), reliez votre instrument avec un câble
mono ou branchez le microphone de contact disponible en op-
tion. Branchez un ampli à la prise OUTPUT (c) avec un câble mono.
Ne débranchez jamais la che de la prise INPUT alors que la prise
OUTPUT est raccordée.
Accord (Fig.2)
1. Appuyez sur le bouton d’alimentation (d) pour activer le GA-50.
2. Appuyez sur le bouton GUITAR/BASS (e) pour sélectionner le
type d’instrument à accorder. 3. Jouez une note unique sur votre
instrument. 4. Accordez votre instrument de sorte que le nom de
la note voulue s’ache sur l’achage (f) et que l’indicateur d’ac-
cordage (g) se trouve sur “ ”au centre. L’indicateur d’accordage se
déplace vers la gauche quand la hauteur est trop basse et vers la
droite quand la hauteur est trop élevée.
Fiche techniques (Aperçu)
Alimentation: deux piles AAA (3V). Durée des piles: Environ 135 heures pour
des piles au zinc-carbone. Mise hors tension automatique: Environ 20 mi-
nutes. Dimensions: 100 mm (L) x 67 mm (P) x 17 mm (H). Poids: 81g (piles
comprises). Accessoires fournis: Guide de prise en main, deux piles AAA.
*Les caractéristiques et l’aspect du produit sont susceptibles d’être modiés
sans avis préalable en vue d’une amélioration.
Pour une utilisation et une longévité optimales de cet accordeur, veuillez té-
lécharger et lire le Manuel d’utilisation de cet accordeur sur le site internet de
Korg. www.korg.com
Deutsch
Batterien einlegen (Fig.1)
1. Schieben Sie den Batteriefachdeckel des GA-50 auf. 2. Legen Sie
die Batterien ein und achten Sie hierbei auf die korrekte Polung. 3.
Schieben Sie den Batteriefachdeckel wieder zu.
Anschlüsse (Fig.2)
Wenn Sie das interne Mikrofon (a) verwenden wollen, schließen
Sie nichts an. Falls Sie die INPUT-Buchse (b) verwenden, schließen
Sie Ihr Instrument mit einem Mono-Kabel an - Sie können hier
auch ein im Fachhandel erhältliches Kontaktmikrofon anschließen.
Schließen Sie Ihren Amp mit einem Mono-Kabel an die OUT-
PUT-Buchse (c) an. Ziehen Sie nie den Stecker von der IN-
PUT-Buchse ab, während die OUTPUT-Buchse verbunden ist.
Stimmen (Fig.2)
1. Drücken Sie die Einschalttaste (d), um das GA-50 einzuschalten.
2. Drücken Sie die GUITAR/BASS-Taste (e), um das Instrument zu
wählen, das Sie stimmen wollen. 3. Spielen Sie eine einzelne Note
auf Ihrem Instrument. 4. Stimmen Sie Ihr Instrument so, dass der
gewünschte Notenname im Display (f) erscheint und die Stim-
manzeige (g) zentral auf„ “ steht. Ist die Stimmung zu tief, bewegt
sich die Stimmanzeige nach links; ist sie zu hoch, nach rechts.
Technische Daten (Übersicht)
Stromversorgung: Zwei AAA-Batterien (3V). Lebensdauer der Batterien:
Etwa 135 Stunden (Zink-Kohlenstobatterien). Energiesparfunktion: Etwa
20 Minuten. Abmessungen: 100 mm (B) x 67 mm (T) x 17 mm (H). Gewicht:
81g (mit Batterien). Lieferumfang: Blitzstart, zwei AAA-Batterien.
*Änderungen der technischen Daten und des Designs ohne vorherige An-
kündigung vorbehalten.
Bitte laden Sie sich die Bedienungsanleitung zu diesem Produkt herunter
und lesen Sie sie durch, um das Stimmgerät korrekt zu bedienen und lange
Ihre Freude daran zu haben. www.korg.com
Español
Instalación de las pilas (Fig.1)
1. Quite la tapa del compartimento de las pilas del GA-50
deslizándola. 2. Inserte las pilas asegurándose de que lo
hace con la polaridad correcta. 3. Cierre la tapa del comparti-
mento de las pilas deslizándola de nuevo.
Conexiones (Fig.2)
Si utiliza el micrófono incorporado (a), no tiene que conectar
nada. Si utiliza el jack INPUT (b), conecte el instrumento con
un cable mono, o bien conecte el micrófono de contacto (se
vende por separado). Conecte un amplificador al jack OU-
TPUT (c) con un cable mono. Nunca desconecte el conector
del jack INPUT mientras el jack OUTPUT esté conectado.
Afinación (Fig.2)
1. Pulse el botón de alimentación (d) para encender el GA-50.
2. Pulse el botón GUITAR/BASS (e) para seleccionar el instru-
mento que desee anar. 3. Toque una nota única en su instru-
mento. 4. Ane el instrumento de modo que el nombre de la
nota deseada aparezca en la pantalla (f), y que la indicación
del medidor (g) esté en “ ” en el centro. La indicación del
medidor se mueve hacia la izquierda si el tono de anación
está bajo y hacia la derecha si el tono de anación está alto.
Especificaciones (Resumen)
Alimentación: dos pilas AAA (3V). Duración de la pila: Aproximada-
mente 135 horas (Pilas zinc-carbono). Apagado automático: Aproxi-
madamente 20 minutos. Dimensiones: 100 mm (Anch.) x 67 mm
(Prof.) x 17 mm (Alt.). Peso: 81g (incluyendo las pilas). Elementos in-
cluidos: Guía de inicio rápido, pilas AAA (x2)
*Las especicaciones y el aspecto est sujetas a cambios sin previo
aviso por mejora.
Descargue el Manual de usuario de este anador desde el sitio web de
Korg y léalo para poder hacer el mejor uso de él y que dure mucho
tiempo. www.korg.com
日本語
電池を入れる (Fig.1)
1.GA-50の裏面をスライドさせて開けます。
2.極性に気を付け
て電池を入れます。3.スライドさせて閉めます。
*
付属の電池は動作確認用のため、通常より寿命が短い場合があります。
接続 (Fig.2)
内蔵マイク(a)を使用するときは、何も接続しないでください。
INPUT端子(b)に接続するときは、モノラル・ケーブルで楽器
を接続するか、別売のコンタクト・マイクを接続します。
OUTPUT端子(c)にはモノラル・ケーブルでアンプ類を接続し
ます。OUTPUT端子に接続しているときは絶対にINPUT端子
からプラグを抜かないでください。
チューニングする (Fig.2)
1.電源ボタン(d)を押して電源をオンにします。2.GUITAR/
BASSボタン(e)を押してチューニングする楽器を選びます。
3.楽器を単音で鳴らします。4.合わせたい音名がディスプレ
イ(f)に表示され、メーター (g)が中央の“ ”を指すように
チューニングします。メーターは音が低いときは左を、高いと
きは右を指します。
仕様(概略)
電 源:単4形乾電池2本(3V)電池寿命:約135時間(マンガン電池使用
時 ) オート・パワー・オフ:約20分外形寸法:100mm(W)x67mm
(D)x17mm(H)質 量:81g(電池含む)付属品:クイック・スタート・
ガイド、動作確認用単4形乾電池x2本
*仕様および外観は改良のため予告なく変更する場合があります。
製品の仕様を最大限に活用し、末永くご愛用いただくためにも、コル
グ・ウェブサイトから「取扱説明書」をダウンロードして、お読みくだ
さい。 www.korg.com
Fig.1
Fig.2
/
/
Published 11/2017 Printed in Vietnam

保証規定(必ずお読みください)
本保証書は、保証期間中に本製品を保証するもので、付属品類
(ヘッドホンなど)は保証の対象になりません。保証期間内に本
製品が故障した場合は、保証規定によって無償修理いたします。
1.本保証書の有効期間はお買い上げ日より1か年です。
2.
次の修理等は保証期間内であっても有償修理となります。
・消耗部品(電池など)の交換。 ・お取扱い方法が不適当のため
に生じた故障。 ・天災(火災、浸水等)によって生じた故障。
・故障の原因が本製品以外の他の機器にある場合。 ・不当な改
造、調整、部品交換などにより生じた故障または損傷。 ・保証
書にお買い上げ日、販売店名が未記入の場合、または字句が書
き替えられている場合。 ・本保証書の提示がない場合。尚、当
社が修理した部分が再度故障した場合は、保証期間外であって
も、修理した日より3か月以内に限り無償修理いたします。
3.本保証書は日本国内においてのみ有効です。
ThiswarrantyisvalidonlyinJapan.
4.お客様が保証期間中に移転された場合でも、保証は引き続きお
使いいただけます。詳しくは、お客様相談窓口までお問い合わ
せください。
5.修理、運送費用が製品の価格より高くなることもありますの
で、あらかじめお客様相談窓口へご相談ください。発送にかか
る費用は、お客様の負担とさせていただきます。
6.修理中の代替品、商品の貸し出し等は、いかなる場合において
も一切行っておりません。
本製品の故障、または使用上生じたお客様の直接、間接の損害に
つきましては、弊社は一切の責任を負いかねますのでご了承くだ
さい。本保証書は、保証規定により無償修理をお約束するための
もので、これによりお客様の法律上の権利を制限するものではあ
りません。
■お願い
1.
保証書に販売年月日等の記入がない場合は無効となります。記入
できないときは、お買い上げ年月日を証明できる領収書等と一緒
に保管してください。
2.
保証書は再発行致しませんので、紛失しないように大切に保管し
てください。
コルグ GA-50 保証書
本保証書は、保証規定により無償修理をお約束するも
のです。
お買い上げ日 年 月 日
販売店名
アフターサービス
修理および商品のお取り扱いについてのご質問、ご相談は、
お客様相談窓口へお問い合わせください。
お客様相談窓口
PHS等一部の電話ではご利用できません。固定電話または
携帯電話からおかけください。
受付時間
月曜~金曜10:00 ~ 17:00(祝祭日、窓口休業日を除く)
●
サービス・センター:
〒168-0073東京都杉並区下高井戸1-18-16 2F
English
Installing the batteries (Fig.1)
1. Slide the battery cover o of the GA-50. 2. Insert the batteries,
making sure the polarity is correct. 3. Slide the battery cover
closed.
Connections (Fig.2)
If you’re using the internal mic (a), don’t connect anything. If you’re
using the INPUT jack (b), connect your instrument with a mono ca-
ble, or connect the separately sold contact mic. Connect an amp to
the OUTPUT jack (c) using a mono cable. Never disconnect the
plug from the INPUT jack while the OUTPUT jack is connected.
Tuning (Fig.2)
1. Press the power button (d) to turn on the GA-50. 2. Press the
GUITAR/BASS button (e) to select the instrument that you want to
tune. 3. Play a single note on your instrument. 4. Tune your instru-
ment so that the desired note name appears on the display (f),
and the meter indication (g) is at “ ”at the center. The meter indi-
cation moves to the left if the pitch is at, and to the right if the
pitch is sharp.
Specifications (Overview)
Power supply: two AAA batteries 3V. Battery life: Approximately 135 hours
(using zinc-carbon batteries). Auto power-o: Approximately 20 minutes.
Dimensions: 100mm(W) x 67mm(D) x 17mm(H) / 3.94” x 2.64” x 0.67”.
Weight: 81g / 2.86 oz (including the batteries). Included items: Quick Start
Guide, two AAA batteries.
*
Specication and appearance are subject to change without notice for improvement.
Please download and read the Owner’s Manual for this tuner from the Korg
website, in order to make the best use of this tuner and to ensure long use.
www.korg.com
Français
Mise en place des piles (Fig.1)
1. Retirez le couvercle du compartiment des piles du GA-50 en le
glissant. 2. Placez les piles dans leur compartiment, en veillant à
respecter les indications de polarité. 3. Refermez le couvercle du
compartiment des piles.
Raccordements (Fig.2)
Si vous utilisez le micro incorporé (a), ne branchez rien. Si vous
utilisez la prise INPUT (b), reliez votre instrument avec un câble
mono ou branchez le microphone de contact disponible en op-
tion. Branchez un ampli à la prise OUTPUT (c) avec un câble mono.
Ne débranchez jamais la che de la prise INPUT alors que la prise
OUTPUT est raccordée.
Accord (Fig.2)
1. Appuyez sur le bouton d’alimentation (d) pour activer le GA-50.
2. Appuyez sur le bouton GUITAR/BASS (e) pour sélectionner le
type d’instrument à accorder. 3. Jouez une note unique sur votre
instrument. 4. Accordez votre instrument de sorte que le nom de
la note voulue s’ache sur l’achage (f) et que l’indicateur d’ac-
cordage (g) se trouve sur “ ”au centre. L’indicateur d’accordage se
déplace vers la gauche quand la hauteur est trop basse et vers la
droite quand la hauteur est trop élevée.
Fiche techniques (Aperçu)
Alimentation: deux piles AAA (3V). Durée des piles: Environ 135 heures pour
des piles au zinc-carbone. Mise hors tension automatique: Environ 20 mi-
nutes. Dimensions: 100 mm (L) x 67 mm (P) x 17 mm (H). Poids: 81g (piles
comprises). Accessoires fournis: Guide de prise en main, deux piles AAA.
*Les caractéristiques et l’aspect du produit sont susceptibles d’être modiés
sans avis préalable en vue d’une amélioration.
Pour une utilisation et une longévité optimales de cet accordeur, veuillez té-
lécharger et lire le Manuel d’utilisation de cet accordeur sur le site internet de
Korg. www.korg.com
Deutsch
Batterien einlegen (Fig.1)
1. Schieben Sie den Batteriefachdeckel des GA-50 auf. 2. Legen Sie
die Batterien ein und achten Sie hierbei auf die korrekte Polung. 3.
Schieben Sie den Batteriefachdeckel wieder zu.
Anschlüsse (Fig.2)
Wenn Sie das interne Mikrofon (a) verwenden wollen, schließen
Sie nichts an. Falls Sie die INPUT-Buchse (b) verwenden, schließen
Sie Ihr Instrument mit einem Mono-Kabel an - Sie können hier
auch ein im Fachhandel erhältliches Kontaktmikrofon anschließen.
Schließen Sie Ihren Amp mit einem Mono-Kabel an die OUT-
PUT-Buchse (c) an. Ziehen Sie nie den Stecker von der IN-
PUT-Buchse ab, während die OUTPUT-Buchse verbunden ist.
Stimmen (Fig.2)
1. Drücken Sie die Einschalttaste (d), um das GA-50 einzuschalten.
2. Drücken Sie die GUITAR/BASS-Taste (e), um das Instrument zu
wählen, das Sie stimmen wollen. 3. Spielen Sie eine einzelne Note
auf Ihrem Instrument. 4. Stimmen Sie Ihr Instrument so, dass der
gewünschte Notenname im Display (f) erscheint und die Stim-
manzeige (g) zentral auf„ “ steht. Ist die Stimmung zu tief, bewegt
sich die Stimmanzeige nach links; ist sie zu hoch, nach rechts.
Technische Daten (Übersicht)
Stromversorgung: Zwei AAA-Batterien (3V). Lebensdauer der Batterien:
Etwa 135 Stunden (Zink-Kohlenstobatterien). Energiesparfunktion: Etwa
20 Minuten. Abmessungen: 100 mm (B) x 67 mm (T) x 17 mm (H). Gewicht:
81g (mit Batterien). Lieferumfang: Blitzstart, zwei AAA-Batterien.
*Änderungen der technischen Daten und des Designs ohne vorherige An-
kündigung vorbehalten.
Bitte laden Sie sich die Bedienungsanleitung zu diesem Produkt herunter
und lesen Sie sie durch, um das Stimmgerät korrekt zu bedienen und lange
Ihre Freude daran zu haben. www.korg.com
Español
Instalación de las pilas (Fig.1)
1. Quite la tapa del compartimento de las pilas del GA-50
deslizándola. 2. Inserte las pilas asegurándose de que lo
hace con la polaridad correcta. 3. Cierre la tapa del comparti-
mento de las pilas deslizándola de nuevo.
Conexiones (Fig.2)
Si utiliza el micrófono incorporado (a), no tiene que conectar
nada. Si utiliza el jack INPUT (b), conecte el instrumento con
un cable mono, o bien conecte el micrófono de contacto (se
vende por separado). Conecte un amplificador al jack OU-
TPUT (c) con un cable mono. Nunca desconecte el conector
del jack INPUT mientras el jack OUTPUT esté conectado.
Afinación (Fig.2)
1. Pulse el botón de alimentación (d) para encender el GA-50.
2. Pulse el botón GUITAR/BASS (e) para seleccionar el instru-
mento que desee anar. 3. Toque una nota única en su instru-
mento. 4. Ane el instrumento de modo que el nombre de la
nota deseada aparezca en la pantalla (f), y que la indicación
del medidor (g) esté en “ ” en el centro. La indicación del
medidor se mueve hacia la izquierda si el tono de anación
está bajo y hacia la derecha si el tono de anación está alto.
Especificaciones (Resumen)
Alimentación: dos pilas AAA (3V). Duración de la pila: Aproximada-
mente 135 horas (Pilas zinc-carbono). Apagado automático: Aproxi-
madamente 20 minutos. Dimensiones: 100 mm (Anch.) x 67 mm
(Prof.) x 17 mm (Alt.). Peso: 81g (incluyendo las pilas). Elementos in-
cluidos: Guía de inicio rápido, pilas AAA (x2)
*Las especicaciones y el aspecto est sujetas a cambios sin previo
aviso por mejora.
Descargue el Manual de usuario de este anador desde el sitio web de
Korg y léalo para poder hacer el mejor uso de él y que dure mucho
tiempo. www.korg.com
日本語
電池を入れる (Fig.1)
1.GA-50の裏面をスライドさせて開けます。
2.極性に気を付け
て電池を入れます。3.スライドさせて閉めます。
*
付属の電池は動作確認用のため、通常より寿命が短い場合があります。
接続 (Fig.2)
内蔵マイク(a)を使用するときは、何も接続しないでください。
INPUT端子(b)に接続するときは、モノラル・ケーブルで楽器
を接続するか、別売のコンタクト・マイクを接続します。
OUTPUT端子(c)にはモノラル・ケーブルでアンプ類を接続し
ます。OUTPUT端子に接続しているときは絶対にINPUT端子
からプラグを抜かないでください。
チューニングする (Fig.2)
1.電源ボタン(d)を押して電源をオンにします。2.GUITAR/
BASSボタン(e)を押してチューニングする楽器を選びます。
3.楽器を単音で鳴らします。4.合わせたい音名がディスプレ
イ(f)に表示され、メーター (g)が中央の“ ”を指すように
チューニングします。メーターは音が低いときは左を、高いと
きは右を指します。
仕様(概略)
電 源:単4形乾電池2本(3V)電池寿命:約135時間(マンガン電池使用
時 ) オート・パワー・オフ:約20分外形寸法:100mm(W)x67mm
(D)x17mm(H)質 量:81g(電池含む)付属品:クイック・スタート・
ガイド、動作確認用単4形乾電池x2本
*仕様および外観は改良のため予告なく変更する場合があります。
製品の仕様を最大限に活用し、末永くご愛用いただくためにも、コル
グ・ウェブサイトから「取扱説明書」をダウンロードして、お読みくだ
さい。 www.korg.com
Fig.1
Fig.2
/
/
Published 11/2017 Printed in Vietnam
Other manuals for GA-50
1
Table of contents
Other Korg Tuner manuals

Korg
Korg Pitchclip 2 User manual

Korg
Korg Pitchjack GB-1 User manual

Korg
Korg Dolcetto-T User manual

Korg
Korg CA-2 User manual

Korg
Korg DTR-1000 User manual

Korg
Korg Pitchblack XS User manual

Korg
Korg PitchHawk-U User manual

Korg
Korg AW-OTG-POLY User manual

Korg
Korg PC-O User manual

Korg
Korg AW-LT100G User manual