KPI-JCI 8203FP User manual

86470 Franklin Blvd, Eugene, OR 97405 • 800-314-4656 • 541-736-1400 • Fax 541-988-9401
24/7 Parts Number 888-474-0115
Screening Plant Operation Manual
and Parts Book
Model 8203FP


Table of Contents
Fast Pack Operation and Service Manual
Rev. 03
SECTION 1: INTRODUCTION
Description...................................................................................................................................................... 1
Fast Pack Operation Manual..................................................................................................................... 4
New parts and equipment warranty................................................................................................................ 4
Disclaimer/Limitation of Warranties........................................................................................................... 4
Address for Notices........................................................................................................................................ 5
SECTION 2: SAFETY
Safety Overview ............................................................................................................................................. 7
Hazard and Advisory Statements................................................................................................................... 7
Hazard Statements.................................................................................................................................... 7
Advisory Statements ................................................................................................................................. 7
Lockout/Tagout............................................................................................................................................... 7
Who Must Use Lockout/Tagout?............................................................................................................... 7
What is Lockout/Tagout?........................................................................................................................... 8
When Must Lockout/Tagout Occur?.......................................................................................................... 8
How is Lockout/Tagout Performed?.......................................................................................................... 8
When Can Lockout/Tagout Devices be Removed? .................................................................................. 8
Lockout/Tagout Devices............................................................................................................................ 9
Lockout/Tagout Rules ............................................................................................................................... 9
Additional Lockout/Tagout Requirements ................................................................................................. 9
Miscellaneous Safety Tips.............................................................................................................................. 10
Know Your Machinery ............................................................................................................................... 10
Be Prepared for Emergencies................................................................................................................... 10
Wear Personal Protective Equipment (PPE)............................................................................................. 10
Observe Personal Safety Precautions ...................................................................................................... 10
Help Prevent Accidents............................................................................................................................. 11
Avoid Alcohol and Other Drugs................................................................................................................. 11
Be Aware of Your Surroundings................................................................................................................ 11
Practice Good Housekeeping.................................................................................................................... 11
Inspect And Maintain Machinery ............................................................................................................... 12
Machinery Installation Safety.......................................................................................................................... 12
Foundations............................................................................................................................................... 12
Guarding .............................................................................................................................................. 12
Customer Modifications........................................................................................................................ 12
Electrical Hook-up .......................................................................................................................................... 13
Maintenance and Repair Safety..................................................................................................................... 13
General Precautions.................................................................................................................................. 13
Electrical Systems..................................................................................................................................... 13
Pressurized Systems (hydraulic and air)................................................................................................... 14
Welding On Machinery.............................................................................................................................. 14
Clearing Jammed Material ........................................................................................................................ 14
Hazardous Materials ................................................................................................................................. 15
Disposal Of Excess Fuels, Lubricants And Liquids................................................................................... 15
Flammable and Combustible Liquids ........................................................................................................ 15
Hoisting and Handling Safety......................................................................................................................... 15
General Precautions.................................................................................................................................. 15
Wire Rope ............................................................................................................................................ 15
Connecting Or Clamping Wire Ropes.................................................................................................. 16
Chains.................................................................................................................................................. 16

Table of Contents
Fast Pack Operation and Service Manual
Rev. 03
Fiber Or Synthetic Slings ..................................................................................................................... 16
Transporting Machinery.................................................................................................................................. 16
Conveyor Safety............................................................................................................................................. 17
Safety Decals ................................................................................................................................................. 19
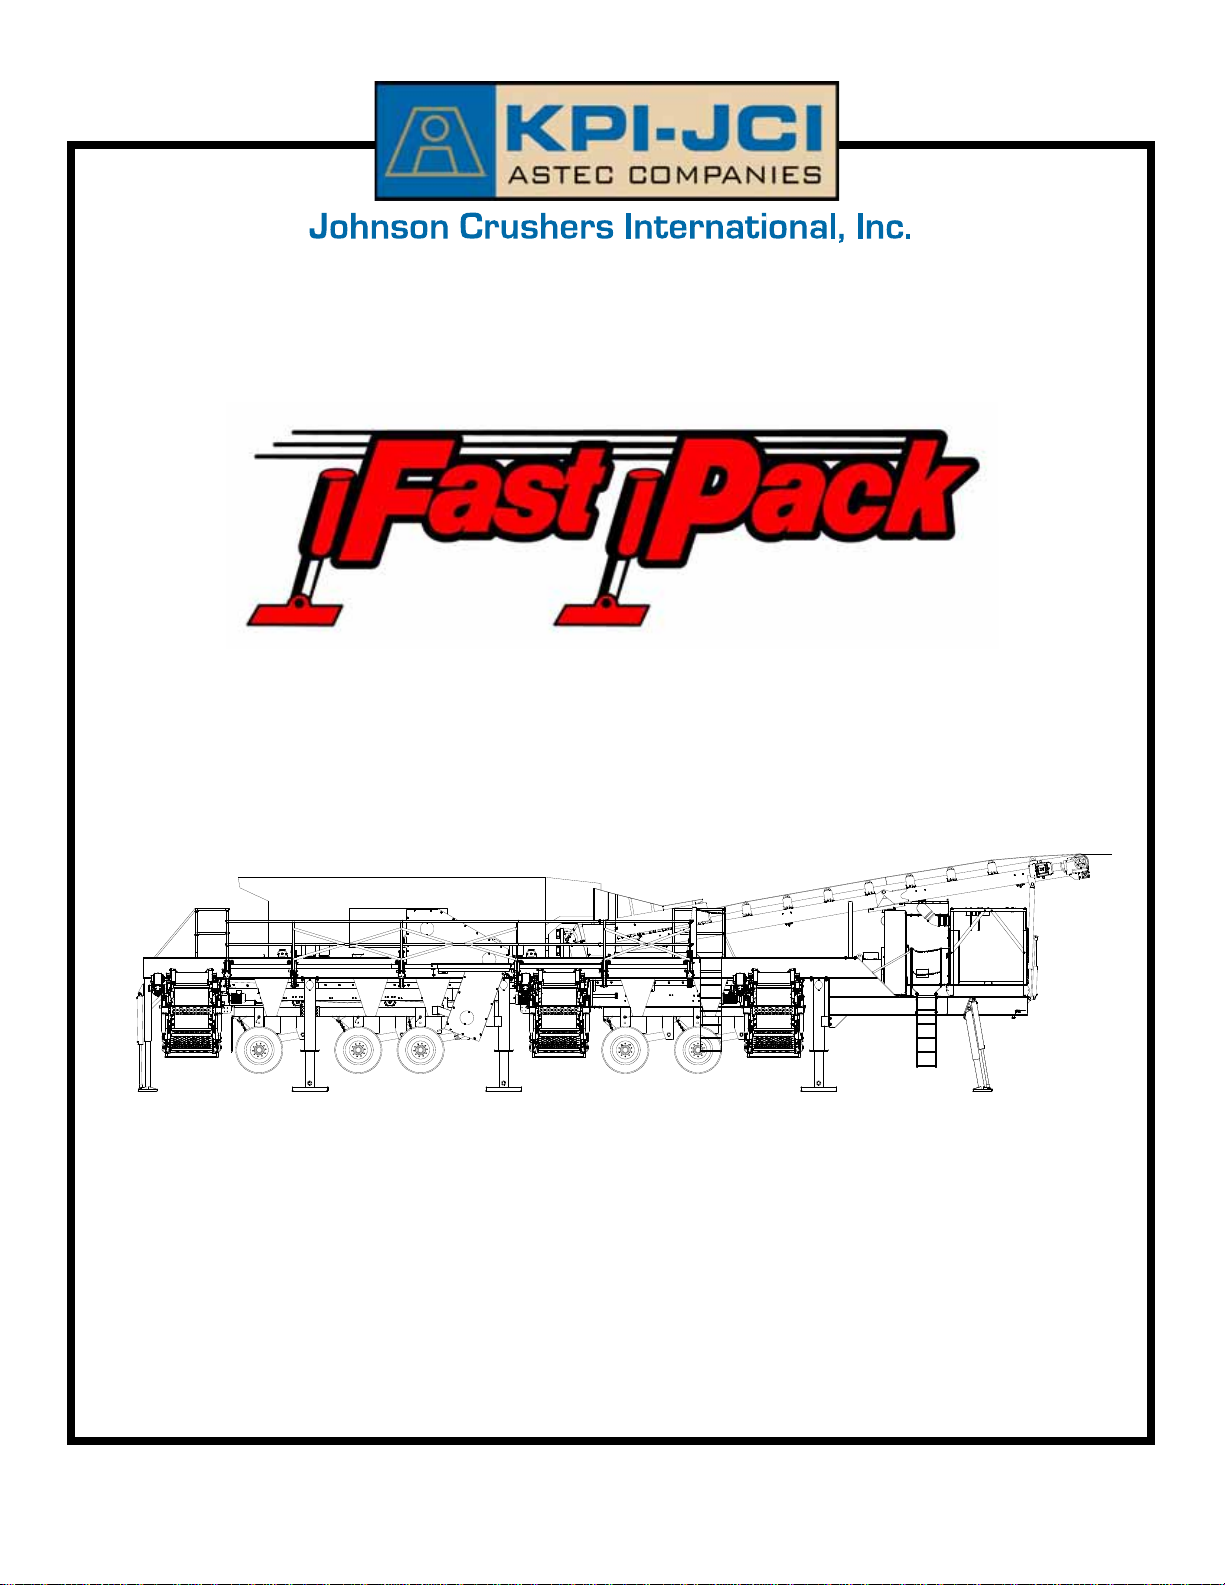
Scalping Plant Right-Hand Side................................................................................................................ 25
Scalping Plant Left-Hand Side .................................................................................................................. 26
SECTION 3: SPECIFICATIONS
Screen Plant Specification.............................................................................................................................. 29
Operation Dimension................................................................................................................................. 29
Travel Dimensions..................................................................................................................................... 31
Capacities.................................................................................................................................................. 32
Conveyor Widths....................................................................................................................................... 32
Engine....................................................................................................................................................... 32
Batteries.................................................................................................................................................... 32
Component Weights.................................................................................................................................. 32
Relief Pressures........................................................................................................................................ 32
SECTION 4: CONTROLS AND INDICATORS
Introduction..................................................................................................................................................... 33
Screen Plant Control and Indicator Location............................................................................................. 34
Travel and Set-up Controls, Indicators, and Gauges ..................................................................................... 36
Suspension System................................................................................................................................... 36
Air Bag Pressure.................................................................................................................................. 36
Air Bag Pressure Gauge...................................................................................................................... 36
Height Control Valve............................................................................................................................ 36
Height Adjust Valve.............................................................................................................................. 36
Self Steering Axle Pressure Value....................................................................................................... 36
Self Steering Axle Pressure Gauge ..................................................................................................... 36
Self-Steering Axle Lock Value.............................................................................................................. 37
Hydraulic System Controls........................................................................................................................ 37
Hydraulic Level Operation......................................................................................................................... 37
Hydraulic Stabilizer Control Bank......................................................................................................... 38
Stabilizer Locations.............................................................................................................................. 38
Hydraulic Jack Control Bank................................................................................................................ 39
Jack Laotians....................................................................................................................................... 39
Operational Controls, Indicators, and Gauges ............................................................................................... 39
Plant Emergency Stop (E-Stop) Switches and Warning Horns ................................................................ 39
Emergency Stop (E-Stop) Switches..................................................................................................... 39
Warning Horns..................................................................................................................................... 40
Battery Isolation (ISO) Switch .................................................................................................................. 40
60 Amp Circuit Breaker............................................................................................................................. 40
Generator Shut Off Switch ........................................................................................................................ 41
Fuel Gauge................................................................................................................................................ 41
Air Intake Restriction Indication................................................................................................................. 41
Profinet Connection................................................................................................................................... 41
Electrical Connections............................................................................................................................... 42
Conveyors and Walkways Hydraulic Controls........................................................................................... 43
Conveyor Adjustments......................................................................................................................... 43
Walkway Adjustments.......................................................................................................................... 43
Blending Chute Controls ........................................................................................................................... 43

Table of Contents
Fast Pack Operation and Service Manual
Rev. 03
Hydraulic Power Unit................................................................................................................................. 44
Hydraulic Filter Gauge............................................................................................................................... 44
Hydraulic System PSI Gauge.................................................................................................................... 44
Hydraulic Fluid Temperature Gauge ......................................................................................................... 44
Engine Control Panel ................................................................................................................................ 45
Engine Maintenance Light/Maintenance Reset Switch........................................................................ 45
Diesel Fuel Pressure Gauge................................................................................................................ 46
Engine Error Warning Light.................................................................................................................. 46
Engine Oil Pressure Gauge ................................................................................................................. 46
Engine Coolant Temperature Gauge ................................................................................................... 46
Engine Shutdown Warning Light.......................................................................................................... 47
Voltmeter.............................................................................................................................................. 47
Tachometer Engine Error Code Display/Hour Meter ........................................................................... 47
Ignition Switch...................................................................................................................................... 47
Engine Shutdown Switch ..................................................................................................................... 48
Engine Idle Speed Adjust Switch......................................................................................................... 48
Control Panel Switch Operation ................................................................................................................ 48
Finishing Plant Electrical Panel................................................................................................................. 49
Circuit Breakers.................................................................................................................................... 50
Starter and Overload Breaker .............................................................................................................. 50
Scalping Plant Electrical Panel.................................................................................................................. 51
Control Panel Switch Operation........................................................................................................... 52
Finishing Plant Control Panel.................................................................................................................... 53
Transfer Conveyor Start/Stop Switch................................................................................................... 53
Left-Hand Under Screen Conveyor Forward Start/Stop Switch........................................................... 53
Left-hand Under Screen Conveyor Reverse Start/Stop Switch ........................................................... 53
Right-Hand Under Screen Conveyor Forward Start/Stop Switch......................................................... 53
Right-Hand Under Screen Conveyor Reverse Start/Stop Switch ........................................................ 53
Top Deck Conveyor Start/Stop Switch................................................................................................. 53
Local / Remote Switch ......................................................................................................................... 54
Screen Start/Stop Switch ..................................................................................................................... 54
Side Discharge Conveyor Front Start/Stop Switch .............................................................................. 54
Side Discharge Conveyor Middle Start/Stop Switch ............................................................................ 54
Side Discharge Conveyor Rear Start/Stop Switch............................................................................... 54
Hydraulic Pump Start/Stop Switch ....................................................................................................... 54
Emergency Stop Switch....................................................................................................................... 54
Warning Horn Button............................................................................................................................ 55
Scalping Plant Control Panel..................................................................................................................... 56
Left-Hand Under Screen Conveyor Start/Stop Switch ......................................................................... 56
Right-Hand Under Screen Conveyor Start/Stop Switch....................................................................... 56
Top Deck Conveyor Start/Stop Switch................................................................................................. 56
Screen Start/Stop Switch ..................................................................................................................... 56
Side Discharge Conveyor Front Start/Stop Switch .............................................................................. 56
Side Discharge Conveyor Middle Start/Stop Switch ............................................................................ 56
Side Discharge Conveyor Rear Start/Stop Switch............................................................................... 56
Hydraulic Pump Start/Stop Switch ....................................................................................................... 57
Emergency Stop Switch....................................................................................................................... 57
Warning Horn Button............................................................................................................................ 57
Local / Remote Switch ......................................................................................................................... 57

Table of Contents
Fast Pack Operation and Service Manual
Rev. 03
SECTION 5: SET-UP
Introduction..................................................................................................................................................... 59
Proper Site Selection................................................................................................................................. 59
Plant Alignment Procedures...................................................................................................................... 59
Engine Start-Up.............................................................................................................................................. 59
Plant Pre-Start Checks.............................................................................................................................. 59
Plant Pre-Start Checks.............................................................................................................................. 61
Engine Start Up Procedures........................................................................................................................... 62
Removing the Bag House Shipping Cover................................................................................................ 62
Plant Set-Up................................................................................................................................................... 63
Conveyor Unfolding Considerations.......................................................................................................... 63
Connecting Profinet System...................................................................................................................... 64
Remotely Controlling Your Plant.......................................................................................................... 64
Non-Network Plant Operation.............................................................................................................. 64
Spray System Hook-Ups........................................................................................................................... 65
Additional Set-up Information......................................................................................................................... 66
Adjusting Screen Drive V-Belts................................................................................................................. 66
General Conveyor Information.................................................................................................................. 66
Conveyor Belt Training......................................................................................................................... 66
Adjusting Belt Side Creep.................................................................................................................... 67
Conveyor Loading................................................................................................................................ 68
Moving a Discharge Conveyor ................................................................................................................. 68
Relieving The Hydraulic System Pressure........................................................................................... 69
To move a conveyor:............................................................................................................................ 69
SECTION 6: OPERATION
Introduction..................................................................................................................................................... 71
Fast Pack Pre-Start Checks........................................................................................................................... 71
Fast Pack Plant Pre-Start Checks............................................................................................................. 71
Conveyor Pre-Start Checks....................................................................................................................... 71
Screen Pre-Start Checks........................................................................................................................... 71
Fast Pack Start-up Procedures ...................................................................................................................... 71
Screen Plant Engine and Generator Set Starting Procedures .................................................................. 72
Fast Pack Post Start-up Checks ............................................................................................................... 73
Fast Pack Start-Up Sequence................................................................................................................... 73
Fast Pack Shut Down Procedures.................................................................................................................. 73
Restarting the Fast Pack After Emergency Stop Activation ........................................................................... 73
Moving the Fast Pack Plant............................................................................................................................ 73
Fast Pack Tear Down................................................................................................................................ 73
SECTION 7: MAINTENANCE
Introduction..................................................................................................................................................... 75
Maintenance Safety................................................................................................................................... 76
Oil Recommendations.................................................................................................................................... 76
Grease Recommendations........................................................................................................................ 76
Hydraulic Oil Recommendations............................................................................................................... 76
Scheduled Maintenance................................................................................................................................. 76
Plant Grease Lubrication Items...................................................................................................................... 77
Scheduled Grease Lubrication Items........................................................................................................ 78

Table of Contents
Fast Pack Operation and Service Manual
Rev. 03
Fast Pack Plant Daily Walk Around Inspection Checklist............................................................................... 79
Maintenance Schedules................................................................................................................................. 80
Weekly Or Every 50 Hours of Operation.............................................................................................. 80
Monthly or Every 200 Hours of Operation............................................................................................ 80
Every 500 Hours of Operation.............................................................................................................. 80
Every 1000 Hours of Operation............................................................................................................ 80
Yearly or Every 2000 Hours of Operation ............................................................................................ 80
Daily Walk Around Items ................................................................................................................................ 80
Engine Oil Level........................................................................................................................................ 81
Engine Coolant Level................................................................................................................................ 81
Drain the Fuel Water Separator. ............................................................................................................... 82
Engine Charge Air Cleaner ....................................................................................................................... 82
Restriction Indicator................................................................................................................................... 82
Hydraulic Power Unit................................................................................................................................. 83
Profinet System......................................................................................................................................... 83
Engine Fuel Level...................................................................................................................................... 83
Relieving the Hydraulic System Pressure ...................................................................................................... 84
Hydraulic Hoses and Connections ............................................................................................................ 84
Weekly Or Every 50 Hours of Operation........................................................................................................ 85
Adjusting Drive V-Belts.............................................................................................................................. 85
Battery Maintenance ................................................................................................................................. 86
Radiator and Cooler Core.................................................................................................................... 87
Conveyor Checks...................................................................................................................................... 87
Monthly or Every 200 Hours of Operation...................................................................................................... 87
Hydraulic Oil.............................................................................................................................................. 87
Every 1000 Hours of Operation...................................................................................................................... 88
Hydraulic Oil Filter..................................................................................................................................... 88
Yearly or Every 2000 Hours of Operation....................................................................................................... 88
Fluid Coupling Oil...................................................................................................................................... 88
Hydraulic Oil.............................................................................................................................................. 88
Additional Maintenance items......................................................................................................................... 88
Lubrication of the Gear Reducer ............................................................................................................... 88
Maintenance Recommendations.......................................................................................................... 89
Oil Recommendations.......................................................................................................................... 89
How to Repair a Broken Conveyor Belt.......................................................................................................... 90
How to Measure for the Proper Length ..................................................................................................... 90
How to Square the Ends ........................................................................................................................... 90
How to Drill and Skive Your Conveyor Belt............................................................................................... 91
How to Attach the Belt Ends...................................................................................................................... 93
Using the Flexco 840 Belt Cutter ......................................................................................................... 95

Table of Contents
Fast Pack Operation and Service Manual
Rev. 03

Section 1: Introduction
1
Rev 03
Fast Pack Operation and Service Manual
DESCRIPTION
The Fast Pack Plant system is composed of
portable screening and crushing plants controlled
by a centralized computer system. The Fast Pack
plant is designed to be set-up and torn down with
the minimum amount of man power in a short
periodof time.Each FastPackisdesignedto meet
your needs, therefore you may not be using all of
the equipment included in this operational manual.
The JCI plant components include cone crushing
plants, a scalping plant, and afinishing plant. Each
plant is equipped with a hydraulically activated
stabilizers, conveyors, and operator walkways.
Diesel engines mounted on each plant provides
drive power for the hydraulic systems and,
electrical power for the screen plants, stacking
conveyors and operator controls. Plant trailers are
equipped with an airbag suspension system and
somearealsoequippedwithself-steeringaxlesfor
easy towing.

Section 1: Introduction
2Rev 03
Fast Pack Operation and Service Manual

Section 1: Introduction
3
Rev 03
Fast Pack Operation and Service Manual
2) Fast Pack Trailer Frame
3) Front Hydraulic Stabilizer Assembly
4) Hydraulic Stabilize
5) Hydraulic Stabilize
6) RH Under Screen Conveyor
9) Cross Conveyors
11)42” Transfer Conveyor
13)42” X “35 Folder Conveyor
14)Top Deck Tail Pulley
15)10 Degree Feed Conveyor Chute
16)Screen Blending Chute
17)Screen Drive
18)Engine Assembly with 300W Generator
20)Fuel Tank
22)15 Hp, 20 Gallon Hydraulic Power Unit (3000PSI)
23)CVR Hydraulic Power Unit
27)Rear Walkway
28)Front Walkway
29)Bag House
100)Spring Pad Marching
101)Single Snubber Single
105)Tagline Adjustment Bracket
The scalping and finishing screen plants feature
JCI 8203 screens, reversible under-screen
conveyors, folding discharge conveyors (for
travel), and diesel driven generators that provide
electrical power for the screening plant, stacking
conveyors, and control trailer. The screen plant
has folding walkways around the screen which
allow for easy access. Depending on your
configuration you can mount the side discharge
conveyors on either side of the plant. The finishing
screen plant has an adjustable blend chute
arrangement that allows the Fast Pack plant
system to produce a wide range of products.
The integrated “Profinet Network” computerized
control system allows the operator to control all
FastPack systemfunctionsfrom thecontroltrailer.
TheProfinetNetworkusesethernetconnectionsto
communicate with all components such as
Crusher plants, Screen plants, Conveyors,
programmable logic controllers (PLC) and touch
screen panels.

Section 1: Introduction
4Rev 03
Fast Pack Operation and Service Manual
Fast Pack Operation Manual
This manual provides the information for an
experienced operator to successfully and safely
operate the Fast Pack Plant. Please review this
manual carefully to insure you receive the most
benefit from your plant. Ensure that all personnel
are aware of, and use, proper safety precautions
when working with and/or around the plant and
related equipment. For information on service,
contact your JCI dealer or the JCI service
department. Please refer to your parts book for
further JCI contact information.
NEW PARTS AND EQUIPMENT
WARRANTY
JCI warrants to the Distributor and Distributor’s
customers on resale with respect to JCI products
sold that the new equipment will be free from
defect in material and workmanship under normal
use for a period of one year after the date of
start-up or 2,000 hours of operation, whichever
first occurs. JCI further warrants to the Distributor
and Distributor’s customers on resale that any and
all parts supplied by JCI will be free from defect in
material and workmanship under normal use
(excluding ordinary wear) for a period of six
months after installation. The sole and exclusive
remedy for any breach of warranty, breach of
contract, or any claim in tort (including, but not
limited to, strict liability and negligence) shall be
the repair or replacement (at JCI’s option) of any
defective part, parts or equipment at JCI’s
manufacturing plant in Lane County, Oregon. Any
part(s) and/or equipment claimed to be defective
shall be returned, freight prepaid, to JCI’s
manufacturing plant in Lane County, Oregon,
following the receipt of JCI’s returned goods
authorization. Written notice of any claimed defect
must be provided to JCI within sixty (60) days of
the discovery of any claimed defect(s).
Disclaimer/Limitation of Warranties
The expressed warranty described above is
expressly in lieu of other warranties, expressed or
implied AND ANY AND ALL IMPLIED
WARRANTIES, INCLUDING, BUT NOT LIMITED
TO, ANY AND ALL IMPLIED WARRANTIES OR
MERCHANTABILITY OR FITNESS FOR A
PARTICULAR PURPOSE ARE HEREBY
EXPRESSLY DISCLAIMED AND EXCLUDED.
NO PERSON(S), INCLUDING, BUT NOT
LIMITED TO, EMPLOYEES AND AGENTS OF
JCI AND/OR ITS DISTRIBUTORS ARE
AUTHORIZED TO MAKE ANY
REPRESENTATION OR WARRANTY
CONCERNING JCI PRODUCTS THAT ARE IN
ANY WAY INCONSISTENT WITH THE
FOREGOING WARRANTY.
JCI MAKES NO WARRANTY OR WARRANTIES,
EXPRESSED OR IMPLIED, WITH RESPECT TO
ANY ACCESSORIES, COMPONENTS OR
PARTS NOT MANUFACTURED BY JCI, AND
THE INSTALLATION OF ANY PARTS OR
COMPONENTS NOT MANUFACTURED OR
SUPPLIED BY JCI, AND ANY ALTERATION OF
EQUIPMENT OR PARTS SUPPLIED BY JCI
WITHOUTJCI’SEXPRESSWRITTENCONSENT
SHALLVOIDTHEWARRANTYGRANTEDHERE
BY.
UNDER NO CIRCUMSTANCES SHALL
JOHNSON CRUSHERS INTERNATIONAL, INC.
BE RESPONSIBLE FOR ANY INCIDENTAL OR
CONSEQUENTIAL DAMAGES, INCLUDING,
BUT NOT LIMITED TO, LOST PROFITS OR
LOSS OF USE.

Section 1: Introduction
5
Rev 03
Fast Pack Operation and Service Manual
ADDRESS FOR NOTICES
Anyandall inquiriesand/orwarrantyclaimsshould
be submitted in writing to JCI at the following
address:
Johnson Crushers International, Inc.
86470 Franklin Blvd
Eugene OR 97405
For Service Assistants:
Johnson Crushers International, Inc.
Attention: Service Department
86470 Franklin Blvd
Eugene OR 97405
Phone: (866) 875-4058
For Parts Sales Assistants:
Johnson Crushers International, Inc.
Attention: Parts Sales
86470 Franklin Blvd
Eugene OR 97405
Phone: (888) 474-0115

Section 1: Introduction
6Rev 03
Fast Pack Operation and Service Manual

Section 2: Safety
7
Rev 03
Fast Pack Operation and Service Manual
SAFETY OVERVIEW
It is the responsibility of the quarry management
team to develop a comprehensive safety
awareness program, and to ensure that all quarry
workers and support personnel receive
appropriate safety training as required by federal,
state and local regulations.
Safety is basically common sense. There are
standard safety rules, but each situation has its
own peculiarities which cannot always be covered
by rules. Therefore, quarry personnel must
continually watch for possible safety hazards and
be prepared to take promptcorrective action when
necessary.
Failure to observe the precautions contained in
this chapter can result in serious personal injury
and even loss of life. As with most industrial work
environments, a careful operator is the best
insurance against an accident.
Thecompleteobservanceofonesimplerulewould
prevent many unnecessary injuries and deaths
each year. This rule is:
“Never attempt to clean, lubricate, repair or
adjust any machinery unless it is stopped and
properly locked out.”
Please note that this chapter is only intended as a
brief review of basic quarrysafety precautions and
procedures.Thegeneral guidelinesincludedin the
following paragraphs should not be considered in
lieu of a quarry’s official safety procedures,
insurance company requirements, or applicable
federal, state and local regulations.
HAZARD AND ADVISORY
STATEMENTS
Throughout this manual, the use of hazard and
advisory statements has been emphasized. The
following safety alert symbol is used to bring
attention to the specific advisory:
When you see the symbol, it means that you
should pay particular attention to the advisory that
follows as your safety and that of others is
involved.
Hazard Statements
The Caution, Warning and Danger statements
are hazard statements used to alert workers of
unsafe practises and potentially harmful or
life-threatening situations. Each of these
statements is preceded by the Safety Alert
Symbol.
•CAUTION indicates a potentially hazardous
condition that, if not avoided, may result in MINOR
PERSONAL INJURY.
•WARNING indicates a potentially hazardous
condition that, if not avoided, could result in
SERIOUS PERSONAL INJURY or DEATH.
•DANGER indicates a potentially hazardous
condition that, if not avoided, will result in SEVERE
PERSONAL INJURY or DEATH.
Advisory Statements
The Note and Important statements are advisory
statements which relate to equipment operation,
maintenance and service procedures. They are
used to draw attention to proper procedures and
practises.
•NOTE is a basic informational statement or helpful
suggestion.
•IMPORTANT is used to draw attention to a
procedure that must be observed to prevent
machine damage or malfunction.
LOCKOUT/TAGOUT
Who Must Use Lockout/Tagout?
Quarry owners, managers, and safety officers
must be aware of OSHA’s “lockout/tagout”
standard: CRF Section 29 1910.147, The Control
of Hazardous Energy. This standard is also
recognized by MSHA.
All mechanics, maintenance personnel, operators,
and electricians must fully understand and comply
with this standard to ensure the safety of all
employees.

Section 2: Safety
8Rev 03
Fast Pack Operation and Service Manual
What is Lockout/Tagout?
Lockout/tagout is a means to ensure that
personnel who install, operate, repair, maintain,
serviceorotherwisedisablemachines,equipment,
or electrical energy systems are protected from
harm due to unexpected energizing, or the release
of stored energy by...
1. Lockout – Placing a disconnect switch, circuit
breaker, valve, or other energy-isolating
mechanism in the off or safe position and securing
it with a lock so the energy-isolating mechanism
cannot be activated.
2. Tagout – A prominent written warning (tag or label)
placed on the energy-isolating mechanism
indicating the name of the individual placing the
mechanism out-of-service, and stating that the
energy isolating mechanism cannot be activated
until the tagout device is removed.
When Must Lockout/Tagout Occur?
Lockout/tagout must occur whenever service or
maintenance is performed, and injury could occur
due to the unexpected start-up of equipment, or
the release of stored energy. See Figure 1–2.
• In general, lockout/tagout procedures must be
performed under the following circumstances:
• Before cleaning, lubricating, adjusting or repairing
machinery or equipment.
• Before working on electrical, hydraulic or
pneumatic circuits or devices.
• Before clearing jammed mechanisms, machinery
or equipment.
• Before removing guards or other protective
devices.
• Whenever a machine or its controls will be left
unattended.
How is Lockout/Tagout Performed?
OSHA has identified the following step-by-step
lockout/ tagout procedure:
1. Prepare for shutdown – Before shutting down a
piece of equipment, know the type and magnitude
of the energy that powers it, the hazards of that
energy, and how to control it. Warn all employees
that the machinery is about to be shut down.
2. Shutdown the equipment – After warning all
employees, shut down the machine, equipment, or
electrical system by the normal stopping
procedure.
3. Control stored energy – any potentially
hazardous stored energy (electrical, mechanical,
hydraulic, pneumatic, etc.) That remains must be
released, dissipated, restrained, or otherwise
rendered safe. If stored energy reaccumulates,
monitor it until the possibility of accumulation no
longer exists.
4. Isolate the equipment – Disengage all isolating
devices, both primary and secondary, so that the
equipment is isolated from all of its energy sources
(electrical, mechanical, hydraulic, pneumatic, etc.).
5. Apply lockout/tagout devices – Attach lockout
tagout devices (according to your company’s
safety program) in such a manner that the isolating
device (circuit breaker, control, etc.) will be held in
a safe or off position. Attach tags to alert others
that the machinery is being serviced.
6. Verify that equipment is isolated – After warning
all employees to stay clear, engage the start button
to confirm the machine is inoperable. Return the
control to the off position before proceeding with
servicing.
When Can Lockout/Tagout Devices be
Removed?
Lockout/tagout devices can only be removed after
the following conditions are met:
• All guards and protective devices are properly
re-installed.
• All tools and repair equipment are removed from
the equipment and the immediate area.
• All mechanics and other personnel are clear of the
equipment and its immediate area.
• All personnel have been warned that the
equipment is about to be restarted (sound warning
horn or activate warning lights).
After removing lockout/tagout devices, always use
the normal start-up procedure as described in the
operator’s manual for the machinery.

Section 2: Safety
9
Rev 03
Fast Pack Operation and Service Manual
Lockout/Tagout Devices
1) Multiple Lockout Device
2) Pad Lock
3) Tag
Lockout/tagout devices include:
•Locks
• Tags and labels
• Multiple lockout devices
A lock must be sufficiently durable, so it can
withstandtheenvironmentalconditions(heat,cold,
moisture, etc.) around it. A lock must also be
strong enough so that it cannot be easily removed
or forced open. A tag or label must be affixed to
each lock to alert others that service work is in
progress. Each tag or label must have the
following characteristics:
• Be sufficiently durable to withstand wear and
abuse, even if used in dirty or damp environments.
• Be securely attached with a cable that is difficult to
remove, cut or tear.
• Contain the name of the person that applied it.
• Contain a warning or other precautionary
statement that briefly indicates why the machine is
locked out and what hazards could result if the
equipment is started while service work is in
progress.
When two or more people are working on a piece
of equipment, a multiple lockout device must be
used. This allows each person to install their own
lock, preventing accidental start-up.
Lockout/Tagout Rules
• Always lockout/tagout any machinery before
performing any adjustment, inspection, lubrication,
maintenance or repair procedures. Failure to
observe this precaution may result in serious
personal injury or death.
• Your company’s lockout/tagout program may be
somewhat different than described in this manual.
If so, be sure to completely follow your company’s
official policies and procedures when lockout/
tagout is necessary. Consult your company’s
safety officer if you have any questions.
• A lock must have only one user and one key.
Anyone who installs a lock must keep the key in
their possession at all times. Except in an
emergency situation, only the person that installs a
lock is authorized to remove it.
• To prevent accidental start-up, never give your lock
or its key to another employee.
• Your key must open your lock only. Your key
should not be capable of opening any other locks.
Keys for other locks should not be capable of
opening your lock.
• Except in an emergency situation, never attempt to
remove anyone else’s lock. Do not allow others to
remove your lock.
• When disconnecting power, be sure that the circuit
breaker handle (or other isolating device) is in the
OFF position. Accidentally locking a control in the
ON position could result in serious personal injury
or death.
• If two or more people are working on a machine, a
multiple lockout device must be used to prevent
accidental start-up in the event that one person
finishes working before another.
• Each lock must have a tag. If two or more people
are working on a machine, each person must
attach a separate tag to their lock. Never attach a
lock without a tag.
• Never use tags alone. A tag should always be
accompanied by a lock which prevents the
isolating device from becoming energized.
Additional Lockout/Tagout Requirements
• Be sure that the power is COMPLETELY turned
off. A motor may be stopped and locked out.
However, interlocks, starters, and other
supplemental electrical components may still be
energized. Use a voltmeter and/or ammeter to
verify that all electrical circuits are completely
dead.
• Always be sure that all peripheral equipment, such
as feed conveyors, grizzly feeders and discharge
1
2
3

Section 2: Safety
10 Rev 03
Fast Pack Operation and Service Manual
conveyors, is also tagged and locked out. Serious
personal injury or death can result if any of these
items starts unexpectedly while the crusher is
being serviced.
• Although lockout/tagout procedures are most
commonly associated with electrical systems, be
aware that hydraulic, pneumatic and mechanical
systems must also be tagged and locked out
before servicing. This may involve the lockout/
tagout of valves, levers and other non-electrical
devices.
• For machinery powered by internal combustion
engines (diesel, gas, etc.), always disconnect
batteries and shut-off fuel supply before servicing
the machinery. Lockout/tagout engine controls to
ensure that engine is not accidentally started while
the machinery is being serviced.
• Always be sure that all hydraulic or air pressure is
completely relieved before working on hydraulic or
pneumatic systems. Dangerous pressures can be
present, even when equipment is turned off and
locked out.
• After maintenance or repairs are completed,
always warn all employees that the machinery is
about to be restarted. Be sure no one is on or near
the equipment before a lock and tag is removed.
• As a precaution, always activate a warning horn or
light before restarting the machinery. This will
provide additional warning for personnel to stay
clear of machinery that is about to be started.
MISCELLANEOUS SAFETY TIPS
Know Your Machinery
• Read the manufacturer’s operation and
maintenance manuals for all machinery and
equipment that you operate. Be sure that all
hazard statements contained within the manuals
are completely understood.
• Become familiar with the controls, functions and
settings of each machine. Fully understand all
phases of each machine’s operation.
• Be sure that you completely understand and follow
all start-up and shut-down procedures as
described in the manufacturer’s manuals.
• Be familiar with the safety signs on your
equipment, and the hazards against which they
warn.
• Check the legibility of all safety signs every day.
Order new signs from the machinery manufacturer
if they become illegible or worn.
Be Prepared for Emergencies
• Know the proper emergency shut-down
procedures for the equipment you operate.
• Know where fire extinguishers are kept and how to
use them. Be sure that fire extinguishers are
properly rated, and that they remain fully charged
and ready for use at all times.
• Know the procedure for contacting emergency
medical personnel. Keep a list of emergency
phone numbers handy at all times.
• Know where first-aid kit, stretcher and other
emergency supplies are kept. Be sure that first aid
supplies are properly maintained and ready for
use.
• Make sure that a clear path to emergency
equipment and exits is always maintained. Do not
allow equipment, spilled materials or other
obstructions to get in the way.
• Know how to report accidents. Always report all
accidents immediately to the appropriate
supervisor.
Wear Personal Protective Equipment
(PPE)
• Wear safety glasses or goggles whenever outside
of an approved operator’s enclosure. Failure to
wear appropriate eye protection can result in
permanent eye injuries and loss of sight.
• Wear appropriate ear protection when working
within 50 feet of any operating quarry machinery,
and in other areas where noise levels are high.
Prolonged exposure to high noise levels can cause
permanent hearing loss.
• Wear steel-toe safety boots, heavy-duty gloves
and a hard hat. This equipment is mandatory in
most areas of the quarry.
• Use respirators in dusty locations and when
working with hazardous substances. Prolonged
exposure to rock dust or chemical fumes can
cause permanent respiratory illness.
• Other personal protective equipment may be
necessary for your specific job assignment, such
as a full face shield and safety harness. Wear or
use these items when necessary and as required
by applicable federal state and local regulations.
Observe Personal Safety Precautions
• Never wear loose or ragged clothing when working
on or around rotating power equipment. Avoid
wearing necklaces, rings or other jewelry. These
items can become caught or tangled in the
machinery, resulting in severe personal injury or

Section 2: Safety
11
Rev 03
Fast Pack Operation and Service Manual
death.
• Keep hair short, if possible. Keep long hair
securely tied-up to prevent it from becoming
caught in the machinery.
• Be especially careful whenever using wet
walkways, platforms, or ramps. The combination of
rock dust and wet metal can create an extremely
slippery surface. Keep all walkways and other
access structures clean, dry and free of grease or
oil.
• Use walkways and ladders when working near
machinery, or observing its operation. Use a safety
harness when necessary. Keep handrails and
machine contact surfaces clean.
• To avoid back injuries, always use proper lifting
techniques to safely lift heavy objects. Lift with your
legs and keep your back straight. Keep the
materials or object close to your body. Have a
co-worker assist you if the load cannot be lifted
safely by one person.
• Before starting the machinery, check that no
personnel are inside, on, under or beside the
equipment. Unless absolutely necessary, do not
allow anyone to be on or near the equipment while
it is operating.
• Never attempt to catch falling materials or objects.
• Be aware of flammable liquids and other potential
fire hazards. Do not smoke when refilling engines
or using cleaning solvents.
• Do not stand under equipment or components that
are being hoisted or suspended. Never allow other
quarry personnel to do so.
• Before you assemble, operate, clean, lubricate, or
adjust machinery, be sure to read and understand
all procedures contained in the machinery
manufacturer’s manual.
• Be sure to operate quarry machinery in compliance
with current OSHA and MSHA regulations, and all
applicable federal, state or local regulations.
Help Prevent Accidents
• Do not allow unauthorized personnel in or near the
work area. Never allow unauthorized personnel to
operate, adjust, maintain or repair machinery.
• Allow only properly trained and experienced
personnel to operate machinery. Be sure
inexperienced operators are carefully supervised
at all times.
• Do not allow personnel to be near loading areas, or
anywhere else that falling or ejected material could
hit them.
• Use extreme caution if the machinery must be
operated for inspection or observation purposes.
Stay a safe distance from the machinery and wear
appropriate personal protective devices.
• Before making repairs to the machinery, always
clear all quarry material from the feed and
discharge devices (feeders, conveyors, chutes,
etc.).
• In areas which present a danger of falling, use an
appropriate fall protection device, such as a safety
harness and lifeline.
• Always report any unsafe conditions or defective
equipment to the appropriate supervisor.
Avoid Alcohol and Other Drugs
• Do not operate or work near quarry machinery
when under the influence of alcohol or other drugs.
These substances can result in reduced alertness
and impaired judgement. Serious personal injury or
death could result.
• Some prescription and non-prescription
medications can cause drowsiness or other
adverse side effects. Do not operate or work near
quarry machinery when under the influence of such
medications.
Be Aware of Your Surroundings
• The quarry environment contains many situations
that are potentially hazardous. Use extreme
caution to avoid being struck by haul trucks,
loaders and other quarry mobile equipment.
• Be aware of idle machinery that could start-up
without warning. Stay clear of such machinery and
the immediate area.
• Be aware of overhead obstructions, such as
conveyors, support structures or power lines.
Practice Good Housekeeping
• Do not store tools or equipment on walkways.
• Be sure that all walkways, platforms, stairs and
ramps are kept free of spilled material and trash. A
build-up of material in these areas can cause slips
and falls. Make repairs as required in areas where
spillage is present.
• Do not allow machinery to become buried under
piles of spilled material. This will make the
machinery more difficult to inspect and may hide
broken welds, loose fasteners and other serious
problems that could cause a safety hazard.
• Keep the areas around control panels and
machinery free of spilled material. Free access
must be maintained at all times. In the event of an
emergency, quick access to controls could prevent
injury or death.
• Clean up spilled fuel or oil immediately to eliminate

Section 2: Safety
12 Rev 03
Fast Pack Operation and Service Manual
slipping hazards. If necessary, use an oil
absorbent.
• Always be sure that power is tagged and locked
out before cleaning spilled material or oils. Never
clean-up these items while the machinery is
operating.
Inspect And Maintain Machinery
• Always perform a safety inspection at the
beginning of each shift. Refer to the machinery
manufacturer’s operation and maintenance
manuals for detailed pre-start-up inspection and
maintenance procedures.
• Test all warning devices before starting the
machinery to ensure that they are working
properly. Never disable or bypass any alarm
systems or interlocks.
• Be sure that any defective components or systems
are properly repaired by a qualified technician
before the machinery is started. Immediately report
any serious problems to the appropriate
supervisor.
• Before performing inspections or maintenance,
always lock out power and tag controls to the
machine drive, and to all feed and discharge
equipment. Warn all personnel that the equipment
is being serviced. Refer to the Lockout/Tagout
section of this chapter for additional information.
• Maintenance inspection procedures are included
throughout this manual. Although maintenance is
not typically a safety concern, machinery that is
regularly maintained and in proper working
condition will minimize the occurrence of safety
hazards and emergency situations.
MACHINERY INSTALLATION
SAFETY
Foundations
Proper foundations and support structures are
essential to ensure the safe and efficient operation
of quarry equipment.
• Crushing machinery needs a firm foundation on
which to operate. This does not need to be a
poured pad, but it must not be unstable ground.
When selecting the location, be sure that the entire
area is as level as possible.
• Follow all manufacturer’s installation drawings and
specifications when constructing the base pads for
permanent plants.
• If any questions arise regarding foundation
requirements or modifications necessary for JCI
machinery, please contact the JCI Service
Department.
• Customer-designed support structures for JCI
equipment must meet JCI’s engineering standards.
All plans must be submitted in advance to the JCI
Engineering Department for approval.
Guarding
• Quarry management is responsible for the proper
installation and placement of guards to prevent
personnel from coming in contact with rotating or
moving parts.
• In addition to the guards supplied with the
machinery, additional guards and related safety
equipment may be required to comply with OSHA,
MSHA and any applicable local regulations. The
proper fabrication, installation and placement of
these items is quarry management’s responsibility.
• When fabricating guards, refer to MSHA’s Guide to
Equipment Guarding at Metal and Nonmetal
Mines. Additional information can also be provided
by the safety officer at your worksite.
• Never remove guards until the machinery is
stopped, power is locked out, and controls are
tagged. Be sure that guards are properly
re-installed before reconnecting power.
Customer Modifications
• Do not modify quarry machinery in any way without
prior approval from the manufacturer. Such
modifications may include (but are not limited to)
changing machine speed or direction of rotation,
drilling additional holes and welding or bolting
additional equipment to the machinery.
• All customer modifications to JCI machinery must
be approved in writing by the JCI Engineering
Department.
Table of contents
Other KPI-JCI Industrial Equipment manuals
Popular Industrial Equipment manuals by other brands

Directive Systems & Engineering
Directive Systems & Engineering DSE3318LYBRM quick start guide

Eaton
Eaton P3 Series Instruction leaflet

CBE
CBE 520 Safety, Installation, Operation, Maintenance

Daewoo
Daewoo DA5100-HC user manual

WIKA
WIKA F4801 operating instructions

ATD Tools
ATD Tools ATD-81049 Operating instructions & parts manual

IEMCA
IEMCA MASTER 880 MP E-volution Manual for use and maintenance

Micro
Micro VT-04 manual

Staubli
Staubli SLS425-SL Assembly instructions

Wise Controls
Wise Controls Thermowell A50 Series instruction manual

Siemens
Siemens 3VA9132-0WA00 operating instructions

Rittal
Rittal MICROSOFT 48Ux1200x1200 MOR installation manual