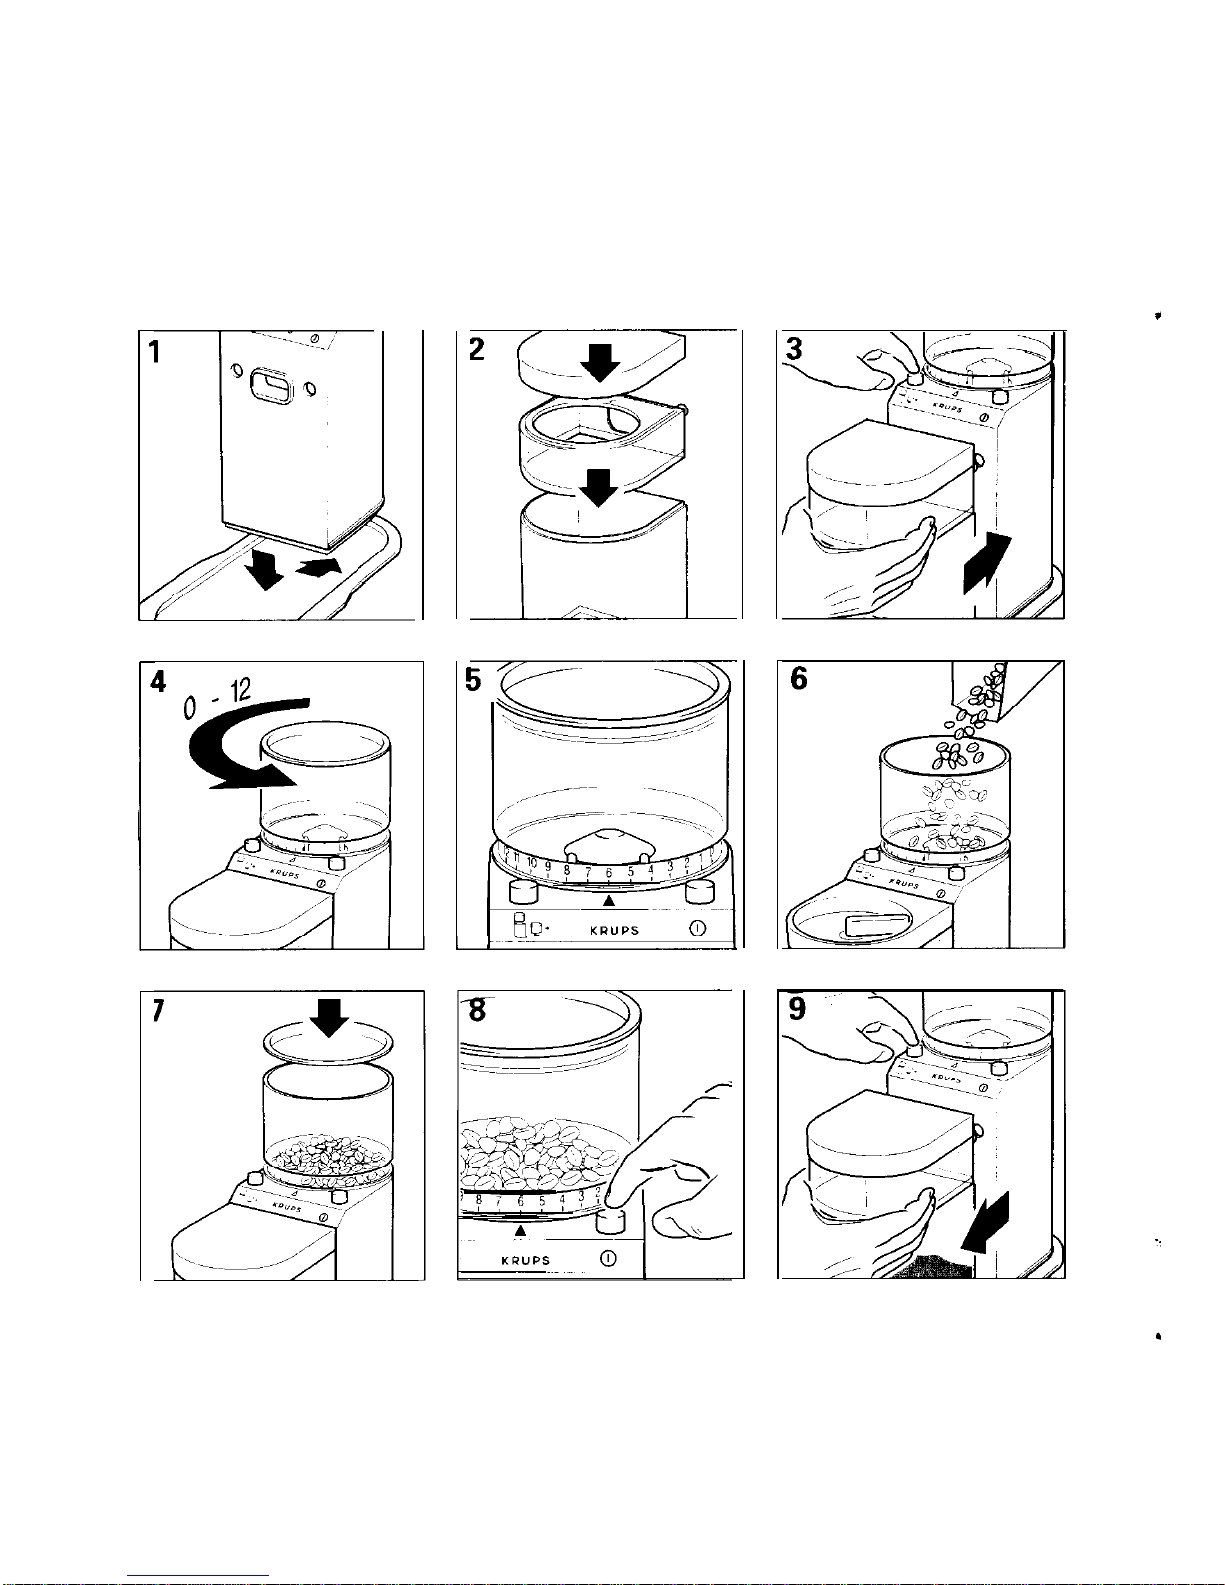
Turning The Machine On
Press the ON/OFF button
(c)
(see figure 8).
The grinder should run until all beans have
gone through the stainless steel grinding
discs. Press the ON/OFF button to turn the
grinder off.
Removing Coffee Grounds
To remove the coffee storage container from
the motor base, press the lock/release button
IdI
(see figure 91. Detach the coffee storage
container. Remove the storage receiver
(i)
and replace it with the storage container lid
(h)
(see figure
10).
Cover should be properly
secured to retain freshness.
Note: Some coffee grounds may remain in
the chute and may be loosened and
removed using the cleaning brush.
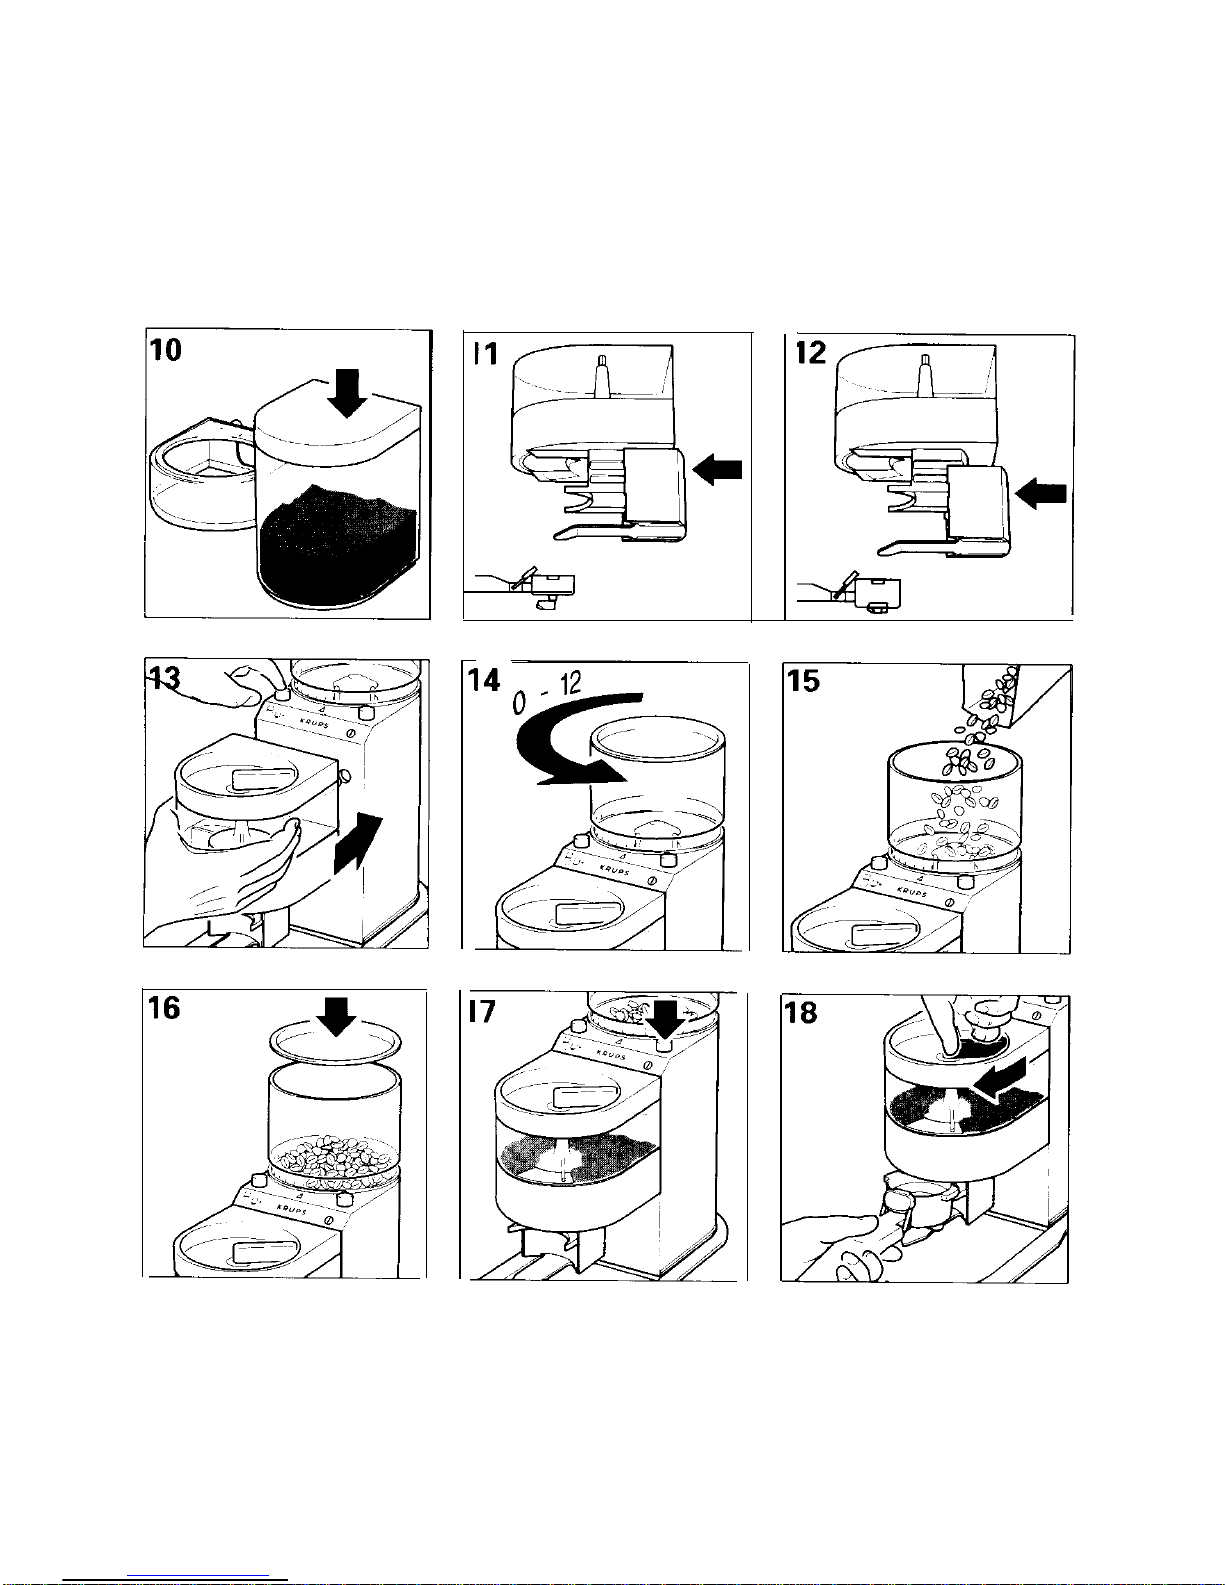
Portion Control Dispenser
The
“II
Bar&a” features a portion control
dispenser that will dispense directly into the
filter holder of your espresso maker.
Please note that the filter holder guide is
adjustable to two positions; the upper
position accommodates small size filter
holders, and the lower position
accommodates larger size filter holders
(see figure 11 and 12).
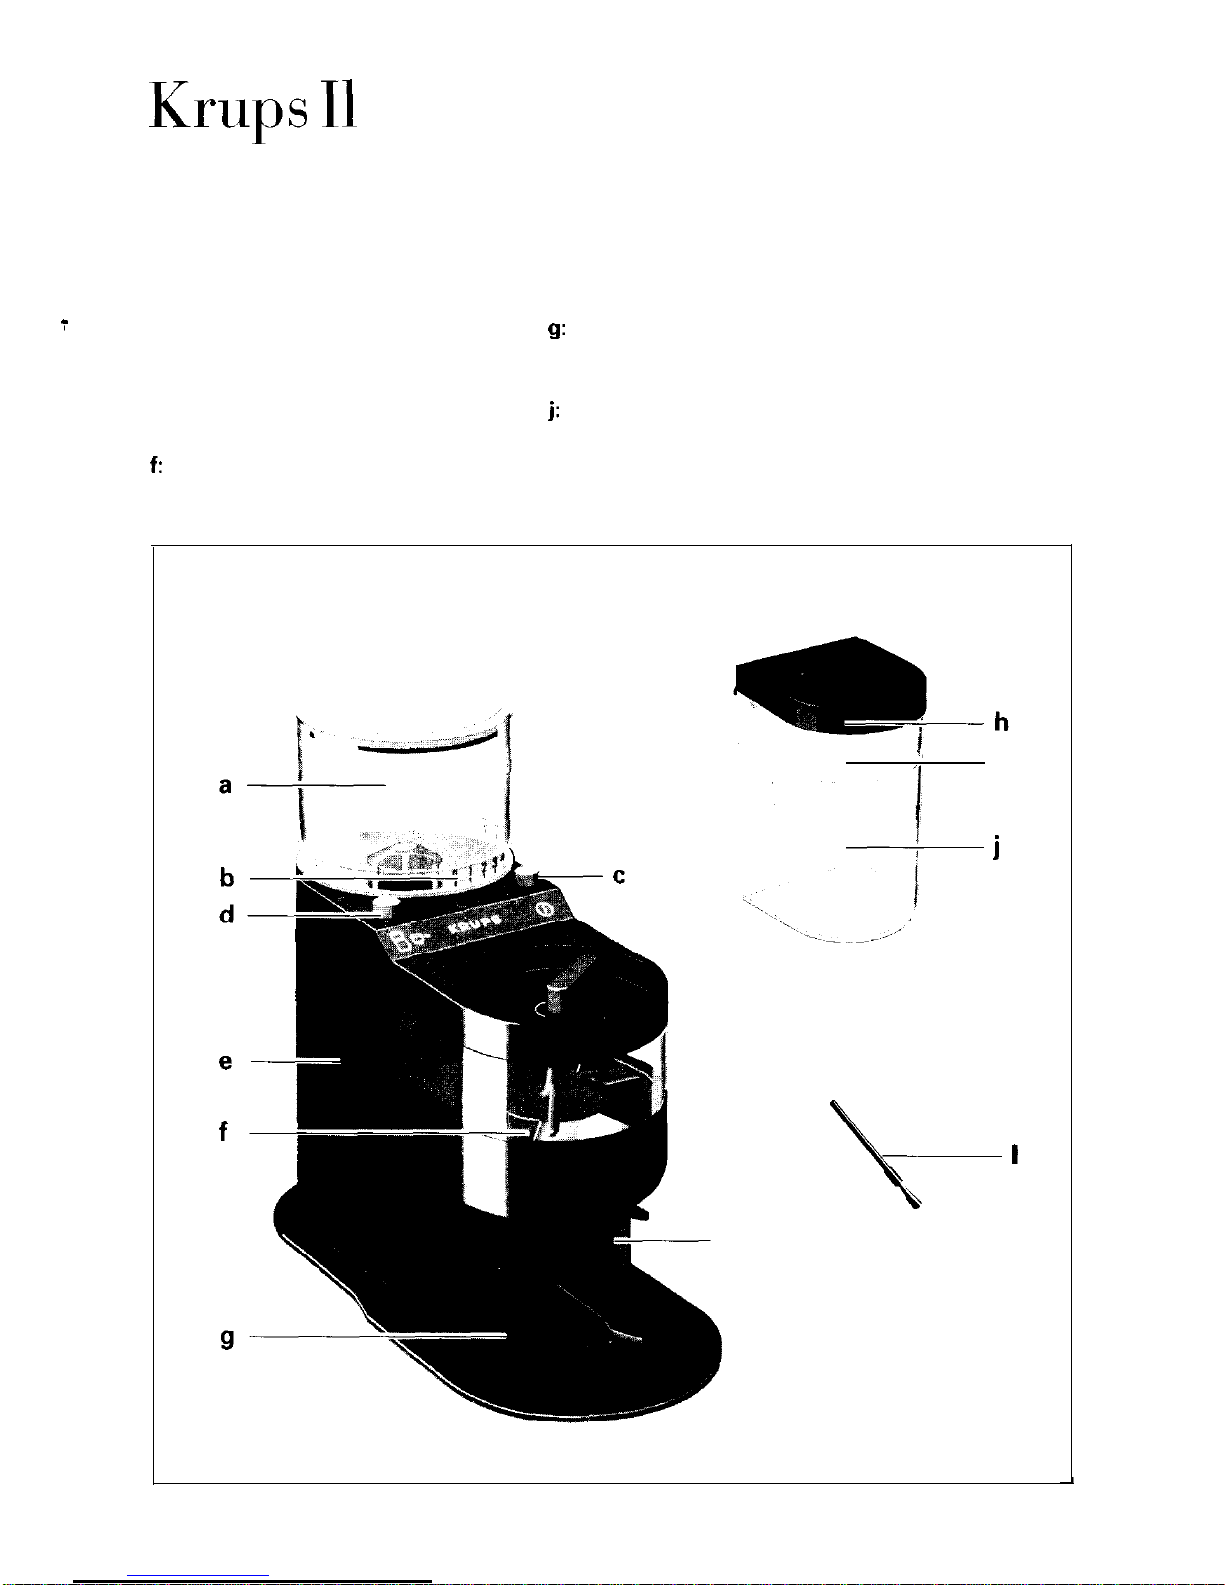
1. Attach the portion control dispenser(f) to
the motor base
(e),
aligning the pegs in
the dispenser with the holes in the motor
base (see figure 13). Press inward until
you hear a definitive “click“.
2. Select desired degree of grinding using
the grinding dial
(b)
(see figure 14).
3. Place beans into the grinding chamber
isee
figure
15).
Place the lid back onto the
grinding chamber (see figure 16).
4. Turn the espresso grinder ON and run
until all the beans have been ground.
Turn the grinder OFF (see figure 17).
5. Insert the proper filter sleve into the filter
holder from your espresso machine
(1
or
2 cups). Insert the filter holder under the
portion control dispenser, so that it rests
against the universal filter guide
mounting
fk)
(see figure 18).
6. To dispense ground coffee into your
espresso holder, place filter holder
directly under the portion control
dispenser. Pull the lever forward
(clockwise) one full pull. Upon release of
the lever, coffee will be dispensed into the
filter holder.
One pull releases ground coffee for one
cup of espresso. Two pulls releases
enough ground coffee for two cups of
espresso (see figure 18).
Note: To ensure that you release enough
coffee into your filter holder, be sure
to pull the lever completely forward
each time.
7. To remove the portion control dispenser
from the motor base, press the
lock/release button
(d).
Note: Overloading Safety Mechanism!
If the grinder should become too hot
and overheat, turn the grinder off and
let it cool for approximately
2 minutes. Once the unit has cooled,
resume operation.