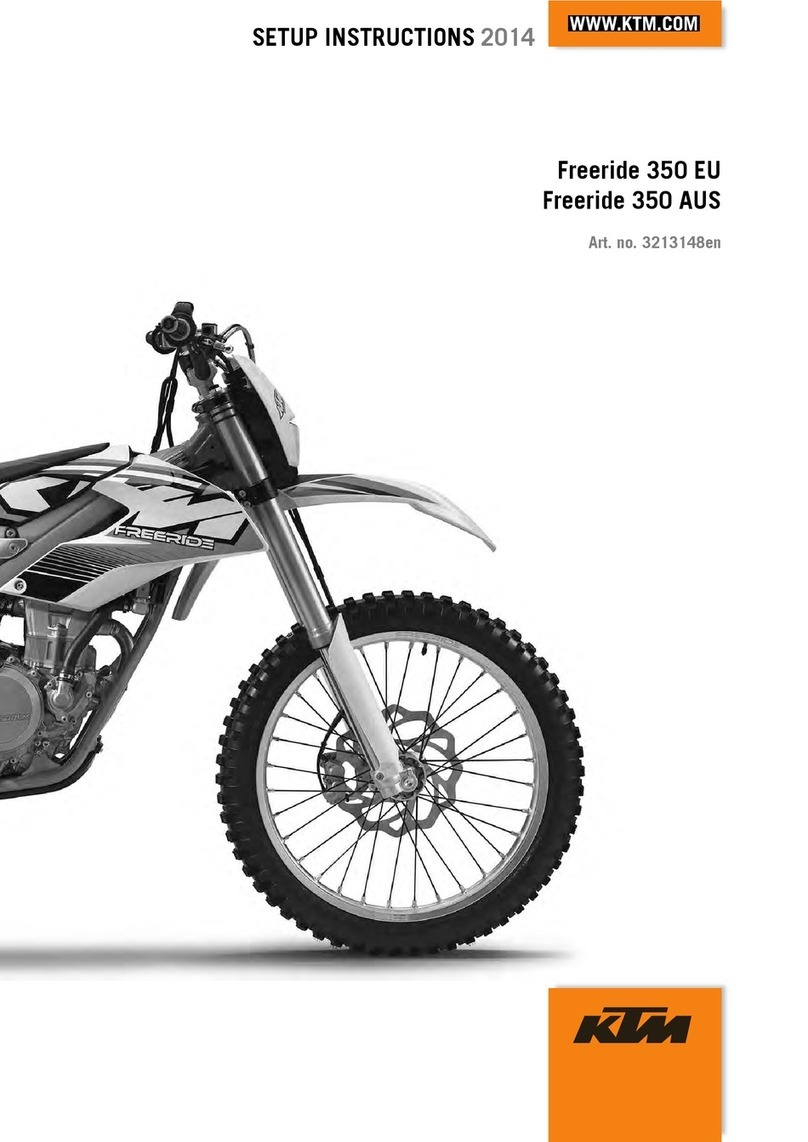
KTM Freeride E-SX User manual

OWNER'S MANUAL 2014
Freeride E-SX
Art. no. 3213219en

This Owner's Manual contained the latest information for this model series at the time of going to print. Slight deviations
resulting from continuing development and design can, however, not be completely excluded.
This Owner's Manual serves as a technical instruction manual for use of the KTM Freeride E, explains important safety
matters, and provides an overview of the main functions. This Owner's Manual is only intended for personal use. This
Owner's Manual is not intended for commercial use.
All specifications are non-binding. KTM Sportmotorcycle AG specifically reserves the right to modify or delete techni-
cal specifications, prices, colors, forms, materials, services, designs, equipment, etc., without prior notice and without
specifying reasons, to adapt these to local conditions, as well as to stop production of a particular model without prior
notice. KTM accepts no liability for delivery options, deviations from illustrations and descriptions, misprints or other
errors. The models portrayed partly contain special equipment that does not belong to the regular scope of supply.
© 2014 by KTM-Sportmotorcycle AG, Mattighofen, Austria
All rights reserved
Reproduction, even in part, as well as copying of all kinds, is permitted only with the express written permission of the
copyright owner.
Please read through this Owner's Manual carefully, exercise caution when using the vehicle, and contact an authorized
KTM workshop if you have any questions.
We wish you a lot of enjoyment in riding this vehicle.
ISO 9001 (12 100 6061)
KTM uses quality assurance processes in line with the international quality management standard ISO 9001
that lead to the maximum possible product quality.
Certified by: TÜV Management Service
KTM-Sportmotorcycle AG
5230 Mattighofen, Austria
DEAR KTM CUSTOMER 1

Warning
Danger of injury Missing or poor protective clothing presents an increased safety risk.
Wear protective clothing (helmet, boots, gloves, pants, and jacket with protectors) every time you ride the vehicle.
Always wear protective clothing that is in good condition and meets the legal requirements.
In the interest of your own safety, KTM recommends that you only operate the vehicle while wearing suitable protective
clothing.
1.3 Degrees of danger and symbols
The safety instructions are highlighted in the text. The vehicle has warning labels in prominent locations. Do not remove
any warning labels, or else you or others may fail to recognize sources of danger and become injured.
Only operate the electric motorcycle on closed-off properties away from public road traffic.
1.1 Use definition – intended use
1.2 Safety instructions and warning labels
1.4 Protective clothing
Danger
Identifies a danger that will immediately and invariably lead to fatal or serious permanent injury if the appropriate
measures are not taken.
Warning
Identifies a danger that is likely to lead to fatal or serious injury if the appropriate measures are not taken.
Caution
Identifies a danger that may lead to minor injuries if the appropriate measures are not taken.
Note
Identifies a danger that will lead to considerable machine and material damage if the appropriate measures are not taken.
Identifies an expected reaction (e.g. to a work step or a function).
Identifies an unexpected reaction (e.g. to a work step or a function).
This warning label is located on top of the frame in front of the multifunc-
tion display. This warning label warns of high voltage and the danger of
electric shock, and refers to the Owner's Manual.
This warning label is located on the left and right sides of the lithium ion
battery. This warning label warns of high voltage and refers to the mainte-
nance instructions in the Owner's Manual and Repair Manual.
1 SAFETY INSTRUCTIONS 2

There is no special risk of fire in the KTM Freeride E.
However, if the vehicle should catch fire, inform the responding fire department that the vehicle is an electric vehicle with
a lithium-ion battery.
Warning
Danger of injury Work on high-voltage components requires special training.
Have all electrical work that is not described and explained in the "Electrical system" section performed by trained
KTM mechanics only.
Do not open the electric motor nor the KTM PowerPack.
Warning
Danger of injury Damaged components on the vehicle pose an increased safety risk.
After a fall or accident, check the throttle grip, main switch, motor housing, and KTM PowerPack.
Check the chassis and suspension after a fall or accident.
Switch the vehicle off with the main switch and have the vehicle checked by an authorized KTM workshop, even if
the damage is only minor.
Only begin using the vehicle again after it has been checked.
If the vehicle is lying on its side, it switches from ready mode to standby mode after seven seconds.
To switch the vehicle back into ready mode, place it in an upright position and press the start button.
1.6 Falls and accidents
1.7 Work on the motor and KTM PowerPack
1.8 Danger of fire
The KTM Freeride E is a high-voltage electric motorcycle. Therefore, please note the special safety and care instructions
for a battery-operated electric motor.
Because the KTM Freeride E does not have an engine brake, the vehicle handles similar to a bicycle with a freewheel.
When you close the throttle, the vehicle continues rolling without significant deceleration. The vehicle speed decreases on
account of rolling resistance and air resistance.
The rear brake lever is located on the left side of the handlebar. Because this vehicle does not have a manual transmis-
sion, there is no clutch.
As with all water-cooled vehicles, the operating temperature rises according to use, outside temperature, and cleanliness
of the cooling surfaces. When the temperature of the motor, the high-voltage battery (KTM PowerPack, 260 V), or the con-
trol unit exceeds the operating temperature, the power is reduced considerably. This protects the system against damage
from overheating. When power reduction is imminent, the active drive mode indicator flashes. When power reduction is
active, all three drive mode indicators light up. When all components have returned to their normal operating temperature,
full system power is restored after restarting.
1.5 Safe operation
When you respect the rights of others and use your motorcycle legally, you will help protect the future of motorcycle sport
and avoid most conflicts and problems.
When disposing of used oil, other operating and auxiliary fluids, and used components, comply with the laws and regula-
tions of the respective country.
When disposing of the lithium-ion battery and the 12-V battery, comply with the laws and regulations of the respective
country.
Because motorcycles are not subject to the EU regulations governing the disposal of used vehicles, there are no legal regu-
lations that pertain to the disposal of an end-of-life motorcycle. Your authorized KTM dealer will be glad to assist you.
Electrical devices like the charger may not be disposed of with household waste. Electrical devices must be disposed of
through the appropriate recycling centers. Contact your municipality or your authorized KTM dealer.
1.9 Environment
1 SAFETY INSTRUCTIONS 3
When using the KTM PowerPack for the first time, the vehicle must be ridden until the KTM PowerPack is fully dis-
charged. The vehicle will initially reduce its output power. It can be operated in this power-reduced state for several min-
utes before the drive switches off altogether. Then charge the KTM PowerPack until the charger completes the process at
100%. The status and charge state displayed on the charger indicate the progress. Charging can take up to four hours. Do
not skip this procedure as it has a significant influence on the performance of the KTM PowerPack.
The vehicle contains a high-voltage battery 1(the KTM PowerPack,
260 V) and a 12-V battery 2. The 12-V battery is located under the seat.
Next to the 12-V battery there is a fuse box 3with two fuses.
The KTM PowerPack is located under the seat and is screwed onto the
electric motor. The KTM PowerPack can be removed in just a few steps.
The KTM PowerPack can be charged while it is installed in the vehicle
or outside of the vehicle. Check the KTM PowerPack for damage to the
housing or connector every time it is removed and reinstalled.
The 12-V battery is necessary to operate the vehicle. The vehicle control
unit requires the 12-V battery to start the system. If the 12-V battery is
faulty, discharged, or disconnected, the vehicle will not start.
2.1 Power supply
2.2 New KTM PowerPack
To protect the KTM PowerPack, the motor control unit reduces the power at low temperatures.
When the temperature of the KTM PowerPack drops to below 8 °C, the motor control unit reduces the power to 80%. Be-
low 0 °C, 50% of power remains available. In both cases, the active drive mode indicator flashes slowly. The vehicle can
continue to be operated. The KTM PowerPack is not damaged by the reduction in power.
The KTM PowerPack warms up during vehicle operation. When the temperature of the KTM PowerPack rises above 0 °C,
power is restored to 80% after the vehicle is restarted. When the temperature of the KTM PowerPack rises above 8 °C, full
vehicle power is restored after the vehicle is restarted.
2.3 Operation at low temperatures
This vehicle requires a special coolant because the cooling unit contains copper parts. Never use conventional, commer-
cially available coolant as it will cause corrosion. Only use the coolant specified here.
KTM Special Antifreeze Ready Mix E-Bike (00062020205)
2.4 Coolant
2 IMPORTANT NOTES 4

The rear brake lever 1is located on the left side of the handlebar.
The front brake lever 1is located on the right side of the handlebar.
The main switch 1is located on the right side of the handlebar.
Possible states
The main switch is switched off. In this position, the vehicle is
switched off.
The main switch is switched on. In this position, the vehicle is in
standby.
The main switch is used as the emergency OFF switch.
The start button 1is located on the right side of the handlebar. The start
button is only enabled when the main switch is switched on.
When the start button is pushed down for 1 second, the vehicle switches
from standby to ready mode.
The drive mode indicator and an acoustic signal indicate operating readi-
ness.
When the start button is pushed down again for 1 second, the vehicle
switches back to standby mode.
The drive mode indicator goes out, see Section 3.5.4.
Info
Standby mode can only be switched to ready mode if the throttle grip is
fully closed and the vehicle speed is less than 5 km/h.
If the vehicle is not moved for 90 seconds after ready mode is activated
and the throttle grip is not turned, the vehicle automatically switches
back to standby mode.
3.1 Main switch
3.2 Front brake lever
3.3 Rear brake lever
3.4 Start button
3 CONTROLS 5

For troubleshooting, see page 18, Section 8, Troubleshooting.
If there is a fault in the system, the yellow electric motor indicator lamp
(MIL) 1flashes. Warning tones are emitted by the multifunction display
in time with the flashing lamp.
While the vehicle is being activated or self-tests of the vehicle electronics
are being performed, the yellow electric motor indicator lamp (MIL) 1
lights up.
3.5 Multifunction display
3.5.1 Overview
3.5.2 Error message
1Map Select button
2Drive mode indicator
3Electric motor indicator lamp (MIL)
4Charge state indicator
The Map Select button 1is only enabled when the vehicle is in standby
or ready mode.
The Map Select button 1defines the drive mode, see Section 3.5.4.
3.5.3 Map Select button
3 CONTROLS 6

A red indicator lamp with the digit 1, 2, or 3 indicates the selected drive
mode.
Three drive modes are available. The drive modes define how the ve-
hicle will respond to operation of the throttle grip. The figures contain
approximate values for illustration purposes and do not show the actual
response.
Drive mode 1 is "Beginner".
The motor torque is reduced by 50%.
Drive mode 2 is "Enduro".
The further the throttle grip is opened, the more the motor power
is increased.
Drive mode 3 is "Cross".
The greatest increase in power occurs at the very outset, after
which the motor power increases more slowly.
3.5.4 Drive mode
The Map Select button 1is only enabled when the vehicle is in standby
or ready mode.
- To change the drive mode, press the Map Select button 1for at
least one second. The drive mode is activated when the button is
released.
If the throttle grip is fully closed and the vehicle speed is less than
5 km/h, the drive mode can also be changed while the vehicle is being
operated.
7
Possible states
• The selected drive mode lights up:
The vehicle is ready to operate and delivers full power.
• The selected drive mode flashes slowly:
High temperature; the system is still fully operational.
- Adjust your riding style.
Low temperature; the system delivers 80% of power under 8 °C
and 50% of power under 0 °C. After the KTM PowerPack
has warmed up sufficiently, either full power or 80% of power will
be available after a restart, depending on the temperature.
• All three drive mode indicators light up, blink code 22, 23, or 24:
Warning that the system has exceeded the maximum operating
temperature. To protect the system against damage, power has
been reduced considerably.
- If possible, park the vehicle and let it cool down. The vehicle does
not return to full power until the affected component has cooled
down and the vehicle is restarted.
• All three drive mode indicators light up, blink code 41:
A throttle grip fault has been detected. The system goes into
emergency mode and delivers 50% of power.
3.5.5 Drive mode/power reduction
3 CONTROLS

3.5.6 Charge state indicator
1Charge state 80% – 100%
2Charge state 60% – 80%
3Charge state 40% – 60%
4Lights up yellow: charge state 20% – 40%
4Lights up red: charge state 10% – 20%
4Flashes red: charge state 0% – 10%
• The selected drive mode flashes slowly and the charge state indicator
lights up red or flashes red:
The charge state of the KTM PowerPack is below 20%. Vehicle
power will be reduced. Park the vehicle and charge the
KTM PowerPack, see Section 5.1.3.
8
3 CONTROLS

- Select the drive mode using the Map Select button 5, see
Section 3.5.4.
- Press the start button 4.
The vehicle is ready to operate and responds to turning of the throttle
grip.
- First familiarize yourself with the new riding and handling behavior of the electric motorcycle.
- Turn the throttle grip carefully. The absence of engine noise belies the actual power of the electric motorcycle.
Activation:
- Press the main switch 3into position .
Info
The vehicle must be at a standstill during the starting procedure as the
self-test of the vehicle electronics cannot be performed while the vehicle
is rolling.
The vehicle is in standby.
- Set and adjust the controls.
- Wear protective clothing.
- Remove the vehicle from the side stand.
- Secure the side stand using the rubber strap 2.
- Mount the vehicle.
4.1 Starting procedure
4.2 Starting off
9
Preparations:
- Install the KTM PowerPack, see Section 5.1.3.
- Check the protection cap of the charging socket 1and the seal.
Do not start up the vehicle if the protection cap of the charging
socket is damaged or is not mounted.
4 RIDING INSTRUCTIONS

4.3 Applying the brakes
Warning
Danger of accident Excessively forceful application of the brakes blocks the wheels.
Adjust application of the brakes to the respective riding situation and riding surface conditions.
4.4 Stopping, parking
Note
Danger of damage The parked vehicle may roll away or fall over.
Always park the vehicle on a firm and level surface.
Warning
Danger of accident Reduced braking efficiency caused by spongy pressure point of front or rear
brake.
Check the brake system and do not continue riding.
Warning
Danger of accident Reduced braking efficiency due to a wet or dirty brake system.
If the brake system is wet or dirty, apply the brakes carefully to dry or clean them.
Warning
Danger of misappropriation Usage by unauthorized persons.
Never leave the vehicle unattended while it is ready to operate. Protect the vehicle against access by unauthorized
persons.
Note
Material damage Damage to or destruction of components due to excessive load.
The side stand is only designed for the weight of the motorcycle. Do no sit on the motorcycle while it is resting on the side
stand. The side stand or the frame may become damaged and the motorcycle may fall over.
- Apply the brakes to stop the motorcycle.
- Switch off the main switch.
- Park the motorcycle on firm ground.
Info
The rear brake lever is located on the left side of the handlebar since this vehicle does not have a manual transmission
with a clutch.
- When braking, release the throttle and apply the front and rear brakes at the same time.
- If possible, complete the braking procedure before riding into a curve.
10
4 RIDING INSTRUCTIONS

Warning
Danger of injury The KTM PowerPack is very heavy.
A collision with or dropping of the KTM PowerPack causes serious injury and damages the transport vehicle.
Secure the KTM PowerPack with tension belts or other suitable fixing materials.
Take the following steps when transporting the KTM PowerPack:
- To ensure rapid access in the event of an emergency, always transport the KTM PowerPack close to the cargo door.
- Transport the KTM PowerPack separately from flammable liquids or ignition sources such as fuel, gas, or oil.
- Have available a suitable fire extinguisher.
4.6 Transporting the KTM PowerPack
4.5 Transport
Note
Danger of damage The parked vehicle may roll away or fall over.
Always park the vehicle on a firm and level surface.
- Press the main switch into position .
- Use tension belts or other suitable devices to secure the
motorcycle against falling over or rolling away.
11
4 RIDING INSTRUCTIONS

Danger
Danger of injury A faulty or damaged charger or device component, including cables and
connections, poses an electric shock hazard.
Do not use the charger if the charger is faulty or damaged.
Contact an authorized KTM workshop.
Danger
Danger of injury Using the charger in a wet environment poses an electric shock hazard.
Only use the charger in dry environments.
5.1 KTM PowerPack charger
5.1.1 Overview of the KTM PowerPack charger
1 Residual current circuit breaker
2 Charger switch off
3 Charger switch on
4 Charger
5 Charge mode switch
6 Charge status indicator
7 Status indicator
8 LED for charger fault
9 LED for KTM PowerPack fault
The charger is designed for the following specifications:
Line voltage: 230 V
Line frequency: 50 Hz
12
5 ELECTRICAL SYSTEM

5.1.2 Removing the KTM PowerPack
- Switch off the main switch.
- Push the release lever 1back.
- Lift the seat and fold it up.
- Loosen screws 2.
Note
Material damage Water and dirt damage or destroy
components.
Mount the cover cap after you have removed the KTM PowerPack.
Place the KTM PowerPack on a clean and dry surface.
- Remove the KTM PowerPack.
- Mount the cover cap 3.
13
5 ELECTRICAL SYSTEM

5.1.3 Installing the KTM PowerPack
Note
Material damage Water and dirt damage or destroy components.
Before installing the KTM PowerPack, check the discharging plug on the motor and the discharging socket on the
KTM PowerPack for cleanliness.
Check the sealing lips on the discharging plug and discharging socket.
If the connectors are soiled, clean them carefully without using water or compressed air.
Spray the sealing lips of the discharging connectors with silicone spray.
- Remove the cover cap 1.
- Check the discharging plug 2on the motor and the discharging
socket
3on the KTM PowerPack for cleanliness.
- Check the sealing lips of the discharging plug and discharging
socket and exchange them if necessary.
- If the discharging plug and discharging socket are soiled, clean
them and spray silicone spray on the sealing lips.
- Position the KTM PowerPack in the vehicle.
- Tighten screws 4.
Guideline
- Fold down the seat and lock it.
KTM PowerPack fixation M6 10 Nm
14
5 ELECTRICAL SYSTEM

5.1.4 Charging the KTM PowerPack
Note
Material damage Water and dirt damage or destroy components.
Mount the protection cap of the charging socket while the KTM PowerPack is not connected to the charger.
Note
Material damage Overload damages the line supply system.
The "Fast" charge mode requires at least 13 amperes of continuous current. The "Normal" charge mode requires at least
10 amperes of continuous current.
Ensure that the line supply is specified for these continuous currents and that it features the necessary fuse protection.
- Switch off the main switch.
- Unlock the seat and fold it up.
- Remove the protection cap of the charging socket 1.
- Check the seal of the protection cap of the charging socket.
- Connect the charger with the KTM PowerPack. Note the connector
marking
A.
Note
Material damage The charging socket becomes damaged from incorrect handling.
Ensure that the connector is correctly positioned when mounting it.
The charging procedure is identical regardless of where the
KTM PowerPack is charged – while installed in the vehicle or outside
of the vehicle. However, the 12-V battery is only charged while the
KTM PowerPack is being charged in the vehicle.
Do not activate the vehicle while the charger is connected to the
KTM PowerPack.
If the vehicle is activated while the vehicle is being charged with the
KTM PowerPack installed, the vehicle switches to the fault state.
Charging of the KTM PowerPack continues but charging of the 12-V bat-
tery stops.
If you have problems charging the KTM PowerPack, consult Section 8
Troubleshooting.
- Connect the power plug of the charger to the line socket.
- Set the charge mode switch 2to "Fast" or "Normal".
- Switch on the charger using switch 3.
Charging starts automatically. The status indicator flashes while the sys-
tem is charging, see Section 5.1.1.
15
5 ELECTRICAL SYSTEM

The charge state is indicated by five LEDs.
LED 1: 20 %
LED 2: 40 %
LED 3: 60 %
LED 4: 80 %
LED 5: flashes until 100% is reached.
After the charging process is completed, all five LEDs light up while the
status indicator is switched off.
If LED 5 of the charge state indicator on the charger flashes, the KTM PowerPack is ready to use. However, full capacity is
not yet available.
To ensure maximum power of the KTM PowerPack, fully discharge the KTM PowerPack and recharge it again fully every
20 charge cycles. If this procedure is not followed, the vehicle may switch off due to a low charge state without first
reducing the power.
The KTM PowerPack is fully discharged when the vehicle switches off with blink code 11, see Section 8.1.
If the temperature of the KTM PowerPack exceeds the permissible value while it is being charged, the charger stops
charging. The status indicator lights up permanently.
After the temperature of the KTM PowerPack returns to the permissible range, charging is resumed automatically.
- Switch off the charger using switch 4.
- Disconnect the charging cable from the KTM PowerPack.
- Check the seal of the protection cap of the charging socket.
- Mount the protection cap of the charging socket.
- Fold down the seat and lock it.
16
5 ELECTRICAL SYSTEM

6.1 Cleaning the motorcycle
- If the KTM PowerPack is removed for cleaning, mount the cover
cap
1.
- Remove coarse dirt particles with a gentle spray of water.
- Spray very dirty areas with a commercial motorcycle cleaner and
clean with a brush.
Info
Do not apply motorcycle cleaner to the vehicle while it is dry. First rinse
the vehicle with water.
- Use warm water with commercially available motorcycle cleaner
and a soft sponge.
- After cleaning, rinse the vehicle thoroughly with a soft spray of
water.
- Dry the vehicle with a soft cloth.
Warning
Danger of accident Reduced braking efficiency due to a wet
or dirty brake system.
If the brake system is wet or dirty, apply the brakes carefully to dry
or clean them.
- Drive a short distance after cleaning.
Note
Material damage The vehicle and the KTM PowerPack are not suitable for cleaning with high pressure
cleaners.
The high pressure forces water into the electrical components, connectors, bearings, etc. As a result, components may be
damaged or destroyed.
Never clean the vehicle and the KTM PowerPack with a high-pressure cleaner or a powerful jet of water.
Note
Material damage Water and dirt damage or destroy components.
Always mount the cover cap after removing the KTM PowerPack.
Do not direct the water jet toward the connector, even if the cover cap is mounted.
Info
To preserve the value and appearance of the vehicle, clean it regularly.
Avoid direct sunlight on the vehicle during cleaning.
The KTM PowerPack may be removed if desired but does not have to be.
17
6 CLEANING, CARE

7.1 Storage
- Ride the vehicle until the KTM PowerPack is below 50% capacity.
- Remove the KTM PowerPack.
- Store the KTM PowerPack in a dry location that is not subject to
large temperature fluctuations.
- Charge the KTM PowerPack in the "Storage" charge mode of the
charger.
- Clean the vehicle.
- Check the tire inflation pressure.
- Remove the 12-V battery.
- Charge the 12-V battery.
- Store the 12-V battery in a dry location that is not subject to large
temperature fluctuations.
- Store the 12-V battery and the KTM PowerPack at 10… 25 °C,
avoiding direct sunlight.
- Park the vehicle in a dry location that is not subject to large
temperature fluctuations.
If the vehicle is placed on a lift stand, the tires and spring elements will
be relieved of weight.
- Position the vehicle on a lift stand.
- Cover the vehicle with a tarp or similar cover that is permeable to
air.
Do not use materials that are impermeable to air as they will trap mois-
ture and promote corrosion.
Info
The maximum period of inactivity of the KTM PowerPack is 1 year.
If it remains inactive for a longer period, the maximum power of the KTM PowerPack is no longer guaranteed.
If the vehicle will not be ridden for an extended period, additional steps are recommended:
18
7 STORAGE

8.1 Vehicle troubleshooting
The blink codes are displayed by the yellow electric motor indicator lamp.
The following example shows blink code 31:
Fault Blink
code
Measure 1 Measure 2 Measure 3 Measure 4
Switch-off due to low
charge state
11 Charge the
KTM PowerPack
Test the new
KTM PowerPack
Contact an authorized
KTM workshop
Fault during charging 13 Stop charging,
switch off the main
switch, and restart
charging
Contact an
authorized KTM
workshop
Overtemperature of the
control unit
22 Check the coolant
level
Check the radiator
for dirt
Contact an authorized
KTM workshop
Overtemperature of the
motor
23 Check the coolant
level
Check the radiator
for dirt
Contact an authorized
KTM workshop
Overtemperature of the
KTM PowerPack
24 Let the KTM Power-
Pack cool down
Contact an
authorized KTM
workshop
Fault in the CAN com-
munication
31 Switch the main
switch off and on
Check the correct
positioning of the
KTM PowerPack
Check the connection
of the multifunction
display for loose con-
nectors
Contact an au-
thorized KTM
workshop
Fault in the com-
munication with the
KTM PowerPack
33 Switch the main
switch off and on
Check the correct
positioning of the
KTM PowerPack
Contact an authorized
KTM workshop
Fault in the communi-
cation with the multi-
function display
34 Switch the main
switch off and on
Check the con-
nection of the
multifunction
display for loose
connectors
Contact an authorized
KTM workshop
The pause between the signal of the 1st digit is 0.25 seconds.
The pause between the 1st and 2nd digits is 1 second.
The pause until the blink code repeats is 3 seconds.
Important
For all faults that do not appear in the table, switch the vehicle off and on again. If this does not eliminate the fault, con-
tact an authorized KTM workshop.
19
8 TROUBLESHOOTING
Other manuals for Freeride E-SX
1
Table of contents
Other KTM Motorcycle manuals

KTM
KTM 250 SX 2022 User manual

KTM
KTM 250 EXC-F EU 2010 User manual

KTM
KTM 1290 Super Adventure User manual

KTM
KTM 350 EXC-F 2023 User manual

KTM
KTM 250 EXC-F 2013 User manual

KTM
KTM 2014 65 SX Manual

KTM
KTM 65 SX 2001 User guide

KTM
KTM 1090 ADVENTURE 2017 User manual

KTM
KTM 990 Supermoto T 2012 Manual

KTM
KTM 85 SX 2019 User manual

KTM
KTM 890 DUKE R 2021 User manual

KTM
KTM 890 DUKE 2021 User manual

KTM
KTM 450 Rally Factory Replica User manual

KTM
KTM 2006 660 SMC User manual

KTM
KTM 250 EXC SIX DAYS TPI 2022 User manual

KTM
KTM 400 LS-E/MIL User guide

KTM
KTM 125 SX User manual

KTM
KTM 2004 660 SMC User manual

KTM
KTM 1090 Adventure R 2018 Manual

KTM
KTM 790 Adventure 2019 User manual