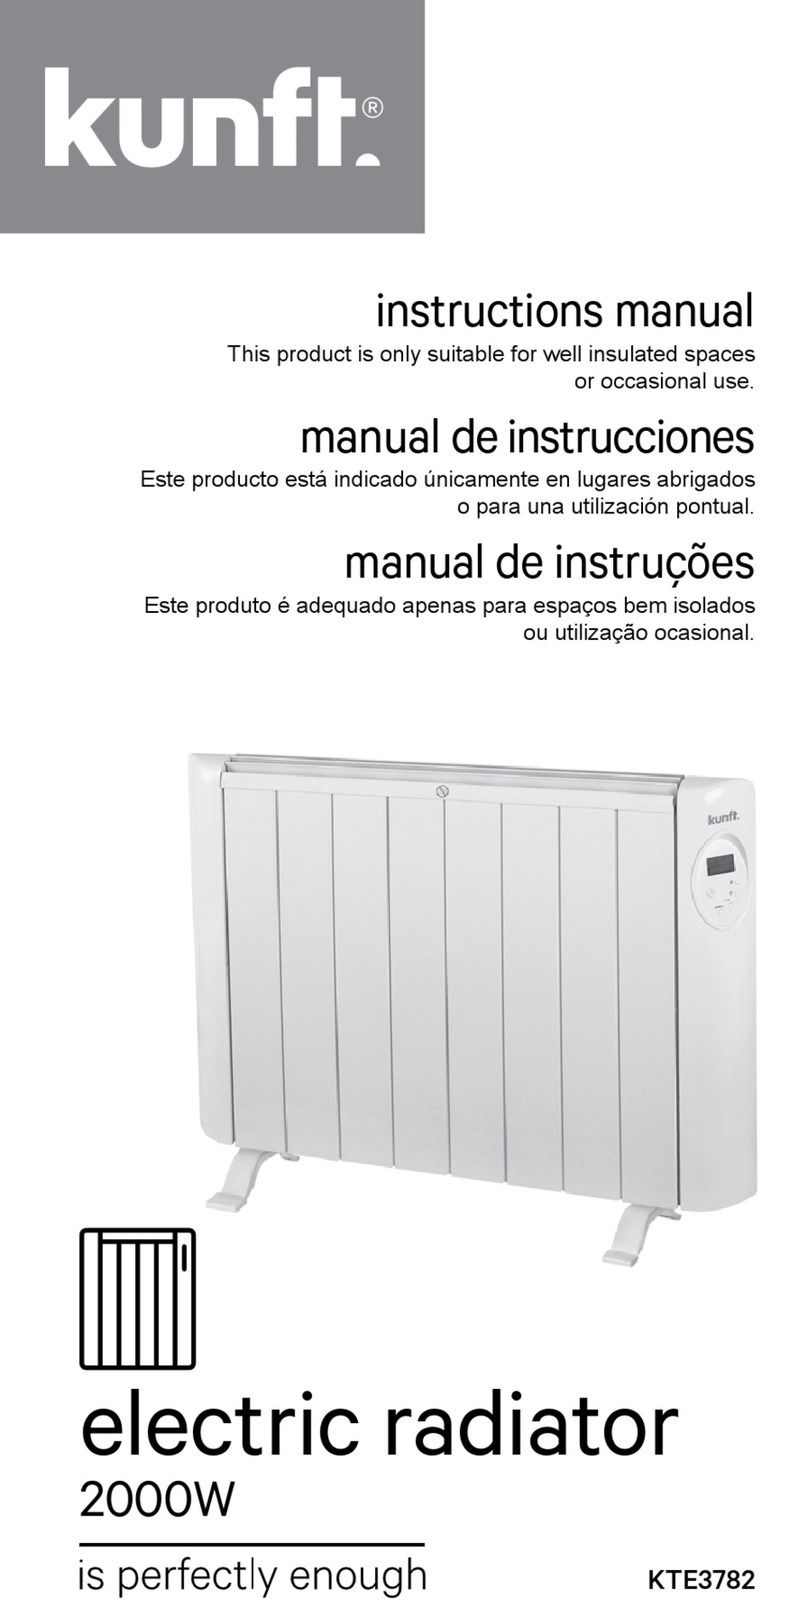
Kunft KTE3781 User manual

electric radiator
1500W
KTE3781
instructions manual
This product is only suitable for well insulated spaces
or occasional use.
manual de instrucciones
Este producto está indicado únicamente en lugares abrigados
o para una utilización pontual.
manual de instruções
Este produto é adequado apenas para espaços bem isolados
ou utilização ocasional.

2 3
KTE3781
Dear client,
Thank you for purchasing this product.
The quality of this appliance has been certied by several
laboratory tests. This instructions manual is provided
to simplify the use of the appliance as well as to guarantee
a safe use.
Please read carefully the instructions and safety measures
described in this manual.
We sincerely hope you will be satised when using your
new appliance.
INDEX
1. SAFETY INSTRUCTIONS...................................... 4
1.1. Power supply ................................................. 5
1.2. Power cord and other cables .......................... 6
1.3. Humidity and water ......................................... 6
1.4. Cleaning.......................................................... 6
1.5. General precautions........................................ 6
2. OPERATING INSTRUCTIONS............................. 10
2.1. Product description ....................................... 10
2.2. Product usage............................................... 12
2.3. Maintenance ................................................. 19
3. TECHNICAL SPECIFICATIONS........................... 19
3.1 Information requirements for electric
local space heaters........................................ 20
4. POST-SALE SERVICE......................................... 21
5. ENVIRONMENTAL PROTECTION ...................... 21
EN
electric radiator 1500W

4 5
KTE3781
1. SAFETY INSTRUCTIONS
WARNING
Risk of Electric Shock
Do Not Open
Warning: to avoid the risk of electric
shock, do not remove the cover.
The interior does not contain any parts
that can be repaired by the user.
Ask for assistance from the Customer
Support Service.
Important Warnings
Before using your appliance read these ins-
tructions manual carefully and keep it in a
safe place as you may need to consult it in
the future.
Before turning on your appliance, and to
ensure a safe and correct operation, do not
use if:
- It has fallen to the ground;
- You notice any evidence of damage;
- Any anomaly occurs during its operation.
To avoid hazards or deterioration of your ap-
pliance through incorrect use it is advisable
to read these instructions thoroughly.
Your appliance should not be used for other
purposes than the ones intended and sole-
ly for household use. Any damage resulting
from using the appliance outside this scope,
any incorrect use, as well as any manual
modications to the product will not be co-
vered and automatically voids the warranty.
Assistance
In case of malfunction, take your appliance
to the Customer Support Service for assis-
tance.
This appliance can be used by
children from the age of 8 and by
peoplewith reducedphysical, sen-
sorial or mental capabilities and/
or lack of experience and know-
ledge if they have been given ins-
tructions on using the appliance
safely and if they understand the
hazards involved. Children may
not play with the appliance. Cle-
aning and maintenance must not
be carried out by children without
supervision.
These instructions are also available at
www.suporteworten.pt
1.1. Power supply
Make sure the main voltage is compatible
with the appliance’s. If this is not the case,
please consult the Customer Support Ser-
vice.
EN
electric radiator 1500W

6 7
KTE3781
1.2. Power cord and other cables
Do not tangle the cord or pull it to discon-
nect the appliance. Also, keep the cord
away from warm surfaces.
Never use the appliance if it has a damaged
cable or socket.
Take it to the Customer Support Service for
replacement.
1.3. Humidity and water
Do not use your appliance in humid places.
Do not allow the appliance to become wet
under any circumstances as this may be
dangerous. To avoid re hazard or electric
shock do not expose your appliance to humi-
dity or water. Furthermore, do not place your
appliance under water (e.g. for cleaning).
1.4. Cleaning
Before cleaning, be sure to switch off the ap-
pliance and remove the plug from the main
power supply. Always allow the unit to cool
down before cleaning.
To clean the exterior of the product, use a
dry soft cloth only.
1.5. General precautions
• Please follow the instructions in the user
manual which will help you to properly ins-
tall and operate this product and enjoy its
advanced features. Please keep the ins-
tructions for future reference.
• Read all instructions before using the pro-
duct.
• Maintenance and service operations are
only to be carried out by authorized pro-
fessionals.
• Any damage caused by manual modica-
tions to the product is not covered by the
warranty.
• If this product is used for other purposes
than the ones originally intended, or if it is
not correctly connected, the product may
become damaged and the warranty will be
voided.
• The product is for household and commer-
cial use only.
• Connect the appliance to a single-phase
AC supply with the voltage specied on
the rating plate.
• Do not cover the heater in order to avoid
overheating.
• Caution is necessary when any heater is
used by or near children, invalids or elder-
ly persons and whenever the heater is left
operating and unattended.
• The heater must not be located immedia-
tely below an electrical socket.
• Do not run the cord under carpeting and
do not cover the cord with throw rugs, run-
ners or the like. Arrange the cord so that
the risk of it being trodden on is minimised
and where it will not be tripped over.
EN
electric radiator 1500W

8 9
KTE3781
• Do not operate the heater with a damaged
cord or plug, or after the heater malfunc-
tions, has been dropped, or damaged in
any manner.
• If the supply cord is damaged, it must be
replaced by the manufacturer, its service
agent or a similarly qualied person in or-
der to avoid a hazard.
• Use the heater in a well-ventilated area.
Do not insert or allow objects to enter any
ventilation or exhaust opening. To prevent
a re hazard, do not block air intakes or
exhaust openings in any manner.
• Do not use on soft surfaces, where openin-
gs may become blocked. Use the heater
on at, dry surfaces only.
• Do not place this heater near ammable
materials, surfaces or substances, as the-
re may be a risk of re. Keep the above
ammable materials, surfaces or substan-
ces at least 1 m from the front of the pro-
duct and keep them away from the sides
and rear.
• Do not use the heater in any areas where
petrol, paint or other ammable liquids are
stored e.g. garages or workshops.
• Don’t use this heater in the immedia-
te surroundings of a bath, a shower or a
swimming pool (600 mm clearance) in an
upright position. Never locate the heater
where it may fall into bathtub or any other
water container.
• Never touch the heater with wet hands.
The heater should be installed so that it
cannot be touched by a person taking a
bath or a shower. (600 mm clearance)
• This heater is hot when in use. To avoid
burns and personal injury, do not let bare
skin make contact with hot surfaces.
• Before moving the heater, please unplug it
and let it cool down for 15 minutes. If pro-
vided, use handles when moving the pro-
duct.
• Please be aware that if other appliances
are in use in the same electrical circuit as
the appliance this can cause an overload.
• The radiator is equipped with a ceramic
heating element.
EN
electric radiator 1500W

10 11
KTE3781
2. OPERATING INSTRUCTIONS
2.1. Product description
STRUCTURE AND PARTS
1. 1 heat setting
2. Overheating protection
3. Digital LCD
4. Room temperature setting
5. Room temperature sensor
6. Digital clock, digital week calendar
7. Multi-operation mode: daily
program mode, weekly program
mode, free use mode
8. Anti-frost function
Steel
housing
Out-let
LCD
screen
Power
switch
Temperature sensor
9. Can be wall-mounted or used on wheels
INSTALLATION
With wheels
1. Fit the feet onto the bottom of the appliance.
2. Fasten the feet with 4 screws.
Fig. 1.
Wall-mounted
Distance between xing points
T. EMITTER 4 5 6 7 8
L1 (mm) 242 322 402 482 562
L2 (mm) 242 322 402 482 562
Fig. 2 Fig. 3
1. Drill holes according to the
instructions in g. 2
2. Place the tubes into the holes of
the wall.
3. Set up grips with screws (Fig. 4)
4. Place the T. Emitter on the upper
grips
5. Place the down grips to maintain
the appliance against the wall.
6. Screw grips down with screws.
WALL
TUBES
SCREWS GRIPS
GRIPS
Fig. 4
CAUTION: Before starting the appliance, make sure it’s correctly
wall-mounted. If it’s not parallel to the oor, technical problems can
occur.
Control panel and LCD screen
Control panel:
There is a total of 5 buttons on the control panel as follows:
Power standby switch
Date and time settings; Timer settings; Running mode
Running mode; Set program;
Increase
Decrease
The screen has a backlight which will automatically turn itself of after
1 minute if no buttons are pressed. It will light up again if you press
any button.
The unit has an auto button lock function. The buttons will be locked
( ) after 1 minute if you don’t press any buttons.
To remove the lock: press and at same time.
Screen:
1. Clock
2. Date
3. Program name/ number
4. Hour of the day
5. Comfort
6. Economy
7. Anti-frost
8. Standby
9. Buttons locked
10. Heating symbol
11. Program setting
12. Timer
13. Day settings
14. Target temperature
EN
electric radiator 1500W

12 13
KTE3781
2.2. Product usage
Operation modes
There are 3 operation modes:
Free use/manual mode , Daily program ~and weekly
mode .
1. Free use mode ( ): Includes normal mode and timer mode ;
2. Daily mode ( ~ ): There are a total of 9 daily programs.
Every program is a combination of the 3 working modes:
Comfort is represented by ( AND ),
Economy is represented by ( AND ),
Anti-frost is represented by ( and empty).
Every day (24 hours) is evenly divided into 24 segments. Each
segment will be lled in with one block of either comfort, economy
or anti frost temperature mode to combine and form a daily program.
All the settings for the daily program will be kept in memory. If a daily
program is selected, the unit will repeat this program every day.
3. Weekly mode:
Selecting one daily program (from the daily programs P1-P9) for
every day in a week to combine and form a weekly program.
Operation
1 Powering on
Plug in and switch on the unit. On rst use, the screen will show the
following:
Press ,then the symbol will disappear, and the unit enters free
use mode (Note: units always go into free use mode from the stand-
by mode).
2-1 Free Use Program
For rst time use, the screen will show the following:
2-1-1 Time setting
Press the button and the hours will start to blink. Use or
to select the required hour (0 ~ 23).
Press again, and the minutes will start to blink.
Use or to select the minute (0 to 59);
Pressing again, will make the date start to blink. Use or
to select the date
(1 - Monday, 2 - Tuesday, 3 - Wednesday, 4 - Thursday, 5 - Friday,
6 - Saturday, 7 - Sunday);
Finally, press to conrm and nish the setting.
If no buttons are pressed, the blinking will stop after 5 seconds and
the setting will be nished automatically.
2-1-2 Setting the Temperature
Press or to set the target temperature directly, at which point
the temperature starts to blink.
Press or to set the target temperature.
The temperature is adjustable ranging from 10°C to 35°C.
If no buttons are pressed, the blinking will stop after 5 seconds and
the setting will be nished automatically.
2-1-3 Setting the Timer (timer mode)
Hold for 3 seconds until the symbol is shown.
At the same time the clock will turn to 00:00 and start to blink.
To set the timer, do the following:
Press or to set the duration of the timer. Every button press
will change the duration by half an hour (30 minutes).
The maximum timer duration is 24 hours.
When the timer is over, the unit will enter standby mode .
You can also set time and temperature as in 2-1-1 and 2-1-2.
To quit timer mode: hold the button for 3 seconds until the
symbol has disappeared.
The unit will automatically return back to free use mode.
(Note: When the unit exits the free use program (enters the daily,
weekly, or standby mode it always enters into the free use mode rst.
The original timing mode will be automatically cancelled).
EN
electric radiator 1500W

14 15
KTE3781
2-2 Selecting the Operating Mode
Press the button to select the program (Program No. starts to
blink).
Press or to select the operating mode:
, ~ ,
Then press to conrm.
The unit will run following the newly selected program.
Note: During this period, if no buttons are pressed, the selection is
automatically completed 5 seconds later.
2-3 Daily program
The daily program has three kinds of operating modes:
Comfort mode: ( and program content displayed as ), An
adjustable range from 10°C to 35°C;
Economic mode: ( and program content displayed as ), An
adjustable range from 10°C to 35°C;
The temperature should be no higher than is comfortable;
Anti-frost mode: ( and program content displayed empty), 7°C
is xed.
If a daily program was chosen, the unit will repeat the program every
day.
Different program used for the rst time as follows:
P1: P2:
P3: P4:
P5: P6:
P7: P8:
P9:
2-3-1 Setting the Time
Same as in 2-1-1, then the unit will automatically adjust to the current
time and running accordingly.
2-3-2 Temperature setting
Hold the button for 3 seconds until the symbol blinks, at the
same time the original comfort temperature will start to blink.
Press the or the button to set the target comfort temperature.
Press to conrm, and the symbol will start to blink, the original
economy temperature also starts to blink.
Press the or buttons to set the target economy temperature.
Use to conrm it temperature setting is completed. The unit is
now operating in comfort mode.
The temperature will then be kept in memory.
2-3-3 Setting the Daily Program
Amending a pre-set program to your set times
Press the button to choose the program from ~that you
want to set.
Then hold the button for 3 seconds to enter the program setting
and at this time will be displayed on the screen.
will be shown until the setting is completed, and the heating will
stop during the setting.
The date does not show, and the time is 00:00.
The mark starts to blink rapidly.
First segment of selected program,
such as following (when the selected
daily program is P1):
EN
electric radiator 1500W

16 17
KTE3781
starts the mode for comfort Economy , empty for the
anti-frost.
Then press (forward), or (back) to copy the mode into every
segment.
Finally press to conrm the program and exit program setting.
will disappear, and the unit will be back in the normal working
mode.
The new program will be kept in memory and replace the original
program.
2-4 Weekly Program
You may select the weekly program according to 2-2.
First use will be as follows:
2-4-1 Time setting
Same as 2-1-1. The unit will automatically adjust to the current time
and operate accordingly.
2-4-2 Setting the Temperature
Same as 2-3-2.
2-4-3 Setting the Weekly Program
Hold for 3 seconds to enter the weekly program setting, the time
and operating mode are no longer displayed, and is shown.
is displayed while this setting is active. The unit stops heating
during the setting.
The Monday marker will begin to blink, the Monday program name
will also blink (and the corresponding program content is also shown).
The screen shows the following:
Press either or to select the daily program from ~
for Monday (1).
Press to conrm and automatically enter the Tuesday program (2).
With the same method, you can select a daily program for every
day of the week.
Finally press to nish setting the weekly program.
Then the symbol will disappear, and the unit will operate
according to new weekly program.
Note: Settings can be terminated at any time during setting.
The new content will be retained.
3 OPEN WINDOW Function:
Your radiator is equipped with the open window function.
When the windows are open for an extended period of time, close
to where the radiator is located, a sensor detects the sharp drop in
the temperature. The radiator switches off automatically and the
symbol ickers on the screen.
The radiator is automatically turned on after 10 minutes.
However, you can manually turn on the radiator before the 10 minutes
have elapsed, by pressing the “ ” button on the radiator. The “ ”
symbol disappears from the screen.
3-1 Starting of the function:
1. Press once. Using the keys and , choose among
. Press once to conrm your choice.
2. Once in the program fenestrate open, the following screen appears:
meaning “function not in operation”
Using the keys and , to change OFF to ON, ( meaning
“function is in operation”)
The open window function is operational.
Press once to validate your choice. Without pressing the touch
button for 5 seconds, the function is validated automatically.
4 Factory pre-sets
The unit has the following factory pre-sets:
Date: 1 (Monday)
Clock: 00:00
Anti-frost: 7°C
Free mode temperature: 10°C
Comfort: 22°C
Economy: 17°C
EN
electric radiator 1500W

18 19
KTE3781
Weekly Program: 1 ~ 5 (Mon-Fri): P1
6 (Saturday): P2
7 (Sunday): P3
Factory presetting
Confort (
Economic (
AU: 1~5 (Monday ~ Friday): P1
6 (Saturday): P2
7 (Sunday): P3
Anti-frost ( empty): 22°C
): 17°C
): 7°C
Note: When pressing to power on, the unit will come back on to
the factory pre-sets.
4 Other notes
• The screen has a back light. It will turn off after 1 minute if you don’t
press any buttons. It will light up again if you press any button.
• The unit has a button lock function. The buttons will be locked ( )
after 1 minute if you don’t press any buttons.
• To unlock: press and at same time.
• The time will be reset to 00:00 if you unplug the unit, or if there is
a power cut.
• This heater includes an overheat protection system that shuts off
the heater when parts are getting excessively hot.
• will only show when the unit is heating.
• The units will always go into free use mode from standby mode.
• The unit will return to the last operating mode when powered off
and on.
2.3. Maintenance
Always remove the plug from the socket and allow the heater to cool
down before cleaning it.
Wipe the exterior surface of the heater occasionally with a soft damp
cloth (not dripping wet) and dry the exterior surface before operating
the heater.
WARNING:
Do not immerse the heater in water.
Do not use any cleaning chemicals such as detergents and
abrasives. Do not allow the interior to get wet as this could
create a hazard.
Accumulated dust may be removed from the heater with a soft dry cloth.
To store the heater, put the heater back into its original packaging
and store it in a clean dry place.
In case of malfunction or if you have any doubt, do not try to repair
the heater by yourself, it may result in a re hazard or electric shock.
3. TECHNICAL SPECIFICATIONS
MODEL NO FINS NET SIZE
RATED
VOLTAGE
RATED
POWER
KTE3781 /
NDFL791B-7R 7 735 x 590 x 80 mm ~230V/50HZ 1500W
EN
electric radiator 1500W

20 21
KTE3781
4. POSTSALE SERVICE
KUNFT has designed this appliance in order to guarantee maximum
reliability. However, if a problem occurs do not attempt to open the
appliance - there is a risk of electrical shock. If you are not able to
solve the problem, please contact the Customer Support Service
of any Worten, Modelo or Continente store in order to be assisted.
Worten Equipamentos para o Lar provides a 2-year warranty for
manufacturing defects from the date of purchase of the appliance.
WARNING: any attempt to repair the appliance without contacting
the manufacturer or seller will void the warranty.
All users must be familiar with these instructions. Knowing what
could go wrong can help prevent problems from occurring.
5. ENVIRONMENTAL
PROTECTION
In order to protect the environment, we strive to reduce the volume of
packaging used, limiting it to three easily sorted materials: cardboard,
paper and plastic.
The appliance is manufactured using recyclable
materials after disassembled by a specialized company.
Please comply with local regulations concerning the
recycling of all materials.
EN
electric radiator 1500W
3.1 Information requirements for
electric local space heaters
Model identier(s): KTE3781
Item Symbol Value Unit Item Unit
Heat output Type of heat input, for electric
storage local space heaters only
Nominal
heat output
Pnom 1,50 kW Manual heat charge control,
with integrated thermostat
No
Minimum
heat output
(indicative)
Pmin 1,50 kW Manual heat charge control
with room and/or outdoor
temperature feedback
No
Maximum
continuous
heat output
Pmax,c 1,50 kW Electronic heat charge control
with room and /or outdoor
temperature feedback
No
Auxiliary electricity
consumption
Fan assisted heat output No
At nominal
heat output
elmax N/A kW Type of heat output /room
temperature control
At minimum
heat output
elmin N/A kW Single stage heat output and
no room temperature control
No
In standby
mode
elSB N/A kW Two or more manual stages,
no room temperature control
No
With mechanic thermostat
room temperature control
No
With electronic room
temperature control
No
Electronic room temperature
control plus day timer
No
Electronic room temperature
control plus week timer
Yes
Other control options
Room temperature control,
with presence detection
No
Room temperature control,
with open window detection
Yes
With distance control option No
With adaptive start control No
With working time limitation No
with black bulb sensor No
Contact details Worten Equipamentos p/ Lar S.A.
Rua João Mendonça, nº 505
4464-503 Senhora da Hora - Portugal

22 23
KTE3781
Estimado cliente:
Gracias por adquirir este producto.
Este aparato ha sido sometido a diversas pruebas
que avalan su calidad. Este manual de instrucciones
está destinado a facilitar el uso del aparato y garantizar
un uso seguro.
Lea atentamente las instrucciones, así como las medidas
de seguridad descritas en este manual.
Esperamos sinceramente que esté satisfecho
con su nuevo aparato.
ÍNDICE
1. INSTRUCCIONES DE SEGURIDAD ................... 24
1.1. Alimentación ................................................. 25
1.2. Cable de Alimentación y Otros Cables ......... 26
1.3. Humedad y Agua .......................................... 26
1.4. Limpieza........................................................ 26
1.5. Precauciones Generales............................... 27
2. INSTRUCCIONES DE FUNCIONAMIENTO........ 30
2.1. Descripción del producto .............................. 30
2.2. Utilización del producto................................. 32
2.3. Mantenimiento .............................................. 39
3. ESPECIFICACIONES TÉCNICAS ....................... 39
3.1. Requisitos de información que deben
cumplir los aparatos de calefacción
local eléctricos .............................................. 40
4. SERVICIO POSVENTA ........................................ 41
5. PROTECCIÓN MEDIOAMBIENTAL..................... 41
ES
radiador eléctrico 1500W

24 25
KTE3781
1.INSTRUCCIONESDE SEGURIDAD
ATENCIÓN
Peligro de electrocución
No abrir
Atención: para evitar el riesgo de
electrocución, no abra esta unidad. Su
interior no contiene elementos que puedan
ser reparados por el usuario. Acuda
al Servicio de Atención al Cliente.
Avisos importantes
Antes de usar el aparato, lea atentamente
este manual de instrucciones y guárdelo en
un lugar seguro, pues puede tener que con-
sultarlo en el futuro.
Antes de encender el aparato, y a n de ga-
rantizar su utilización de forma correcta y
segura, no lo utilice si:
- Se ha caído al suelo;
- Nota alguna señal de daño;
- Se produce alguna anomalía durante su
funcionamiento.
Para evitar posibles peligros y el deterioro
del aparato debido a un uso incorrecto, se
recomienda que lea atentamente las ins-
trucciones.
Este aparato no deberá ser utilizado para
otros nes que no sean los previstos en el
manual y únicamente para uso doméstico.
Cualquier daño derivado del uso del aparato
fuera de este ámbito de aplicación, cualquier
uso incorrecto, así como cualquier modica-
ción manual del producto, no estará cubierto
y anulará automáticamente la garantía.
Asistencia
En caso de avería, acuda al Servicio de
Atención al Cliente.
Este aparato podrá ser utilizado
por niños de ocho años o más y
por personas con discapacidad fí-
sica, sensorial o mental, o perso-
nas con falta de experiencia o co-
nocimientos, siempre que cuen-
ten con supervisión o se les haya
proporcionado instrucciones para
usar este aparato de un modo se-
guro, y entiendan los riesgos que
conlleva. Los niños no deben ju-
gar con el aparato. La limpieza y
mantenimiento no deben ser rea-
lizados por niños sin supervisión.
Estas instrucciones también están
disponibles en www.suporteworten.pt
1.1. Alimentación
Compruebe que la tensión de la red eléctri-
ca es compatible con la indicada en el apa-
ES
radiador eléctrico 1500W

26 27
KTE3781
rato. En caso de que no sea compatible,
consulte al Servicio de Atención al Cliente.
1.2. Cable de alimentación y otros
cables
No enrolle el cable de alimentación ni tire de
él para desenchufar el aparato. Asimismo,
manténgalo alejado de supercies calien-
tes.
Nunca utilice este aparato si el cable o el
enchufe están dañados.
En su lugar, llévelo a un Servicio de Aten-
ción al Cliente para que proceda a su sus-
titución.
1.3. Humedad y agua
No utilice el aparato en lugares húmedos.
No deje que el aparato se moje en ningu-
na circunstancia, pues puede ser peligroso.
Para evitar el peligro de incendio o descarga
eléctrica, no exponga el aparato al agua o la
humedad. Asimismo, no sumerja el aparato
(por ejemplo, para limpiarlo).
1.4. Limpieza
Antes de proceder a la limpieza del aparato,
apáguelo y desconecte el cable de la cor-
riente. Deje siempre que el aparato se en-
fríe antes de efectuar cualquier operación
de limpieza.
Para limpiar el exterior del producto, utilice
únicamente un paño suave y seco.
1.5. Precauciones generales
• Siga las instrucciones de este manual,
que le ayudarán a instalar y poner correc-
tamente en funcionamiento este producto
y disfrutar de sus características avanza-
das. Guarde las instrucciones para refe-
rencia futura.
• Lea todas las instrucciones antes de usar
el aparato.
• Las operaciones de reparación o manteni-
miento deben ser realizadas únicamente
por profesionales autorizados.
• Cualquier daño provocado por modica-
ciones manuales al producto no estará
cubierto por la garantía.
• Si usa el producto para otros nes que no
sean para los que ha sido originalmente
diseñado, o si no está correctamente co-
nectado, el producto podrá sufrir daños y
la garantía quedará anulada.
• El producto está diseñado solamente para
su uso doméstico y comercial.
• Conecte el aparato a una fuente de CA
monofásica con el voltaje especicado en
la placa de características.
• No cubra la resistencia para evitar el so-
brecalentamiento.
• Tenga precaución cuando el radiador sea
utilizado por niños, personas discapacita-
das o ancianos, o cerca de ellos, así como
ES
radiador eléctrico 1500W

28 29
KTE3781
si se deja en funcionamiento y sin super-
visión.
• No ubique el radiador justo debajo de una
toma de corriente.
• No extienda el cable por debajo de la al-
fombra ni lo cubra con tapetes, alfombrillas
o similares. Disponga el cable de modo
que se minimice el riesgo de pisarlo y de
tropezarse con él.
• No utilice el radiador si el cable o el enchu-
fe están dañados, o después de que haya
funcionado incorrectamente, o se haya ca-
ído o dañado de alguna manera.
• Si el cable de alimentación está dañado,
debe ser sustituido por el fabricante, su
agente de servicio o personas igualmente
cualicadas para evitar peligros.
• Utilice el radiador en un área bien venti-
lada. No inserte ni permita que se intro-
duzcan objetos en las aberturas de venti-
lación o escape. Para evitar un riesgo de
incendio, no bloquee las tomas de aire ni
las aberturas de escape de ninguna ma-
nera.
• No utilice el aparato sobre supercies
blandas donde las aberturas pueden blo-
quearse. Utilice el radiador solamente en
supercies planas y secas.
• No coloque el radiador cerca de materia-
les, supercies o sustancias inamables,
ya que puede haber un riesgo de incendio.
Manténgalos a 1 m de distancia, como mí-
nimo, de la parte delantera del producto y
lejos de los lados y la parte posterior.
• No utilice el radiador en áreas donde se al-
macene gasolina, pintura u otros líquidos
inamables, p. ej. garajes o talleres.
• No utilice este radiador en el entorno in-
mediato de un baño, una ducha o una pis-
cina (600 mm de espacio libre) en posición
vertical. No coloque el radiador de modo
que pueda caer en la bañera o en otro re-
cipiente de agua.
• Nunca toque el radiador con las manos
mojadas. El radiador debe instalarse de
modo que no pueda ser tocado por una
persona que tome un baño o una ducha (a
una distancia de seguridad 600 mm).
• El radiador se calienta durante el uso. Para
evitar quemaduras y lesiones personales,
no permita que la piel desnuda entre en
contacto con las supercies calientes.
• Antes de mover el radiador, desenchúfe-
lo y déjelo enfriar durante quince minutos.
De haberlas, use las asas para mover el
producto.
• Tenga en cuenta que si otros dispositivos
están en uso en el mismo circuito eléctrico
que el dispositivo, esto puede causar una
sobrecarga.
• El radiador está equipado con un elemen-
to calefactor de cerámica.
ES
radiador eléctrico 1500W

30 31
KTE3781
2. INSTRUCCIONES DE
FUNCIONAMIENTO
2.1. Descripción del producto
ESTRUCTURA Y PARTES
1. 1 regulador de temperatura
2. Protección contra el
sobrecalentamiento
3. Pantalla LCD digital
4. Regulador de la temperatura
ambiente
5. Sensor de temperatura ambiente
6. Reloj digital, calendario de semanal
digital
Carcasa
de acero
Salida
Pantalla
LCD
Interruptor de
alimentación
Sensor de temperatura
7. Modo de funcionamiento múltiple: modo de programa diario,
modo de programa semanal, modo de uso libre
8. Función antihielo
9. Puede montarse en la pared o sobre ruedas
INSTALACIÓN
Con ruedas
1. Coloque los pies en la parte inferior del
aparato.
2. Fije los pies con cuatro tornillos.
Fig. 1.
Montado en pared
Distancia entre los puntos de jación
EMISOR T. 4 5 6 7 8
L1 (mm) 242 322 402 482 562
L2 (mm) 242 322 402 482 562
Fig. 2 Fig. 3
1. Taladre los oricios de acuerdo con
las instrucciones de la g. 2.
2. Coloque los tubos en los agujeros
de la pared.
3. Monte las asas con tornillos (Fig. 4).
4. Coloque el Emisor T. en las asas
superiores.
5. Coloque las asas hacia abajo para
mantener el aparato contra
la pared.
6. Fije las asas con tornillos.
PARED
TUBOS
TORNILLOS APOYOS
APOYOS
Fig. 4
PRECAUCIÓN: antes de encender el aparato, asegúrese de que
esté correctamente montado en la pared. Si no está paralelo al
suelo, pueden producirse problemas técnicos.
Panel de control y pantalla LCD
Panel de control:
El panel de control posee un total de cinco botones:
Interruptor de modo de espera
Ajustes de fecha y hora; Ajustes del temporizador; Modo de
ejecución
Modo de funcionamiento; Establecer programa;
Aumento
Disminución
La pantalla tiene una luz de fondo que se apagará automáticamente
después de 1 minuto si no se presiona ningún botón. Se volverá a
encender cuando pulse cualquier botón.
La unidad tiene una función automática de bloqueo de los botones.
Los botones se bloquearán ( ) después de 1 minuto si no
presiona ningún botón.
Para eliminar el bloqueo: presione y al mismo tiempo.
Pantalla:
1. Reloj
2. Fecha
3. Nombre / número del
programa
4. Hora del día
5. Comodidad
6. Ahorro
ES
radiador eléctrico 1500W

32 33
KTE3781
7. Antihielo
8. En espera
9. Botones bloqueados
10. Símbolo de calefacción
11. Conguración de programa
12. Temporizador
13. Ajustes de día
14. Temperatura deseada
2.2. Utilización del producto
Modos de funcionamiento
El radiador dispone de tres modos de funcionamiento:
Modo manual / uso libre , Programa diario ~y modo
semanal .
1. Modo de uso libre ( ): incluye modo normal y modo tempo-
rizador;
2. Modo diario ( ~): posee un total de nueve programas
diarios.
Cada programa tiene una combinación de los tres modos de
funcionamiento:
El modo de comodidad está representado por ( Y ),
El modo de ahorro está representado por ( Y )
El modo de antihielo está representado por ( Y vacío).
Todos los días (24 horas) se dividen uniformemente en 24
segmentos. Cada segmento se rellenará con un bloque, ya sea de
comodidad, ahorro o modo de temperatura antihielo para combinar y
formar un programa diario.
Todos los ajustes para el programa diario se mantendrán en la
memoria. Si se selecciona programa diario, la unidad repetirá este
programa todos los días.
3. Modo semanal:
Seleccione un programa diario (de los programas diarios P1-P9)
para todos los días en una semana para combinar y formar un
programa semanal.
Funcionamiento
1 Encendido
Conecte y encienda la unidad. En el primer uso, la pantalla mostrará
lo siguiente:
Presione , luego, el símbolo desaparecerá, y la unidad entrará
en el modo de uso libre (Nota: las unidades siempre entran en modo
de uso libre desde el modo de espera).
2-1 Programa de uso libre
Para el primer uso, la pantalla mostrará lo siguiente:
2-1-1 Ajuste de hora
Presione el botón y las horas comenzarán a parpadear. Use
o para seleccionar la hora requerida (de 0 a 23).
Presione nuevamente y los minutos comenzarán a parpadear.
Utilice o para seleccionar el minuto (de 0 a 59);
Al presionar nuevamente, hará que la fecha comience a parpa-
dear. Use o para seleccionar la fecha
(1 - lunes, 2 - martes, 3 - miércoles, 4 - jueves, 5 - viernes, 6 - sábado,
7 - domingo);
Por último, presione para conrmar y nalizar el ajuste.
Si no se presiona ningún botón, el parpadeo se detendrá después de
5 segundos y la conguración nalizará automáticamente.
2-1-2 Conguración de la temperatura
Presione o para congurar directamente temperatura ideal,
en cuyo punto la temperatura comienza a parpadear.
Presione o para seleccionar la temperatura deseada.
La temperatura se puede ajustar desde 10 a 35°C.
Si no se presiona ningún botón, el parpadeo se detendrá después de
5 segundos y la conguración nalizará automáticamente.
2-1-3 Conguración de temporizador (modo temporizador)
Mantenga presionado durante 3 segundos hasta que aparezca
el símbolo .
Al mismo tiempo, el reloj volverá a 00:00 y comenzará a parpadear.
Para ajustar el temporizador, haga lo siguiente:
ES
radiador eléctrico 1500W

34 35
KTE3781
Presione or para establecer la duración del temporizador.
Cada vez que presione un botón cambiará la duración en media hora
(30 minutos).
La duración máxima del temporizador es de 24 horas.
Cuando el temporizador termine, la unidad entrará en modo de
espera .
También se puede denir tiempo y temperatura como en 2-1-1 y 2-1-2.
Para salir del modo temporizador: mantenga pulsado el botón
durante 3 segundos hasta que el símbolo desaparezca.
La unidad regresará automáticamente al modo de uso libre.
(Nota: cuando la unidad sale del programa de uso libre (entra en
el modo diario, semanal, o de espera, siempre entra primero en el
modo de uso libre. El modo de temporización original se cancelará
automáticamente).
2-2 Selección del modo de funcionamiento
Presione el botón para seleccionar el programa (el n.º de progra-
ma comenzará a parpadear).
Presione o para seleccionar el modo de funcionamiento:
, ~ ,
Presione para conrmar.
La unidad se ejecutará siguiendo el programa que acaba de selec-
cionar.
Nota: durante este período, si no se presionan botones, la selección
nalizará automáticamente después de 5 segundos.
2-3 Programa diario
El programa diario tiene tres tipos de modos de funcionamiento:
Modo comodidad: ( y el contenido del programa se muestran
como ), con un intervalo ajustable de 10 a 35°C;
Modo ahorro: ( y el contenido del programa se muestran como ),
con un intervalo ajustable de 10 a 35°C;
La temperatura no debe ser más alta de lo que es cómodo;
Modo antihielo: ( y el contenido del programa se muestran
vacío), 7°C quedará jo.
Si ha elegido un programa diario, la unidad repetirá el programa
todos los días.
Programa diferente utilizado por primera vez de la siguiente manera:
P1: P2:
P3: P4:
P5: P6:
P7: P8:
P9:
2-3-1 Conguración del tiempo
Igual que en el apartado 2-1-1, la unidad se ajustará automáticamente
a la hora actual y funcionará en consecuencia.
2-3-2 Conguración de la temperatura
Mantenga pulsado el botón durante 3 segundos hasta que el
símbolo parpadee, al mismo tiempo la temperatura de comodidad
original comenzará a parpadear.
Presione el botón o para establecer la temperatura de co-
modidad deseada.
Presione para conrmar y el símbolo empezará a parpadear,
la temperatura de ahorro original también empezará a parpadear.
Presione los botones o para ajustar la temperatura de
ahorro deseada.
Use para conrmar que se haya completado la conguración
de temperatura. La unidad ahora estará funcionando en el modo de
comodidad.
La temperatura se guardará en la memoria.
ES
radiador eléctrico 1500W

36 37
KTE3781
2-3-3 Conguración del programa diario
Enmendar un programa preestablecido a sus tiempos estable-
cidos
Presione el botón para elegir el programa de a que
desea seleccionar.
Luego mantenga pulsado el botón durante 3 segundos para in-
troducir la selección del programa y se mostrará en la pantalla.
se mostrará hasta que se nalice el ajuste. El radiador se
detendrá durante el ajuste.
La fecha no aparece y la hora es 00:00.
La marca empezará a parpadear rápidamente.
Primer segmento del programa
seleccionado, como el siguiente
(cuando el programa diario
seleccionado es P1):
comienza el modo para comodidad Ahorro , vacío
para el modo antihielo
Luego presione (hacia adelante), o (atrás) para copiar el
modo en cada segmento.
Por último, presione para conrmar el programa y salir de la
conguración.
desaparecerá, y la unidad volverá al modo de funcionamiento
normal.
El nuevo programa se guardará en la memoria y reemplazará al
programa original.
2-4 Programa semanal
Puede seleccionar el programa semanal según 2-2.
El primer uso será el siguiente:
2-4-1 Ajuste de hora
Igual que el apartado 2-1-1. La unidad se ajustará automáticamente
a la hora actual y funcionará en consecuencia.
2-4-2 Conguración de la temperatura
Igual que el apartado 2-3-2.
2-4-3 Conguración del programa semanal
Mantenga presionado durante 3 segundos para acceder a
la conguración del programa semanal, el tiempo y el modo de
funcionamiento ya no se muestran, y se muestra.
se muestra mientras esta conguración está activa. La unidad
deja de calentar durante el ajuste.
El marcador del lunes comenzará a parpadear, el nombre del
programa del lunes también parpadeará (y también se mostrará el
contenido del programa correspondiente).
La pantalla muestra lo siguiente:
Presione o para seleccionar el programa diario de ~
para el lunes (1).
Presione para conrmar y entrar automáticamente en el progra-
ma del martes (2).
Con el mismo método, puede seleccionar un programa diario
para todos los días de la semana.
Finalmente presione para nalizar la conguración del programa
semanal.
Entonces el símbolo desaparecerá, y la unidad funcionará se-
gún el nuevo programa semanal.
Nota: los ajustes se pueden cancelar en cualquier momento durante
la conguración.
El nuevo contenido quedará congurado.
3 Función VENTANA ABIERTA:
Su radiador dispone de una función de ventana abierta.
Cuando las ventanas están abiertas por un período de tiempo
prolongado, cerca de donde se encuentra el radiador, un sensor
detecta la fuerte caída de la temperatura. El radiador se apaga
automáticamente y el símbolo parpadea en la pantalla.
El radiador se encenderá automáticamente después de 10 minutos.
Sin embargo, puede encender manualmente el radiador antes de
que hayan transcurrido los 10 minutos, presionando el botón “”
en el radiador. El símbolo “” desaparecerá de la pantalla.
3-1 Inicio de la función:
1. Presione el botón una sola vez. Utilice las teclas y , elija
en . Presione una vez para conrmar
su elección.
2. Una vez en el programa, abierto, aparece la siguiente pantalla:
signica que la función está desactivada.
Use las teclas y , para cambiar de OFF a ON, ( signica
«la función está activada»)
ES
radiador eléctrico 1500W

38 39
KTE3781
La función de ventana abierta está operativa.
Presione una vez para validar su elección. Sin presionar el botón
táctil durante 5 segundos, la función se valida automáticamente.
4 Preajustes de fábrica
La unidad tiene los siguientes preajustes de fábrica:
Fecha: 1 (Lunes)
Reloj: 00:00
Antihielo: 7°C
Temperatura de modo libre: 10°C
Comodidad: 22°C
Ahorro: 17°C
Programa semanal: de 1 a 5 (de lunes a viernes): P1
6 (sábado): P2
7 (domingo): P3
Preajuste de fábrica
Confort (
Económico (
Anti-helada ( vacío): 22°C
): 17°C
): 7°C
AU: 1 ~ 5 (lunes ~ viernes): P1
6 (sábado): P2
7 (domingo): P3
Nota: al presionar para encender el aparato, la unidad volverá a
los preajustes de fábrica.
4 Notas adicionales
• La pantalla tiene una luz de fondo. Se apagará después de 1
minuto si no presiona ningún botón. Se volverá a encender cuando
pulse cualquier botón.
• La unidad tiene una función de bloqueo del botón. Los botones se
bloquearán ( ) después de 1 minuto si no presiona ningún botón.
• Para desbloquear: presione y al mismo tiempo.
• La hora se restablecerá a 00:00 si desenchufa la unidad, o si hay
un corte de electricidad.
• El radiador incluye un sistema de protección contra el sobreca-
lentamiento que apaga el aparato cuando las piezas se calientan
excesivamente.
• solo se mostrará cuando la unidad se está calentando.
• Las unidades siempre entrarán en modo de uso libre desde el
modo de espera.
• La unidad volverá al último modo de funcionamiento cuando se
apague y se encienda.
2.3. Mantenimiento
Desconecte siempre el enchufe de la toma de corriente y deje que el
radiador se enfríe antes de limpiarlo.
Limpie la supercie exterior del radiador de vez en cuando con un
paño húmedo suave (bien escurrido) y seque la supercie exterior
antes de ponerlo en funcionamiento.
ADVERTENCIA:
No sumerja el radiador en agua.
No utilice ninguna sustancia química de limpieza, tales como
detergentes y abrasivos. No permita que el interior se moje, ya
que podría producirse un peligro.
Elimine el polvo acumulado del radiador con un paño suave y seco.
Para guardar el radiador, vuelva a colocarlo en su embalaje original
y guárdelo en un lugar limpio y seco.
En caso de un funcionamiento incorrecto, o si tiene alguna duda, no
intente reparar el radiador por su cuenta, ya que puede producirse
un riesgo de incendio o descarga eléctrica.
3. ESPECIFICACIONES TÉCNICAS
MODELO N.° ALETAS TAMAÑO NETO
TENSIÓN
NOMINAL
POTENCIA
NOMINAL
KTE3781 /
NDFL791B-7R 7 735 x 590 x 80 mm ~230V/50HZ 1500W
ES
radiador eléctrico 1500W
This manual suits for next models
1
Table of contents
Languages:
Other Kunft Heater manuals