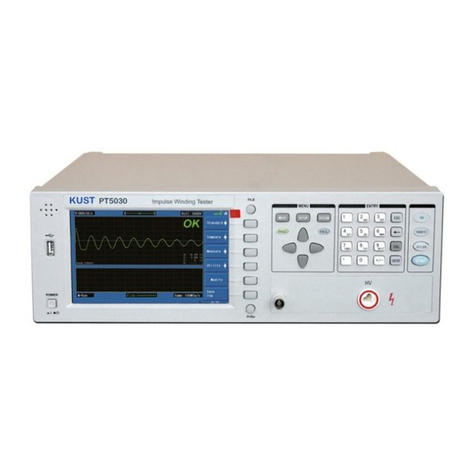
KUST Elektronik MM Series User manual

MM Series DC Resistance Meters - Operation Manual
2
Content:
Chapter 1 Unpacking and Preparation
............................................................................................................................ 3
1.1
Checking the Shipment
........................................................................................................................................ 3
1.2
Power connection
............................................................................................................................................... 3
1.3
The Fuse
............................................................................................................................................................. 3
1.4
Operating Environment
....................................................................................................................................... 3
1.5
Test fixture
......................................................................................................................................................... 4
1.6
Accuracy guarantee
............................................................................................................................................ 4
1.7 Additional Features......................................................................................................................................... 5
Chapter 2 Panel description and basic operation........................................................................................................ 6
2.2 Rear Panel
......................................................................................................................................................... 7
2.3 basic operation
................................................................................................................................................... 7
2.4 format of data storage
.......................................................................................................................................... 8
Chapter 3 Function description
...................................................................................................................................... 8
3.1 <MEAS DISP> Discription
................................................................................................................................ 8
3.2 <STATS DISP> Discription
............................................................................................................................... 9
3.3 <MEAS SETUP> Discription
.......................................................................................................................... 10
3.4 < CORR SETUP> Discription
.......................................................................................................................... 10
3.5 < TEMP SETUP> Discription
.......................................................................................................................... 11
3.6 < SYSTEM SETUP> Discription
...................................................................................................................... 13
3.7 < COMM SETUP> Discription
........................................................................................................................ 14
3.8 < ABOUT SYSTEM> Discription
.................................................................................................................... 14
3.9 < FILES SETUP> Discription
.......................................................................................................................... 15
Chapter 4 performance parameter
................................................................................................................................ 16
4.1 Accuracy of measurement
............................................................................................................................... 16
4.2 Measurement Speed
......................................................................................................................................... 17
Chapter 5 Handler
..................................................................................................................................................... 17
5.2 HANDLER Application................................................................................................................................ 18
5.3 HANDLER Custom with optocoupler output
.................................................................................................... 19
Chapter 6 Appendix
.................................................................................................................................................. 20

MM Series DC Resistance Meters - Operation Manual
3
Chapter 1 Unpacking and Preparation
This chapter describes some of the tests that must be carried out after you receive the instrument, and
the
conditions to be understood before the installation and use of the instrument.
1.1
Checking the Shipment
After you receive the DC Resistance meter, please check whether the meter arrived in tact. If the
contents
are incomplete, if there is mechanical damaged or defect, or if the instrument does not pass
the power-on self
tests, please notify our company.
1.2
Power connection
Confirm that the power supplied to the instrument meets the following requirements:
(1)
The voltage range: 100 ~120 V AC.
198 ~242 V AC.
(2)
The frequency range: 47 ~63 Hz.
(3)
The power consumption range:
≥
30VA.
(4)
The L-line, the N-line and the E-line of the input power must be the same with power supply
plug.
(5)
The instrument should be used in low noise environment, although it has been designed carefully to
decrease the noise disturbance caused by the AC power. If you can’t avoid using the instrument in
high noise environment, please install the power filter.
Note
:
To avoid the damage to the instrument or harm yourself, which is caused by the leakage current,
you
should ensure that the ground line of the power is connected to the ground reliably.
1.3
The Fuse
The fuse has been set up before shipping, you should use the fuse prepared by our Company or the one
with the
same type. To verify and replace the fuse, remove the power lead and pull out the fuse holder.
1.4
Operating Environment
The instrument must be operated under the following environment conditions:
(1)
Please don’t use the instrument under those conditions: high dust level, risk of high vibrations,
(2)
exposing the instrument to the intensive sunlight or corrosive environment.
(3)
Operating Temperature range: 5 °C ~ 40 °C, Humidity:
≤
85%R.H.
(4)
Sufficient space must be kept behind the instrument to avoid obstructing the air flow of the cooling
f
ans.
The instrument should be used in low noise environment, although it has been designed
carefully to
decrease the noise disturbance caused by the AC power. If you can’t avoid using the
instrument in
high noise environment, please install the power filter.
(5)
If the instrument not going be used for a long time, please store the instrument under the conditions
below:
Temperature: 5°C to 40°C, Humidity:
≤
85%R.H. at 40°C, avoid corrosive environment, and do not
expose the equipment to the direct intense sunlight.
(6)
The instrument, especially the test leads, must be kept away from the intense electromagnetic field
to
avoid the disturbance to the test.

MM Series DC Resistance Meters - Operation Manual
4
1.5
Test fixture
Please use the test fixture or the test leads supplied by “KUST Elektronik GmbH”. You must keep the test fixture,
the test leads and the pins of the DUT clean, so that the test device can be contact the test fixture in best
possible
way.
Connect the test fixture or the test leads to the four test terminals (Hcur
、
Hpot
、
Lcur
、
Lpot) on the front
panel. If the DUT with shielded enclosure is tested, connect the shielded layer to the instrument ground
“
┴
”.
1.6
Accuracy guarantee
(1)
To acquire the best result, the preheating time after turning on the power must be not less than 15
minutes.
(2)
Please try to avoid cycling the power continuously, instrumenting works best when stabilized.
(3)
Short circuit
:
When using the range of 20 m
Ω
and 200 m
Ω
, you should compensate the short
circuit
before testing.
(4)
Use of shielding
:
When the test is of low or very high resistance, the test results may occur
interference from the environment, user can implement shielding (metal case etc.).
Note: at any time,
the shield should not be in contact with the test connections.
(5)
Avoid too long-range open of 20m
Ω
and 200m
Ω
: When using 20m
Ω
and 200m
Ω
two ranges, output
test
terminal voltage is clamped within 1V, if the test side for a long time open, then when the range
is switched
to high impedance range, test terminal open circuit digital bounce phenomenon will
appear
(6)
The four-terminal resistance standard test
Common resistance standard is shown below, there are four
test side. Hcur and Lcur are the current
excitation ends. Hpot and Lpot are voltage sampling terminals.
Resistance lead terminals A, B to
test terminal connected by wire.
Wrong connection method:
If you press the graph method to test the connection. Test results include a Hpot, Lpot end to A, B-side
lead
resistance. When the measured standard resistance value is very small, it will introduce large
errors.
The correct connection method as shown below, use the four separate test line, in order to eliminate
the error

MM Series DC Resistance Meters - Operation Manual
5
of the standard resistance wire.
1.7 Additional Features
(1)
Power consumption:
≤
30VA.
(2)
Dimensions (W * H * D): 240mm * 100mm * 345mm; (foot support height included)
(3)
Weight: about 3kg

MM Series DC Resistance Meters - Operation Manual
6
Chapter 2 Panel description and basic operation
This series of intelligent low resistance tester is used to test the resistance, and has the function of
compare. In the
compare state, the resistance value or the percentage of the value can be selected,
and the value of the
resistance value can be judged to be high, low or pass. In the rear panel of the
machine, a sorting interface
can be connected to the components of mechanical processing
equipment and engaged in automatic
testing.
Example of application: coils, inductors, transformers, coil, the relay contact resistance,
connectors,
resistor, fuse, resistance cable, printed board line resistance, resistance welding hole,
conductive film,
metal testing etc. Temperature compensation function eliminates the effect of
temperature on the test,
the temperature conversion function can effectively measure the temperature
of the measured piece.
This series of instruments also have many kinds of communication interface, which is good for the
function of
statistical monitoring, or the automatic test system.
This series of instruments have a variety of configurations, see appendix
.
2.1 Front Panel
Figure 2-1 shows the brief description of the
MM SERIES front panel.
Figure 2-1 the front panel
1)
Power on/off
2)
Instrument type plate.
3)
The USB interface is used to connect with USB disk.
4)
LCD Display
5)
Ground Terminal.
6)
Test terminal: Lcur
、
Lpot
、
Hpot
、
Hcur
7)
TOOLS: The tool key
8)
SOFTKEYS
Five softkeys are used to select control and parameter functions. Each softkey has a softkey label
along its left side. The softkey label changes when the display page changes.
9)
CURSOR Keys
The CURSOR keys are used to move the field from one field to another field on the LCD display
page.
10)
The “OK” key
:
Used to determine the input Numbers or letters
11)
Shortcut menu keys
:{
MEAS
、
SETUP
、
SYSTEM
、
FILE etc.
}
12)
Comparison results indicating lamp: PASS
、
FALL

MM Series DC Resistance Meters - Operation Manual
7
2.2 Rear Panel
Figure 2-2 shows the brief description of the MM Series
rear panel.
Figure 2-2 the rear pane
1)
RS232C Interface Connector
This is the RS232C interface connector used when operating on the serial interface is used.
2)
GPIB interface (Optional)
General Purpose Interface Bus (GPIB). The connection of an external controller and other devices
through this connector allows you to configure an automatic measurement system.
3)
LINE Input Receptacle
AC power receptacle.
4)
Power switch (110V/220V)
5)
Ground Terminal
6)
The USB device interface.
7)
HANDLER Interface Connector.
This is the HANDLER interface connector used when you perform the operation with a component
handler to fully automate component testing, sorting, and quality control data processing.
8)
TC SENSOR:
The temperature sensor interface
2.3 Basic operation
The basic operation for MM SERIES is described in the following paragraphs.
(1)
direction key, move the cursor to the place where it needs to be set.
(2)
soft keys, used to change options.
(3)
shortcut menu keys: SETUP, SYSTEM, FILE, MEAS are respectively used to directly select the
<
MEAS
DISP >, <MEAS SETUP >, < SYSTEM SETUP >, < File Management > function page.
Special note: when the
instrument is in the < MEAS DISP > page, and the cursor is in < MEAS DISP >,
press MEAS key, < MEAS
DISP > page will display the maximum display.
(4)
TOOLS key: tool key tool in the features page will be different.
When press TOOLS key, soft key area
will be the appropriate tool operation, short press the TOOLS
button again, the Tools menu disappears.
When the long press TOOLS key 1s, the instrument will enter the key lock status; long press the
TOOLS key 1s, the instrument will release key lock status.

MM Series DC Resistance Meters - Operation Manual
8
2.4 Format of data storage
When you use the USB to save the data in the measurement page using the TOOLS key, there will be
two kinds of
saving data mode. The basic form is as follows:
<A>, <COMP> [<Cp>, <CpK>, <NUM>], [<T>]
A: When the instrument displays the resistance, A as resistance value;
When the instrument displays the percentage deviation, A as a percentage value.
The difference is that “save data 1” , A is scientific notation; if “save data 2”, A is a unit value (as
displayed
on the LCD).
COMP: 0 -- instrument is not compared
1 -- pass
2 -- high
3 -- low
When CpK does not exist, then saved as "-----."
T will be active when the instrument has temperature functions and temperature function is open.
Chapter 3 Function description
3.1 <MEAS DISP> Description
The page can be set as follows:
MEAS DISP
:
<MEAS DISP> or <STATS DISP> can be choosed.
RANGE
:
AUTO,
HOLD,
INCR+,
DECR-
SPEED:
FAST,
MED,
SLOW,
[FAST2] (see appendix)
COMP
:
ON/OFF
STATS
:
ON,
OFF,
RESET
R
:
FONT(LARGE/SMALL),
DISP(ON/OFF),
DEV %(ON/OFF) (NOTE1)
MODE
:
Δ
% /
Δ
ABS
(NOTE2)
NOM
:
input by digital keys
HIGH/LOW
: ON/OFF or input by digital keys (NOTE 3)
SHORT: ON/OFF/SHORT
LOAD:
ON/OFF
Note 1
:
% when deviation is open
,
the display value is
Note 2
:
Δ
%, a percentage comparison mode, if
Percentage
deviation
value
between [lower] and
[limit], the
stall owners reference qualified;
Δ
ABS
:
absolute deviation comparison mode. If values of (Test value-nominal value) between
the
[lower] and [limit], the stall owners reference qualified;
Note 3
:
if use statistical functions, the upper and lower limits must be set.
Note 4
: when the cursor is located in the <MEAS DISP>, press “MEAS” menu key to display
measurement
results in full screen.

MM Series DC Resistance Meters - Operation Manual
9
3.2 <STATS DISP> Description
The function is not standard.
Only “STATS” in this page can be operated: ON, OFF, RESET.
The page displays the parameters and state as follows:
R: measurement results, do not support the% deviation display mode.
Num: the number of statistics, the maximum of the machine are 30000 times
Cp, CpK: process capability index
X
:
the average value of the measurement results.
σ
: the overall standard deviation. S: Standard deviation.
IN: The number of qualified.
HI: product number of high then high limit. LO: product number of lower then low limit.
Max: the maximum value of the product. MaxNum: maximum number.
Min: the minimum value of the product. MinNum: the serial number of the minimum.
HIGH/LOW: the high and low limit of the statistics, computed from the limit of <MEAS DISP>.
SHORT
:
ON/OFF state.
LOAD
:
ON/OFF state.
The related computation formula is as follows:
s
In the above formula, the n is a valid sample number, Hi and Lo are the high and low limit of the
statistics.
CpK, Cp show the process of production capacity is qualified, usually by the following criteria:
,
C
p
,C
Pk
>
1.33
The process is perfect.
1.33
≥ Cp, C
pK
>1 Process capability
1.00
≥C
p
C
pK
Process capability is poor.
Note:
•
Only one effective sampling, s
、
Cp
、
CpK does not exist.
•
When s=0, Cp=CpK=99.99.
•
Cp, CpK maximum 99.99.
•
When CpK<0, CpK=0.

MM Series DC Resistance Meters - Operation Manual
10
3.3 <MEAS SETUP> Description
The page can be set as follows:
MEAS SETUP
:
MEAS SETUP, CORR SETUP, T SETUP (nonstandard).
AVERAGE
:
INCR+
、
DECR-
,
or enter a value in the 1~255 by the numeric keys (default 1).
RangeDwell
:
INCR+
、
DECR-
,
Or enter the value of the 0~9999 within the (default 0ms).
TrigSource
:
INT
、
EXT
TrigDelay
:
INCR+
、
DECR-, Or enter the value of the 0~9999 within the (default 0ms).
TrigEdge
:
RISING
、
FALLING
Handler
:
CLEAR
、
HOLD
、
PULSE
PulseWidth
:
INCR+
、
DECR-, Or enter the value of the 1~9999 within the (default 1, mS).
Station
:
INCR+
、
DECR-, Or enter a value in the 0~30 by the numeric keys (default 0).
LineFreq
:
50Hz
、
60Hz
Note:
(1)
When the TrigSource is “INT”, it means continuous measurement; when the TrigSource is
“EXT”,
you can trig the measurement through the front panel TRIGGER key, or HANDLER trigger,
or through
the bus command trigger.
(2)
TrigEdgeis used to determine the external HANDLER trig.
S
orting interface (HANDLER) output
result signals (PASS, HIGH, LOW):
CLEAR: When the instrument receives the trigger signal, first
reset the results of the result signals. will
output a new signal;
HOLD: The result signal is only
changed when the instrument’s result is changed, otherwise it will
remain the original state;
(3)
Pulse: the result signal of the instrument is a low level pulse signal.
(4)
Station: can make the results of the signal output delay n times measurement,
0
≤
n
≤
30
.
(5)
Line Freq: according to the user's power frequency to choose the working frequency. It can
improve
the stability of the test.
3.4 < CORR SETUP> Description
Note:
User should be careful to use the functions in this page , wrong operation will lead to measure error.
The priority of mathematical operations in the instrument: short > Load.
The page can be set as follows:
SHORT
:
ON, OFF, SHORT.
LOAD
:
ON, OFF.
RES
:
ON, OFF.
REF
:
the standard value of the resistance by the digital key input
MEAS
:
measure the value of the resistance.
TEMP
:
ON, OFF. (the option is required to support the temperature function).
REF
:
the reference value of the current temperature by the digital key
MEAS
:
measure the value of the current temperature.
Note:
-
SHORT: when using the 20m
Ω
ohm and 200m
Ω
range
,
should be cleared first before tested, and in
other range does not generally need to be cleared. The test clip clip together each other, so that the
Hpot side and the Lpot side of direct contact, the Hcur side and the Lcur side of direct contact, and
maintain good contact, and then use the short circuit operation.
Since the instrument uses a four terminal measurement method, so when using the clearing, must
make the instrument of the Lpot and Hpot end direct contact, Hcur and Lcur direct contact. (the two
test clip has a direct contact with the two metal sheet of the test line, and the two metal sheet without
the test line have a direct contac . Otherwise, for 20m
Ω
and 200m
Ω
range, because the instrument
gain is very high, the instrument will display a very unstable base.

MM Series DC Resistance Meters - Operation Manual
11
When using KA1002, the following figure is shown below. The two test lines are connected to the
red clip,
which is labeled with a red sleeve for Hcur, the other is Hpot; the upper two is connected to
the black clip, which
is marked by black Lcur, the other is Lpot.
Load correction: (caution)
A. the user can refer to the following steps in the resistance test:
1
move the cursor to the<REF> (under the RES), and use the digital key to enter the standard values
of the
standard parts;
2
the tested standard is connected with test piece, move the cursor to the<MEAS>, according to the
softkey
“MEAS”, the measurement value is obtained;
3
move the cursor to the <RES>, select ON;
4
move the cursor to the<LOAD> and select ON.
After the completion of the above, the user can test the
same kind of product in the same standard.
B. when the user measures temperature with different temperature sensor, can use this function to
correct
temperature measurement
1.
to move the cursor to the< REF> (under the TEMP), with a digital key input temperature reference
value;
2.
move the cursor to the< MEAS>, press softkey “MEAS”, get the value;
3.
move the cursor to the <TEMP>, select ON;
4.
move the cursor to the< LOAD>, select ON.
3.5 < TEMP SETUP> Description
The function is not standard.
The page can be set as follows:
❖
TEMP
:
OFF, TC,
Δ
t, Tm.
TC: the abbreviation of temperature correction, the resistance values are corrected according to
the
change of temperature, which is defined as the temperature compensation function.
Δ
t
:
refers to the temperature conversion, according to the value measured in the cold resistance
and
heat resistance, and the environment temperature to the final measured temperature, referred to
as the temperature conversion function.
Tm
:
only measure temperature, without any effect on other values.
OFF
:
the instrument does not conduct temperature testing.
❖
SENSOR:
OFF, Pt, AnLG_IN.
OFF
:
the instrument is not connected to any temperature sensor.
Pt
:
the instrument uses platinum resistance.
AnLG_IN
:
the thermocouple type. Users can make it according to the following figure.

MM Series DC Resistance Meters - Operation Manual
12
❖
t
0
and
α
t0
are used for TC
.
t
0
:
enter the value of the -10~99.9 within the digital key
(
)
α
t
0
:
enter the value of the -10~99.9 within the digital key
(
ppm
)
Temperature compensation formula is as follows:
Rt=Rt0 *{1+αt0*(1-t0)}
R
t
:
Measurement value of the DUT
R
t0
:
The value of the calculated value is calculated by the modified
T
0
:
Corrected correlation temperature
T: Ambient temperature when measured
A
t0
:
Temperature coefficient (temperature=
t
0
)
For example: if a copper to be measured at 40°C when the measuring resistance is 100 ohm,
then how much it’s value at 20°C (the temperature coefficient of the DUT is 3930ppm).
Note:
Temperature is the surrounding environment temperature, not the surface temperature of the DUT.
Before the test to ensure that the instrument and temperature probe to be full preheating,
measurement of the temperature probe to be as far as possible from the DUT, to have enough time to
let
the surrounding environment temperature stable.
Common metal temperature coefficient see appendix.
❖
R1
、
T1
、
K1 used for
Δ
t
R1: input through the digital key, 0<R1<20m
Ω
.
T1: input the value of -10~99.9 by the digital keys (
).
K1: input through the digital key, -1000<k1<1000.
According to the IEC standard 60034, the temperature change is calculated by using the formula of
resistance variation.
V
t
:
Temperature change (
)
t
1:
The temperature when the value of R
1
was measured.
t
a
: Environmental temperature in the final measurement
R
1:
The value of the resistor at t
1
R
2
: The value of the resistor at t
2
K
:
The reciprocal of the temperature coefficient of electrical conductivity at 0°C
For example: when t1=20°C, R1=200mΩ; when ta= 25°C, R2= 210 mΩ

MM Series DC Resistance Meters - Operation Manual
13
α
to
:
The temperature coefficient of the soft copper wire
at 20
℃
is 3930ppm
According to the calculated K is close to the value of the copper in the IEC standard
: 235
。
❖
V1, T1, V2 and T2 used for AnLG_IN.
V1, V2
:
input the value of the 0~2 (unit V) through the digital keys
(
V
)
.
T1, T2
:
input the value of the -99.9~999.9 by the digital keys (
).
Analog input voltage
According to the linear relationship between the above, the temperature can be calculated by the
electric potential of the thermocouple.
3.6 < SYSTEM SETUP> Description
The page can be set as follows:
Theme
:
TRAD BLUD, TRAD BLACK
Language
:
English, Chinese
Key Tone
:
ON, OFF
Pass Tone
:
OFF
、
LONG
、
SHORT
、
TWO SHORT
Fail Tone
:
OFF
、
LONG
、
SHORT
、
TWO SHORT
ParaSave
:
AUTO SAVE
、
AUTO LOAD
PassWord
:
OFF
、
LOCK SYSTEM
、
LOCK FILE
、
MODIFY
、
SAVE TO U-DISK
Date
:
INCR++
、
INCR+
、
DECR-
、
DECR--
Time
:
INCR++
、
INCR+
、
DECR-
、
DECR--
❖
Parameters save have two modes
Auto save refer to save real-time measurement parameter settings, the next boot and shutdown
last
have the same state.
Automatic loading: Automatically call the internal file for the last time when the boot is on.

MM Series DC Resistance Meters - Operation Manual
14
❖password:
Lock system: including file protection and boot password.
Lock file: file protection.
Change Password: change password. Factory default password for example: 2517, 2518 and so
on
(by the instrument model).
Saved to disk: save password to disk, such as password file called "2517.STA" (by type of
instrument). When the instrument operation needs to enter a password, the
instrument will
automatically detect the password file is valid, so as to achieve the purpose of
lifting passwords.
3.7 < COMM SETUP> Description
The page can be set as follows:
•
Bus Mode
:
RS232C
、
GPIB
、
USBTMC
、
USBCDC
•
Baudrate
:
INCR+
、
DECR-
•
Data Bit
:
6
、
7
、
8
•
Stop Bit
:
1
、
2
•
Parity
:
None
、
Odd
、
Even
•
Tx Term
:
LF(OxOA)
、
CR(OxOD)
、
CRLF(0x0D0A)
•
Gpib Addr
:
INCR++
、
INCR+
、
DECR-
、
DECR--
•
CMD Type
:
SCPI
、
2512
Note:
➢
used to RS232C: Baudrate, Data Bit, Stop Bit, Parity
➢
used to GPIB: GpibAddr.
➢
terminator: the end code of the instrument data send the data.
➢
For detail orders, please contact the sales staff or dealers.
3.8 < ABOUT SYSTEM> Description
This page displays the identity information of the instrument and some system functions
the identity
information as follows:
This instrument model
、
Serial number
、
The software version number
、
The hardware version
number
、
The registration information etc.
system functions as follows
Reset: reset she system setup and restart the instrument.
Factory: return to the factory setting.
The firmware upgrade: upgrade of instrument software.
Exit: return to < SYSTEM SETUP > page.

MM Series DC Resistance Meters - Operation Manual
15
3.9 < FILES SETUP> Description
Press “FILE” to enter < INTER Files List > page
Figure 3-9-1
Press “FILE” again to change INT/EXT .
Figure 3-9-2
File operation steps:
A.
Refer to the existing file
1)
use direction key to check files
2)
input the corresponding serial number of files, then press “OK”
B.
Save parameters to files
1)
move the cursor to the serial number of files which need to be stored, then press soft key of
“save” .
C.
load parameters from files
1)
press “FILE”, Switch to the page of Files list
2)
move the cursor to the object file
3)
press the soft key of “load”
D.
Copy the file to the E (USB)
1)
Connect the USB flash drive
2)
move the cursor to the object file, press the soft key of “copy to E :”

MM Series DC Resistance Meters - Operation Manual
16
Chapter 4 performance parameter
4.1 Accuracy of measurement
1)
Resistance Accuracy
test environment: 18
to 28
, RH: below 75%, test conditions: slow.
For MM2010, see then table below:
Range
20 mΩ
200 mΩ
2 Ω
20 Ω
200 Ω
20 kΩ
20 kΩ
Accuracy
±0.1 % +3
±0.1% +2
Resolution
1 µΩ
10 µΩ
100 µΩ
1 mΩ
10 mΩ
100 mΩ
1 Ω
Temperature
coefficient
100 ppm
50 ppm
The other accuracy refers to the following table:
Range
20 mΩ
200
mΩ
2 Ω
20 Ω
200 Ω
2 kΩ
20 kΩ
200 kΩ
2 MΩ
10 MΩ
Accuracy
±0.2%
+5
±0.1% +2
±0.2%
+2
±0.2%
+3
Test current
1
A
100
mA
10
mA
1
mA
100’
µA
10
µA
1
µA
100
nA
Open-circuit
voltage
< 1V
<4 V
Resolution
1
µ
Ω
10
µ
Ω
100
µ
Ω
1
m
Ω
10
m
Ω
100
m
Ω
1
Ω
10
Ω
100
Ω
1k
Ω
Temperature
coefficient
100 ppm
Note: range
MM2020
20 mΩ to 2 MΩ
MM2010
200 mΩ to 200 kΩ
MM2030
20 mΩ to 10 MΩ
MM2040
200 mΩ to 200 kΩ
2)
Temperature Accuracy
❖
The temperature sensor (the following indicators for the instrument at 25
measurement
accuracy, using different PT1000 will produce error, please use < user > temperature
correction for improving the accuracy)

MM Series DC Resistance Meters - Operation Manual
17
❖
When the temperature sensor uses analog input
Note
: the method of temperature precision conversion:
T
1V
: Temperature refer to 1V;
T
0V
: Temperature refer to 0V;
T
R
:
current temperature
When the temperature is 0
~18
and 28
~40
,
Temperature coefficient is ( 0.1% rdg ±0.3mV)/°C
4.2 Measurement Speed
1)
Resistance measurement speed
The following table is a resistance test time:
Resistance test time = test time + interface signal output time + display time (less than 10ms)
2)
Temperature measurement speed
The temperature measurement test time = 110ms+ display time (less than 10 ms).
Note:
in order to improve the test speed of the instrument in the automatic system, the user can
display the
display of a small font.
Chapter 5 Handler
5.1 HANDLER Description
The output signal of Handler interface is as follows:
Only for 2030,2040

MM Series DC Resistance Meters - Operation Manual
18
Timing of interface signal:
5.2 HANDLER Application
•
Users can refer to the following circuit connection when the external voltage is used, the EXTV
(5~24V)
is the external power supply for the user, COM is the external power supply,
you can adjust R
according to the different needs (such as +5V with 470
Ω
, +24V with 2.2k
Ω
).

MM Series DC Resistance Meters - Operation Manual
19
5.3 HANDLER Custom with optocoupler output
The instrument panel will be labeled " optocoupler ", see below:
EXTV (5~24V) provide with external power supply, COM is the external ground.

MM Series DC Resistance Meters - Operation Manual
20
Chapter 6 Appendix
(1) characteristics of metals and alloys
Electrical conductivity of copper wire:
Because the change of temperature coefficient is based on temperature and electrical conductivity, the
temperature coefficient is calculated according to the formula:
(C for conductivity)
This manual suits for next models
4
Table of contents
Other KUST Elektronik Measuring Instrument manuals