1. 1Set the POWERslide switchon the on the bottom of the Vantage unit to the ON
position.
2. Insert and dock theVantageunit intothe Base Station inorder to syncthem together
and to charge the BWC battery.
Tips:
-BWC will not charge inbase station ifthe caris off.
-The last two Vantage cameras are the only devices that are going to transmit to ICV.
-Ensure the BWC are fully charged and connected before use.
3. The Vantagecan be used to start a recording bypressing the REC button. You will
feela single buzz or hear a single beep (depending onthe set up) and LED will
appear red or flashing red.
4. While recording, theVantage can be mutedbypressing themute. Presstheswitch
again toreturn to activemode.
Tips:
-Even when audio is muted, video recording continues.
9652 Loiret Boulevard
Lenexa, KS 66219-2406
TEL 913-492-1400 800-458-7866
FAX 913-492-1703
www.kustomsignals.com KSIPart#006-0071-10 Rev.1.0
Eyewitness®HD ICVSystem
DVR/ TabletControllerConfiguration
withEyePortal AudioIntegration
DVRButton Guide:
Loading/unloading Recording Media:
Before turning on the system, confirm that amedia
drive isloaded in the DVR. If not, insert thedrive and
lock it inplace. If you removethe drive at the end of
the shift (asopposed to using wirelessfile transfer),
use the keyto unlockthe cartridge, thenpullit out of
the DVR and turn it in for ingestion into the database.
SystemStart-up:
Your system haseither been configured to power on and
off automaticallywith the vehicle’s ignition, oryou will
controlpower with the Tablet Controller’spower button.
Bootup should takea coupleminutes. Oncelive video is
shown on the Tablet, the system is readyto operate.
Start and Stop Recording:
1) Most record activations occur
automatically by activating the
emergency lights. Recording can also
be started by activating the Wireless
Transmitter or Siren
(if connected to the system), or you
can manually start recording by
pressing any active camera icon. You
can also start a recording by double-
tapping the primary video window.
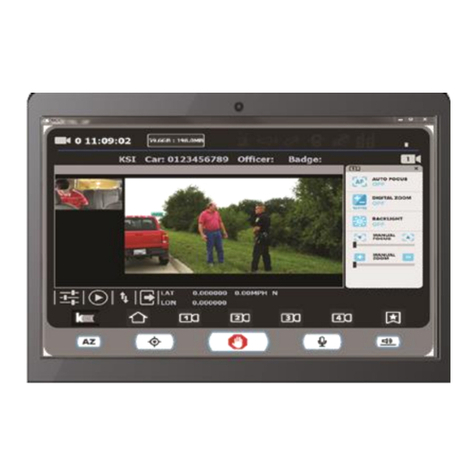
2) Regardless of how the recording starts,
recording is indicated by:
•The video window outline will turn
red (and flash if configured)
•The corresponding camera icon
will turn red
•The record icon at the top of the
screen will turn red
3) Press the STOPbutton to stopall
cameras recording, or press the
camera icon to stop just the selected
camera. If configured with Stop/Hold
Classifications, they will appear on
screen each time a recording is
stopped, allowingyou to makea
selection.


