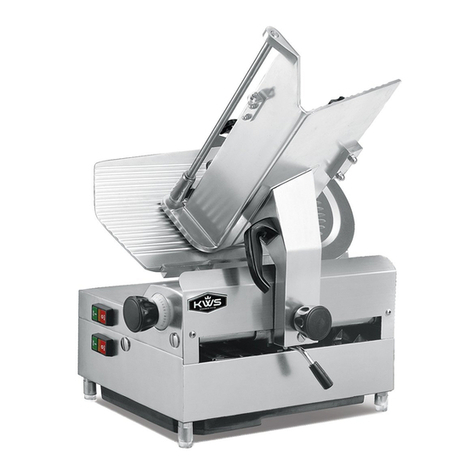
KWS MS-14A User manual

1
Thank you for purchasing this KitchenWare Station electric slicer. Before operating the equipment,
read and familiarize yourself with the following operating and safety instructions.
SAVE THESE INSTRUCTIONS FOR FUTURE REFERENCE.

2

3
Table of Contents
Unpacking ............................................................................................................... 4
Safety Instruction .................................................................................................... 5
Features and Controls ............................................................................................. 6
Operating Instructions ........................................................................................... 7
Cleaning and Sanitizing Instruction ........................................................................ 9
Slicer Disassembly, Cleaning and Sanitizing ......................................................... 9
Maintenance ........................................................................................................ 10
Blade Sharpening .................................................................................................. 11
Technical Parameters ............................................................................................ 12
Circuit Diagram ..................................................................................................... 13
Slicer Component List ........................................................................................... 15
Troubleshooting .................................................................................................... 17
Customer Care ...................................................................................................... 19
Limited Warranty .................................................................................................. 20

4
UPON RECEIVING
UNPACKING:
The slicer was inspected before leaving the factory. The carrier assumes full responsibility for
safe delivery upon acceptance of the shipment.
1. Unpack the electric slicer immediately after receipt. If the machine is found to be damaged
after unpacking, save the packaging material and contact the carrier and KitchenWare Station
Customer Service Department within seven (7) days of delivery.
2. You should receive the slicer, sharpener, complimentary belt, complimentary sharpening
stone, and an instruction manual. Contact KitchenWare Station Customer Service Department if
you did not receive all of these materials or if you need additional spare parts.
The electrical cord on this machine is equipped with a NEMA 6-30P plug which
must be connected to a properly grounded receptacle. If the receptacle is not
the proper grounding type, contact a certified electrician. Do not remove the
grounding prong from the plug.
Le cordon électrique de cette machine est équipé d'une fiche NEMA 6-30P qui
doit être connectée à une prise correctement mise à la terre. Si le type de prise
n’est pas correctement mis à la terre, contactez un électricien agréé. Ne retirez
pas la broche de terre de la fiche.
3. Examine slicer to make sure all parts have been provided.
4. Make sure that the instruction manual is available near the slicer.
5. Complete the online warranty/registration at: www.kitchenwarestation.com/registration/
6. Before use, clean and sanitize slicer. Refer to Cleaning and Sanitizing.
7. Contact your local representative or KitchenWare Station directly if you have any questions
or problems with the installation or operation of this slicer.

5
IMPORTANT SAFETY INSTRUCTION
Thank you for purchasing KitchenWare Station Electric Slicer. Each unit has been manufactured
to ensure safety and reliability. Before using it for the first time, please read the instructions
carefully and keep them for further reference.
WARNING! READ AND SAVE THESE INSTRUCTIONS.
ATTENTION! LISEZ ET CONSERVEZ CES INSTRUCTIONS.
Failure to follow all of the instructions listed below may result in electric shock, fire and/ or
serious personal injury.
NEVER touch slicer without training and authorization from your supervisor or if you are
under 18 years old.
Read this manual thoroughly before installation and operation. DO NOT continue with
installation and operation if you have any questions or do not understand anything in
the manual. Contact KitchenWare Station Customer Service Team for further assistance.
To avoid electrical hazards, do NOT place the slicer in or near water or other liquid.
Plug only into grounded electrical outlets matching the nameplate rated voltage.
Do NOT operate unattended.
ONLY install slicer on a level, nonskid surface in a clean, well-lighted work area away
from children and visitors.
Do NOT use an extension cord with this equipment.
Do NOT plug this equipment into a power strip or multi-outlet power cord.
Do NOT turn equipment on unless all guards are in place.
Check equipment before each use to ensure the equipment is clean.
Wear proper apparel. Do not wear loose fitting or hanging garments while operating
this equipment.
It is forbidden to cut materials such as wood, plastic, paving tiles, bricks, stones, glass,
metals, leather, cardboard, fabrics, bone, etc.
Unplug equipment, turn it off and let it cool before cleaning or moving.
Do NOT spray controls or outside of equipment with liquids or cleaning agents.
Do NOT clean the equipment with steel wool or high-pressure spray gun.
Keep equipment and power cord away from open flames, electric burners, or excessive
heat.
Do NOT operate if equipment has been damaged or is malfunctioning in any way.
NEVER push product into the slicer using your hands or any other object except the
provided product grip handle.
Before cleaning, servicing, or removing any parts, always turn the slicer off and unplug
the unit.
Keep unit UNPLUGGED when not in use to prevent accidental start up.

6
FEATURES AND CONTROLS
1. Product Tray 2. Thickness Adjustment
Control
3. Base Frame
4. Slicer Stand 5. Caster 6. Sharpener
7. Blade Cover 8. Blade 9. Support Arm
1
2
3
4
5
7
8
6
9

7
OPERATING INSTRUCTIONS
LOCATION
Place the slicer on a suitable counter or tabletop. Allow enough space around the slicer so the
product tray can move freely forward and back.
Keep the slicer away from heat sources and not in a passageway.
Before use, clean and sanitize the slicer. Refer to Cleaning and Sanitizing.
Make sure that the place is dry, not humid, dust-free, clean, and free from insects or
other animals.
SAFETY FEATURES
OVERHEAT PROTECTION
If the slicer becomes overloaded, the overheat protection function will stop the slicer to protect
the motor.
Vertical, Horizontal and Top Clamp
Keep hands away from the slicer blade at all times. The vertical, horizontal, and top clamps help
secure product in position and must be used when slicing to keep your hand(s) away from the
knife.
CONTROLS
On Off Switch:
Press “I” pushbutton to turn on the slicer
Press “o” pushbutton to turn off the slicer
Speed Control:
Turn counterclockwise to slow down the product tray
Turn clockwise to speed up the product tray
Product Tray Control:
Push to product tray control to move product tray to the left

8
SLICER OPERATION
It is forbidden to slice materials such as wood, plastic, paving tiles, bricks,
stones, glass, metals, leather, cardboard, fabrics, bone, etc.
Slicing foods that contain too much liquid may damage the motor.
When the slicer is not running, the thickness adjustment control must be
turned fully clockwise, so the gauge plate covers the blade edge.
Il est interdit de trancher des matériaux tels que le bois, le plastique, les
pavés, les briques, les pierres, le verre, les métaux, le cuir, le carton, les
tissus, les os, etc.
Trancher des aliments contenant trop de liquide peut endommager le
moteur.
Lorsque la trancheuse n'est pas en marche, le bouton de réglage d'épaisseur
doit être tourné à fond dans le sens des aiguilles d'une montre pour que la
plaque de mesure recouvre le bord de la lame.
1. Make sure the slicer is properly grounded by adjusting the leg stands.
2. Connect unit to a NEMA6 receptacle.
3. Turn the thickness adjustment control fully clockwise so the gauge plate closed
completely.
4. Lift the vertical clamp up.
5. Place the product to be sliced on the product tray.
6. Place the vertical clamp on end of the product to be sliced and secure the product with
the horizontal clamps and top clamps.
7. Adjust the gauge plate to obtain the desired slice thickness by turning the thickness
adjustment control.
8. Adjust the slicing speed control to obtain the desired automatic slicing speed.
9. Begin operation by turning both the top and bottom power switch to on “I”.
10. Collect product slices at the back of the machine.
TIPS: Slightly freeze cheese before slicing to achieve optimal slicing result.
NOTE: Spare parts are available on the KitchenWare Station official website.

9
CLEANING AND SANITIZING
IMPORTANT: To maintain the appearance and increase the service life, clean, and sanitize your
equipment daily after use. Clean before use if equipment has not been used for a while.
TO AVOID SERIOUS PERSONAL INJURY:
BEFORE CLEANING, SERVICING, OR DISASSEMBLE ANY PARTS, always turn slicer OFF and
unplug unit.
NEVER attempt to clean the slicer while slicer is in operation.
DO NOT put components in the dishwasher or immerse base in water.
DO NOT hose down, pressure wash, or pour water on slicer.
NEVER use a scrubber pad, steel wool, or abrasive material to clean slicer.
The slicer blade is very sharp. Exercise extreme caution when working near the blade.
Allow all parts to air dry before placing them back on slicer.
SLICER DISASSEMBLY, CLEANING & SANITIZING
1. Make sure the unit is turned OFF.
2. Push the product tray control button until the product tray away
from the blade.
3. Unplugged the unit from receptacle.
4. Wear cut resistance gloves before handling the slicer blade.
5. Remove the sharpener cover (# 1) and blade cover (# 2) by
loosening three knobs at the back of blade cover.
6. Wash, rinse, and sanitize removed items with a neutral detergent and warm water
solution to remove fatty oils. DO NOT soak your removed parts.
7. Clean the front and back side of the blade with water solution spray (50/50 hot water
and dish soap) OR degreaser spray, wiping from the center outward.
8. Clean and sanitize the rest of the machine with a damp cloth or sponge with neutral
detergent and warm water solution.
9. Make sure that all parts and surfaces are fully air dry before reassembling the unit.

10
MAINTENANCE
IMPORTANT: To maintain the appearance and increase the service life, the following rules must
be abided:
Disconnect the power cable from the socket when not in use.
Use a neutral detergent to clean the machine. The pH for a natural detergent should be
at 7 or no higher than 8. A detergent that contains too much acidic or alkaline could
damage the appearance of the machine.
Never use abrasive products, chlorate substances, wire wools, brushes of any type,
scrapers, etc. to clean the machine.
Rinse the removable parts well with a lot of hot clean water and dry with a soft cloth or
a spongy material. Do not clean the slicer with stream jets or similar methods.
Do not lay objects on the machine and make sure that the place of storage is dry, not
humid, dust-free, clean, and free from insects or other animals and protected against
bad weather conditions or other agents (for example, atmospheric agents, drops of
water or other liquids, pollution) which might damage it; the place must not be subject
to considerable temperature ranges.
WARNING! The machine must never be washed with pressurized water jets.
WARNING! After a thorough visual check at the beginning of each shift, pay attention to:
The condition of the power cable that is located outside the machine body.
The condition of the on-off switch (check whether there are cracks, splintering,
scratches, distortions, cuts, etc.)
If damaged or bad working components are detected, do not allow staff to use the machine
and put a warning about the prohibition on it; then contact the dealer or KitchenWare
Station for further assistance.
Lubricate Gear Box Oil Gauge
Inspect the gear box oil gauge periodically to ensure oil levels are properly maintained.
1. Remove front and back stainless-steel base cover.
2. Inspect the oil level through the glass window on the side of gear box.
3. Remove the gear box oil cap on top of the gear.
4. Add oil to the gear by inserting the lubricant dispenser nozzle into the port.

11
Lubricate Support Arm Oil Gauge
Lubricate the carriage slide rod at least once a month and any time that the tray becomes
difficult to move. Use food grade lubricant. Do NOT use cooking oil.
1. Press and release the OFF (O) button.
2. Unplug the slicer from the electrical outlet.
3. Add oil to the transmission by inserting the lubricant dispenser nozzle into the port (1) on
the product tray support arm seat ( part# 59).
BLADE SHARPENING
Blade sharpening of slicer with built-in sharpener
WARNING: SHARPENING OPERATION WILL EXPOSE KNIFE.
Before proceeding with blade sharpening, remain alert to the RESIDUAL RISKS
that refer to the hazard of serious injuries if the instructions below are not
followed.
Sharpen the blade weekly or any time that cutting becomes difficult and/or produces a
large amount of waste. The slicer should be considered and treated as a knife: If it is not
adequately sharpened, the slicing results will be poor, and the slicer will be overloaded.
It is necessary to follow the detailed instructions:
1. Make sure the unit is turned OFF.
2. Push the product tray control button until the product tray away from the blade.
3. Disconnect the plug from the outlet.
4. Turn the thickness adjustment knob to 0 and clean the blade thoroughly to remove any
grease or food residue.
5. Open the sharpener cover by flipping the cover to the right.

12
6. Loosen the sharpener knob (part # 31), lift the built-in sharpener up and relock the
sharpener knob.
7. Adjust the sharpening stone push rod (Part # 24) to get the sharpening stone connected
to the blade.
8. Connect the plug and press the top “I” pushbutton to turn on the blade.
9. Do NOT turn on the automatic on-off switch for product tray while sharpening the
blade.
10. Let the blade rotate against the grinding mole for 30 - 40 sec. to produce a burr on the
blade edge.
11. It is recommended to clean the sharpening stones and blade after the sharpening
procedure.
12. Once the sharpening is completed, set the sharpening attachment in its original position
inverting the above procedure.
Video tutorial can be obtained from KitchenWare Station customer service team via E-mail
TECHNICAL PARAMETERS
Model MS-14A
Rated Voltage AC 120V / 60Hz
Slicing Motor Power 2550W / 3.47 HP
Reciprocating Motor Power 750W / 1.02 HP
Blade Rotational Speed 600 r/min
Slicing Speed 42 -56 times / min
Cutting Thickness 0 - 0.7 inch
Best Meat Temperature
17.6 F / -8C
Lowest Meat Temperature
5F / -15C
Packaging Dimension 48” L x 40” W x 67” H
Shipping Weight 700 lbs.
Certification
ETL, NSF, FDA
* H= Height W= Width L= Length

13
Circuit Diagram
Description:
KM1 / KM2 – AC Contactor M1 – Blade Motor M2 – Automatic Motor
HL1 / HL2 / HL3 – Light BF1 / BF2 – Thermal Links SW1 / SW2 – Transformer
SB1 – Blade Off Switch SB2 – Blade On Switch SB3 – Automatic Off Switch
SB4 – Automatic On Switch SB5 – Point Move On Switch

14
Model: MS-14A

15
Part No.
Description
Part No.
Description
1 SHARPENER COVER 26 SHARPENING STONE EXTENSION
SLEEVE
2 BLADE COVER 27 COPPER BUSH
3 BLADE 28 SHARPENING STONE SPINDLE
4 BLADE COVER BASE 29 SHARPENING STONE
5 BEARING 30 SHARPENING STONE GASKET
6 SEAL RING 31 SHARPENER KNOB
7 MAIN SHAFT SLEEVE 32 SHARPENING STONE FIX SHAFT
PIN
8 MAIN SHAFT HOOP 33 SHARPENING STONE SEAT
SUPPORT
9 MEAT RETAINER 34 SHARPENING STONE ADJUST
SEAT
10 ENCLOSURE 35 ACTIVE POSITIONING SCREW
11 GUIDE ROD 36 SHARPENER POSITIONING SEAT
12 RECEIPROCATING SHAFT 37 MAIN SHAFT SPACER BUSH
13 RECEIPROCATING SHAFT PRESS
COVER
38 MAIN SHAFT
14 WORM LEAF SPRING 39 BEARING PRESS COVER
15 WORM 40 TOP CLAMP POSITIONING PIN
16 WORM PRESS COVER 41 TOP CLAMP WASHER
17 WORM HAND WHEEL 42 SQUARE SHAFT HORIZONTAL
PIN NUT
18 WORM WHEEL 43 TOP CLAMP SQUARE SHAFT
19 WORM WHEEL SEAT 44 TOP CLAMP HORIZONTAL
SCREW PIN
20 SLIDING BLOCK 45 TOP CLAMP LOCATION PLATE 1
21 SLIDING BLOCK SHAFT 46 TOP CLAMP LOCATION PLATE 2
22 WORM WHEEL SHAFT 47 HORIZONTAL SPACER BUSH
23 MEAT RETAINER 48 HORIZONTAL CLAMP HANDLE
24 SHARPENING STONE PUSH ROD 49 HORIZONTAL CLAMP COVER
25 SHARPENING STONE SEAT 50 HORIZONTAL CLAMP ARM

16
51 HORIZONTAL CLAMP HANDLE 78 OIL DEFLECTOR
52 FASTEN SCREW 79 RIGHT BASE COVER
53 PRESS BLOCK 80 SQUARE TRACK
54 VERTICAL CLAMP WHEEL SHAFT 81 AUTOMATIC MOTOR
55 VERTICAL CLAMP WHEEL 82 BELT
56 RECIPROCATING SHAFT BUSH 83 SPEED BELT WHEEL
57 RECIPROCATING SEAT
CONNECTING ROD SCREW
84 ADJUSTABLE GUIDE RAIL
58 RECIPROCATING SEAT SHEET 85 AUTOMATIC MOTOR SEAT
59 PRODUCT TRAY SUPPORT ARM
SEAT
86 ADJUST SCREW ROD LOCATING
SLEEVE
60 PRODUCT TRAY BRACKET 87 AUTOMATIC MOTOR ADJUST
SCREW ROD
61 PRODUCT TRAY SEAT SCREW 88 TRUNDLE
62 PRODUCT TRAY BRACKET
SUPPORT BOLT
89 GROUND STUDDLE
63 PRODUCT TRAY REGULATING
BOARD
90 AUTOMATIC MOTOR ADJUST
SCREW ROD KNOB
64 PRODUCT TRAY SEAT 91 SCREW ROD BEARING SEAT
65 HORIZONTAL CLAMP 92 REDUCTION GEAR BOX BELT
WHEEL
66 PRODUCT TRAY 93 ELECTRIC BOX
67 VERTICAL CLAMP UPPER
BRACKET
94 SQUARE SHAFT FUNCTION
BEARING
68 PRODUCT TRAY SHAFT 95 REDUCTION GEAR BOX
69 VERTICAL CLAMP HANDLE 96 CRANK
70 VERTICAL CLAMP 97 LEFT BASE COVER
71 UNDER BRACKET 98 PRODUCT TRAY CONTROL
72 TOP CLAMP 99 POWER INDICATING LIGHT
73 BLADE BELT WHEEL 100 AUTOMATIC MOTOR ON-OFF
74 BLADE BELT WHEEL AXLE 101 BLADE MOTOR ON-OFF
75 BLADE BELT WHEEL SEAT 103 RACK
76 BLADE MOTOR DRIVING WHEEL 104 CRANK PIN SHAFT
77 BLADE MOTOR 105 / 107 BELT

17
TROUBLESHOOTING GUIDE
Issue Cause Solution
Machine does not start Slicer not plugged in Plug in slicer
Lack of power from the
electrical network
Restore the supply of
power from the electrical
network
Machine’s On-Off switch is
in “o” position
Push the green button to
“I” position
Damaged On-Off switch Contact dealer or
KitchenWare Station
customer service team to
have the damaged part
replaced
Machine starts but blade
does not spin
Blade is in contact with
blade guard ring
Contact dealer or
KitchenWare Station
customer service team for
assistance
Machine does not stop Damaged On-Off switch Contact dealer or
KitchenWare Station
customer service team to
have the damaged part
replaced
Damaged motor Contact dealer or
KitchenWare Station
customer service team to
have the damaged part
replaced
Machine shut down
suddenly
Motor overheated Turn the machine off and
let the machine rest and
cool down
Insufficient power supply Make sure to have enough
amps to support the
machine
Machine trips the breaker Insufficient power supply Make sure to have enough
amps to support the
machine

18
Issue Cause Solution
Ragged cuts-poor yield Dull blade Sharpen blade. Refer to
blade sharpening
Chipped blade Sharpen or replace blade
Hard to push product tray No lubrication
Lubricate carriage slide rod
thoroughly with food grade
lubricant
Worn tow bracket Replace tow bracket
Blade does not sharpen
satisfactorily
Stones dirty, wet, or
clogged with grease
Clean sharpener with soapy
water and brush
Blade dirty Clean blade with soapy
water
Worn stones Replace sharpening stones
Blade slow down slicing
cheeses
Cheese is too soft Slightly freeze your cheese
before slicing. Slicing a
room temperature block of
cheese is not
recommended.
Dull blade Sharpen blade. Refer to
blade sharpening
Machine runs but product
tray does not move
automatically
Gear set to manual mode Pull the gear shift handle
out and turn to left, and
connect to gear bracket
Product tray On-Off switch
is in “o” position
Push the green button to
“I” position
Damaged double chain Contact dealer or
KitchenWare Station
customer service team to
have the damaged part
replaced
If problem persists and the above solution does not remedy the issue, please call KitchenWare
Station’s Customer Service Department at 888-505-3698.

19
CUSTOMER CARE
If you should ever have questions or require service, training, spare parts, or additional manuals
of this slicer, please contact KitchenWare Station Customer Service Department.
KitchenWare Station, LLC
13732 Milroy Pl
Santa Fe Springs, CA 90670
Toll Free: 1-888-505-3698 (Monday – Friday 10:00am – 5pm PST)
Email: Customerservice@kitchenwarestation.com
Official Website: http://www.kitchenwarestation.com
NOTE: Spare Parts can be purchased directly on KitchenWare Station official website or contact
customer service department if part not found.

20
LIMITED WARRANTY
Thank you for purchasing KitchenWare Station’s product. This electric slicer was tested and
meets our stringent quality standards. This product is warrantied to be free from manufacturing
defects under normal/ proper use and conditions for 1 year- part only.
To register your warranty for this product, complete the warranty registration form provided in
the package, and send it back to us. Or register online by visiting
www.kitchenwarestation.com/registration.
If you experience unsatisfactory operation, first refer to the troubleshooting section in the
manual to ensure that it is not due to care or cleaning.
If you have any questions or comments, please do not hesitate to Email our customer service
team: customerservice@kitchenwarestation.com . Please specify the model number and order
ID so our customer service department can assist you.
-------------------------------------------------------------------------------------------------------------------------------
KitchenWare Station’s obligation and liability under this warranty is expressly limited to
providing parts for equipment that proves to be manufacturing defects under normal/ proper
use within the applicable warranty period.
This warranty does not apply to defects due directly or indirectly to fire, water, burglary,
misuse, abuse, negligence, accidents, repairs, alterations, lack of maintenance, punitive
damages, loss of use, down time, lost profit, improper installation by unauthorized persons, low
voltage conditions, inadequate wiring or normal wear and tear. The defects mentioned above
are not manufacturing defects and are strictly the responsibility of the purchaser. Under no
circumstances will KitchenWare Station be liable for incidental or consequential damages
resulting from defective products. Seller shall in no event be liable for death, injuries to persons
or property, or for incidental, contingent, special, or consequential damages arising from the
use of our products.
Warranty valid only in the 48 contiguous United States plus the District of Columbia.
KitchenWare Station reserves the right to change the price and specifications of the equipment
and/ or material without notice. Prices are F.O.B plant of manufacture.
Any instructions or warranty included in this manual are based on the latest data available at
the time of publication. KitchenWare Station reserves the right to make changes or
improvements at any time without notice. For the most up to date instructions and warranty
information, please visit our official website.
To receive warranty instructions and return authorization, please email KitchenWare Station
Customer Service.
For more information regarding warranty and limitation, please visit
www.kitchenwarestation.com/warranty-information/
Table of contents
Other KWS Kitchen Appliance manuals