manuals.online logo
Brands
  1. Home
  2. •
  3. Brands
  4. •
  5. Kyocera
  6. •
  7. Cell Phone
  8. •
  9. Kyocera TORQUE G03 Service manual

Kyocera TORQUE G03 Service manual

Basic Operation
For explanations of basic functions, refer to "Basic Manual".
Display
Touch directly with your finger to operate.
FPower button / fingerprint sensor
Turning the
Power On
Press and hold F
(Power button) until the
charging light turns on.
Displaying Home screen
From the Start screen, tap " " and slide/flick
toward "START" to display the Home screen.
Slide/flick toward "CAMERA"/"PHONE" to
activate camera/phone. 《Start screen》
[ (Apps)] Apps list icon
Display the apps menu.
Navigation bar
C(BACK): Return to the previous screen. When " " appears in the character entry screen,
tap this button to hide the keyboard or menu.
H(HOME): Display the Home screen. Long-touching this button activates Google (Google
Now).
N
(RECENTS):
Show recently-used applications. Long-touching this button activates the multi-
window during apps activation. When the multi-window activates, this button is
changed to " ". Long-touching this button deactivates the multi-window.
《Home Screen (Standard Home)》
Tap/Double-tap
Lightly touch a screen and
then immediately release your
finger. Tapping a screen twice
in the same position is called
double-tap.
Long-touch
Keep touching a screen.
Slide
While lightly touching the
screen, trace to the desired
direction.
Flick
Touch the screen and flick up/
down/left/right.
Zoom in/Zoom out
With two fingers on the screen,
widen your fingers (zoom in)
or close them (zoom out).
Drag
To move an item, icon, etc.,
lightly touch the screen and
slide it to the desired position.
■Character entry
For character entry, there are flick input and input by tapping a key repeatedly.
Flick input
Tap a key to display characters like the right screen that can be input by flick input. Flick
to the direction of the character to enter.
《Character entry screen
(10-key)》
Character entry
mode switch key
Tap to switch character
type.
■Setting Silent mode
• Press and hold l(volume down button) on the left side of the product for at least one second to set the Silent mode to ON/OFF.
• To change the Silent mode type, while in the Silent mode, press r(volume up button) / l(volume down button) →Tap [Vibrate] /
[Mute] / [Drive]. Alternatively, tap Apps →[Settings] →[Sound] →[Silent mode] →[Silent mode type] to change the type.
■Setting App permissions
When you first activate app/function that access the functions or information of the product, a confirmation screen for requesting access
permission appears. When the screen for confirmation is displayed, confirm the content and tap "DENY"/"ALLOW".
• If you do not permit, app/function may not be activated or use of function may be restricted.
• For some apps/functions, an explanation screen for the permission appears. A confirmation screen may appear in several times and its
content may vary. Confirm the content and follow the on-screen instructions.
• In this manual, description of such confirmation screen may be omitted.
Initial Settings
When you turn on the product for the first time after purchasing the product, follow the on-screen instructions to set language, functions and
services.
■Setting up Google account
Set up Google account to use Google applications such as "Gmail", "Play Store", "Duo".
Setting items are as below (besides the items below, register "First" name and "Last" name).
User name Register your Google account (user ID) and a character string for mail address. You can register a desired name,
but a name already registered by another user cannot be set.
Password Register password for the Google account.
12345
Tap " 日本語(日本)"
to select "English".
→Select the language
region
Tap [LET’S GO]. [Set up as new]
* If you restore a backup
or copy from a device,
select [Copy your data]
and follow the on-screen
instructions.
Set up the Wi-Fi ®
network to connect as
required
* If you do not set up,
tap [Use cellular
network for setup] →
[CONTINUE].
* Tap [Don’t use any
network for setup] →
[CONTINUE]. Continue
by following the on-
screen instructions.
[More options] →
[Create account]
* If you have a Google
account, enter a mail
address or phone
number →[NEXT].
6 7 8 9
10
Enter "First name"
and "Last name"
→[NEXT] →Enter
the date of birth and
gender →[NEXT].
Enter a user name
→[NEXT]
Checking
registration of user
name starts.
Enter a password
and reenter the
password for
confirmation →
[NEXT]
Confirm/Change
the country name
and phone number
→[NEXT]*1→
[VERIFY]
* If you do not set up,
tap "SKIP".
Check the contents,
then [I AGREE]
11 12 13 14 15
Check the contents,
then [NEXT]
[ADD FINGERPRINT]
→Tap the type of
security →Follow on-
screen instructions
to set security and
notification
* If you do not set up,
tap [Skip] →[SKIP
ANYWAY].
Confirm the Google
service settings, then
[NEXT]
[CONTINUE] →Check
Google app permissions,
then [YES I’M IN]
* If you do not enable, tap
"NO THANKS".
[GET STARTED] →
Follow on-screen
instructions to set
voice recognition
* If you do not set up,
tap "DO IT LATER".
16 17
Set up other
settings as required.
* If you do not set up,
tap "ALL SET".
Check the contents and
mark the check box,
then [NEXT]
* If you do not set up, tap
"NEXT".
*1 Text message for Google verification code will be sent to the set phone number.
au Easy Setting
By setting au ID, you can use various services provided by au such as "au Kantan Kessai" which allows you to purchase applications from
the au スマートパス (au Smart Pass) or Google Play. Main setting items are as follows.
au ID* Register your au phone number or a character string for au ID (user ID).
au ID password Register password for using au ID.
* "au ID" which is already used by another user cannot be set.
• If you skip the operation of "au Easy Setting" at that time, you can set au ID later. In that case, operate from Apps menu →[ツール (Tools)]
→[au ID Setting].
12 3 4 5
Welcome to au screen →
[Next]
[Register "au ID"] →
[Next]
[au IDの設定・保存 (Set
and save au ID)]
Enter the security code
→[OK]
* Default value is a four-
digit number written at
subscription.
Enter a security
password →[ 設定
(Settings)] →[ 終了
(Exit)]
6 7 8 9
10
[Update] / [Skip update]
→[Next]
Check the terms and
conditions (reading
requires), [Agree] →
[Next]
[Agree] [Turn Auto Backup on] /
[Turn Auto Backup off]
→[Next]
* To back up photos and
contacts to au server
automatically using
"Data Storage App",
tap "Turn Auto Backup
on".
Check the contents,
then [Activate] / [Skip
activation] →[Next]
* In "Basic Manual" of the
product, the operations
on Home screen of
"Standard Home" is
provided as examples.
Tap [Skip activation]
here.
11 12 13 14 15
[Activate] / [Skip
activation] →[Next]
[Activate] / [Skip activation]
→[Next]*1
When the " データを
戻す (Restore data)"
screen is displayed,
mark data type to be
restored →[ 次へ
(Next)]
Select apps to
install →[ 次へ
(Next)]
[Finish]
*1 To complete the initial setting of Lookout for au, permit the access permission on each request screen.
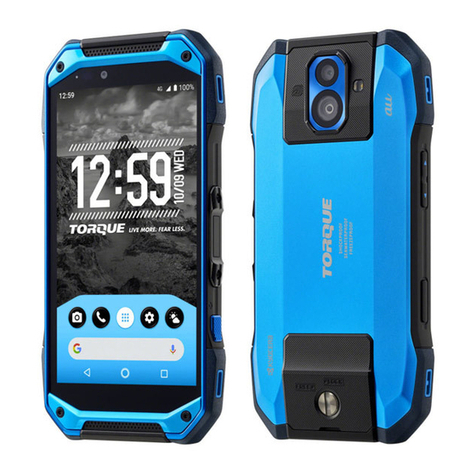
Thank you for buying the "TORQUE G03" (simply called the "product" from here on).
In this guide, settings and precautions for using the product are described.
For explanations of basic functions, refer to "Basic Manual".
■Basic Operation
Describes the basic operations.
■Initial Settings
Make initial settings when you turn the
power on for the first time.
■au Easy Setting
Set au ID.
■E-mail
Make initial settings for E-mail (@
ezweb.ne.jp) etc.
■Basic Manual App
Describes how to download/use "Basic
Manual app".
■Making a Call
Describes how to make a call.
■Receiving a Call
Describes how to receive a call.
■Setting Display
Describes how to set brightness level
and backlight time.
■Setting Wi-Fi®
Describes how to connect Wi-Fi®net-
work.
■Viewing/Playing Data
Describes how to view/play still images
or video data.
■Transferring data from au Settings
Menu
Describes how to restore/back up data
from/to your previously used phone to/
from this product using microSD card
or the au server.
Company names and product names referred to in this manual are trademarks or
registered trademarks of respective companies.
The TM, ® marks may be omitted in this manual.
Illustrations and screens shown in this manual may look different from the actual
illustrations and screens.
In some cases, minor details or a part of a screen may be omitted.
Introduction
Setting Guide
G03
July 2017, 1st Edition
Sold by: KDDI CORPORATION
OKINAWA CELLULAR TELEPHONE COMPANY
Manufactured by: KYOCERA Corporation
E-mail
To use E-mail (@ezweb.ne.jp), subscription to LTE NET is required.
If you did not subscribe it when you purchased the product, contact an au shop or Customer Service Center.
Your E-mail address is determined automatically after initial setting. You can change the E-mail address later.
■Initial settings * You cannot make initial settings in Wi-Fi®communication.
1 2 3 *1 If a description screen for the E-mail function
is displayed, follow the on-screen instructions.
Home screen →[E-mail] Check your E-mail
address →
[閉じる (Close)]
Check the contents,
[同意する (Agree)]
→[ 完了 (Done)]*1
■Checking your E-mail address
1234
Home screen →[E-mail] [ ] [E-mail information] Your E-mail address is
displayed.
■Changing your E-mail address
1 2 3 4 5
Home screen →[E-mail] [ ] →[Change
Address/Setting Filter]
[Eメールアドレスの変更
へ(To Change E-mail
address)]
Enter the security code
→[ 送信 (Send)]
Check the contents,
then [ 承諾する
(I accept)]
6 7 8
Enter E-mail address
→[ 送信 (Send)]
[OK] [ 閉じる (Close)]
Basic Manual App
■Download "Basic Manual app"
■Use "Basic Manual app"
1 2 1 2
Apps menu →[ サ
ポ ート (Support)] →
[Basic Manual]
[UPDATE] Apps menu →[ サポー
ト(Support)] →[Basic
Manual]
* If a instruction
screen (how to use
this application) is
displayed, follow the
on-screen instructions.
The front cover of
Basic Manual is
displayed.
Making a Call
■Adding new contact and making a call
■Making a call from the call history
1 2 3 1 2
Apps menu →
[コミュ ニ ケ ー ション
(Communication)] →
[Contacts]
[ ] →Enter necessary
items →[SAVE]
[ ] Home screen →[Phone]
→
Tap "RECENTS" tab
Tap " " of a party
to call
Checking your own phone number (Profile)
Operate as follow to check your own phone number.
Apps menu →[Settings] →[Profile]
→Profile screen appears.
Receiving a Call
You can receive a call in the following steps.
■Calling
■Receiving the screen in sleep mode
or while the start screen is displayed
1 2 3
Receiving screen
→[ANSWER]
Calling starts. To end the call, [ ]Follow the on-screen instructions.
* To answer the call, slide " " right.
■Answering with Auto answering
Answer by the answering memo message and record a message of the party when you cannot answer calls.
12345
Receiving screen →Tap
the operation panel
[Auto answering] [RECORD] The caller hears
the guidance.
To answer the call, slide
[] right.
Answering with SMS
Reject an incoming call and answer with SMS.
Operate as follow to answer with SMS.
Receiving screen →Tap the operation panel →[Message] →Select a message →[SEND] →SMS message is sent.
Forwarding an incoming call without answering
Forward an incoming call to the forwarding phone number or remote operation of voice mail service.
Forward the incoming call in the following steps.
Receiving screen →Tap the operation panel →[Call forward] →[FORWARD] →The incoming call is forwarded.
Setting Display
Describes how to set brightness level and backlight time.
■Adjusting the screen brightness level
■Increasing the backlight time of the screen
1 2 1 2
Apps menu →[Settings]
→[Display]
Slide the indicator of
"Brightness level" left/right.
* To make brighter, slide the
indicator right. To make
darker, slide the indicator left.
Apps menu →[Settings]
→[Display]
[Sleep] →Select
the lighting time
Setting Wi-Fi®
Use your home Wireless LAN (Wi-Fi®) or public wireless LAN to connect to the Internet.
Main settings are as follows.
Select Wi-Fi®network for connection Search for and connect to an available Wi-Fi®network.
WPS system Use for registration of access point compatible with Wi-Fi Protected Setup™ with WPS mark.
* If you turn on wireless LAN (Wi-Fi®) function, battery consumption increases. You are recommended to turn wireless LAN (Wi-Fi®) function to OFF
when not using wireless LAN (Wi-Fi®) function.
■
Selecting and Connecting
to a Wi-Fi®Network
1 2 3 4 5
Apps menu →[Settings] [Wi-Fi] [OFF]
* Indication changes to
"ON".
Available Wi-Fi®networks
are detected automatically
and their SSIDs appear in
the Wi-Fi®networks.
Select the Wi-Fi®
network to connect to*1
→[CONNECT]*2
*1 If the Wi-Fi® network you want to connect to cannot be detected, tap "Add network" and add the network manually.
*2 To connect to a protected Wi-Fi® network, enter the password (security key) and tap "CONNECT". The password (security key)
is set with the Wi-Fi® network. For details, contact with the network administrator.
■Using a WPS System Access Point
WPS button WPS Pin Entry
5 6 Press the Wi-Fi Protected
Setup button* on the Wi-
Fi router to set the access
point to WPS mode, and
the product automatically
searches for and registers
an access point.
* May be indicated as "WPS"
or as a symbol such as
" ".
5 6
Enter displayed PIN code for
access point, then registration
starts.
[ ] → [Advanced] →
[WPS Push Button]
[ ] →[Advanced] →
[WPS Pin Entry]
Viewing/Playing Data
By transferring data from the previously used au phone to au a microSD™ memory card, you can insert the microSD memory card into this
product and view/play*still image or movie data using "File Commander" in the product. When you activate for the first time, the Terms and
Conditions appears. Follow the on-screen instructions.
1 2 * Copyrighted data on the previously used au phone cannot be transferred to the
product. However, some Chaku Uta Full®, Video Clip, Chaku Uta Full Plus®may be
able to be transferred and played on the product with the same phone number by
backing up with LISMO Port Ver 4.2 or later.
Apps menu
→
[データ (Data)] →
[File Commander] →
[CONTINUE] →
[CONTINUE WITH ADS]
Tap a category to be
displayed →Tap a file →
Tap data
Data is viewed/played.
Transferring data from au Settings Menu
Restore/back up data from/to your previously used au phone to/from this product using microSD card or the au server.
• To return data using an au server, store the data from the old au phone to the au server beforehand. Setting au ID is required for using
the au server (If the old au phone does not have an au Settings Menu, use the Friends Note app or au Cloud app).
• For restoring data using microSD memory card, save the data to the microSD memory card using your previously used au phone in
advance. (If the old au phone has not au Settings Menu, use au backup app).
1234
Apps menu →[Settings]
[au Settings Menu] [Data Transfer]
The first time you start
up the product, terms
and conditions appear.
Follow onscreen
instructions.
[機種変更はこちら (Here
for model change)]
Continue by following
on-screen instructions to
transfer data.
Using "Data Storage App"
To use "Data Storage App" to back up photos, contacts, etc. to au server automatically, set as follows.
Apps menu →[Settings] →[au Settings Menu] →[Backup Setting] →Tap to select a data type to back up
automatically

Other Kyocera Cell Phone manuals

Kyocera Rally User manual

Kyocera

Kyocera Rally User manual

Kyocera S1000 User manual

Kyocera

Kyocera S1000 User manual

Kyocera Urbano L02 Service manual

Kyocera

Kyocera Urbano L02 Service manual

Kyocera X-TC User manual

Kyocera

Kyocera X-TC User manual

Kyocera Deco User manual

Kyocera

Kyocera Deco User manual

Kyocera au GRATINA Service manual

Kyocera

Kyocera au GRATINA Service manual

Kyocera KX5 - Slider Remix Cell Phone 16 MB User manual

Kyocera

Kyocera KX5 - Slider Remix Cell Phone 16 MB User manual

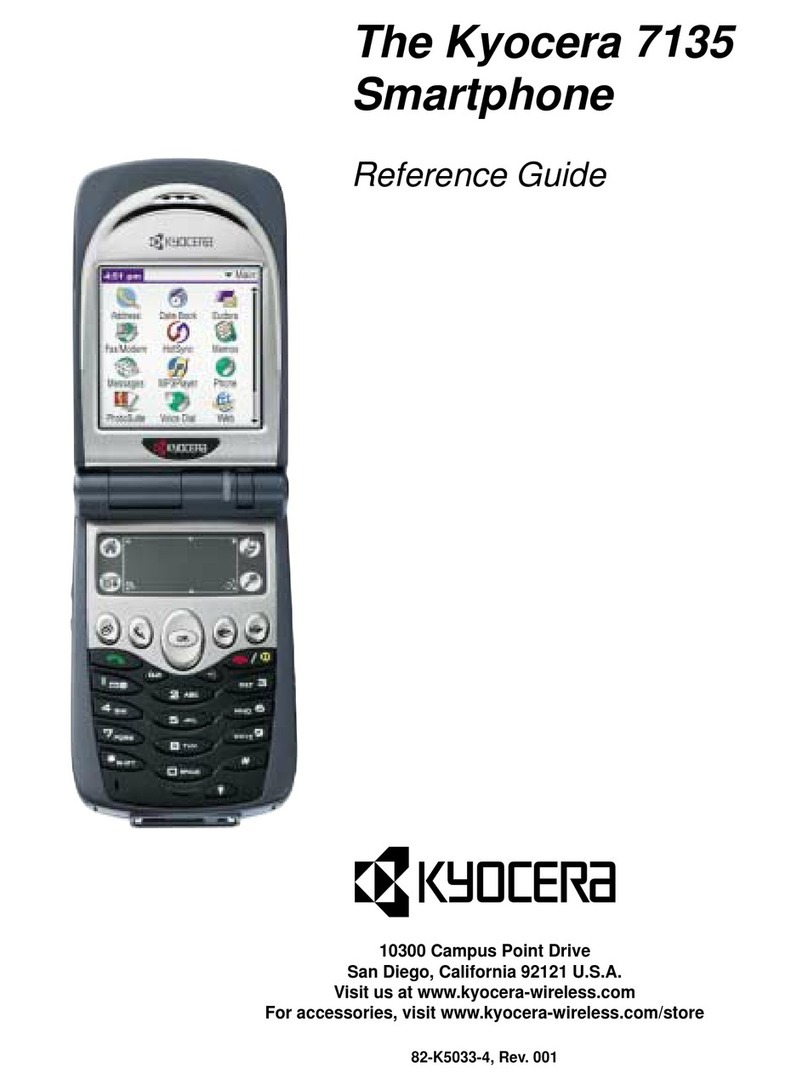
Kyocera 7135 - Smartphone - CDMA2000 1X User manual

Kyocera

Kyocera 7135 - Smartphone - CDMA2000 1X User manual

Kyocera Duraxa User manual

Kyocera

Kyocera Duraxa User manual

Kyocera Tomo S2410 User manual

Kyocera

Kyocera Tomo S2410 User manual

Kyocera K009 User manual

Kyocera

Kyocera K009 User manual

Kyocera Angel SE47 User manual

Kyocera

Kyocera Angel SE47 User manual

Kyocera K2000 User manual

Kyocera

Kyocera K2000 User manual

Kyocera Topaz User manual

Kyocera

Kyocera Topaz User manual

Kyocera Angel SE47 User manual

Kyocera

Kyocera Angel SE47 User manual

Kyocera Milano C5121 User manual

Kyocera

Kyocera Milano C5121 User manual

Kyocera HYDRO VIBE User manual

Kyocera

Kyocera HYDRO VIBE User manual

Kyocera S1600 User manual

Kyocera

Kyocera S1600 User manual

Kyocera DuraPro E4277 User manual

Kyocera

Kyocera DuraPro E4277 User manual

Kyocera DURAFORCE ULTRA 5G User manual

Kyocera

Kyocera DURAFORCE ULTRA 5G User manual

Kyocera SE47 - Slider Cell Phone User manual

Kyocera

Kyocera SE47 - Slider Cell Phone User manual

Kyocera DuraForce Pro 2 Verizon User manual

Kyocera

Kyocera DuraForce Pro 2 Verizon User manual

Kyocera K112 User manual

Kyocera

Kyocera K112 User manual

Kyocera 2035 - QCP Cell Phone User manual

Kyocera

Kyocera 2035 - QCP Cell Phone User manual

Popular Cell Phone manuals by other brands

Alcatel One Touch 960C Ultra user manual

Alcatel

Alcatel One Touch 960C Ultra user manual

LG Optimus E730 user guide

LG

LG Optimus E730 user guide

Sony Ericsson D750i user guide

Sony Ericsson

Sony Ericsson D750i user guide

myPhone Hammer Iron 2 operating instructions

myPhone

myPhone Hammer Iron 2 operating instructions

Samsung Galaxy F04 user manual

Samsung

Samsung Galaxy F04 user manual

Allview P10 Max user manual

Allview

Allview P10 Max user manual

LG KF510C Service manual

LG

LG KF510C Service manual

LG GD510 Service manual

LG

LG GD510 Service manual

Huawei Vitria user guide

Huawei

Huawei Vitria user guide

LG Joy H220 user guide

LG

LG Joy H220 user guide

Binatone SM320 user guide

Binatone

Binatone SM320 user guide

Blaupunkt SM 05 user manual

Blaupunkt

Blaupunkt SM 05 user manual

Samsung SCH-B339 user manual

Samsung

Samsung SCH-B339 user manual

LG LG900G user guide

LG

LG LG900G user guide

Sharp AQUOS wish2 quick start guide

Sharp

Sharp AQUOS wish2 quick start guide

Nokia 3560 - Cell Phone - AMPS user guide

Nokia

Nokia 3560 - Cell Phone - AMPS user guide

Samsung Impression SGH-A877 user manual

Samsung

Samsung Impression SGH-A877 user manual

Nokia 130 2017 user guide

Nokia

Nokia 130 2017 user guide

manuals.online logo
manuals.online logoBrands
  • About & Mission
  • Contact us
  • Privacy Policy
  • Terms and Conditions

Copyright 2025 Manuals.Online. All Rights Reserved.