Labnet Accublock D1301-230V User manual

Accublock Digital Dry Bath User Manual
Copyright 2017
D1301 D1301-230V
D1302 D1302-230V
D1304 D1304-230V

About This Manual
This manual is designed to assist you in the optimal usage of your
AccuBlock Digital Dry Bath. The manual is available in English, French,
German, Italian, Portuguese, and Spanish on our website at:
www.labnetinternational.com
Labnet International’s single and dual Dry Bath Incubators provide
comprehensive designs for a wide variety of life science research
applications. Excellent temperature control gures can deliver accurate and
reliable experimental results from one experiment to another.
Intended use:

Table of Contents
1.0 Safety Precautions ........................................................................1
1.1 Operation Safety Precautions ......................................................1
2.0 General Specications ..................................................................1
2.0 Electrical requirements:................................................................1
3.0 Getting Started................................................................................2
3.1 Unpacking .......................................................................................2
3.2 Initial Operation .............................................................................2
4.0 Controls...........................................................................................2
4.1 Keypad Function ............................................................................2
5.0 Operation.........................................................................................3
6.0 Calibration.......................................................................................4
7.0 USB Interface..................................................................................5
8.0 Troubleshooting Guide/Service ....................................................5
8.1 Service.............................................................................................5
9.0 Cleaning and Maintenance ............................................................5
Appendix A............................................................................................6
Equipment Disposal - European Regulations....................................6
Symbols and Conventions ..................................................................6
Limited Warranty ..................................................................................7

If the digital dry bath is used in a manner not specied by the manufacturer, the
protection provided by the centrifuge may be impaired.

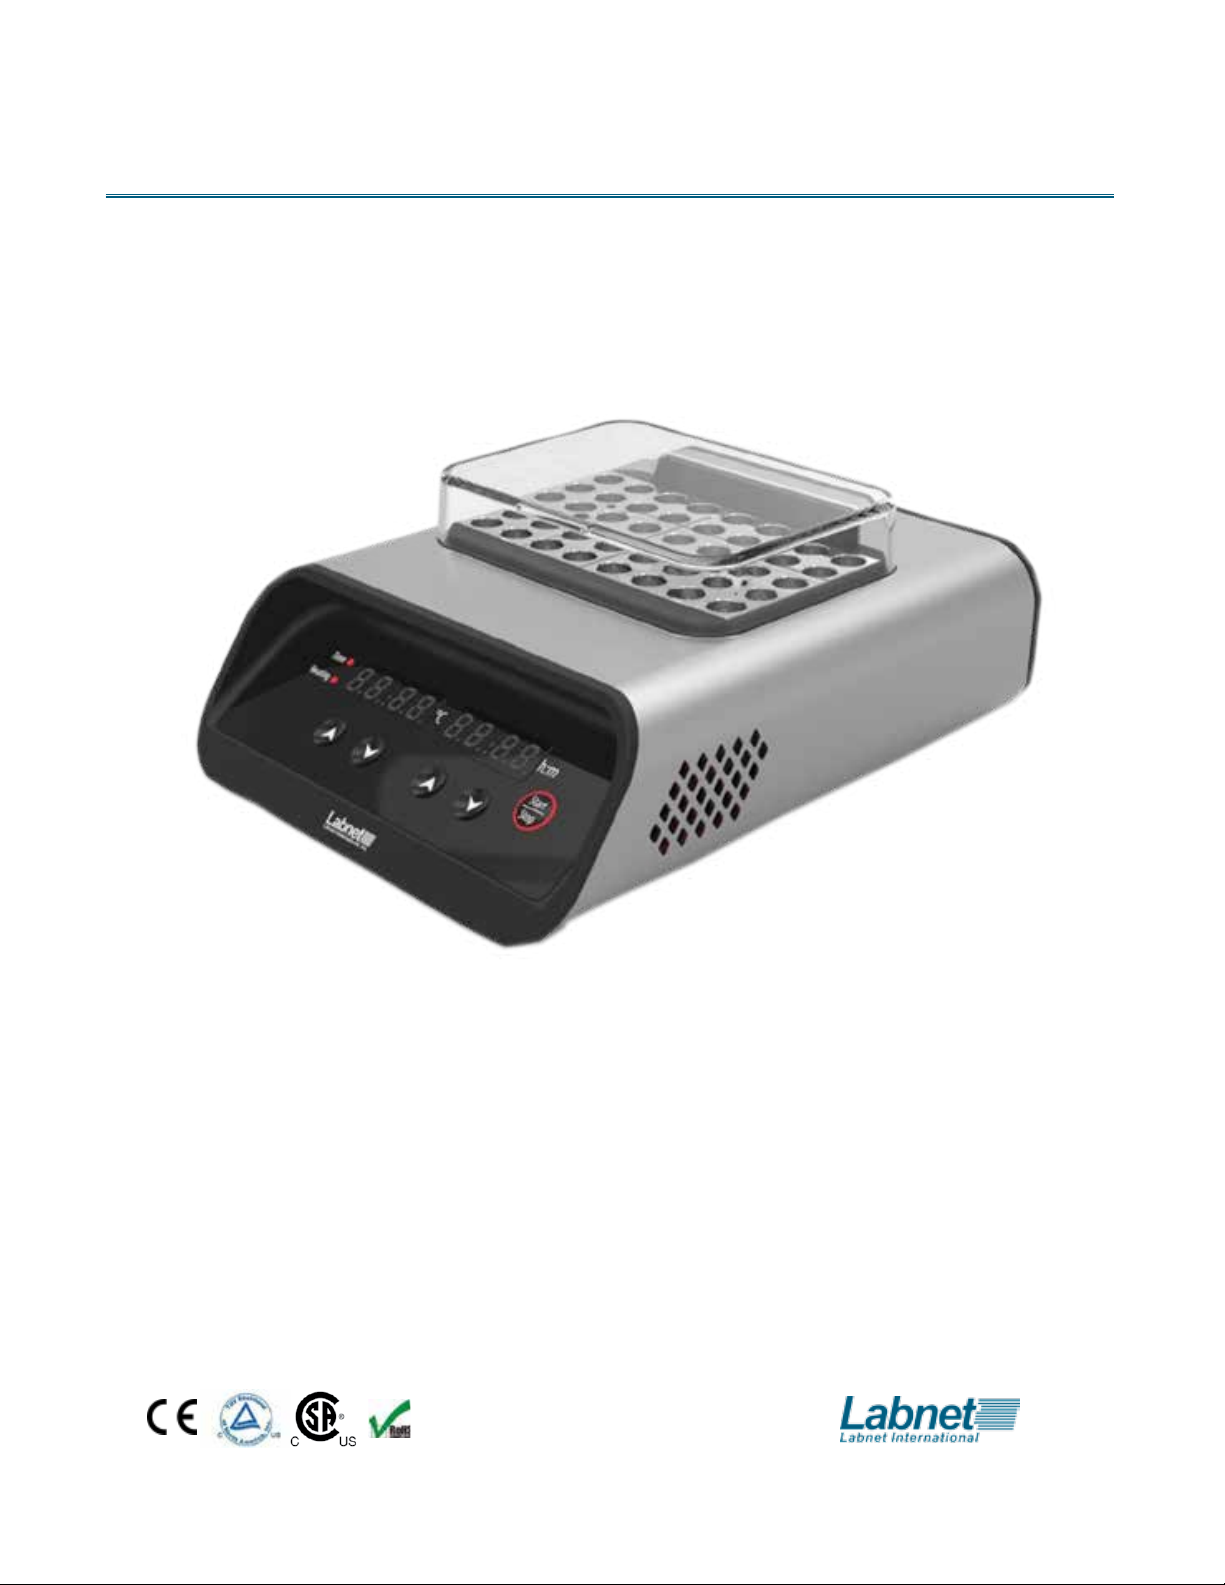
AccuBlock Digital Dry Bath | 1
1.0 Safety Precautions
Before using the AccuBlock Digital Dry Bath for the rst time, please read this entire manual carefully.
To guarantee problem free, safe operation, it is essential to observe the following points:,
1.1 Operation Safety Precautions
•
Do not use this product in an explosive environment
•
Do not use in the presence of ammable or combustible material
•
Do not heat substances that react violently when heated
•
Do not touch block when hot or when unit is heating. Use block lifter.
• Do
not spill liquids into the well area or into the unit side vent holes
• Connect unit only to a properly grounded outlet
2.0 General Specications
Warning! Do not touch area around block or block well when unit is hot. This can result
in bodily injury, including burns.
Warning! Modication of this product or use of the product in any manner not specied
by this instruction manual may cause injury and/or may void the warranty.
If the equipment is used in a manner not specied by the manufacturer, the
protection provided by the equipment may be impaired.
Temperature range Ambient +5°C to 150°C
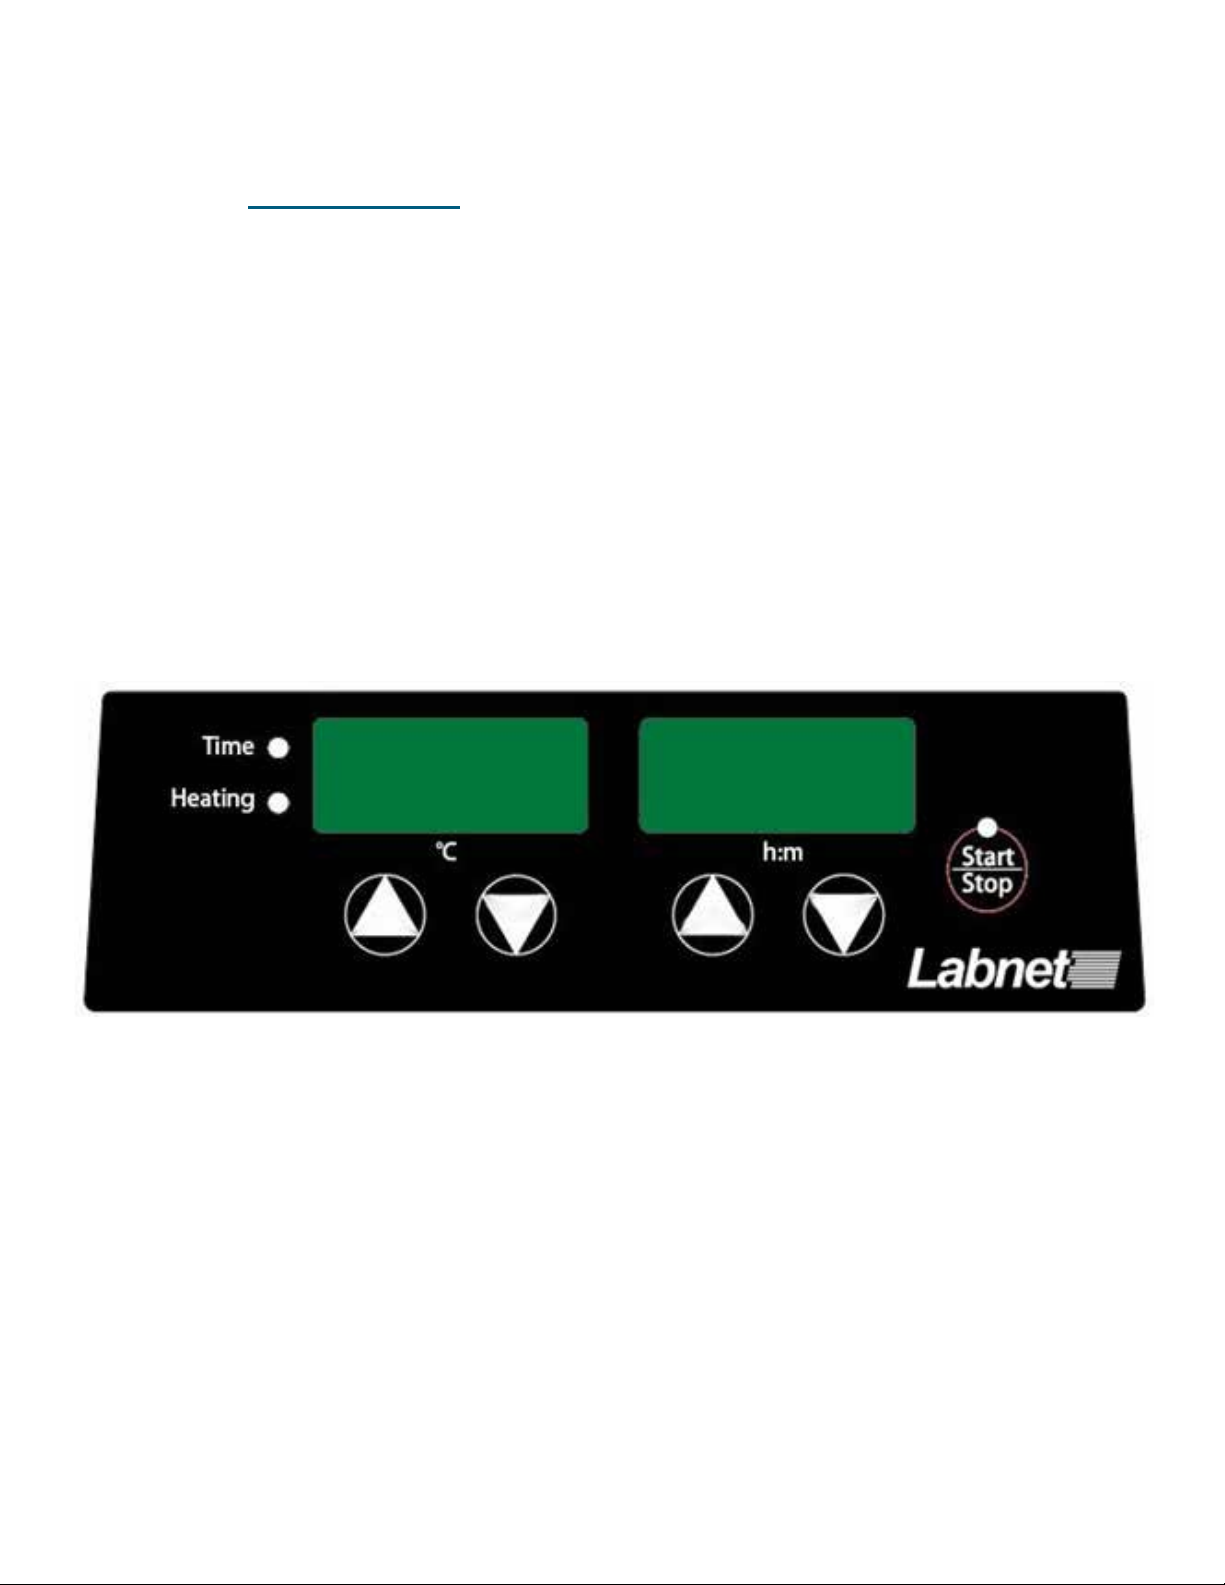
Temperature display resolution 0.1°C 4 digit LED
Temperature uniformity ± 0.2°C (at 37°C in block)
Temperature accuracy ± 0.3°C
Temperature controller Microprocessor – user calibratable
Timer 1 to 99hours59minutes or continuous in 1 minute increments
Operating Altitude Not to exceed 2,000 meters
Control PI Microprocessor controller
I/O USB unidirectional
Dimensions (W x D x H) D1301/D1302 8.3 x 11.4 x 4.7 in./21 x29 x 12cm
D1304 8.3 x 15.3 x4.7 in./21 x 39 x 12 cm
Weight D1301/D1302 7.0 lbs./3.2 kg
D1304 9.6 lbs./4.4 kg
2.0 Electrical requirements:
D1301 115V 50/60Hz, 1 A, Fuse 1.6 AT
D1301-230V 230V 50/60Hz, 0.5 A, Fuse 1AT
D1302 115V 50/60Hz, 1.9A, Fuse 3.15AT
D1302-230V 230V 50/60Hz, 0.95 A, Fuse 1.6AT
D1304 115V 50/60Hz, 3.73 A, Fuse 5 AT
D1305 230V 50/60Hz, 1.86 A, Fuse 3.15 AT

2 | AccuBlock Digital Dry Bath
3.1 Unpacking
3.0 Getting Started
Upon unpacking the Dry Bath, inspect for damages. Shipping damage is the responsibility of the carrier.
Open the AccuBlock Dry Bath package and conrm that all items are included:
•Dry Bath unit •Block Lifter
•Data logger software •Lid
•Line cord •USB cable
If there are any items missing, damaged, or not according to your order, please contact your distributor or
sales representative immediately.
3.2 Initial Operation
Select a location that is dry and not subject to drafts or moving air from heating or air conditioning
vents, or air blown by other equipment. Place the unit on a at, preferably non-ammable surface. Allow
sufcient room around the unit for access and cooling. Six inches minimum on all sides is suggested.
Plug the unit into a properly grounded outlet. Using the lifter, insert the block(s) into the well. The unit is
now ready for use.
4.0 Controls
•On/Off rocker switch. Located on back of unit. Turns primary power on and off
•“Start/Stop” LED, red. Used to activate or stop the unit. Illuminates when unit is in heating mode, off in
temperature set mode
•“Heating” LED, red. Illuminates when unit is in heating mode and unit is actually apply heat to the block.
This LED is on continuously during heat-up and cycles and off when the unit is at set temperature.
•“Time” LED, green - Used to set or select time mode. This LED light indicates running Time Mode.
•“TEMP-UP arrow key. Raises set temperature when unit is in set mode.
•“TEMP-DOWN” arrow key. Lowers set temperature when unit is in set mode
•“Timer-UP” arrow key. Raises set time when unit is in set mode.
•“Timer-DOWN” arrow key. Lowers set-time when unit is in set mode.
•To enter continuous mode, set the time to 00:00, hold the “Timer-DOWN” arrow key while pressing the
“Start/Stop” key. Unit will display “Hold”.
4.1 Keypad Function

AccuBlock Digital Dry Bath | 3
1. Place Labnet Dry Bath Incubator on a sturdy and level surface in a safe, dry place, away from
laboratory trafc.
2. Ensure that the AC power switch is OFF, then plug the three-pronged power cord into a
grounded three-prong AC outlet of the appropriate voltage (115V or 220V as indicated on the
rating sticker near the AC cord on the back of the unit).
3. Select suitable module block(s) or appropriate water volume and put it / them into the Labnet Dry
Bath Incubator
4. Turn the AC power ON.
5. Run temperature calibration procedure when using the instrument for the rst time.
6. Press or Key to adjust to the desired temperature.
7. Press or Key to adjust to the desired timer.
8. Press the Key to start heating.
9. If to reset timer is required during heating, press Key to deactivate heating.
10. Press Key again to stop the unit.
11. If lid is to be used, aim the shaded area on the dry bath surface with the magnet of the lid and
it will be attached to the housing. In order to remove the lid, press one hand rmly on the housing
with another hand pulling the lid off. To use the lid, the tube should not be exceeding 25mm than
the heating block.
5.0 Operation

4 | AccuBlock Digital Dry Bath
1. Press and hold the START/STOP key then simultaneously power up the unit
with the ON/OFF switch.
2. You should hear a “DU-DU-DU.” sound from the dry bath and the display will
have one segment ashing on the left and will show a set temperature, and the right
will show adjt.
3. Use the UP and DOWN arrow keys to set the desired temperature at which
you want to calibrate the unit. Then press the START key.
4. Allow time (up to 10 or 20 minutes) for the unit to heat up to your set
temperature and to equilibrate at this emperature. The entire LED display will
start ashing when equilibration is reached.
5. After the entire display has started slashing, red the thermometer (or sensor
meter) and use the UP and DOWN arrow keys to adjust the display to the
thermometer or sensor reading then press the START/STOP key.
6. The unit will then begin to automatically adjust its operating temperature to
your original set point with the re-calibration factor included. Allow sufcient
time for the unit to reequilibrate and then again compare the thermometer or
sensor reading to the calibrated display. They should closely match. If not,
repeat the calibration procedure.
* Thermometers used for calibration purposes should have a written calibration certicate and be
traceable back to NIST or some other certied body. General lab thermometers are often not accurate
enough for calibration work.
6.0 Calibration
Calibration allows the unit temperature display to be adjusted or matched to the
temperature of a single sample or to a calibrated thermometer making an independent
temperature measure of the block.
The Digital Dry Baths are calibrated at the factory at 37, 60, 90, 120, 140°C using a
standard 20 x 13mm heating block. If you are using a block with a high heat loss rate
such as a block with large holes or a platform style block, you may choose to recalibrate
the unit to your specic application. Also, if you are using very loose or odd shaped
vessels, the calibration function can help you match the display temperature to your
actual sample temperature.
To calibrate the unit for a given block or sample, rst turn the unit off using the On /
OFF switch. Then place a thermometer of known accuracy* into the block thermometer
hole or a thermocouple or other sensor into your sample. Make sure there is a good
t between the thermometer and the block or good contact between any sensor and
sample or sensor and block.
To calibrate the block or sample to the display, use the following procedure:

AccuBlock Digital Dry Bath | 5
7.0 USB Interface
The Digital Dry Baths have a USB unidirectional data port. A software and cable are available which
allow a user to use a desk top or lap top computer to record and/or print a record or the temperature
prole produced by the dry bath.
8.0 Troubleshooting Guide/Service
Problem Explanation Solution
Display/LEDs do not light up 1. Check power cord & outlet
2. Check ON/OFF switch
3. Check fuse
4. Call service
Unit not heating 1. Is set point below room temperature
2. Is “START” LED illuminated
3. Press “START” key
4. Call service
Unit display overshoots 1. Normal operation. Display set point in heat-up
overshoots on initial heat-up but block and sample do
not overshoot. See Operation section of this manual
Block or Sample temp not same as display temp 1. Is unit in heating mode
2. Is unit sitting in draft
3. Check accuracy of thermometer
4. Is thermometer making good contact
5. Follow calibration procedure
8.1 Service
Should you have a question about the operation of the Digital Dry Bath or if service is required,
contact Corning at 800-492-1110. Do not send in a unit for service without rst calling to obtain
a repair authorization number. Should the unit require return to Corning for service, it should be
properly packed to avoid damage. Any damage resulting from improper packaging shall be the
responsibility of the user.
9.0 Cleaning and Maintenance
Make sure that the dry bath and block are cool and the power cord is disconnected before performing
any cleaning or maintenance. Repair or maintenance should only be performed by an authorized
service technician.
The dry bath may be cleaned with a moist cloth containing a mild soap solution. Do not immerse the
dry bath in water or any liquid.
The blocks may also be cleaned in a mild soapy solution. Be sure that all items have thoroughly dried
before attempting to connect the cord or use the unit.
Spills: In the event liquid is accidentally spilled into the bath or well area, disconnect the plug from the
outlet and turn the unit upside down to minimize liquid contact with the internal components. Remove
the bottom cover and inspect to assure liquid has not contacted heater elements, electronic controls,
or connectors. Have qualied service technician clean the unit and replace any damaged parts.

6 | AccuBlock Digital Dry Bath
Appendix A
Equipment Disposal - European Regulations
According to Directive 2012/19/EU of the European Parliament and of the Council of 4
July 2012 on waste electrical and electronic equipment (WEEE), Prism R Refrigerated
Centrifuge is marked with the crossed-out wheeled bin and must not be disposed of with
domestic waste.
Consequently, the buyer shall follow the instructions for reuse and recycling of waste electronic
and electrical equipment (WEEE) provided with the products and available at the following link:
www.corning.com/weee
Symbols and Conventions
The following chart is an illustrated glossary of the symbols that may be used in
this manual or on the product.
The electrical warning indicates the presence of a potential hazard
which could result in electrical shock.
ATTENTION: Hot Surface!
Indicates disposal instruction.
DO NOT throw this unit into a municipal trash bin when this unit has
reached the end of its lifetime. To ensure utmost protection of the
global environment and minimize pollution, please recycle this unit.

AccuBlock Digital Dry Bath Bath | 7
Limited Warranty
Corning Incorporated (Corning) warrants that this product will be free from defects in material and
workmanship for a period of two (2) years from date of purchase. This warranty is valid only if the
product is used for its intended purpose and within the guidelines specied in the supplied instruction
manual.
Should this product require service, contact Corning Customer Service department at 1.800.492.1110
or 978.492.1110 to receive a return authorization number and shipping instructions. Products received
without proper authorization will be returned. All items returned for service should be sent postage
prepaid in the original packaging or other suitable carton, and padded to avoid damage. Corning will
not be responsible for damage incurred by improper packaging,.Corning may elect for onsite service
for larger equipment.
This warranty does not cover damage caused by accident, neglect, misuse, improper service, natural
forces, or other causes not arising from defects in original material or workmanship. This warranty
does not cover motor brushes, fuses, light bulbs, batteries, or damage to paint or nish. Claims for
transit damage should be led with the transportation carrier.
ALL WARRANTIES INCLUDING THE IMPLIED WARRANTY OF MERCHANTABILITY AND FITNESS
FOR A PARTICULAR PURPOSE ARE LIMITED IN DURATION OF 24 MONTHS FROM THE
ORIGINAL DATE OF PURCHASE
.
CORNING’S SOLE OBLIGATION UNDER THIS WARRANTY IS LIMITED TO THE REPAIR OR
REPLACEMENT, AT CORNING’S DISCRETION, OF A DEFECTIVE PRODUCT. CORNING IS NOT
LIABLE FOR INCIDENTAL OR CONSEQUENTIAL DAMAGE, COMMERCIAL LOSS, OR ANY OTHER
DAMAGES RESULTING FROM THE USE OF THIS PRODUCT.
Some states do not allow limitation on the length of implied warranties or the exclusion or limitation of
incidental or consequential damages. This warranty gives you specic legal rights. You may have other
rights which vary from state to state
.
No individual may accept for, or on behalf of Corning, any other obligation of liability, or extend the
period of this warranty.
For your reference, make a note of the model and serial number, date of purchase, and supplier here.
Model No._____________________ Serial No.________________________________
Date Purchased ____________________________________________________________
Supplier __________________________________________________________________

Corning Incorporated
271 County Route 64
Big Flats, NY 14814
www.labnetinternational.com

Accublock Digitales Trockenbad Benutzerhandbuch
Copyright 2017
D1301 D1301-230V
D1302 D1302-230V
D1304 D1304-230V

Über dieses Handbuch
Dieses Handbuch soll Ihnen bei der optimalen Verwendung Ihres
Accublock digitalen Trockenbads behilich sein. Das Handbuch ist
auf Englisch, Französisch, Deutsch, Italienisch, Portugiesisch und
Spanisch auf unserer Website unter www.labnetinternational.com
verfügbar.
Die einzelnen und doppelten Trockenbadinkubatoren von Labnet
International bieten umfangreiche Designs für eine Vielzahl an
Forschungsanwendungen im Bereich der Biowissenschaft.
Ausgezeichnete Temperaturkontrollwerte können präzise und
zuverlässige Versuchsergebnisse von einem Experiment zum anderen
bieten.
Bestimmungsgemäße Verwendung:

Table of Contents
1.0 Sicherheitsvorkehrungen: ............................................................1
1.1 Betrieb Scherheitshinweise..........................................................1
2.0 Allgemeine Spezikation ...............................................................1
2.1 Elektrische Anforderungen ..........................................................1
3.0 Anfangen .........................................................................................2
3.1 Auspacken ......................................................................................2
3.2 Inbetriebnahme ..............................................................................2
4.0 Kontrollen ........................................................................................2
4.1 Tastenfunktion ................................................................................2
5.0 Betrieb .............................................................................................3
6.0 Kalibrierung ....................................................................................4
7.0 USB-Schnittstelle ...........................................................................5
8.0 Fehlersuchanleitung/Service ........................................................5
8.1 Fragen..............................................................................................5
9.0 Reinigung und Wartung .................................................................5
Appendix A ............................................................................................6
Entsorgung der Geräte-der Geräte-Europäische Vorschriften ........6
Symbole und Konventionen ................................................................6
Garantieerklärung.................................................................................7

If the digital dry bath is used in a manner not specied by the manufacturer, the
protection provided by the centrifuge may be impaired.

AccuBlock Digitales Trockenbad | 1
1.0 Sicherheitsvorkehrungen:
1.1 Betrieb Scherheitshinweise
• Verwenden Sie dieses Produkt nicht in einer explosiven Umgebung
• Verwenden Sie dieses Produkt nicht in Gegenwart von brennbarem oder entzündlichem
Material
• Erhitzen Sie nicht Substanzen, die bei erhitzen heftig reagieren
• Berühren Sie den Block oder die Blockvertiefung nicht, wenn die Einheit heiß ist.
Blockheber verwenden.
• Berühren Sie nicht den Bereich um den Block oder die Blockvertiefung, wenn die
Einheit heiß ist.
• Spritzen Sie keine Flüssigkeiten in den Vertiefungsbereich oder in die seitlichen
Belüftungslöcher der Einheit.
• Verbinden Sie die Einheit nur mit einer korrekt geerdeten Steckdose
2.0 Allgemeine Spezikation
Vorsicht!: HEISSE Oberächen, die Verbrennungen oder Verletzungen hervorrufen
können.
Vorsicht!: Die Verwendung dieses Produkts in einer Weise, die nicht vom Hersteller
angegeben ist, oder Modikationen können Verletzungen verursachen und/oder die
Garantie ungültig machen.
Temperaturbereich Umgebungstemperatur +5 °C bis 150 °C
Auösung der
Temperaturanzeige
0,1 °C 4-stelliges LED
Temperaturuniformität ± 0,2 °C (bei 37 °C als Block)
Temperaturgenauigkeit ± 0.3°C
Temperaturregler Mikroprozessor – zur Einstellung durch den B
Zeitregler 1 bis 99 Stunden 59 Minuten oder kontinuierlich in
Betriebshöhe Darf 2.000 Meter nicht übersteigen
Kontrollieren PI-Mikroprozessor-Steuerung
I/O USB unidirektional
Abmessungen (B x T x H) D1301/D1302 21 x29 x 12cm (8.3 x 11.4 x 4.7 in).
D1304 21 x 39 x 12 cm (8.3 x 15.3 x4.7 in.)
Gewicht D1301/D1302 7.0 lbs./3.2 kg
D1304 9.6 lbs./4.4 kg
2.1 Elektrische Anforderungen
D1301 115V 50/60Hz, 1 A, Sicherung 1.6 AT
D1301-230V 230V 50/60Hz, 0.5 A, Sicherung 1 AT
D1302 115V 50/60Hz, 1.9A, Sicherung 3.15 AT
D1302-230V 230V 50/60Hz, 0.95 A, Sicherung 1.6 AT
D1304 115V 50/60Hz, 3.73 A, Sicherung 5 AT
D1305 230V 50/60Hz, 1.86 A, Sicherung 3.15 AT

2 | AccuBlock Digitales Trockenbad
3.1 Auspacken
3.0 Anfangen
Kontrollieren Sie das Trockenbad nach dem Auspacken auf Schäden. Ein Lieferschaden liegt in der
Verantwortung des Spediteurs. Kontrollieren Sie, ob folgende Dinge vorhanden sind: Benutzerhandbuch,
Datenlogger-Software, Netzkabel, Blockheber, Deckel, USB-Kabel.
3.2 Inbetriebnahme
Wählen Sie einen Ort aus, der trocken ist und nicht dem Zug oder der Bewegung heißer Luft oder
Klimaanlagen oder ausgestoßener Luft anderer Geräte ausgesetzt ist. Stellen Sie die Einheit auf eine
ache, vorzugsweise nicht brennbare Oberäche. Lassen Sie ausreichend Platz um die Einheit für
den Zugang und Kühlung. Mindestens 15 cm nach allen Seiten wird vorgeschlagen. Schließen Sie die
Einheit an eine entsprechend geerdete Steckdose an. Stellen Sie den Block/die Blöcke mit dem Lifter in
die Vertiefung. Die Einheit kann jetzt verwendet werden.
4.0 Kontrollen
• Ein/Aus-Kippschalter. Auf der Rückseite der Einheit. Schaltet den Hauptstrom ein und aus
• “Start/Stop“-LED leuchtet rot. Zum Aktivieren oder Anhalten der Einheit. Leuchtet auf, wenn die Einheit im
Erhitzungsmodus ist und ist aus, wenn die eingestellte Temperatur erreicht ist.
• “Erhitzung“-LED leuchtet rot. Leuchtet auf, wenn die Einheit im Erhitzungsmodus ist und die Einheit
gerade Hitze auf den Block anwendet. Diese LED leuchtet während der Erhitzung kontinuierlich auf und
blinkt, wenn die Einheit die gewünschte Temperatur erreicht hat.
• “Zeit“-LED leuchtet grün – Zur Einstellung oder Auswahl des Zeitmodus. Diese LED weist auf den Betrieb
im Zeitmodus hin.
• “TEMP-HOCH“-Pfeiltaste. Erhöht die eingestellte Temperatur, wenn die Einheit im Set-Modus ist.
• “TEMP-RUNTER“-Pfeiltaste. Senkt die eingestellte Temperatur, wenn die Einheit im Set-Modus ist.
• “Zeitregler-Hoch“-Pfeiltaste. Erhöht die eingestellte Zeit, wenn die Einheit im Set-Modus ist.
• “Zeitregler-Runter“-Pfeiltaste. Senkt die eingestellte Zeit, wenn die Einheit im Set-Modus ist.
4.1 Tastenfunktion

AccuBlock Digitales Trockenbad | 3
1. Stellen Sie den Labnet Trockenbadinkubator auf eine stabile und ebene Oberäche in einem
sicheren und trockenen Raum mit Abstand zum Laborverkehr.
2. Stellen Sie sicher, dass der Hauptstromschalter AUS ist und verbinden Sie dann das Stromkabel
mit den drei Zinken mit einer geerdeten Steckdose mit drei Zinken mit der entsprechenden
Spannung (115 V oder 220 V je nach Aufkleber am Stromkabel auf der Rückseite der Einheit).
3. Wählen Sie einen oder mehrere geeignete Modulblöcke oder das angemessene Wasservolumen
aus und legen Sie den oder die Blöcke in den Labnet Trockenbadinkubator.
4. Schalten Sie den Netzstrom ein.
5. Führen Sie ein Temperaturkalibrierungsverfahren durch, wenn Sie das Instrument zum ersten
Mal verwenden.
6. Drücken Sie die oder Taste, um die gewünschte Temperatur anzupassen.
7. Drücken Sie die oder Taste, um die gewünschte Zeit anzupassen.
8. Drücken Sie die Taste, um mit dem Erhitzen zu beginnen.
9. Wenn der Zeitregler während des Erhitzens zurückgesetzt werden muss, drücken Sie die
Taste, um das Erhitzen zu deaktivieren.
10. Drücken Sie die Taste erneut, um die Einheit anzuhalten.
11. Wenn ein Deckel verwendet werden soll, zielen Sie mit dem Magnet des Deckels auf den
schattierten Bereich der Trockenbadoberäche und der Deckel wird am Gehäuse angebracht.
Um den Deckel zu entfernen müssen Sie mit einer Hand fest auf das Gehäuse drücken und mit
der anderen Hand den Deckel abziehen. Um den Deckel zu verwenden, darf der Schlauch nicht
mehr als 25 mm über den Heizblock hinausreichen.
5.0 Betrieb

4 | AccuBlock Digitales Trockenbad
1. Drücken und halten Sie die START/STOPP-Taste, dann fahren Sie die Einheit simul
tan mit dem EIN/AUS-Schalter an.
2. Sie sollten einen „DU-DU-DU“-Ton aus dem Trockenbad hören und in der Anzeige
sollte ein Segment auf der linken Seite aufblinken und eine eingestellte Temperatur
anzeigen. Rechts sollte „Einst.“ angezeigt werden.
3. Drücken Sie die HOCH- oder RUNTER-Pfeiltasten, um die gewünschte Temperatur
einzustellen, auf welche Sie die Einheit einstellen wollen. Drücken Sie die START-
Taste.
4. . Lassen Sie die Einheit bis zur eingestellten Temperatur aufheizen (bis zu 10 oder
20 Minuten) und sich bei dieser Temperatur ausgleichen. Die gesamte LED-Anzeige
wird aufblinken, wenn der Ausgleich erreicht wurde.
5. Lesen Sie nach dem Aufblinken der gesamten Anzeige das Thermometer (oder das
Sensormeter) ab und verwenden Sie die HOCH- und RUNTER-Pfeiltasten, um die
Anzeige auf den Wert des Thermometers oder des Sensors einzustellen. Drücken
Sie die START/STOPP-Taste.
6. Die Einheit wird automatisch beginnen, die Betriebstemperatur an Ihren ursprüngli
chen Sollwert plus Neukalibrierungsfaktor anzupassen. Lassen Sie der Einheit aus
reichend Zeit, ein neues Gleichgewicht zu erreichen, vergleichen Sie dann erneut
den Wert auf dem Thermometer oder Sensor mit der kalibrierten Anzeige. Sie sollten
eng beieinander liegen. Falls nicht, wiederholen Sie das Kalibrierungsverfahren.
* Für die Kalibrierung verwendete Thermometer sollten über ein schriftliches Kalibrierzeugnis verfügen
und zu NIST oder anderen Zertizierungsstellen rückverfolgbar sein. Allgemeine Laborthermometer sind
häug nicht präzise genug für Kalibrierungsarbeiten.
6.0 Kalibrierung
Über die Kalibrierung kann die Temperaturanzeige der Einheit angepasst oder an einer
einzelnen Probe oder einem kalibrierten Thermometer ausgerichtet werden, um eine
unabhängige Temperaturmessung des Blocks zu erhalten.
Die digitalen Trockenbäder werden ab Werk bei 37, 60, 90, 120, mit einem
herkömmlichen 140 °C mit einem standard 20 x 13mm heizblock kalibriert. Wenn
Sie einen Block mit einer hohen Wärmeverlustrate, einen Block mit großen Löchern
oder einen Block im Plattform-Stil verwenden, können Sie die Einheit auch auf Ihre
gewünschte Anwendung neu kalibrieren. Auch bei der Verwendung von sehr losen oder
ungewöhnlich geformten Gefäßen kann die Kalibrierung dabei helfen, die angezeigte
Temperatur an der tatsächlichen Probentemperatur anzupassen.
Um die Einheit für einen speziellen Block oder eine Probe zu kalibrieren, müssen Sie
die Einheit zunächst über den EIN/AUS-Schalter ausstellen. Positionieren Sie dann ein
Thermometer mit bekannter Zuverlässigkeit* in das Thermometerloch im Block, oder
ein Thermoelement oder einen anderen Sensor in Ihre Probe. Achten Sie auf einen
guten Sitz des Thermometers und des Blocks oder auf einen guten Kontakt zwischen
Sensor und Probe oder Sensor und Block.
Verwenden Sie das folgende Verfahren, um einen Block oder eine Probe auf die
Anzeige zu kalibrieren: Verwenden Sie das folgende Verfahren, um einen Block
oder eine Probe auf die Anzeige zu kalibrieren:
This manual suits for next models
5
Table of contents
Languages:
Other Labnet Accessories manuals

Labnet
Labnet 311D Quick guide

Labnet
Labnet I-4001-HCS User manual

Labnet
Labnet I5110 User manual

Labnet
Labnet 211DS User manual

Labnet
Labnet VorTemp 56 User manual

Labnet
Labnet VorTemp 1550 User manual

Labnet
Labnet 311D User manual

Labnet
Labnet VorTemp 56 User manual

Labnet
Labnet I-5222-DS User manual

Labnet
Labnet I5110A User manual
Popular Accessories manuals by other brands

ADVANSEA
ADVANSEA Speed s400 Multilingual installation manual

KMC Controls
KMC Controls STE-6010 Application guide

Dorner
Dorner 2200 series Installation, maintenance & parts manual

Schlage
Schlage B008Q5CTTG Setup and Signals

HYTROL
HYTROL 199-CREZD Installation and maintenance manual

elco
elco iNELS RFDSC-71N quick start guide