8 | SureKey Manual
Selecting a particular option in the settings consists of shortly pressing the button the adequate number of times (x1
means one press, x2, x3, x4 mean two, three and four presses, respectively). After each change of settings, you should
hear a confirmation sound. To leave the settings mode without saving, hold the button for about 3 seconds.
Warning: for the inside of the door, the “Show status” setting is not available. It is not possible to return or
to only edit a particular setting, so any modifications require changing the settings like in a factory-new
SureKey.
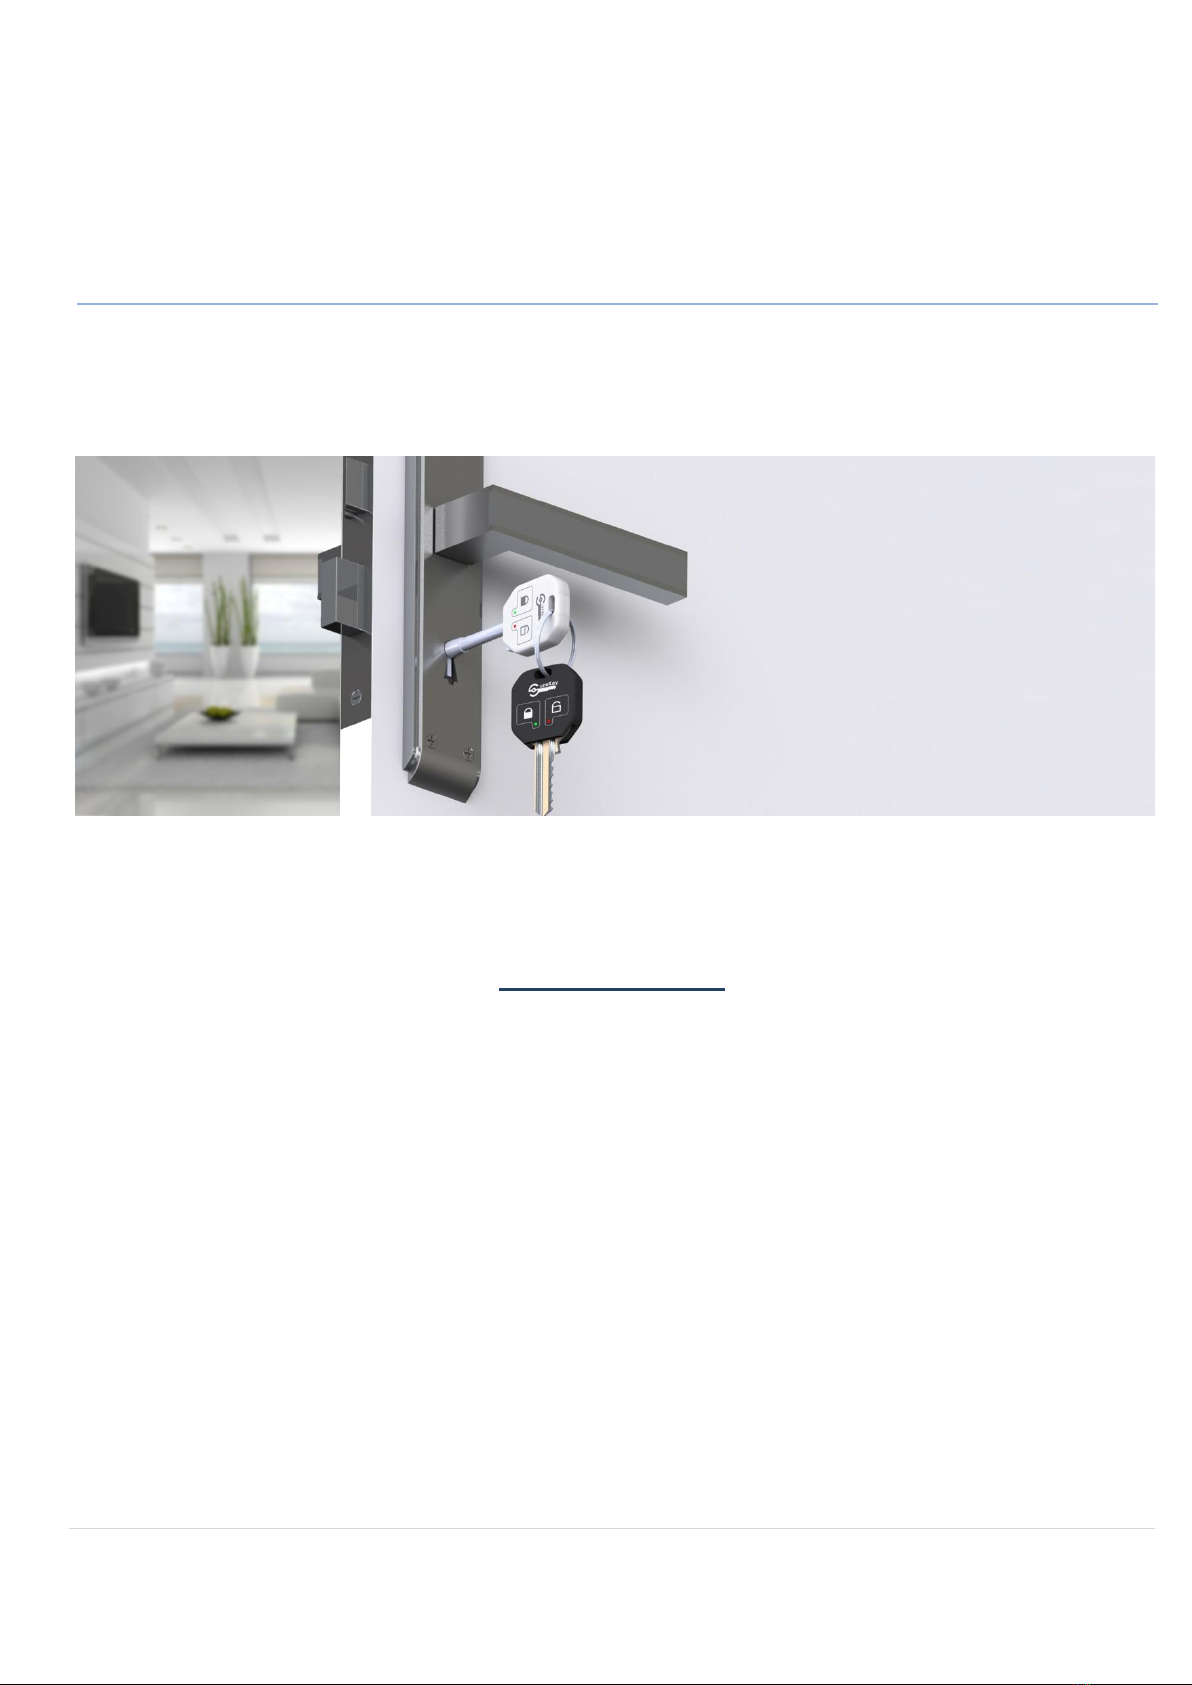
Sample configuration procedure
(1 door; lock on both sides; standard key; all the alarm notifications; find the key inside the house (the key on a hook or
in a container with a magnetic sticker); generate a sound after a change of state; only show the status using LED):
1. Put the key in the lock on the outside of the door. Next, hold the button for about 3 seconds.
2. Press shortly to select the “Standard key” setting. Wait for a confirmation sound signal.
3. Press four times shortly to select the “All notifications” setting. Wait for a confirmation sound signal.
4. Press four times shortly to select the “All home positions” setting. Wait for a confirmation sound signal.
5. Press three times shortly to select the “Sound only” setting. Wait for a confirmation sound signal.
6. Press shortly to select the “LEDs only” setting. Wait for a confirmation sound signal.
7. We start calibrating the key. Press the button shortly to start. You should hear a short double sound signal, after
which you have to turn the key until the lock gets locked (in most cases it is the moment halfway through a full turn of
the lock).
8. After hearing a short sound signal, continue locking until making one full turn. SureKey announces a calibration error
with an adequate sound, after which you have to return to the lock’s initial position and press the button shortly to turn
again.
9. If the calibration was successful (announced with a confirmation sound –the same as when choosing settings), press
the button shortly to start the settings for the lock on the inside.
10. Put the key in the lock on the inside of the door. Repeat paragraphs 2-6. Warning: on the inside, the “Show status”
setting is not available.
11. Perform paragraphs 7-8. In the event of performing the calibration correctly, hold the button for long to accept the
settings and leave the settings mode.
The operating time for a single battery depends significantly on the settings used. The settings structure chart
shows the impact of a particular setting on increasing battery use.
- This icon indicates affect to power consumption (no icon means no affect; three icons mean significant increase)
After a successful configuration, SureKey needs to be tested for each lock. In some instances, it might be
required to reconfigure the device or use additional magnetic identifiers for doors.
9 | SureKey Manual
Closing notes
1. The device utilizes a magnetic field to determine the lock’s state, which is why direct contact with magnets and
magnetized elements should be avoided. In some instances, upon contact with a strong source of magnetic field, the
device needs to be recalibrated.
2. Low battery level will be announced with a modulated sound signal. For the device to work correctly, replace the
battery with a new one according to the manufacturer’s recommendations.
3. If the device is not working correctly, the configuration process has to be repeated, making sure to perform the
sequence carefully and to program the right moment for closing the lock (registering the lock’s behavior at this moment
determines the threshold for detecting a change of state).
4. If the lock is only mounted on the outside, the settings for the inside have to be omitted, or the “None” option has
to be chosen in the menu.
5. If the key is used in a Master-Key system for two doors or two locks were used on one side of the door, the Door 2
settings have to be programmed as well. In some instances (if Door 1 and 2 are arranged in parallel to each other), a
magnetic identifier mounted by the lock has to be used.
6. Using the glue and waiting for it to set has to be performed in a well-ventilated room, and used components have to
be secured and stored away in a place designated for that purpose.
7. The device registers the last state of the lock after using the key, whereas a movement outside of the lock to
replicate a movement inside the lock might be registered as a false state.
8. A movement inside the lock should take at least 1 second, and detecting the lock takes about 0.2 seconds (the key in
the lock’s initial position).
9. After about 10 seconds without any activity, the device goes into a standby mode and a movement is lasting for at
least 2 seconds is required for the device to follow the key’s movement or to indicate the current state.
10. Closing the lock fluently with the maximum number of turns increases the accuracy of detecting the lock’s state
significantly.