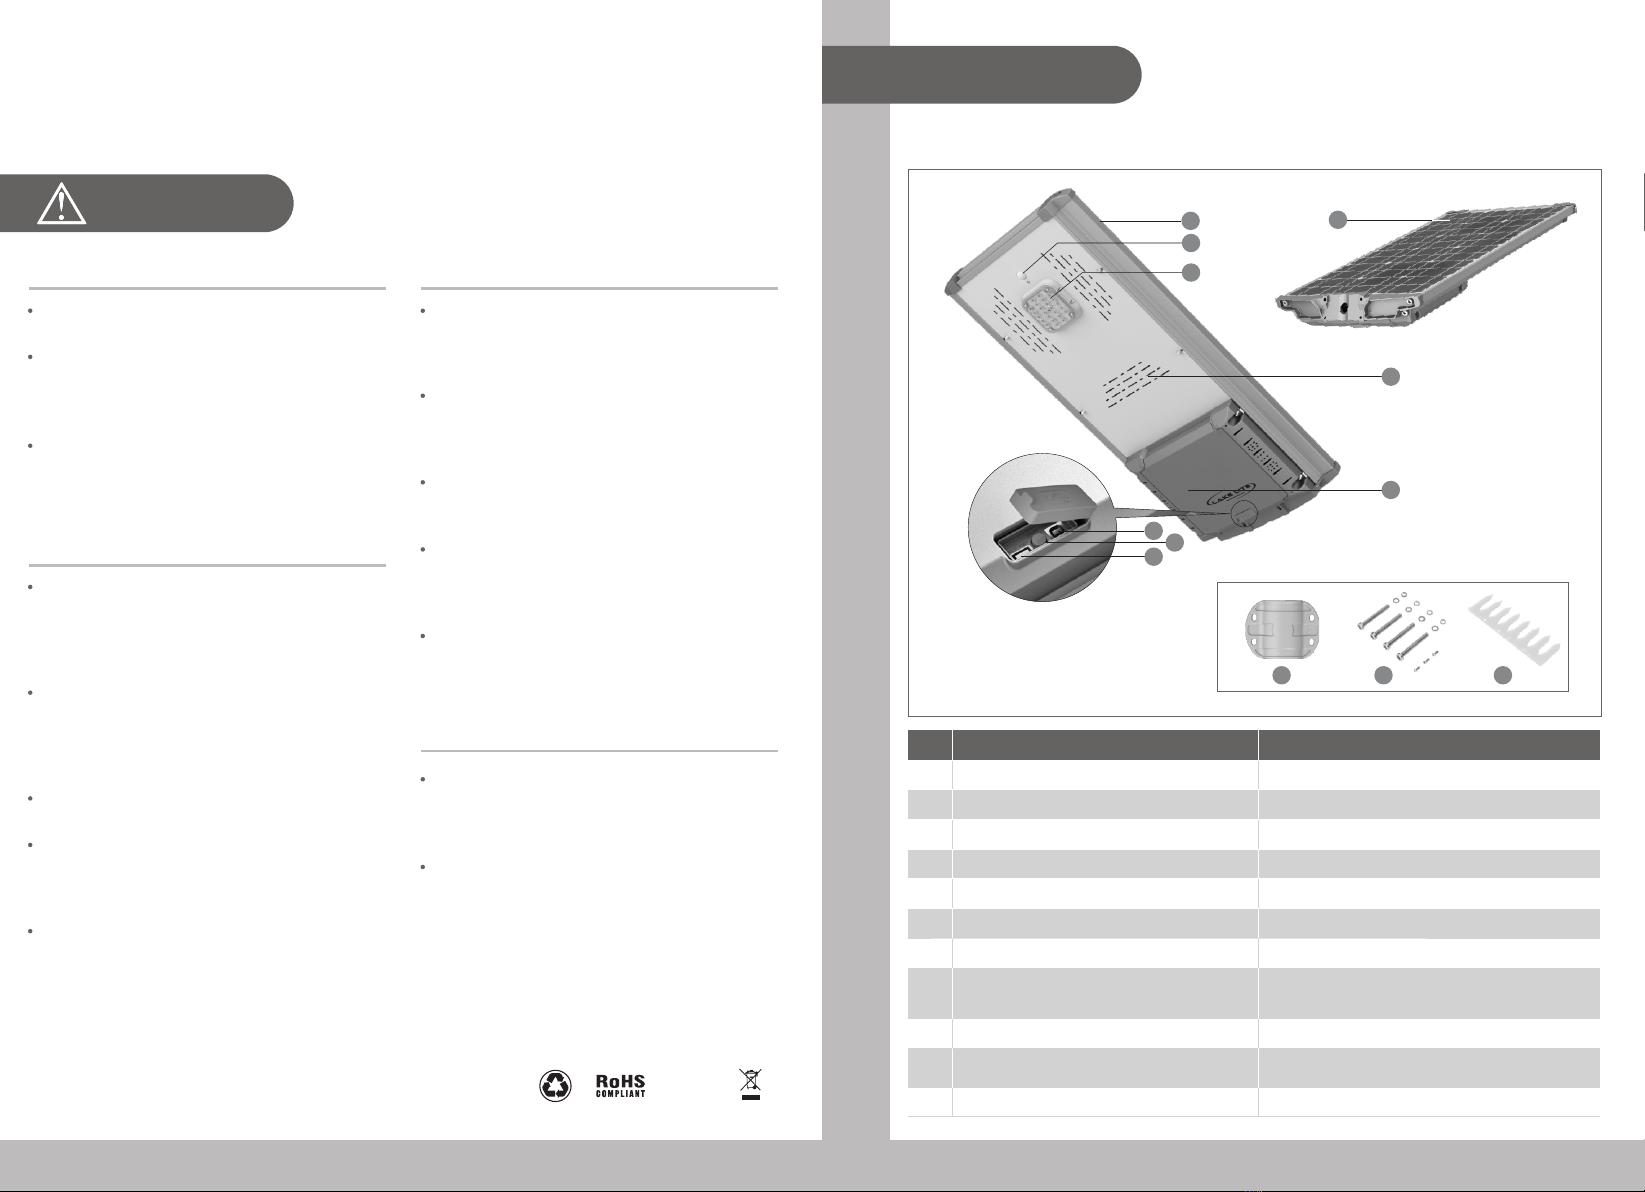
Absorbs and converts solar energy into electricity
Battery (charge / discharge) management
Type B USB connector female
Turn on/off the light, or enter/exit the Transportation mode
Type A USB connector female/
Parameter Configuration Interface
For battery charging via a 14VDC 1.5A power supply/
Parameter Configuration Interface
M8 hexagon headed screws 4pcs / M8 lock washers
4pcs / M8 flat washer 4pcs / self-tapping screw 3pcs
Fix the solar light and bird spike in place
Prevents solar panel contamination from bird droppings
Operating Conditions & Limits:
Transportation & Storage:
Before using the LAKE LITE solar street light, carefully read
the following precautions to avoid damage or errors.
Precautions
This product is rated as IP65 protection grade.
Do not exceed the stated operating limits.
The operating temperature range is from -20℃ to
60℃ and the charging temperature limit is within
0℃ to 60℃. If equipped with heating features, it
may be used between -40℃ and 60℃.
The heavy-duty structure will survive up to a
Category 12 typhoon or cyclone. (Storms above
Category 12 may cause damages to the product).
This product contains lithium batteries. Please
follow air transport regulations when shipping. It
should be regarded as potentially flammable and
explosive, and be isolated from other goods
when stored, so as to avoid any damage.
The solar panels of this product should be
considered as fragile. There should never be
more than 4 layers of boxes when stacked. To
avoid damage to the panels, make sure no heavy
pressure is applied to the boxes.
Please store the product in temperature between
0℃ to 45℃.
If stored for a long period, the product should be
recharged every 6 months. Please only use the
special charger (purchased from manufacturer)
to avoid damage to the battery or device.
When repackaging the product after inspection or
charging, set the light into sleep mode by holding
the on/off button for 5 sec. The light will flash
three times to signal that it has properly entered
sleep mode. You may now repackage the
product into its box. To exit sleep mode, either
press the on/off button one more time, or wait an
hour for the light to reboot automatically through
contact with sunlight.
Product Maintenance:
Product Recycling:
This product is made from recyclable, high-
performance materials. All materials are
compliant to the ROHS standard. Do not dispose
of this product with other household waste.
Please check your local regulations on collection
and disposal of electronic items. Proper disposal
of used product helps prevent negative impacts
on the environment.
IP65
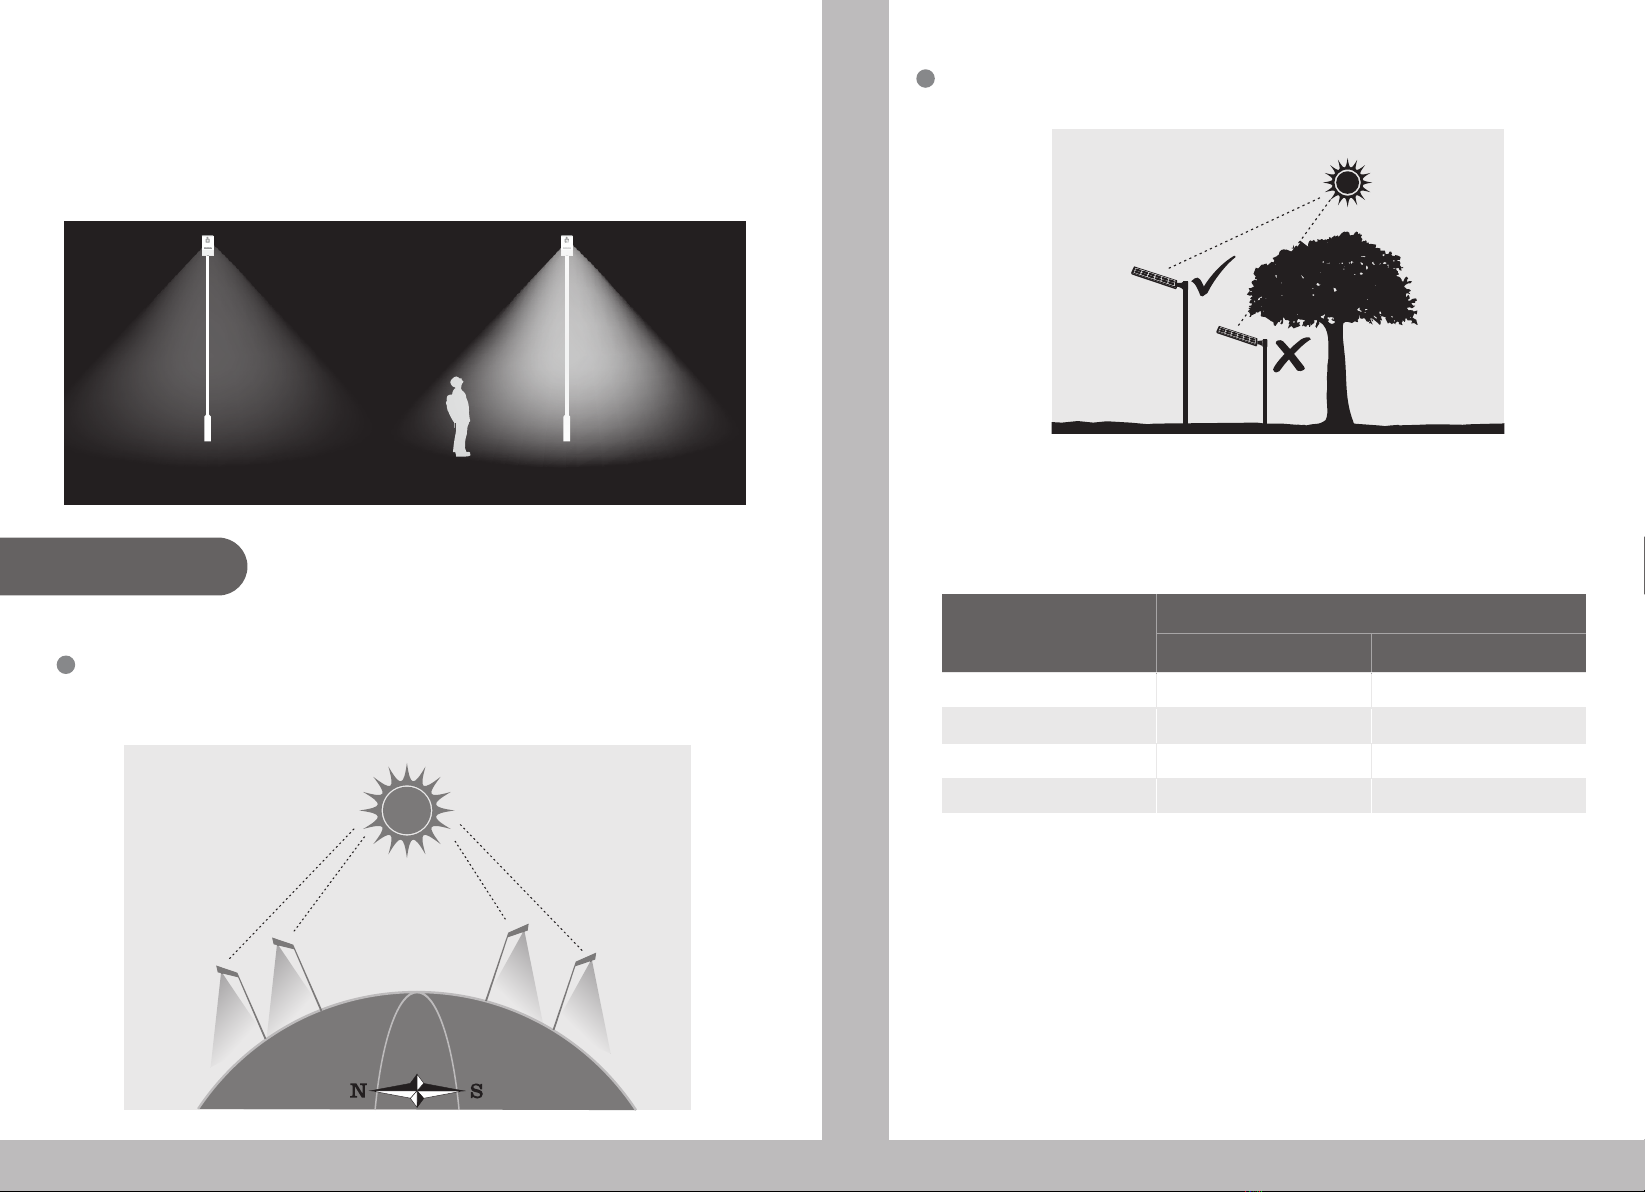
Parts & Functions:
Product Manual:
1
1
2
3
4
5
6
7
8
910 11
21
To ensure effective solar light absorbance, clean
the surface of the panels regularly with water
and a soft cloth. Do not use chemical solutions
or abrasives.
This Solar Street Light operates on a low voltage
DC current. Unless customized otherwise, do
not connect components or ports to an AC
current or any higher rated DC voltage.
The light source contained in this luminaire shall
only be replaced by the manufacturer or his
service agent or a similar qualified person.
Using the third party components to replace the
original ones without authorization is forbidden.
The product will lose warranty if the users
disassemble the product by himself.
To order replacement parts or to have them
fitted, please contact your local distributor.