LAMAX X3.1 Atlas User manual

- 1 -
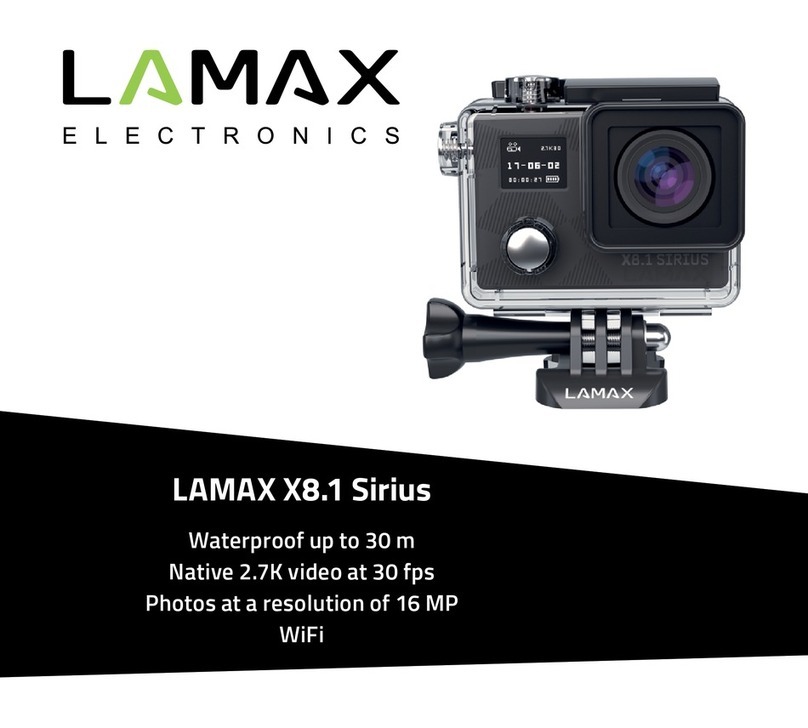
LAMAX X3.1 Atlas
Waterproof up to 30 m
2.7K video at 30 fps
Photos at a resolution of 16 Mpix
WiFi

- 2 -
Safety precautions
1. Do not drop or subject the camera to severe impact and avoid anything which may it
cause physical damage.
2. Do not place the camera near objects that generate magnetic fields, such as magnets or
electric motors. Do not place the camera too close to objects that emit powerful radio
waves, such as antennas. Strong magnetics fields or radio waves may cause damage to
the camera or corrupt the captured video and audio recordings.
3. Do not expose the camera to high temperatures or direct sunlight.
4. Use only high-quality microSDHC and SDXC cards with a speed index of at least Class 10
UHS-I U1. For shooting at a resolution of 4K at 30 fps (fps = frames per second) and 720p
at 240 fps we recommend using UHS-I U3 cards. Slower cards may limit the functionality
of the camera and it may not be able to record in all modes and at all resolutions.
5. Do not place the microSD card near magnetic fields or in places where static electricity
may occur. This will prevent any accidental loss of data.
6. If the device overheats, produces smoke or a suspicious odour whilst charging, imme-
diately unplug the device and stop charging.
7. When charging, keep the camera out of reach of children. Power cord may cause electric
shock or strangulation. Do not charge unattended.
Introduction
Thank you for purchasing the LAMAX X3.1 Atlas action camera. You have acquired a durable
assistant for any situation, that fears no challenge and will reward you with high-quality
recordings. A wide range of accessories are included in the basic package so you can fully
utilize the camera right out of the box. We wish you many wonderful experiences, forever
preserved thanks to your LAMAX action camera.

- 3 -
LAMAX X3.1 Atlas action camera features
–Integrated 2” LCD display, allowing you to choose the best angle for your shot and play
back your photos and videos.
–Waterproof casing means you can dive to a depth of up to 30 m, making it ideal for scuba
diving and water sports.
–High-quality video at a resolution of 2.7K at 30 fps, Full HD at 60 fps amd HD at 120 fps.
–Wide-angle 160° lens.
–16 MP photos.
–Wide selection of resolutions for video and photo.
–Slow motion video
–Time-lapse video and photos modes.
–Wide range of accessories included, making it easy to shoot anytime and anywhere.
–Support for microSDHC and microSDXC cards up to 64 GB (U3 cards recommended).
–USB and HDMI connectivity.
–Integrated WiFi for connecting to wireless devices.
–Intuitive and simple connection to PC or smart mobile devices.

- 4 -
Buttons and camera functions
1. “On/Off” button – this button is located next to
the lens and serves as the “Change mode” button.
2. “Shutter” button – this button is located on the top
of the camera and serves as the “Confirm” button
in the main menu.
3. “Up” button – this button also turns the WiFi
function on and off.
4. “Down” button
1
2
3
4
Package contents
–Action camera LAMAX X3.1 Atlas
–Accessories incl. waterproof case
–USB cable
–User manual
–Safety instruction
Using the LAMAX X3.1 Atlas action camera
1. INSERTING THE MICROSD CARD
Only insert or remove a microSDHC or SDXC card (type „U3“ recommended) from the
microSD card slot when the camera is switched off and not connected to the computer.
Note: Use only branded microSDHC or SDXC cards. Generic unbranded cards are not gua-
ranteed to function correctly for data storage.
2. INSTALLING THE BATTERY
a) Press down on the battery cover lock and remove the battery cover.
b) Insert the battery (connector end first) into the compartment so that the connectors are
on the correct side.

- 5 -
c) Reattach the battery cover and secure it with the lock.
3. CHARGING
a) Camera can be charged by connecting to a PC or using the AC adapter.
b) In a vehicle, the camera can be charged sing the cigarette lighter adapter.
c) Whilst charging, you can still shoot video or take photos (except when charging via PC).
d) Camera may also be charged when turned off.
Note: Never charge unattended. If device overheats, produces smoke or suspicious odour
when charging, immediately unplug and stop charging.
4. TURNING THE CAMERA ON AND OFF
a) To turn camera on, press and hold the “On/Off” button for 2 seconds.
b) To turn camera off, press and hold the “On/Off” button for 2 seconds.
5. SWITCHING MODES AND NAVIGATING THE MENU
Tapping the “On/Off” button toggles between the modes: video / photo / slow motion /
gallery / settings.
6. RECORDING VIDEO
Switch the camera to “video” mode by pressing the “On/Off” button. A camera icon will ap-
pear on the upper left corner of the display. To start recording, press the “Shutter” button.
A recording animation appears on the lower left corner of the display and begins to count-
down the recording time. To stop recording press the “Shutter” button again.
7. PHOTO MODE
Switch the camera to “photo” mode by pressing the “On/Off” button. A camera icon will
appear on the upper left corner of the display. To take a photo press the “Shutter” button.
There will be a shutter sound and the screen will flash.

- 6 -
Settings on the LAMAX X3.1 Atlas action camera
Navigate to the settings menu by tapping the “On/Off” button multiple times. Open set-
tings by pressing the “Shutter” button. Navigate through the options using the “Up” and
“Down” buttons. To confirm your selection press the “Shutter” button, or to go back press
the “On/Off” button.
The menu is divided into 5 sections. The first section is for setting the parameters and
modes of the video. The second section is for setting of parameters and modes of the pho-
tos. The third and fourth sections are for image settings and other settings. The fifth section
is for exiting the menu.
1. VIDEO SETTINGS
–Video resolution – changes the video resolution. Video from 4K to HD resolution. The 4K
resolution is interpolated and best suited for recording time-lapsed videos.
–Slow motion – when enabled, the camera is recording the video slower than in real time
according to the settings.
–Video time-lapse – when enabled, the camera captures images at preset intervals, al-
lowing you to create attractive time-lapse shots.
–Loop recording – when activated, the camera records videos of a predetermined length.
When the memory card is full the most recent recordings are recorded over the oldest
ones.
–Record audio – allows you to shoot video with or without sound.
2. PHOTO SETTINGS
–Photo resolution – changes the photo resolution from 16 Mpix to 2 Mpix.
–Self timer – when activated, it creates a time delay between pressing the “Shutter” and
the picture being taken in photo mode.

- 7 -
–Photo time-lapse – when enabled, the camera captures images at preset intervals.
–Photo burst – when activated, the camera captures the set number of photos in rapid
succession with just a single press of the “Shutter” button.
3. IMAGE SETTINGS
–Image rotation – allows you to rotate the camera image.
–WiFi – enables / disables WiFi. When enabled, the WiFI network icon is displayed in the
upper right corner.
–LED indication light – enables / disables LED indication light.
–Time stamp – this option enables the date and time to be displayed on the final video
or photo.
–Exposure – adjusts the exposure as needed. The exposure is set from -3 to 3.
–White balance – selects the white balance mode when taking photos or recording videos
depending on the ambient lighting.
–Frequency – allows you to select the frequency in accordance with the frequency of the
grid (on the European continent the network frequency is 50 Hz, in the Americas and
parts of Asia it is 60 Hz).
–LCD off – when activated the screen automatically turns off after a predefined period of
inactivity or whilst recording videos.
–Auto power off – when activated, camera automatically turns off after a selected period
of inactivity.
4. OTHER SETTINGS
–Date / Time – sets the date and time of the camera.
–Language – changes the language of the camera menu.
–Format – formats the inserted card.
Note: Formatting will erase all data on the inserted card.

- 8 -
–Factory settings – restores the camera to factory settings.
–Firmware – displays actual version of the firmware installed on the camera.

- 9 -
LAMAX X3.1 Atlas action camera parameters
LCD 2 inch
Waterproof Up to 30 m
Lens HD lens wide-angle lens at 160°
Menu languages English, German, Czech, Slovak, Polish, Hungarian,
Lithuanian
Video resolution options 4K 30 fps, 2,7K 30 fps, 1080p 60 fps, 1080p 30 fps,
720p 120 fps, 720p 60 fps, 720p 30 fps
Video format MP4
Photo format JPG
Video codec H.264
Photo resolution options 16 Mpix, 12 Mpix, 8 Mpix
Photo mode Individual / burst / timer and photo time-lapse
Mains frequency 50 Hz / 60 Hz
USB devices Micro USB 2.0
Compatibility storage Micro SDHC/SDXC up to 64 GB
Connectivity WiFi, micro USB 2.0, HDMI
Battery capacity 1050 mAh
Battery life Full HD video at 1080p / about 90 minutes
Time to fully charge cca. 2 hours
Camera dimensions 59 x 41 x 29.8 mm (incl. lens)
Weight 58 g

- 10 -
WiFi application and connecting the camera and mobile device
The LAMAX X3.1 Atlas camera can be operated using application , which can be downloaded
free of charge for smart devices running Android and iOS (from the app stores Google Play
and the Appstore):
iOS Android
http://lamax-electronics.com/en/
x3-1-app-app-store
http://lamax-electronics.com/en/
x3-1-app-google-play
Note: App may not be available at the time of launch. We apologise for any inconve-
nience.
HOW TO CONNECT
1. Turn on the camera’s WiFi in the menu or by pressing “Up” button when the camera is in
the video or photo mode. This is indicated by an icon on the display.
2. Turn on the WiFi on your smartphone or tablet and you should see the network X3.1 Atlas
(unless you have changed the network name in the camera WiFi settings). To connect to
the network enter the default password “1234567890” without spaces (unless you have
changed the password in the settings).
3. When successfully connected, launch the app and you can now control your camera re-
motely via your smart device.

- 11 -
Remote control
The camera can be controlled remotely using the remote control which comes as part of
the basic package.
Safety when working with the device
1. Read the enclosed safety instructions.
2. Printing errors reserved.

- 12 -
Full English manual can be downloaded from here:
Die Bedienungsanleitung in Deutsch können Sie von hier runterladen:
Český manuál ke stažení zde:
Slovenský manuál na stiahnutie tu:
Instrukcja obsługi w języku polskim do pobrania tutaj:
Használati útmutató:
Naudojimo instrukcija:
http://lamax-electronics.com/x3-1/manuals

- 1 -
LAMAX X3.1 Atlas
Wasserdicht bis 30 m
2,7K native Videoaufnahmebei 30 fps
Fotos mit einer Auflösung von 16 Mpix
WLAN

- 2 -
Sicherheitsmaßnahmen
1. Setzen Sie die Kamera keinen Schlägen aus, lassen Sie sie nicht auf den Boden fallen und
schützen Sie sie vor weiteren mechanischen Beschädigungen.
2. Geben Sie die Kamera nicht in die Nähe von Objekten, die ein starkes Magnetfeld erzeu-
gen, wie z.B. Magneten oder Elektromotoren. Geben Sie die Kamera auch nicht in die
Nähe von Objekten, die starke Radiowellen aussenden, wie z.B. Antennen. Starke Mag-
netfelder oder Radiowellen können eine Beschädigung der Kamera oder eine Beschädi-
gung der gemachten Bild- und Tonaufnahmen verursachen.
3. Setzen Sie die Kamera keiner großen Hitze oder direkter Sonnenbestrahlung aus.
4. Verwenden Sie nur hochqualitative Micro SDHC und SDXC-Karten mit einem Geschwin-
digkeitsindex von mindestens Class 10 UHS-I U1. Mit langsameren Karten besteht die
Gefahr, dass die Funktion der Kamera beeinträchtigt wird und es nicht möglich ist vollw-
ertige Aufnahmen in allen Modi und Auflösungen zu machen.
5. Platzieren Sie die Micro SD-Karten nicht in der Nähe von Magnetfeldern oder Plätzen
mit Entstehung starker statischer Elektrik. Sie verhindern dadurch einen Verlust gespei-
cherter Daten.
6. Sollte es während des Ladenws zu einer Überhitzung, Rauchentwicklung oder verdächti-
gen Gerüchen kommen, trennen Sie das Gerät sofort und unterbrechen Sie den Lade-
vorgang.
7. Bewahren Sie die Kamera während des Ladevorgangs außer Reichweite von Kindern
auf. Das Ladekabel kann Verletzungen durch elektrischen Strom oder ein Ersticken des
Kindes verursachen. Laden Sie nur unter ständiger Aufsicht.
8. Bewahren Sie die Kamera an einem kühlen, trockenen und staubfreien Ort auf.
Einleitung
Wir danken Ihnen, dass Sie eine Action-Kamera LAMAX X3.1 Atlas gekauft haben. Sie haben
damit einen widerstandsfähigen Helfer in jeder Situation gewonnen, der keine Angst vor
Herausforderungen hat und Sie mit qualitativ hochwertigen Aufnahmen belohnt. Das Ba-

- 3 -
sispaket beinhaltet gleichzeitig ausreichendes Zubehör, damit die Kamera gleich nach dem
Auspacken voll eingesetzt werden kann. Wir wünschen Ihnen viele schöne Erlebnisse, die
dank der Action-Kamera LAMAX festgehalten werden.
Die Action-Kamera LAMAX X3.1 Atlas hat folgende Eigenschaften
–Sie beinhaltet ein integriertes 2“ LCD-Display, durch das Sie immer den besten Winkel für
die Aufnahmen wählen und Sie die gemachten Aufnahmen kontrollieren können.
–Sie ist mit einer wasserdichten Hülle ausgestattet, die Tauchgänge bis zu 30 m Tiefe er-
möglichen.
–Sie nimmt qualitativ hochwertige Videos in den Modi 2,7K bis 30 fps, Full HD bis 60 fps
und HD bis 120 fps auf.
–Eine Linse mit Weitwinkel bis zu 160°.
–Macht Fotos mit einer Auflösung bis zu 16 Mpix.
–Die Wahlmöglichkeit, zwischen Videos und Fotos zu wechseln.
–Die Möglichkeit, Aufnahmen zu machen in den Modi Foto Zeitraffer und auch Video
Zeitraffer.
–Die Auswahl, in welchem Modus fotografiert werden soll.
–Die Möglichkeit, die Exposition einzustellen.
–Eine Vielzahl an mitgeliefertem Zubehör, dank dessen Sie Videos aufnehmen können,
Wann immer und Wo immer Sie wollen.
–Unterstützung von Micro SDHC und Micro SDXC-Karten bis zu einer Kapazität von bis zu
64 GB. (empfohlene Karten U3)
–Aufnahme in Zeitlupe
–USB und HDMI Anschlüsse.
–Integriertes WLAN zum Verbinden mit drahtlosen Geräten.
–Die Verbindungsmöglichkeit mit der standardmäßig mitgelieferten Fernbedienung, mit
dem die Kamera ausgestattet ist.
–Intuitive Bedienung, einfaches Verbinden mit dem PC oder intelligenten Mobilgeräten.

- 4 -
Tasten und Kamerafunktionen
1. Taste „An/Aus“ – diese Taste befindet sich neben der
Linse und dient gleichzeitig zur „Modusänderung“.
2. Taste „Auslöser“ – diese Taste befindet sich oben
auf der Kamera und dient als Bestätigungstaste im
Hauptmenü.
3. Taste „Hinauf“ – diese Taste dient gleichzeitig zum
An- und Ausschalten des Wi-Fi.
4. Taste „Hinunter“
1
2
3
4
Packungsinhalt
–Action-Kamera LAMAX X3.1 Atlas
–Zubehör inklusive Wasserdichte Hülle
–USB-Kabel
–Bedienungsanleitung
–Sicherheitshinweise
Verwendung der Action-Kamera LAMAX X3.1 Atlas
1. EINLEGEN DER MICRO SDHC-KARTEN
Micro SDHC bzw. SDXC (empfohlene Karten U3) Karte können Sie am Slot für die Micro
SD-Karte einlegen und herausnehmen, wenn die Kamera ausgeschalten und nicht mit dem
PC verbunden ist.
Anmerkung: Verwenden Sie nur Marken-Micro SDHC bzw. SDXC-Karten. Karten, die nicht
von Markenherstellern sind, garantieren kein richtiges Verhalten des Datenspeichers.
2. INSTALLATION DES AKKUS
a) Drücken Sie die Batterieverriegelung und öffnen Sie das Batteriefach.

- 5 -
b) Legen Sie den Akku mit den Steckern nach vorne so in die Öffnung, damit die Polari-
sierungen auf der richtigen Seite sind.
c) Batteriedeckel anlegen und verriegeln.
3. AKKU LADEN
a) Die Kamera können Sie sowohl über PC-Verbindung als auch mithilfe eines Netzadap-
ters laden.
b) Im Auto können Sie die Kamera mithilfe eines Adapters für den Zigarettenanzünder
laden.
c) Während des Ladevorganges können Sie Videoaufnahmen machen oder fotografieren
(geht nicht im Falle eines Ladens durch einen PC).
d) Die Kamera können Sie auch im ausgeschalteten Zustand laden.
Hinweis: Laden Sie unter ständiger Überwachung. Sollte es während des Ladens zu einer
Überhitzung des Gerätes, Rauchentwicklung oder verdächtigen Gerüchen kommen, tren-
nen Sie das Gerät sofort und unterbrechen Sie das Laden.
4. AN- UND AUSSCHALTEN DER KAMERA
a) Die Kamera schalten Sie durch Drücken und Halten der Taste „An/Aus“ für 2 Sekunden an.
b) Die Kamera schalten Sie durch Drücken und Halten der Taste „An/Aus“ für 2 Sekunden
aus.
5. UMSCHALTEN DER MODI UND BEWEGUNG IM MENÜ
Durch schrittweises kurzes Drücken der Taste „AN/AUS“ können Sie zwischen den Modi-
Videoaufnahme / Fotoapparat / Aufnahme in Zeitlupe / Galerie / Einstellung umschalten.
6. VIDEOAUFNAHMEN MACHEN
Schalten Sie die Kamera in den Modus „Videoaufnahme“ mit der Taste „An/Aus“ um. Dass
Sie im Modus Videoaufnahme sind, erkennen Sie an dem Kamerasymbol in der linken
oberen Ecke. Zum Beginnen der Aufnahme drücken Sie die Taste „Auslöser”. In der linken
unteren Ecke erscheint eine Animation der Aufnahme und der Countdown über die Länge

- 6 -
der Aufnahme. Zum Beenden der Aufnahme drücken Sie wieder die Taste „Auslöser”. Ein-
zelne Aufzeichnungen lassen sich während des Aufnehmens durch Drücken der Taste „An/
Aus“ sperren. Bei aktivierter Funktion „Endlosschleife“ kommt es dann niemals zu ihrem
Löschen.
7. MODUS FOTOAPPARAT
Schalten Sie die Kamera in den Modus „Fotoapparat“ mit der Taste „An/Aus“ um. Dass Sie
im Modus Fotoapparat sind, erkennen Sie an dem Fotoapparat Symbol in der linken oberen
Ecke. Zum Fotografieren drücken Sie die Taste „Auslöser“ und es wird mit dem Ton eines
Verschlusses begleitet und der Bildschirm blinkt kurz.
Einstellungsmöglichkeiten der Action-Kamera LAMAX X3.1 Atlas
Zu den Einstellungen kommt man durch mehrmaliges Drückender Taste „An/Aus“. Die
Wahl der einzelnen Einstellungen öffnet man durch Drücken der Taste „Auslöser“. Zwischen
den einzelnen Auswahlen bewegt man sich mithilfe der Taste „Hinauf“ und „Hinunter“. Zur
Auswahlbestätigung dient die Taste „Auslöser“, zum Verlassen der Auswahl dann die Taste
„An/Aus.“.
Dieses Menü ist in 5 Sektionen unterteilt. Die erste Sektion dient zur Einstellung der Pa-
rameter und Modi der Videos. Die zweite Sektion ist zur Einstellung der Parameter und
Modi der Fotos. Die dritte und vierte Sektion ist für Bildeinstellungen und andere Einstel-
lungen. Die fünfte Sektion ist zum Verlassen des Menüs.
1. VIDEOEINSTELLUNGEN
–Videoauflösung – ändert die Auflösung der Videoaufnahmen. Die 4K (interpoliert) Au-
flösung eignet sich am besten für Zeitrafferaufnahmen.
–Aufnahme in Zeitlupe – Wenn aktiviert, nimmt die Kamera je nach Einstellung lang-
samer auf als in Echtzeit.

- 7 -
–Zeitraffer Videoaufnahme – bei Aktivierung dieser Auswahl macht die Kamera Bilder im
eingestellten Zeitintervall und ermöglicht attraktive Zeitrafferaufnahmen.
–Loop Aufnahme – mit der Aktivierung dieser Auswahl wird die Aufnahme in eingestellte
Zeitabschnitte geteilt. Nach vollständigem Füllen der Karten kommt es nach und nach zu
einem Überspielen der ältesten Aufnahmeabschnitte durch die Neuesten.
–Tonaufnahme – erlaubt Ihnen Videos mit oder ohne Ton aufzunehmen.
2. FOTOEINSTELLUNGEN
–Fotoauflösung – ändert die Auflösung der gemachten Fotos.
–Timer – bei Aktivierung wird die Zeit zwischen dem Drücken der Taste „Timer“ und dem
Fotografieren im Fotomodus verlängert.
–Zeitraffer Fotoaufnahme – wenn aktiviert, nimmt die Kamera in vordefinierten Interval-
len Fotos auf.
–Serienfoto – bei Aktivierung macht die Kamera nach einem Drücken der Taste „Auslöser“
kurz hintereinander die gewünschte Anzahl an Fotos.
3. BILDEINSTELLUNGEN
–Bildrotation – ermöglicht ein um 180Grad gedrehtes Bild der Kamera.
–WiFi – Schaltet WiFi ein / aus. Das Symbol WLAN Netz in der rechten oberen Ecke bei
eingeschalteter Kamera erscheint.
–LED Meldeleuchte – aktiviert / deaktiviert das LED Anzeigelicht.
–Zeit Wasserzeichen – diese Möglichkeit schaltet die Anzeige von Datum bzw. Zeit in dem
daraus resultierenden Video ein.
–Belichtung – von diesen Einstellungen hängt ab, wie die Kamera die Belichtung ausrech-
net. Die Belichtungszeit kann von -3 bis 3 eingestellt werden.
–Weißabgleich – Man wählt diesen Modus zum Ausgleichen der weißen Farbe beim Fo-
tografieren / Video aufnehmen abhängig vom Umgebungslicht.

- 8 -
–Netzwerkfrequenz – ermöglicht die Frequenz zu wählen im Einklang mit dem Frequen-
zraster (auf dem europäischen
–Auto-Bildschirmschoner – nach Aktivierung von automatischen Display aus schaltet
das Display nach gewählter Zeit der inaktiven Dauer bzw. gemachter Videos aus.
–Automatische Abschaltung – nach Aktivierung schaltet die Kamera nach gewählter Zeit
der inaktiven Dauer automatisch aus.
4. ANDERE EINSTELLUNGEN
–Datum/Uhrzeit – Einstellung des Datums und der Zeit auf der Kamera.
–Sprache – man kann die Sprache des Kameramenüs einstellen.
–Format – ermöglicht ein Formatieren der eingelegten Karte.
Hinweis: Beim Formatieren werden alle auf der Karte gespeicherten Daten gelöscht.
–Werkseinstellungen wiederherstellen – erneuert die Grundeinstellungen der Kamera.
–Firmware-Informationen – zeigt die aktuelle Version der Firmware auf der Kamera an.
Table of contents
Languages:
Other LAMAX Action Camera manuals

LAMAX
LAMAX X7 Mira User manual

LAMAX
LAMAX ACTION X6 User manual

LAMAX
LAMAX W7.1 User manual

LAMAX
LAMAX W7.1 User manual

LAMAX
LAMAX X8.1 Sirius User manual

LAMAX
LAMAX W9 User manual

LAMAX
LAMAX X9.2 User manual

LAMAX
LAMAX ACTION X8 Electra User manual

LAMAX
LAMAX ACTION X2 User manual

LAMAX
LAMAX X10 Taurus User manual