Lampa 70178 User manual

Art. 70178
MANUALE
Leggere attentamente il presente manuale prima di usare il caricabatteria
e conservare le informazioni per futuro riferimento.
CARICA BATTERIA CON MICROPROCESSORE
AMPEROMATIC-TRAINER


E
F
D
I
EN
4
6
8
10
12
Compatibilità - Compatibility - Compatibilité - Kompatibilität - Compatibilidad
Piombo STD-lead STD-plomb STD -blei STD-plomo STD
Piombo senza manutenzione - Lead maintenance free
Plomb sans entretien - Blei wartungsfrei - Plomo sin mantenimiento
Lithium LiFePo4
GEL
Start & Stop AGM
Start & Stop EFB

4
I
Per minimizzare il rischio per le persone e la possibilità di scosse elettriche e di incendio, seguire le indicazioni di
sicurezza sottostanti.
PREPARAZIONE DELLA BATTERIA
A) Batterie con tappi sulle celle (a manutenzione):
- Rimuovere la batteria dall’auto per evitare possibili danni all’ alternatore. (Per non danneggiare la carrozzeria in
caso di eventuali fuoriuscite del liquido della batteria, si consiglia di smontarla completamente).
- Rimuovere i tappi dagli elementi della batteria e reinstallarli solo al termine del processo di carica in modo da
consentire la dissipazione dei gas che possono formarsi durante tale processo (la fuoriuscita di un po’ di acido
durante il processo di carica è inevitabile).
- Controllare se il livello del liquido in ogni elemento della batteria è sopra la tacca di riempimento raccomandata.
In caso contrario l’elemento interessato deve essere riempito con acqua ionizzata o distillata. - Non usare mai
acqua di rubinetto! -
B) Batterie senza tappi sulle celle (senza manutenzione): nel caso di batterie senza tappi sulle celle rispettare le
istruzioni di caricamento del costruttore.
CARICA
1. Collegare il morsetto positivo del carica batterie (rosso) al polo positivo della batteria (indicato da “P“ o“+”).
2. Collegare il morsetto negativo del carica batterie (nero) al polo negativo della batteria (indicato da“N” o “-“).
3. Inserire la spina di alimentazione nella presa domestica (230 Volt). Il caricabatteria distinguerà automaticamen-
te se è stata collegata una batteria da 6 V oppure da 12 V. Questa procedura richiede circa 7 secondi.
4. Dopo che il caricabatterie ha individuato la batteria collegata, passerà automaticamente alla modalità di carica
(Led“CARICA-CHARGING”).
QUANDO LA BATTERIA È COMPLETAMENTE CARICA
La batteria è completamente carica quando si accende il Led “COMPLETA-FULL”.
Il caricabatterie ora passa alla modalità operativa di mantenimento.
Il microprocessore mantiene la batteria sempre pronta all’uso, grazie a un sistema di carica ad impulsi. In questo
modo il caricabatterie può rimanere collegato per lunghi periodi alla batteria senza danneggiarla.
Se il processo di ricarica o di mantenimento fosse interrotto per mancanza di corrente sulla rete elettrica, una volta
ripristinata la corrente, il processo sarà riattivato automaticamente (diagnosi, carica, completa).
ERRORE
Collegamento con polarità invertita – Se i morsetti sono collegati in modo errato ai poli della batteria, sul
caricabatteria rimarrà acceso il Led “ERRORE-FAULT”. In questo caso, è suciente togliere la spina dalla corrente
di alimentazione e scollegare i morsetti, ricollegarli in modo corretto e inserire di nuovo la spina della corrente
alternata all’alimentazione 230 V.
Errore batteria – Se dopo pochi secondi dall’attivazione, il caricabatterie non commuta in nessuna modalità
operativa di ricarica, la batteria è in una delle seguenti condizioni di guasto:
a) Tensione batteria bassa: < 3 V (batteria 6 V) ; < 8 V (batteria 12 V)
b) Tensione batteria alta: > 15 V (batteria 12 V) ; > 7.5 V (batteria 6 V)
c) Cortocircuito batteria o cortocircuito elemento batteria
Nei casi a, be cla batteria può essere difettosa e consigliamo di consultare il più vicino centro assistenza.
CARICABATTERIA INTELLIGENTE
- In plastica ABS, antiurto ed impermeabile IP65
- Con microprocessore.
- Omologazione RoHS-CE
- Carica a 6 V - 0,55A o12 V - 1 A
CARICABATTERIA AMPEROMATIC-TRAINER

5
- Curva caratteristica a 5 STEPS
- Alloggiamento a tenuta d’acqua, classe di protezione IP65
- Dimensioni: 16x5x3,8 cm
Caratteristiche:
- Protezione completa contro le scintille
- Protezione dai cortocircuiti
- Compensazione della tensione
- Compensazione della temperatura
- Protezione dal surriscaldamento
- Protezione dall’inversione di polarità
Indicatori:
- Carica: quando la batteria sta eettuando la ricarica della batteria
- Completa: quando la batteria è completamente carica o è in modalità mantenimento
- Errore: quando il sistema rileva problemi nel ricaricare la batteria
ISTRUZIONI DI SICUREZZA IMPORTANTI
Gas
Quando la batteria normale/al piombo è sotto carica, è possibile notare bolle nel uido causate dal rilascio di gas.
Siccome il gas è inammabile non si dovrebbero usare luci dirette attorno alla batteria e l’area dovrebbe essere ben
ventilata. A causa del rischio di gas esplosivi, collegare e scollegare i cavi della batteria solo quando l’alimentazione
è disinserita.
Tipi di batterie: questo caricabatterie è adatto solo per le batterie specicate e non deve essere usato per ricaricare
batterie NI-CAD o di altro tipo.
Note:
Quando non è utilizzato, il caricabatterie deve essere conservato in un ambiente asciutto per evitare l’umidità.
Pericolo
Evitare il contatto tra l’elettrolito e la pelle o gli abiti. È acido e può causare ustioni. In questo caso sciacquare imme-
diatamente l’area colpita con acqua.
Non caricare mai una batteria congelata. Se il uido della batteria (elettrolito) congela, portare la batteria in un’area
calda per scongelarla prima di iniziare la carica. Non collocare mai la batteria sul caricabatterie o viceversa. Non toc-
care i morsetti della batteria quando il caricabatterie è in funzione.
Non azionare mai il caricabatterie se ha subìto un duro colpo, se è caduto o se è danneggiato in altro modo. Portarlo
da un professionista qualicato per l’ispezione e/o la riparazione.
Posizionare adeguatamente il cavo di alimentazione del caricabatterie per non pestarlo, inciampare o danneggiarlo.
Non togliere mai la spina del caricabatterie tirandola dal cavo per evitare danneggiamenti e pericoli.

6
Please read this manual before using the battery and keep the information for future reference.
In order to reduce the risk of injury, electric shocks or re, please follow the safety guidelines below.
BATTERY PREPARATION:
A) Battery with cell caps (maintenance):
- Remove the battery from the car in order to avoid the risk of damaging the alternator. (We suggest you to com-
pletely dismantle the battery in order to avoid the car body to get damaged by the liquid that may spill over the
battery).
- Remove the cell caps from the battery and re-install them only after the charging process. In this way the gases
which may eventually form during the charge can dissipate. (it is unavoidable that some acids will spill over du-
ring the charging process).
- Check that the level of the liquid contained in every element of the battery is above the recommended lling
mark. Otherwise, the cell concerned must be lled with ionized or distilled water. - Never use tap water! -
B) Battery without cell caps (without maintenance): for all the batteries without cell caps we recommend you to
follow the battery instructions manual.
CHARGING MODE
1. Connect the positive battery charger lead (red) to the positive pole of the battery.
(Indicated by“P“ or “+”).
2. Connect the negative battery charger lead (black) to the negative pole of the battery
(Indicated by“N” or “-“).
3. Insert the power plug in the domestic socket (230 V). The battery charger will automatically identify if it is a
6V or 12V battery. This process will require about 7 seconds.
4. After battery identication, it will automatically switch into the charging mode (“CHARGING”Led).
WHEN THE BATTERY IS COMPLETELY CHARGED
When the battery is completely charged, the“FULL”Led will light.
The battery charger will switch into the operating oat mode.
The microprocessor will keep the battery ready to be used thanks to the impulse charging system. This way the
battery will not get damaged if it is connected to the battery charger for long times.
Happen that the charging or operating oat modes are suddenly interrupted due to power cut, the process will
automatically restart as soon as the power will be reactivated (diagnosis, charge, full).
ERROR
Reversed polarity connection – If the battery clamps are connected improperly to the battery terminals, the
Led FAULT will light. In this case the socket and the clamps should be unplugged, the clamps should be properly
re-connected and the plug should be nally inserted in the 230V domestic socket.
Battery error – Happen that after few seconds from battery turning on, the battery charger does not switch into
any of the charging processes, one of the following battery damage conditions occured:
a) Low battery voltage: < 3 V (6 V battery); < 8 V (12 V battery)
b) High battery voltage: > 15 V (12 V battery); > 7.5 V (6 V battery)
c) Battery short circuit or battery cell short circuit
Regarding each of the above mentioned points a, band c, it may be possible that the battery is defective therefo-
re we suggest you to contact your nearest service center.
SMART BATTERY CHARGER
- In ABS material, shock and waterproof
- With microprocessor
- RoHS-CE approval
EN BATTERY TRAINER AND CHARGER

7
- Charges with 6V – 0,55 A or 12V – 1 A
- 5 steps
- Watertight housing, Protection Rating IP65
- Dimensions: 16x5x3,8cm
Features:
- Full protection against sparks
- Short circuit protection
- Voltage compensation
- Temperature compensation
- Overheating protection
- Polarity reversal protection
Indicators:
-“Charging”Led: the battery is in the charging mode.
-“Full”Led: the battery is fully charged or in maitanance operation mode
-“Fault”Led: the Amperomatic system detected a problem during battery charging
IMPORTANT SAFETY INSTRUCTIONS
Gas
When the normal/lead acid battery is being charged, it is possible to see uid bubbles caused by gas release. Since
the released gas is ammable, do not use naked lights around the battery and the area should be well ventilated.
Due to the risk of explosive gases, connect and disconnect the battery cables by yourself when the power is
turned o.
Types of Batteries: this battery charger is suitable for specic batteries and it must not be used to charge NI-CAD
batteries or other types of batteries.
Notes:
Store the battery charger in a dry place in order to avoid moisture when not in use.
Danger
Avoid the contact between the electrolyte and your skin or clothes. It is acid, therefore it may cause burns. If this
occurs, wash immediately the area with water.
Never charge a frozen battery. You should rst defrost the electrolyte in a warm area and then you can proceed
with the charging process. Do not place the battery charger on the battery or viceversa. Do not touch the battery
clamps while the battery charger is working.
Never switch on the battery charger if the battery has ran an accident, has fallen or got damaged. You should rst
take it to the service assistance in order to get inspected and/or repaired.
Place the charging cable properly in order not to step on, trip over or damage it.
Do not unplug the plug from the socket by pulling the cable so as to avoid damages or dangers.

8
An de minimiser le risque pour les personnes et la possibilité de choc électriques et d‘incendie, nous vous prions
de suivre les instructions de sécurité suivantes.
PRÉPARATION DE LA BATTERIE
A) Batteries avec bouchons sur les cellules (entretien):
- Retirez la batterie de la voiture pour éviter tout dommage à l’alternateur. (Pour ne pas endommager la carrosse-
rie en raison de fuites de liquide de la batterie, il est recommandé de la démonter complètement).
- Retirez les bouchons des éléments de la batterie et les réinstaller seulement à la n de l’opération de charge pour
permettre la dissipation des gaz qui peuvent se former pendant la charge (la fuite d’un peu d’acide pendant la
charge est inévitable).
- Vérier si le niveau de uide dans chaque cellule de la batterie est supérieur à l’entaille de remplissage recom-
mandé. Sinon, l’élément concerné doit être rempli avec de l’eau ionisée ou distillée. - Ne jamais utiliser de l’eau
de robinet! -
B) Batterie sans bouchons sur les cellules (sans entretien): pour les batteries sans bouchons sur les cellules il est
recommandé de suivre les instructions de chargement du fabricant de la batterie.
CHARGE
1. Connectez la borne positive du chargeur de batterie (rouge) à la borne positive de la batterie (indiqué par “P”
ou“+”).
2. Connectez la borne négative du chargeur de batterie (noir) à la borne négative de la batterie (indiqué par “N”
ou“-“).
3. Insérez la prise d’alimentation dans la prise domestique (230 V). Le chargeur de batterie distingue automati-
quement si la batterie est de 6V ou de 12V. Cette procédure dure environ 7 secondes.
4. Après que le chargeur a distingué le type de la batterie, il passe automatiquement en modalité chargement
(“CHARGING “Led).
ERREUR
Connexion avec polarité inversée - Si les bornes sont mal raccordés à la batterie, sur le chargeur de batterie le
Led “FAULT ” va s’allumer. Dans ce cas, il sut de déconnecter la prise de la prise domestique et de désactiver les
bornes de l’alimentation, reconnectez-les correctement et rebranchez la prise de courant de 230V.
Erreur batterie – Si, après quelques secondes de l’activation, le chargeur ne change pas dans n’importe quel
mode de chargement, le chargeur de la batterie est dans l’une des conditions de défaut suivantes:
a) Basse tension de batterie < 3 V (batterie 6 V); < 8 V (batterie 12 V)
b) Haute tension de batterie > 15 V (batterie de 12 V); > 7.5 V (batterie 6 V)
c) De court-circuit de la batterie ou de court-circuit de l’élément de batterie
Dans tous les cas a, bet cla batterie peut être défectueuse et nous vous conseillons de consulter votre centre de
service batterie le plus proche.
CHARGEUR DE BATTERIE INTELLIGENT
- En matériel ABS, anti-choc et résistent à l’eau
- Avec microprocesseur
- Homologation RoHS-CE
- Charge à 6V – 0,55 A ou 12V – 1 A
- Courbe caractéristique à 5 étages
- Boîtier étanche, classe de protection IP65
- Dimension: cm 16x5x3,8
Caractéristiques:
- Charging (chargement): lorsque la batterie absorbe la charge
- Full (plein): lorsque la batterie est complètement chargée ou est en mode maintenance
- Fault (erreur): le système detècte de défaillances pendant le chargement de la batterie
ENTRAÎNEUR-CHARGEUR DE BATTERIE AMPEROMATIC
F

9
INSTRUCTIONS DE SECURITÉ IMPORTANTES
Gaz
Lorsque la batterie normale / au plomb est en charge, vous pouvez remarquer des bulles dans le liquide provo-
quées par la libération de gaz.
Comme ce gaz est inammable, vous ne devez pas utiliser des lumières dirèctes autour de la batterie et la zone
doit être bien ventilée. En raison du risque de gaz explosifs, connectez et déconnectez les câbles de batterie uni-
quement lorsque l’alimentation est coupée.
Types de batteries: Ce chargeur de batterie est adapté pour les batteries spéciées et ne doit pas être utilisés
pour recharger les batteries NI-CAD ou d’autres types.
Note:
Lorsqu’il n’est pas utilisé, le chargeur doit être stocké dans un environnement sec pour éviter l’humidité.
Danger
Eviter le contact entre l’électrolyte et la peau ou les vêtements. C’est acide et peut causer des brûlures. Dans ce cas
rincer immédiatement la zone aectée avec de l’eau.
Ne jamais charger une batterie congelée. Si l’électrolyte est gelé, mettez la batterie dans un local chaué avant de
commencer le chargement. Ne jamais placer la batterie sur le chargeur ou vice versa. Ne touchez pas les bornes
de la batterie lorsque le chargeur est en marche.
Ne jamais utiliser le chargeur s’il a subi un coup, s’il est tombé ou endommagé de toute autre manière.
Prenez-le à un professionnel qualié pour l’inspection ou la réparation.
Positionner correctement le cordon d’alimentation du chargeur an de ne pas l’écraser, trébucher ou de l’en-
dommager. Ne retirez jamais la che du chargeur en tirant sur la câble. Tirer sur le cordon peut endommager le
cordon ou la che.

10
Um das Risiko von Personenschäden, Stromschlägen und Bränden zu verringern, befolgen Sie bitte die folgenden
Sicherheitshinweise.
BATTERIEVORBEREITUNG
A) Batterien mit Zellenverschlüssen (mit Wartung):
- Nehmen Sie die Batterie aus das Auto raus, um Beschädigung der Drehstrom-Lichtmaschine zu verhindern. (Um
keine Beschädigungen an der Karosserie durch eventuelles Überlaufen der Batterieüssigkeit zu vermeiden, ist es
ratsam die Batterie vollständig auszubauen)
- Abdeckungsklappen von der Batteriezellen entfernen und erst nach dem Ladevorgang wieder anbringen, damit
Gase, die sich während des Ladevorgangs bilden entweichen können (es ist unvermeidlich, dass während des
Ladevorgangs etwas Säure aus der Batterie austritt).
- Prüfen Sie, dass der Flüssigkeitstand in jeder Zelle über der empfohlene Füllmärke liegt. Wenn nicht, muss die
jeweilige Zelle mit ionisiertem oder destilliertem Wasser aufgefüllt werden. – Unter keinen Umständen Lei-
stungswasser verwenden! –
B) Batterien ohne Zellenverschlüsse (wartungsfreie Batterien): für Batterien ohne Zellenverschlüsse müssen Sie
Herstellerhinweise zum Auaden sorgfältig beachten.
LADEN
1. Das positive Ladekabel (rot) am positiven Anschlusspol der Batterie befestigen (durch “P” oder “+” gekenn-
zeichnet).
2. Das negative Ladekabel (schwarz) am negativen Anschlusspol der Batterie befestigen (durch “N” oder “-“
gekennzeichnet).
3. Stecken Sie den Netzstecker in die Steckdose (230 V). Das Ladegerät ermittelt den Typ der Batterien, ob sie von
6 V oder 12 V ist. Diese Prozesse dauert 7 Sekunden.
4. Nachdem das Ladegerät den Typ der Batterien ermittelt hat, schaltet die Auadung darin automatisch um.
(“CHARGING”Led).
WANN DIE LADEVORGANG FERTIG IST
Die Batterie ist voll aufgeladen, wenn den“FULL” Led sich erleuchtet.
Zusätzlich schaltet das Ladegerät automatisch in den “Maintenance”Modus.
In diesem Modus stellt der Mikroprozessor durch gepulste Auadung sicher und die Batterie wird jederzeit ein-
satzbreit und voll geladen. Das Ladegerät kann dadurch monatelang an der Batterie angeschlossen bleiben, ohne
Beschädigung zu bemerken.
Falls der Ladevorgang durch einen Stromausfall unterbrochen werden sollte, wird die Auadung bzw. die Lader-
haltung danach wieder automatisch fortgesetzt (Diagnose, Auadung, Komplett).
FEHLER
Anschluss an umgekehrte Polarität – falls die Anschlusspole an die Batteriepolen der Gleichstrom-Batterie-
Kabelschellen nicht korrekt verbunden sind, erleuchtet sich den„FAULT“ Led. In diesem Fall, stecken Sie einfach
die Steckdose und die Anschlusspole aus und dann richtig die Anschlusspole verbinden und wieder den Stecker
in die 230 V Steckdose einstecken.
Batteriefehler –Falls nach wenige Sekunden schaltet das Ladegerät keine dieser Funktionen von Auadung um,
eine von diesen Problemen geschehen hat:
a) Niedrige Batteriespannung: < 3 V (6 V-Batterie); < 8 V (12 V-Batterie)
b) Hohe Batteriespannung: > 15 V (12 V-Batterie); > 7.5 V (6 V-Batterie)
c) Batteriekurzschluss oder Batteriezellenkurzschluss.
In jeden von a, bund cPunkte ist es möglich, dass die Batterie defekt ist, deshalb raten wir Ihnen, daran das
Batterie- Service-Center anzuwenden.
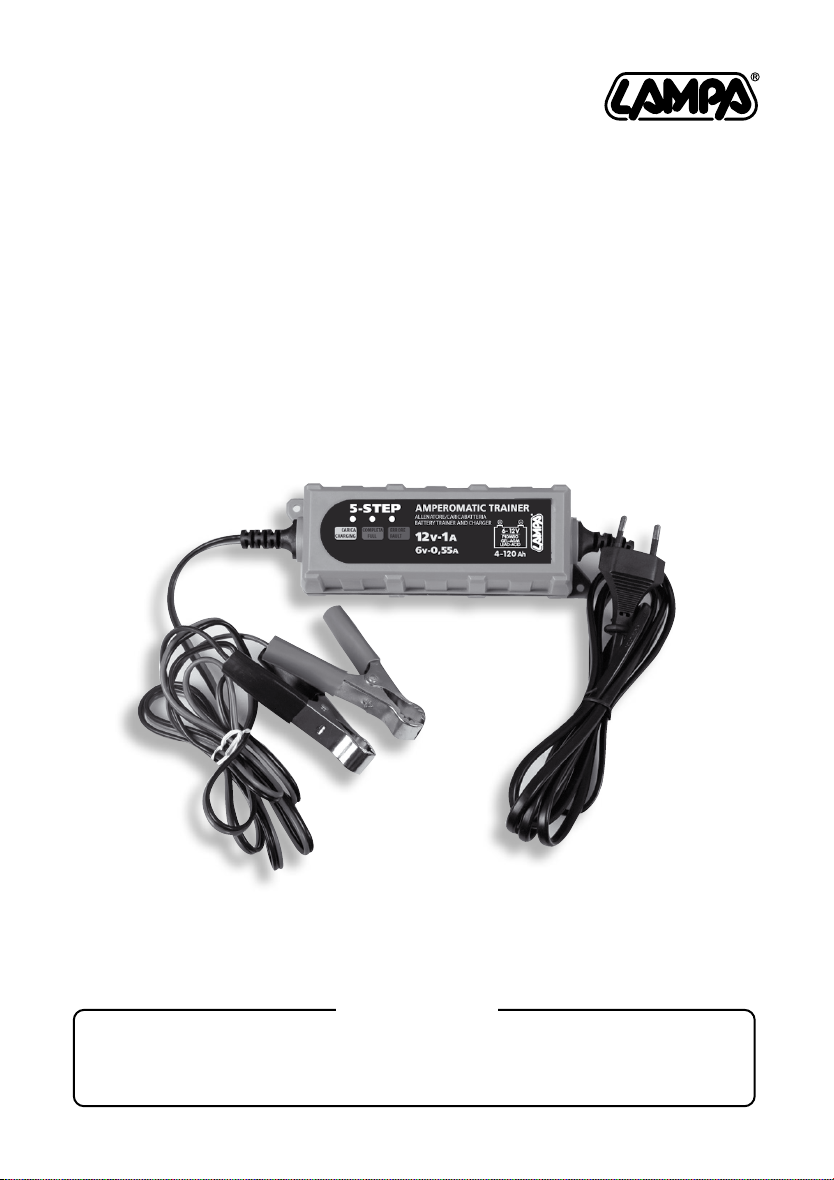
BATTERIELADEGERÄT / BATTERIE TRAINER
D

11
INTELLIGENTES BATTERIELADEGERÄT
- Aus ABS Kunsto, stoßfest und wasserdicht IP65
- Mit Mikroprozessor
- RoHS-CE Zustimmung
- Ladung mit 6V – 0,55 A oder 12V -1 A
- 5-Phasen-Ladevorgang
- Wasserdichtes Gehäuse IP 65
- Dimensionen: 16x5x3,8 cm
Eigenschaften:
- Funksicher
- Kurzschlussschutz
- Spannungsausgleich
- Temperaturausgleich
- Überhitzungsschutz
- Verpolschutz
Anzeige:
- Charging (Auadung): wenn die Batterie auadet.
- Full (Komplett): wenn die Batterie komplett aufgeladen ist oder sie wird in “Maintenance”Modus sein.
- Fault (Fehrler): wenn das System ermittelt, dass ein Problem mit der Batterie besteht.
WICHTIGE SICHERHEITSHINWEISE
Gas
Wenn die Blei-Batterie auadet, ist es möglich, dass Gasblase befreit werden. Der Gas ist entammbar, deshalb ist es
ratsam, keine direkte Lichte benutzen und den Raum soll luftig sein. Wir raten Ihnen, die Anschlusspole auszustek-
ken, nachdem der Stecker ausgesteckt ist.
Batterietypen: Dieses Ladegerät ist nur an spezischen Batterien geeignet, deshalb ist es nicht für NI-CAD oder
andere Batterietypen geeignet.
Hinweis.
Wenn Sie das Ladegerät nicht anwenden, wahren Sie in trockener Umgebung, um aus der Feuchte zu bewahren.
Vorsicht
Der Flüßig-Elektrolyt muss nicht auf den Haut oder die Kleidungen ergießen. Diesen Säure kann Verbrühungen ver-
ursachen. Wenn das passiert, waschen Sie den besondere Punkt mit Wasser ab.
Keine gefrierten Batterie auaden. Batterie mit gefrierten Flüßig-Elektrolyt werden zuerst in einem warmen Raum,
um sie aufzutauen, dann kann man mit der Auadung vorangehen. Keine Batterie auf das Ladegerät stellen oder
gegenteilich, kein Ladegerät auf die Batterie stellen. Berühren Sie nicht die Anschlusspole, wenn das Ladegerät funk-
tioniert.
Falls das Ladegerät Unfalle erleidet, gefallen oder beschädigt ist, überprüfen Sie das Ladegerät von einer Fachperson
und lassen es reparieren.
Stellen Sie das Ladekabel entsprechend, damit es nicht ein Hindernis bildet. Nicht das Kabel des Ladegeräts ziehen,
um es aus der Steckdose auszustecken, es ist gefährlich und kann das Ladegerät beschädigen.

12
Para minimizar el riesgo para las personas y evitar el peligro de descarga eléctrica e incendio, siga las instrucciones
de seguridad a continuación.
PREPARACIÓN DE LA BATERÍA
A) Baterías con tapas en las celdas (mantenimiento):
- Retire la batería del automóvil para evitar posibles daños al alternador. (Para no dañar la carrocería debido a
posibles fugas del líquido de la batería, se recomienda desmontarla por completo).
- Retire las tapas de los elementos de la batería e instálelas solo al nal del proceso de carga para permitir la disi-
pación de los gases que pueden formarse durante este proceso (la fuga de un poco de ácido durante el proceso
de carga es inevitable).
- Compruebe si el nivel de líquido en cada elemento de la batería está por encima de la marca de llenado reco-
mendada. - Nunca use agua del grifo! -
B) Baterías sin tapas en las celdas (sin mantenimiento): en el caso de baterías sin tapas en las celdas, cumpla con
las instrucciones de carga del fabricante.
CARGAR
1. Conecte el terminal positivo del cargador (rojo) al polo positivo de la batería (indicado por“P” o “+”)
2. Conecte el terminal negativo del cargador (negro) al polo negativo de la batería (indicado por “N” o “-”)
3. Inserte el enchufe en la toma de corriente doméstica (230 V). El cargador distinguirá automáticamente si se ha
conectado una batería de 6 V o 12 V. Este procedimiento dura unos 7 segundos.
4. Después de que el cargador haya identicado la batería conectada, cambiará automáticamente al modo de
carga (Led“CHARICA-CHARGING”).
CUANDO LA BATERÍA ESTÁ TOTALMENTE CARGADA
La batería está completamente cargada cuando se enciende el Led “COMPLETA-FULL”.
El cargador entrará en modo de operación de mantenimiento.
Il microprocessore mantiene la batteria sempre pronta all’uso, grazie a un sistema di carica ad impulsi. In questo
modo il caricabatterie può rimanere collegato per lunghi periodi alla batteria senza danneggiarla.
Si el proceso de carga o mantenimiento se interrumpe debido a una falla de energía, una vez que se restablezca
la energía, el proceso se reactivará automáticamente (diagnóstico, carga, completa).
ERROR
Conexión con polaridad invertida - Si los terminales se han conectado incorrectamente a los polos de la ba-
tería, el Led (FAULT-ERROR) permanecerá encendido en el cargador de batería. En este caso, simplemente retire
el enchufe de la fuente de alimentación y desconecte los terminales, vuelva a conectarlos correctamente e inserte
el enchufe de CA nuevamente en la fuente de alimentación de 230 V.
Error de batería - Si después de unos segundos desde la activación, el cargador no cambia a ningún modo ope-
rativo de carga, la batería está en una de las siguientes condiciones de falla:
a) Bajo voltaje de la batería: < 3 V (batería 6 V); < 8 V (batería12 V)
b) Alto voltaje de la batería: > 15 V (batería 12 V); > 7.5 V (batería 6 V)
c) Cortocircuito en la batería o cortocircuito en el elemento de la batería
En los casos a, by c, la batería puede estar defectuosa y recomendamos consultar al centro de servicio más
cercano.
CARGADOR INTELIGENTE DE BATERÍA
- En plástico ABS, a prueba de golpes e impermeable IP65.
- Con microprocesador
- RoHS-CE aprobado
- Carga a 6 V - 0.55 A o 12 V - 1 A
CARGADOR, ENTRENADOR DE BATERÍA AMPEROMATIC
E

13
- Curva característica de 5 PASOS
- Carcasa estanca, clase de protección IP65
- Dimensiones: cm 16x5x3,8
Caracteristicas:
- Protección completa contra chispas.
- Protección contra cortocircuitos.
- Compensación de voltaje
- Compensación de temperatura
- Protección contra sobrecalentamiento
- Protección de polaridad inversa
Indicadores:
- Carga: cuando la batería está cargando la batería.
- Completo: cuando la batería está completamente cargada o en modo de mantenimiento
- Error: cuando el sistema detecta problemas al recargar la batería
INSTRUCCIONES DE SEGURIDAD IMPORTANTES
Gas
Cuando la batería normal de plomo-ácido se está cargando, es posible notar burbujas en el uido causadas por la
liberación de gas.
Como el gas es inamable, no se deben usar luces directas alrededor de la batería y el área debe estar bien ventila-
da. Debido al riesgo de gases explosivos, conecte y desconecte los cables de la batería solo cuando la alimentación
esté apagada.
Tipos de batería: Este cargador solo es adecuado para baterías especícas y no debe usarse para recargar NI-CAD
u otras baterías.
Nota.
Cuando no esté en uso, el cargador debe almacenarse en un ambiente seco para evitar la humedad.
Peligro
Evite el contacto entre el electrolito y la piel o la ropa. Es ácido y puede causar quemaduras. En este caso, enjuague
el área afectada inmediatamente con agua.
Nunca cargue una batería congelada. Si el líquido de la batería (electrolito) se congela, lleve la batería a un área
tibia para descongelarla antes de comenzar a cargar. Nunca coloque la batería en el cargador o viceversa. No toque
los terminales de la batería cuando el cargador esté funcionando. Nunca opere el cargador si ha sido golpeado con
fuerza, caído o dañado. Llévelo a un profesional calicado para su inspección y / o reparación. Coloque adecua-
damente el cable de alimentación del cargador para evitar pisarlo, tropezarlo o dañarlo. No retire el enchufe del
cargador tirando del cable para evitar daños y peligros.

AMPS
1A
14,5V
VOLTS
13,7V
12,0V
9,0V
6V
1 2 3 45
1 Identicazione batteria / battery type check/ Identication batterie/ Batterieidentizierung/ Identicación de la batería
2 Carica “soft”/ soft charge/ Charge“soft”/ soft Ladung / Carga“soft”
3 Carica “massima” / max charge / Charge “maximum” / maximale Ladung/ Carga “maxíma”
4 Analisi batteria / battery analyze / Analyse de la batterie / Batterieanalyse / Analysis de la batería
5 Mantenimento ad impulsi / pulse maintenance / Entretien par coups / gepulste Ladeerhaltung / Mantenimiento por impulsos


LAMPA S.p.A.
Via G. Rossa, 53/55 - 46019
Viadana (MN) ITALY
Tel. +39 0375 820700
UNI EN ISO 9001:2015
Certied Company
www.lampa.it
Made in China
Table of contents
Languages: