Concept
CPC Manual
33
1224
1221
1220
1219
1222
1223
EXPLANATION OF TERMS
SERIAL NO.
Power
LINE
CHANNEL 2
LINE
OUT
CHANNEL 1
LINE
LO
HI
LEVEL
CD/
TAPE
MIC
WARNING THIS EQUIPMENT MUST BE EARTHED
MADE IN THE UNITED KINGDOM BY BLT INDUSTRIES LTD.
POWER
LO
HI
LEVEL
EXT.
SPEAKER 8 OHMS
MINIMUM
CAUTION TO REDUCE THE RISK OF
FIRE HAZARD REPLACE FUSE WITH
SAME TYPE AND RATING ONLY
WARNING TO REDUCE RISK OF FIRE OR
ELECTRIC SHOCK DO NOT EXPOSE THIS
APPLIANCE TO RAIN OR MOISTURE
ATTENTION REMPLACER LE
FUSIBLE PAR LE MEME ET LE
CALIBRE
ATTENTION DEBRACHER A LA PRISE
SECTEUR AVANT D'OUVRIR
CAUTION TO REDUCE THE
RISK OF ELECTRIC SHOCK
DO NOT REMOVE COVERS.
NO SERVICABLE PARTS
INSIDE. REFER SERVICING
TO QUALIFIED SERVICE
MID
Concept CPC12
12
25
1212
16
18
14
13
15
17
1212
14
13
15
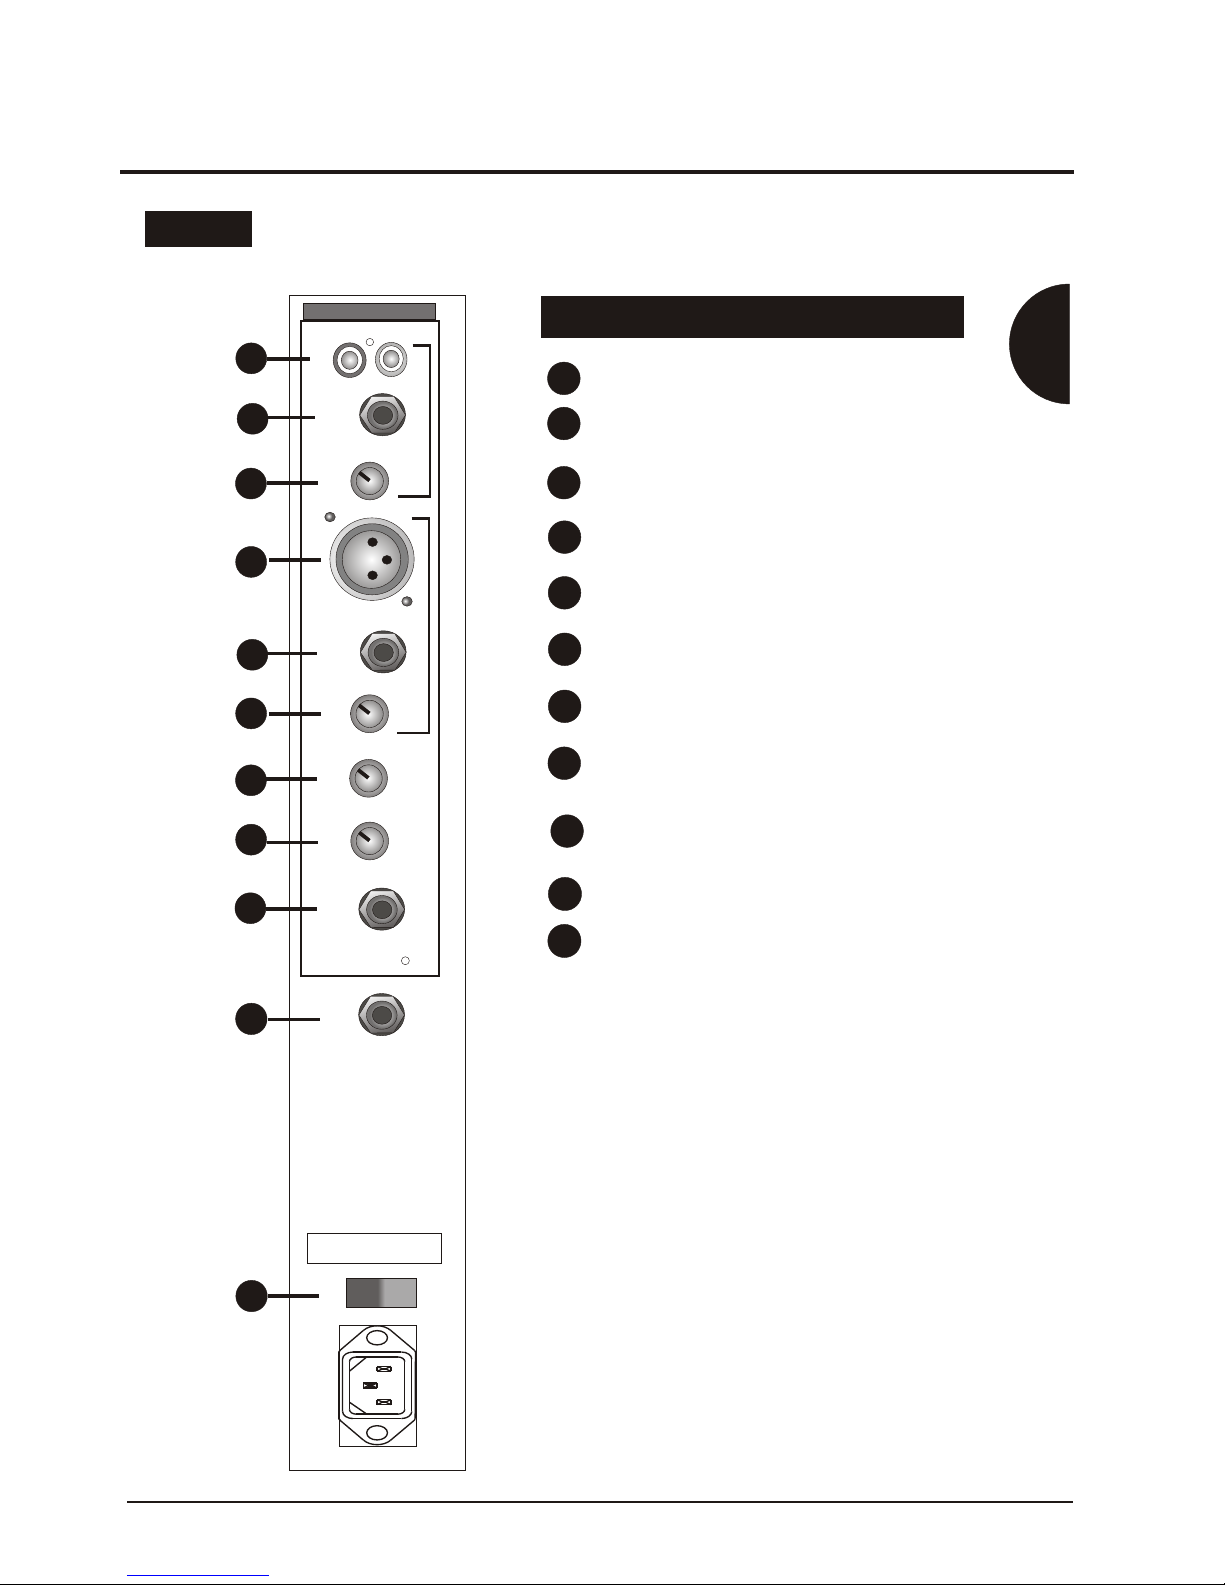
LEVEL: Adjusts the overall output of channel
1on the monitor.
HI: Adjusts the HI frequency response of
channel 1.
MID: Adjusts the MID frequency response of
channel 1.
LO: Adjusts the LO frequency response of
channel 1.
LEVEL: Adjusts the overall output of channel 2
on the monitor.
HI: Adjusts the Hi frequency response of
channel 2.
LO: Adjusts the Lo frequency response of
channel 2.
MIC: XLR input for low impedance
microphones (200-600 Ohm) on channel 1.
LINE: Jack input socket for all line level signals
e.g.: Keyboard, Mic or drum machine, channel
1.
CD/TAPE: Provides input for a CD or tape
player, channel 2.
LINE: Jack input socket for all line level signals
e.g.: Keyboard , mic or drum machine, channel
2
LINE OUT: Provides a line level output signal for
connecting to an additional powered monitor or
to an external power amplifier.
EXTERNAL SPEAKER: Output socket for
connecting further un-powered monitor.
POWER: Power On/Off switch.
1224
16
18
17
21
20
1225
1219
22
23
1
0
CPC12 & CPC15