www.lanpro.com
Cabling Management - Gabinets & Racks - Rack Accessories - KVM - LP-RU07KVXX KVM Series
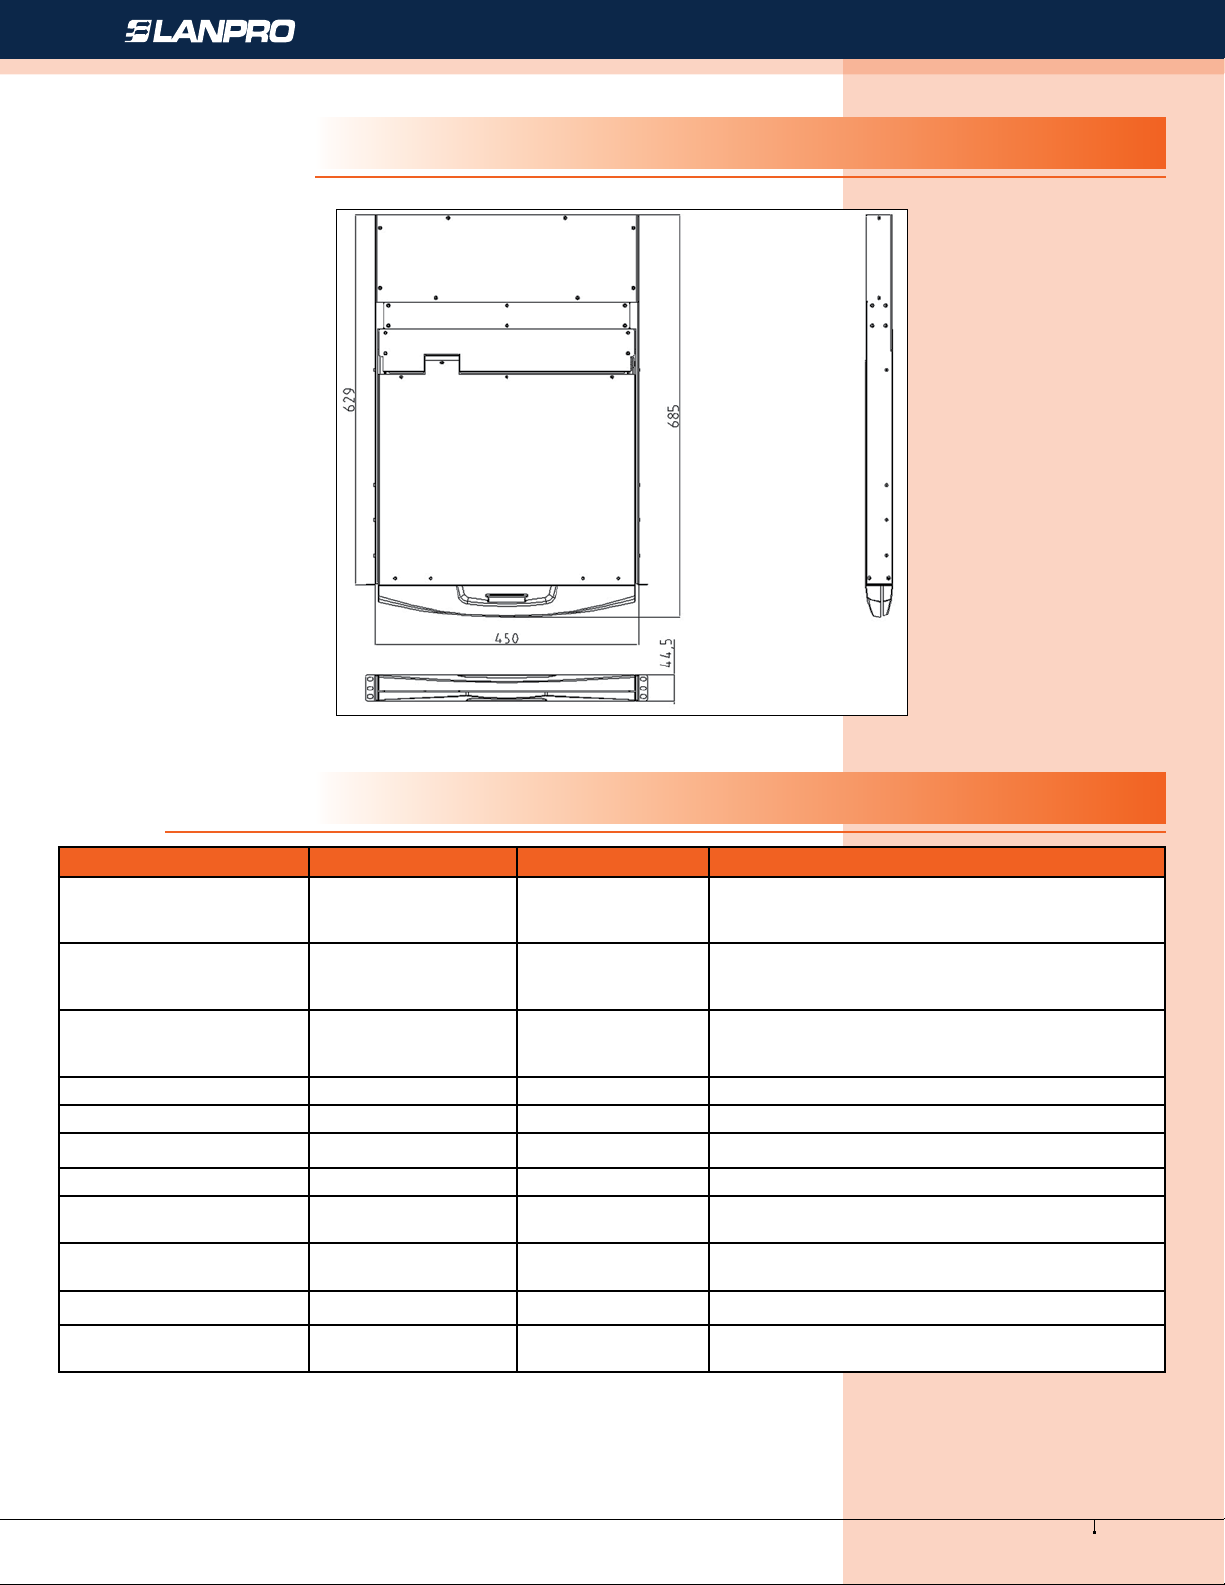
123 Manual for mounting on 19” Racks
7
4.- Rack mounting Lateral Brackets
These brackets shown in Figures 11 and 12 are going to be used for proper mounting of the KVM on a 19” Rack.
5.- Adaptor bracket.
This bracket serves the purpose of adapting the KVM so it can be mounted and afxed to the 19” rack.
It consists of 3 components per side:
A) Two lateral adjustable brackets are needed for afxing the KVM back to the Sliding Bar Bracket and this last
one to each rack front vertical rail, and come with set screws for afxing to the back of the KVM.
The sliding bar brackets:
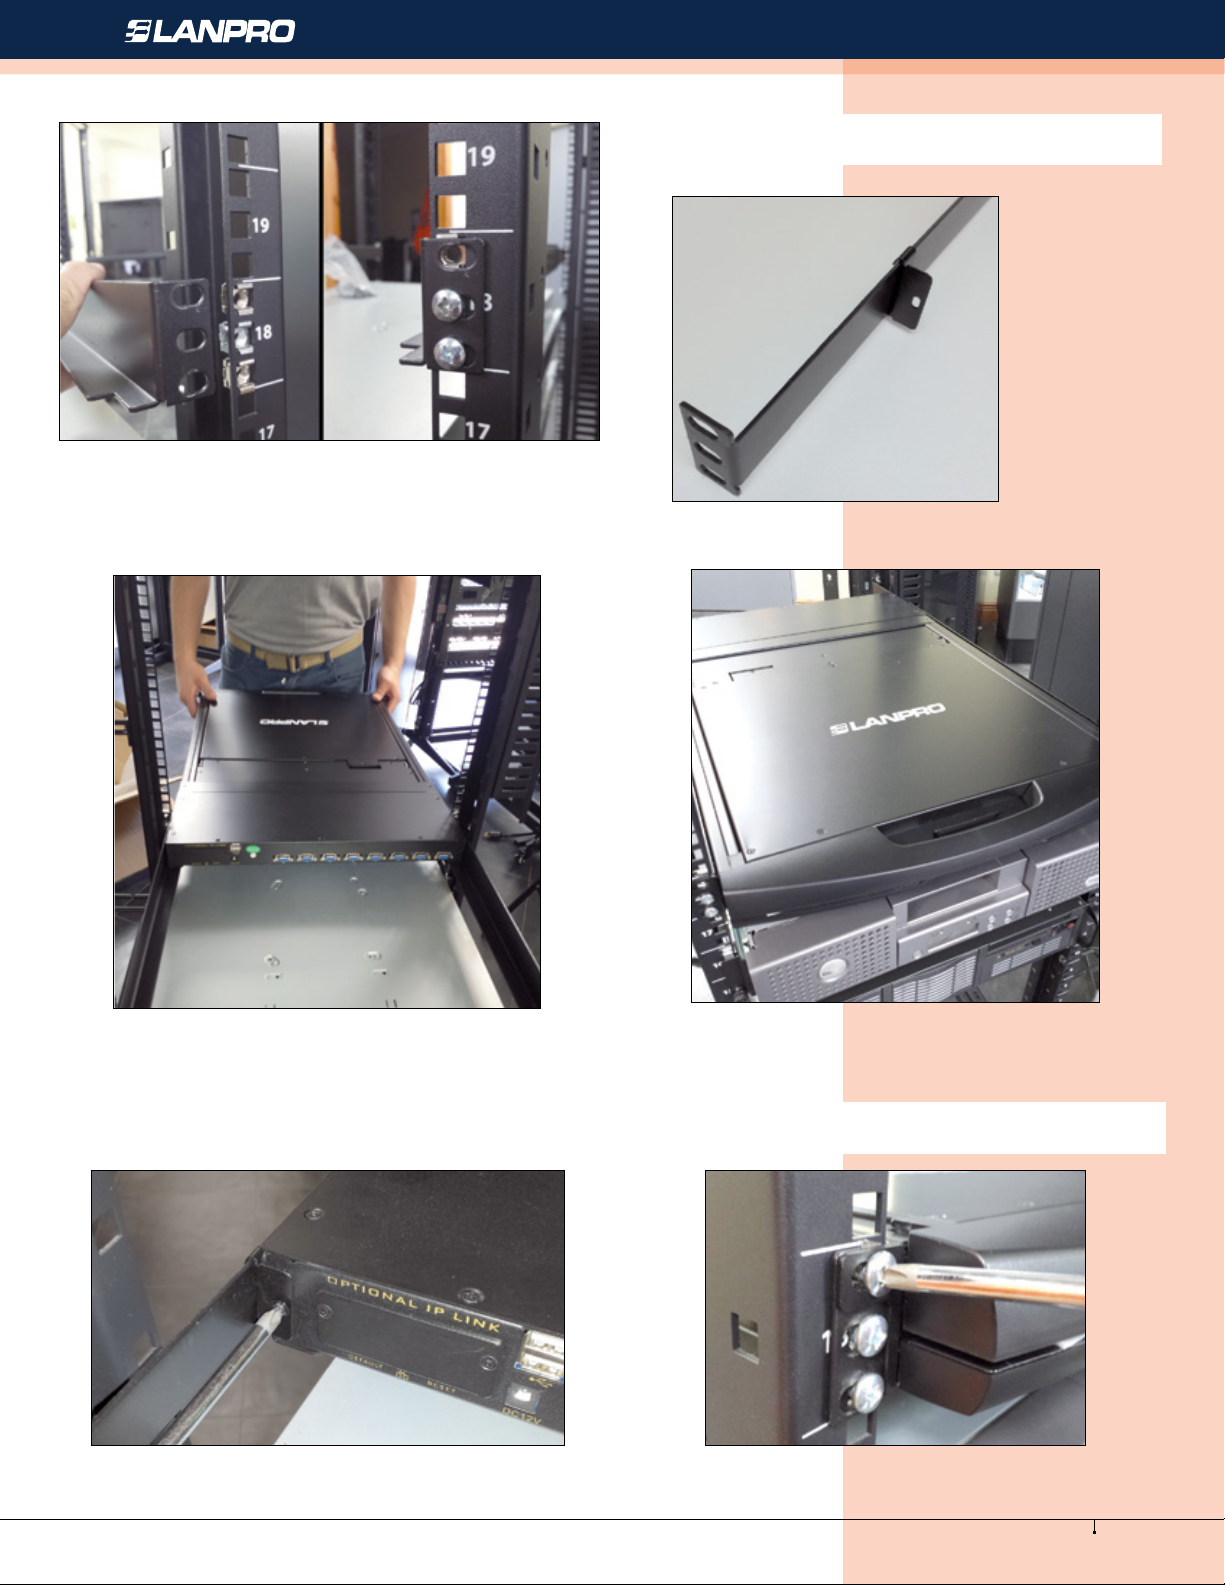
B) After selecting the proper position of the KVM on the
rack, (E.g.: position 18 in the left front rack post) you
can proceed to x the pair of brackets that support the
weight of the KVM on all 4 posts of the 19” rack on
the same position like it is shown in Figure 16 the left
sliding bracket is being xed to the rack. The upper nut
is left unused so the lateral adjustable bracket can be
xed with one screw later.
Figure 11
Figure 13 Figure 14 Figure 15
Figure 16
Left sliding bar bracket xation
Figure 12