Larson Electronics RUL-9 Series User manual

RUL-9 Series
Larson Electronics, LLC Phone: (800) 369-6671 Fax: (903) 498-3364 www.larsonelectronics.com
1of 3
RUL-9 Instruction Manual
INTRODUCTION
Congratulations on purchasing the revolutionary RUL-9 rechargeable lantern. Your RUL-9 lantern has some
outstanding features including lightweight (2.2lbs), high visibility, rear mounted LED taillights, low battery LED
indicator and an articulating head. As the world’s lightest full-power lantern, the RUL-9 redefines what
professionals should expect from a lantern. With proper care and maintenance, this portable lantern will provide
long, dependable service. Please take a moment to read this instruction sheet before using your new lantern. It
provides important safety and operating instructions.
NOTICE
•Before using the lantern or battery charger, read all instructions and cautionary markings on the unit.
CAUTION: Do not attempt to use that charger to recharge any other product. Also do not attempt to
use any other charger to recharge your lantern.
•Do not operate a damaged charger. Replace damaged cords or charger immediately. Do not try to
repair a damaged lantern or charger yourself. Should your charger fail to operate for any reason,
contact our service center, Larson Electronics at 1-800-369-6671, for further instructions.
•Do not abuse the cord. Never carry the charger by the cord or disconnect the charger from a
receptacle by pulling the cord.
•Unplug power adapter and remove lantern from charger before performing any routine cleaning or
maintenance.
•Do not place any metal objects onto the charging terminal located in the charger.
•Do not incinerate or leave the battery pack near a heat source such as a radiator, fireplace, stove, or
any other heat-generating appliance. When exposed to high temperatures, the battery pack could
explode and possibly cause a fire.
•Do not disassemble or mistreat a battery pack or store a battery pack where it could come in contact
with metal objects that could short circuit the battery pack terminals. The resulting current can cause
high temperatures and damage to the battery pack and also can cause burns and possibly fire.
•Please refer to local ordinances concerning battery recycling and disposal.
•Use of this product for other than a lighting device is not recommended. Manufacturer
specifically disclaims liability for other than recommended use.
•The direct wire feature for this charger is intended for power sources between 12 to 24VDC.
Attempting to direct wire to any other power source will cause severe damage to the charger.
•Be sure to check the AC adapter voltage rating to ensure that the required voltage and frequency
match the available power source. On the right side of the lantern is a low battery LED indicator.
*For 4 and 6 cell lanterns, approximately 30 minutes of runtime remains when the indicator is
activated.
*For 8 cell lanterns, approximately 60 minutes of runtime remains when the indicator is activated.
•If your lantern includes a carrying strap, attach the strap to the rings using the quick connect clips
provided on the strap.
RUL-9 Series
Larson Electronics, LLC Phone: (800) 369-6671 Fax: (903) 498-3364 www.larsonelectronics.com
2of 3
MAINTENANCE
Keep the charger free of dirt and moisture. Your charger can be cleaned with mild soap and a damp towel.
Avoid harsh detergents, abrasives, and solvents that could damage the plastic. If wet, disconnect power
adapter and allow to dry for 2-3 days before attempting use. Periodically clean charger, contacts on charger
and lantern with electrical contact de-oxidizer.
Note: For long-term storage, discharge battery 50%, unplug adapter and remove lantern from charge base
to prevent damage to battery. To prevent accidental lighting, when packing for transportation or storage, it is
recommended that you disengage the bulb from the power source by turning the lens ring 1/4 turn counter
clockwise.
BULB REPLACEMENT
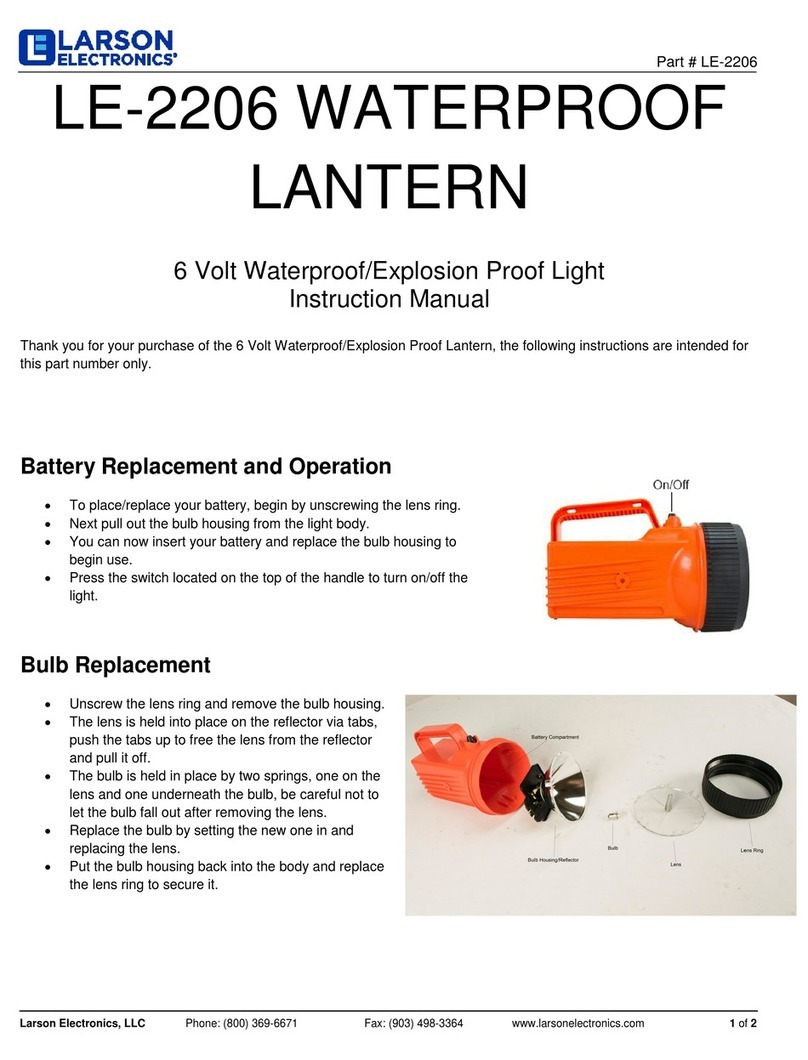
1. To replace the bulb, simply unscrew the lens ring assembly from the lantern.
2. Remove the reflector. Try not to touch the reflector surface.
3. If the bulb is hot, wait for it to cool, and then pull the bulb straight out of the bulb spring.
4. Install a new bulb.
Note: When replacing dual filament bulb, align posts on base of lamp with appropriate slots in bulb
spring mount in head. Both single and dual filament amps are pre-focused and do not need to be
adjusted.
5. Replace the reflector and screw the lens ring assembly back onto the lantern.
6. Be sure to screw the lens ring assembly on firmly, but do not over-tighten.
7. Check O-ring each time bulb is replaced. If necessary, lubricate O-ring and inside lip of lens ring with
silicone grease.
8. Replace worn, scratched or cracked O-rings.
BATTERY REPLACEMENT
1. To replace battery pack, simply remove the six screws from the bottom of the lantern and
remove the cover.
2. Disconnect the battery from the plug and replace with new battery pack by joining male and
female plugs together.
3. Make sure to place pack to rear of lantern housing such that is in contact with rear screw posts.
4. Replace cover and install screws and verify that cover is flush against lantern housing. Do not over-
tighten!
MOUNTING THE CHARGER
•The charger can be mounted in any position.
•Use the 4 screws provided to safely secure charger to mounting surface. Use caution to not over-
tighten mounting screws.
•The charger housing is not weatherproof or submersible. Care should be taken to locate the
charger in a clean, dry place.

RUL-9 Series
Larson Electronics, LLC Phone: (800) 369-6671 Fax: (903) 498-3364 www.larsonelectronics.com
3of 3
INSERTING LANTERN IN CHARGE BASE
The charger is equipped with tow prongs that align with notches in the base of the lantern. Simply align
these parts and apply minimum force to slide the lantern back into the charger until the lantern latches into
the charger base. Using excessive force while inserting lantern may cause damage to charger.
LIFETIME LIMITED WARRANTY
The case, switch, and internal parts, excluding the lens, lamp rechargeable Lithium-ion battery pack and
charger, have a lifetime limited warranty from date of purchase. Should your unit fail to operate for any
reason, contact our service center, Larson Electronics for further instruction at 1-800-369-6671. We will
repair and replace the warranted defective parts without cost and return the unit to you. The rechargeable Li-
ion battery pack and charger are warranted for a period of one year in accordance with the above term. This
warranty does not apply to misuse or abuse.
CHARGING OPTIONS
WARNING: Use only adapter supplied with charger. Use of any other adapter may cause damage to the
charger and lantern.
The RUL-9 can be charged using the supplied 120 VAC wall adapter plug or by direct wiring to a 12-24 VDC
power source (not supplied). For the direct wire option, the wire and DC (male) power jack from the wall plug
adapter can be cut off and used to make connections to the charge base. When mounting in any vehicle,
please have product professionally installed to prevent any safety hazards, personal injury and possible
damage to vehicle or product. The positive lead wire (+) from a 12-24 VDC source must be connected to the
center terminal of the male power jack. The negative lead wire (-) from the 12-24 VDC source must be
connected to the outer terminal of the male power jack. See figure 1 below. It is recommended that a 5 amp,
time delay fuse (not supplied) be connected in a series to the positive lead of the DC power supply before the
male power jack.
FIGURE 1
Table of contents
Other Larson Electronics Lantern manuals

Larson Electronics
Larson Electronics EPL-24-50LED User manual

Larson Electronics
Larson Electronics EPL-LED30W User manual

Larson Electronics
Larson Electronics LE-2206 User manual

Larson Electronics
Larson Electronics RUL-10 User manual

Larson Electronics
Larson Electronics EXPLED-SOL12-M-SW.M10C User manual