Español
English
WARRANTY
WARRANTY
Your BuggyBoard™ is warranted to be free from manufacturing defects for a period
of one year from date of purchase under normal use and in compliance with the ope-
rating instructions. This warranty extends only to the original retail purchaser and is
only valid when supplied with proof of purchase.
We are committed to ensuring that this product is of the highest quality. The manu-
facturing process is regularly checked by both internal and external (TÜV) controllers.
Samples of parts and completed products are also taken out regularly for tests in
our own testing laboratory. The BuggyBoard-Maxi™ is tested and approved by
SGS
Standards Technical Services Co. Ltd, Guangzhou, China and by SP Swedish
National Testing and Research Institute according to the relevant clauses in EN
1888:2003, clause 6.1.1 – 6.1.5, 7.2.2.6, 17.3, 18.2 and 21.4
TESTS
• Intended for use with only one child at a time from
approximately 2 years of age and with a maximum weight
of 20 kg (44 lb).
• Always keep your hands on the pram when your child
is standing on the BuggyBoard™. Never leave your child
unattended while he/she is standing on the BuggyBoard™.
• Make sure your child is always standing with both feet on
the anti-slip rear portion of the BuggyBoard™.
• Never use the stroller’s parking brake while your child is
standing on the BuggyBoard™.
• Before each use, check the connectors and tighten if
necessary.
• Do not use the BuggyBoard™ if any part is broken, torn
or missing.
• Never let children play with the BuggyBoard™.
WARNING IndexE
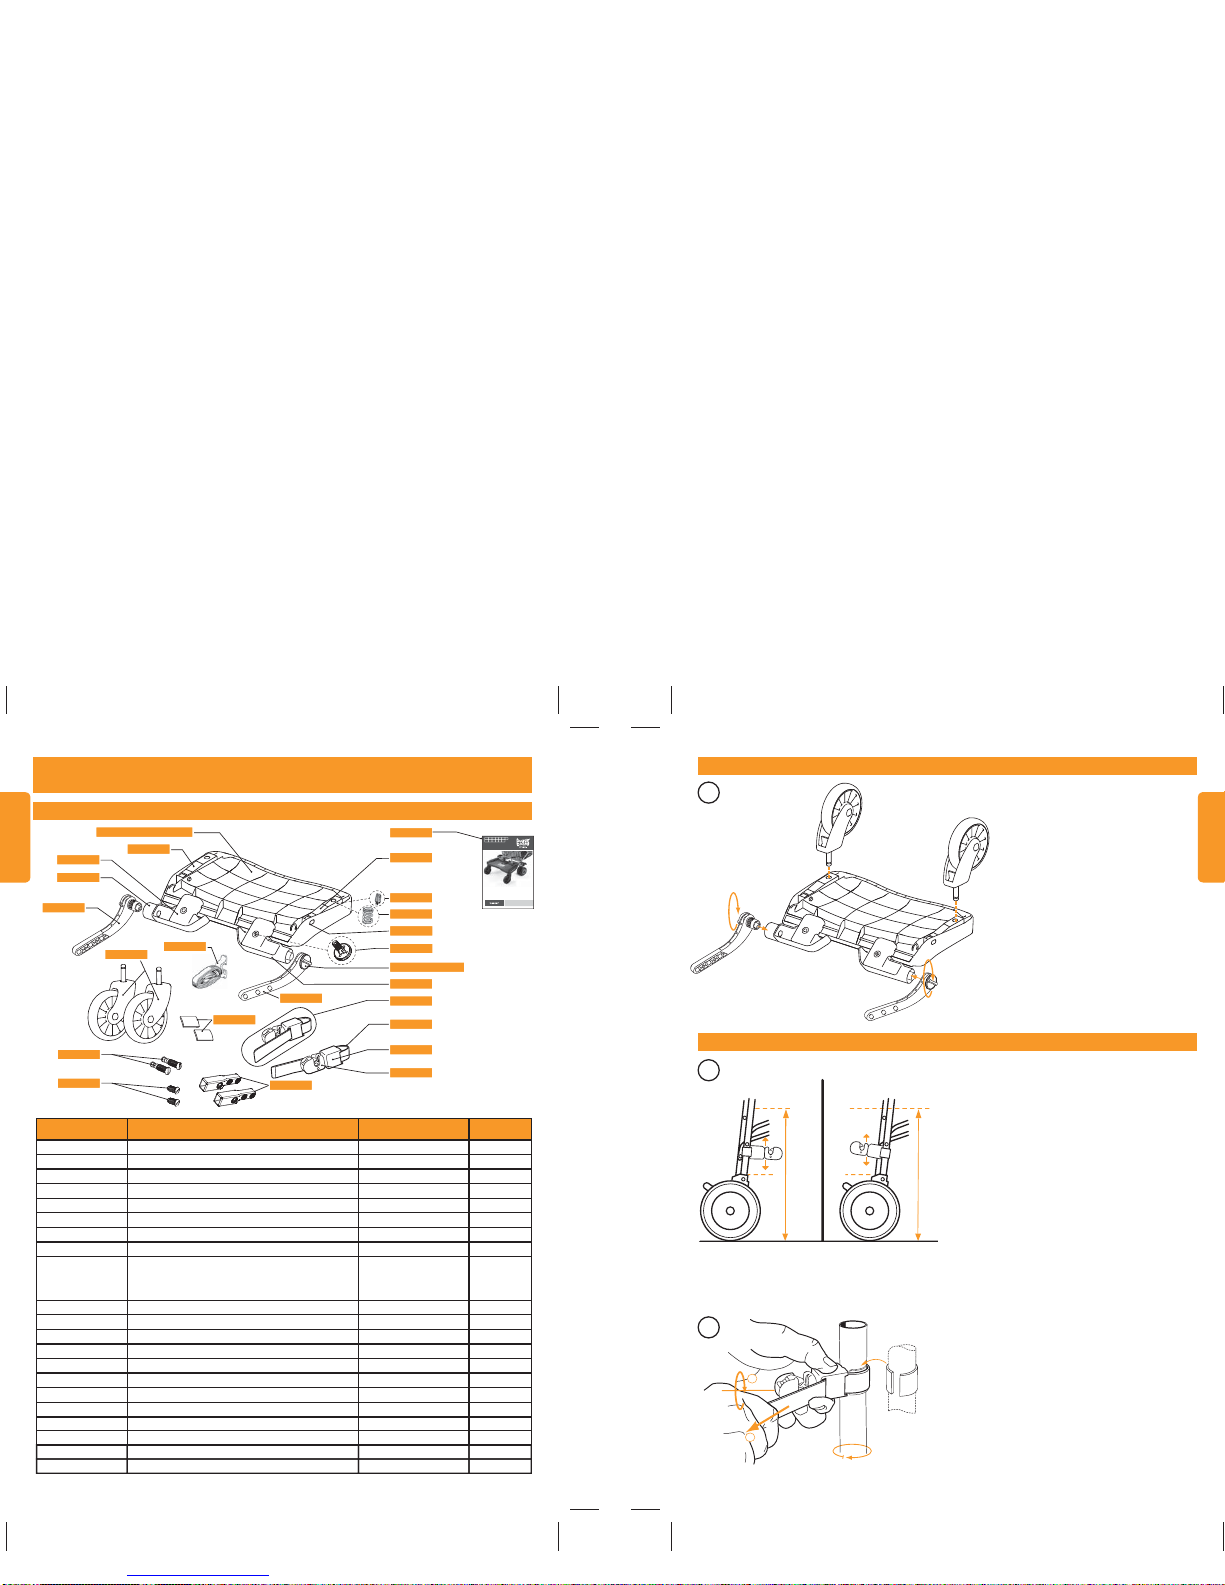
Contenido........................................12
Las ruedas.......................................13
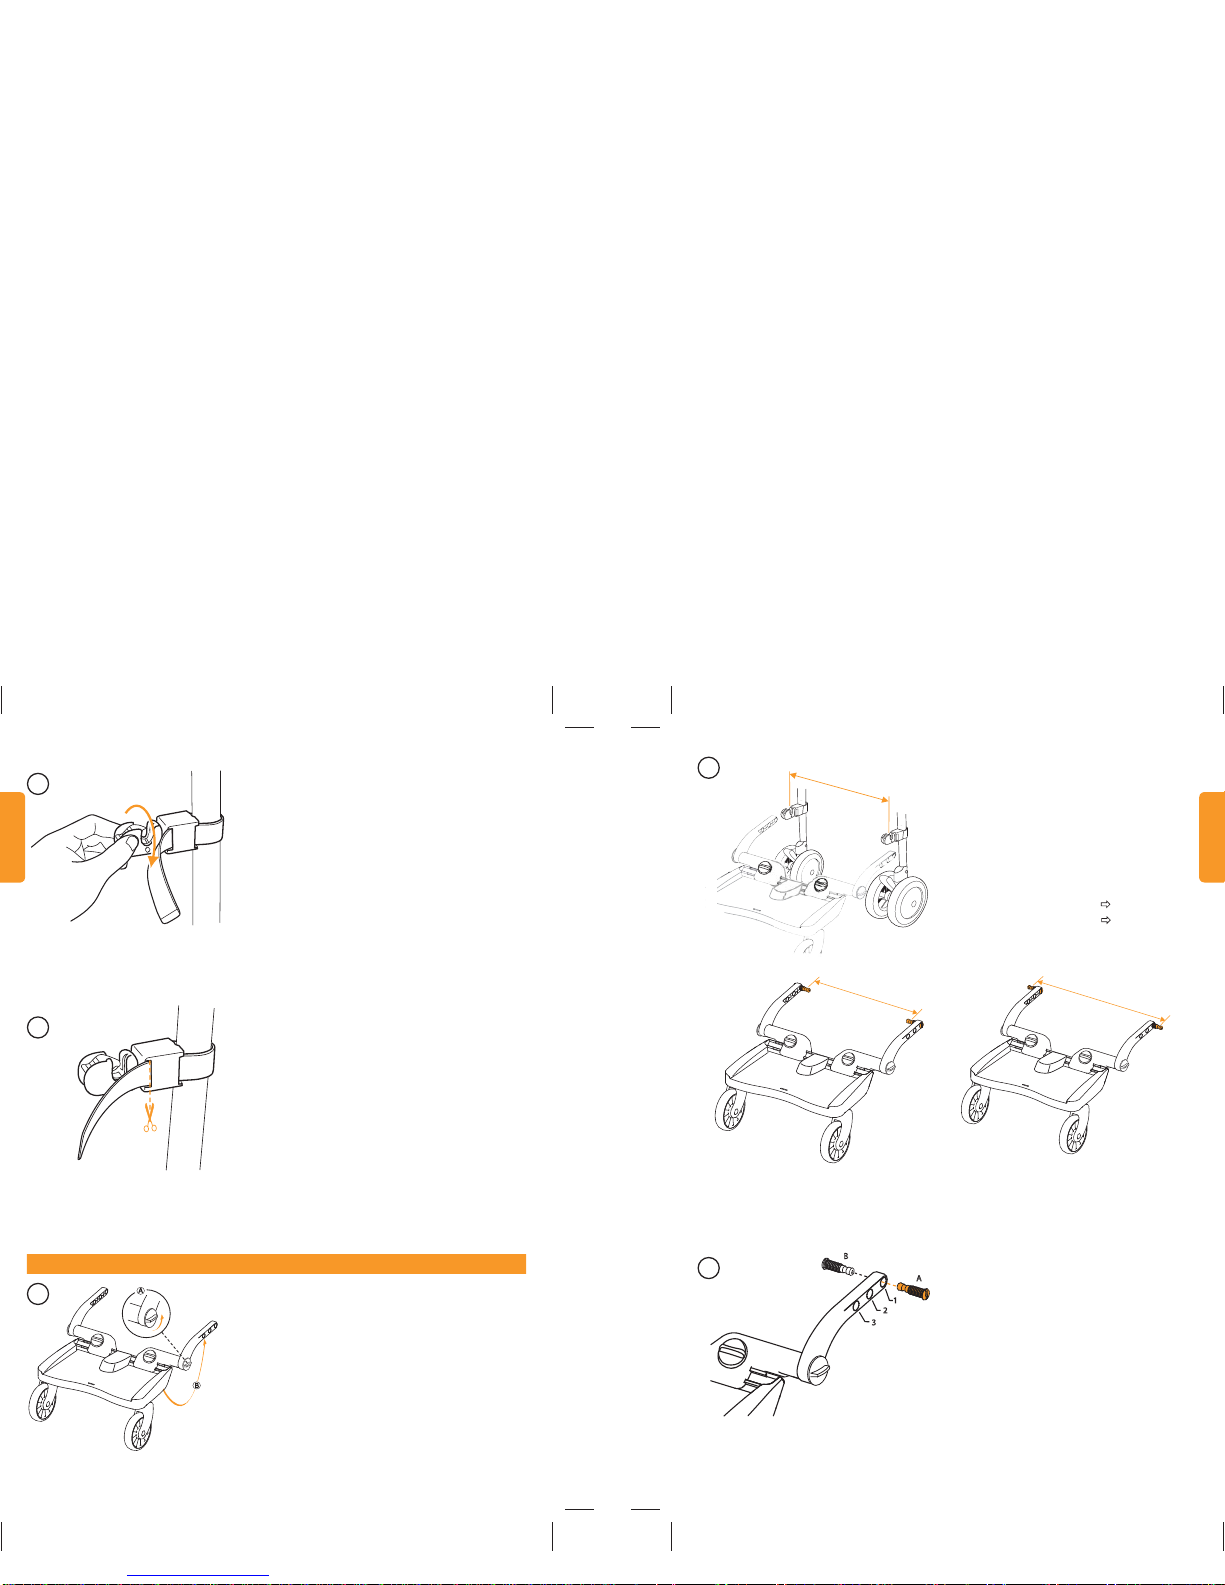
Los conectores .................................13
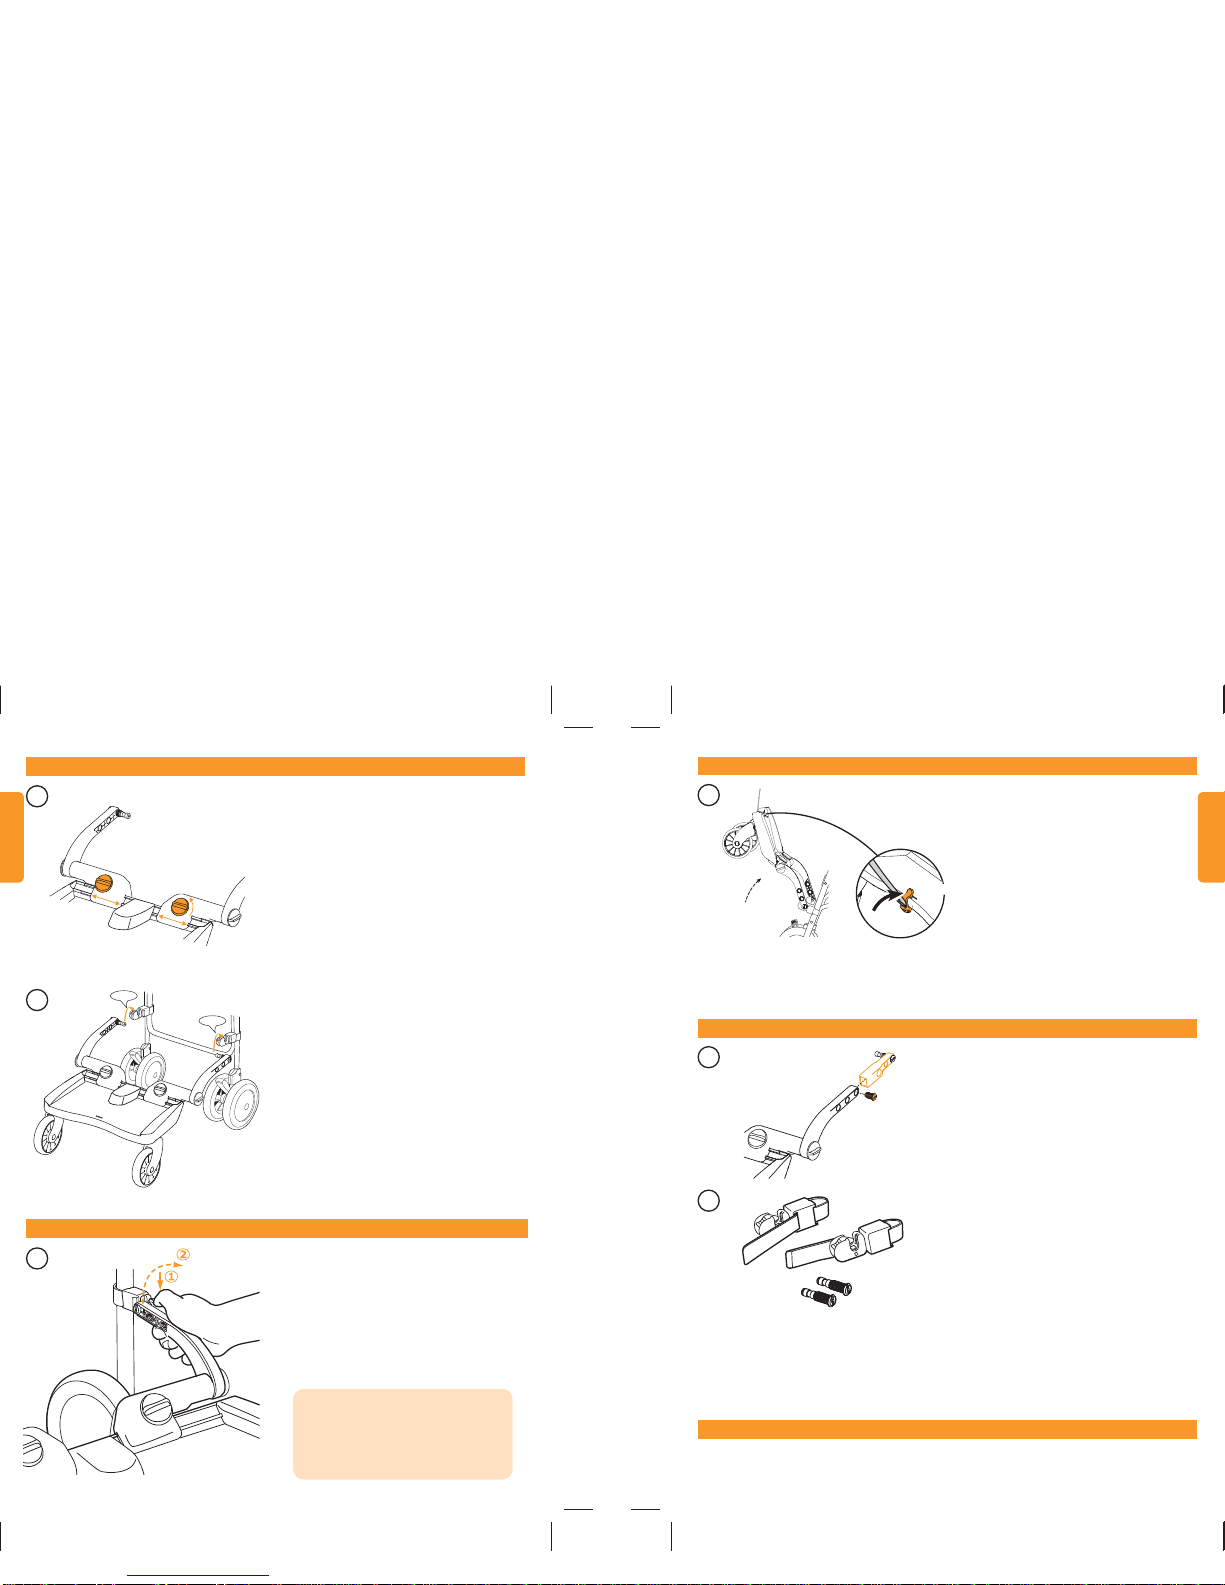
Los brazos.......................................14
Montaje.......................................... 16
Desmontaje.....................................16
Cuando no está en uso......................17
Accesorios .......................................17
Limpieza y reciclado..........................17
Pruebas...........................................18
Advertencias....................................18
Garantía..........................................18
Otros productos de Lascal..................107-108
Contactos de Información..................109-110
Tarjeta de reg. del producto...............111-112
Estimado cliente, gracias por elegir el BUGGYBOARD-MAXI™ de Lascal. Esperamos que su compra le
satisfaga y que haga un buen uso de su BUGGYBOARD-MAXI™.
¡ADVERTENCIA!
Lea estas instrucciones cuidadosamente antes de su uso y guárdelas para
futuras referencias.
ESPAÑOL
- 10 - - 11 -
Sp