Quick Start Installation Guide
18cm 20V MAX* Lithium-Ion Cordless Robotic Mower L10
About This Product
Thank you for choosing the LawnMaster®L10 robotic lawnmower. This product independently
mows the lawn in a random pattern before returning to the base station to charge the battery by
navigating along the boundary wire. The boundary wire both helps the mower to nd the charging
station and enables the mower to understand where to mow in the garden. The mower will
alternately mow and charge for the working time selected, before returning to the base station to
standby until the next day.
Because the product mows little and often, small pieces of grass are returned to the surface of
the grass. These clippings return nutrients back to the ground and cannot be seen by eye when
regular use is in effect, giving the double benet of both feeding the lawn and removing the need
to dispose of grass clippings.
4. Adjust the mower to suit your lawn
Refer to Operation section in the Instruction Manual
To change the working time
Press the STOP button. Unlock the control panel. Press the time setting button to set the desired
working time, and then press the OK button, you will hear two beeps.
To change the start time
At the time you wish the mower to begin mowing every day, press the On/Off switch to the “O”
OFF position to turn off the mower. Then turn on the mower and restart it. The new start time is
also set successfully.
NOTE: If the mower On/Off switch has been turned to the “O” Off position, the mowing schedule
has been interrupted and must be re-set. Turn the On/Off switch to the “I” ON position and unlock
the mower. Press the Start button. The new start time of the working schedule is the same time as
when you restarted the mower, and the mower will follow default daily working schedule includes
8 hours of working time (mowing and charging included), and 16 hours on standby on the base
station.
To mow the edge
For automatically mowing the edge: After nishing two days’ random working, the robotic mower
will follow the boundary wire to cut the grass at beginning of the third day.
To set the cutting height
The cutting height of the mower can be adjusted from MIN (20 mm) to MAX (60 mm).
During the rst weeks after installation, always select the cutting height (40 mm) to avoid
damaging the boundary wire. After this, the cutting height can be lowered step by step every week
until the desired cutting height has been reached.
1) Press the STOP button to stop the robotic lawnmower.
2) Open the hatch.
3) Turn the cutting height adjustment knob to set the cutting height.
- Turn clockwise to raise the cutting height.
- Turn counter-clockwise to lower the cutting height.
7 8 2
)
)
)
)
0,
4UBSU
1
4
58
10
11 12
15
18 19
16 17
20
13 14
9
7
6
2 3
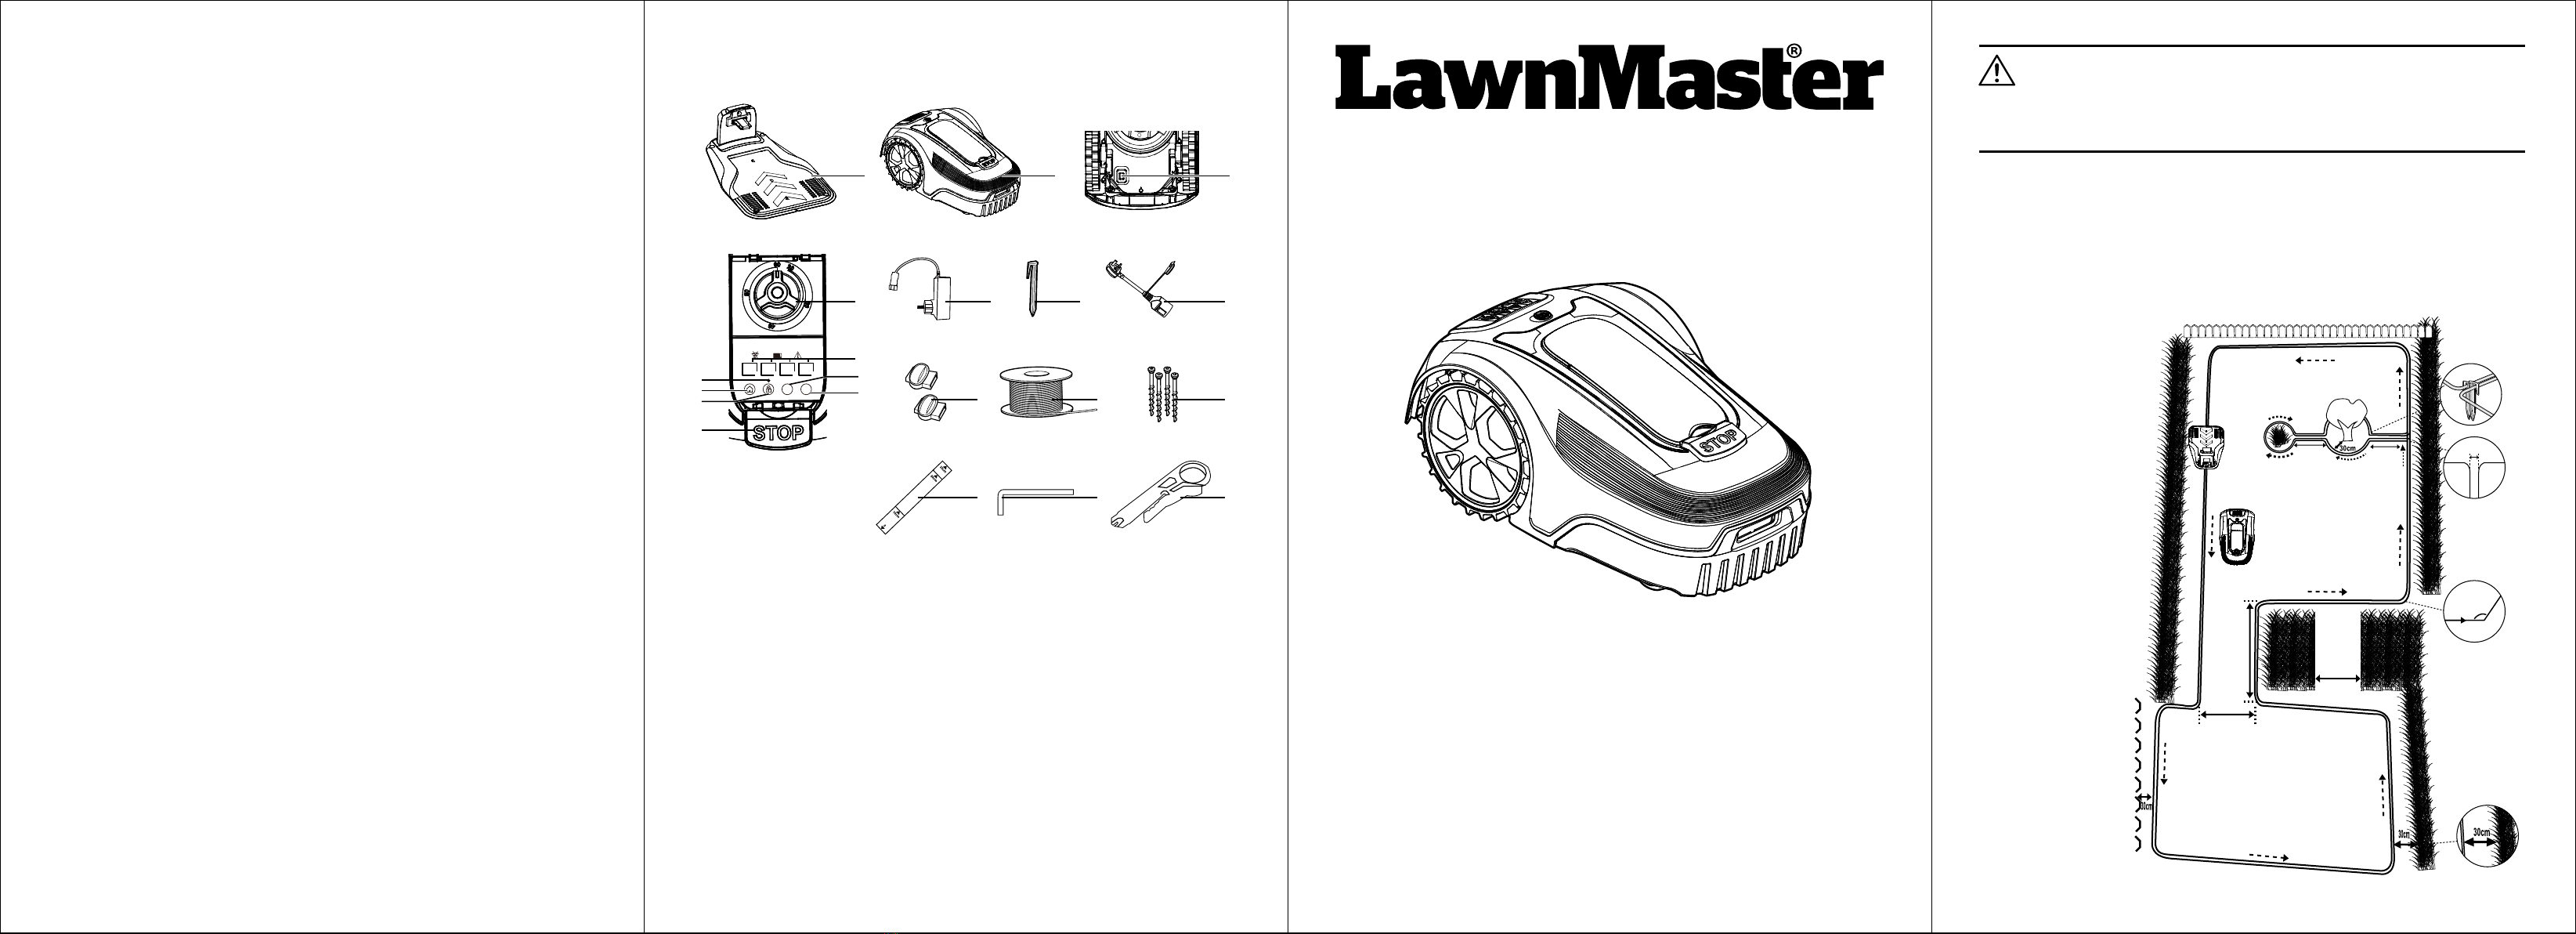
1. Base Station
2. Robotic Mower
3. On/Off Switch
4. UNLOCK Indicator
5. HOME Button
6. UNLOCK Button
7. STOP Button
8. Start Button
9. OK Button
10. Time Setting Buttons
11. Cutting Height Adjustment Knob
12. Power Adaptor
13. Wire Peg (x250)
14. Extension Cable
15. Couplers for Boundary Wire (x2)
16. Boundary Wire
17. Base Station Fixing Screw (x4)
18. Measurement Gauge on the Box
19. Hex Key
20. Wire Stripper
1. Laying the boundary wire
Refer to Assembly Section in the Instruction Manual
NOTE: If desired, to save initial set-up time the robotic mower can be charged in the unsecured
base station while the boundary wire is laid. In doing so, the robotic mower will be ready to mow
immediately after connecting the boundary wire to the base station. Ensure that the base station is
disconnected from the power source when connecting the boundary wire to the terminals.
1) Place the base station in a suitable location in the working area. The surface the base station is
located on should be shady, even and at.
This guide is not intended to replace the product user manual
which contains important safety information.
WARNING
>1m
Main Zone
Sub Zone
Narrow
Passage
>1m <1cm
<5m
≤1m
≥90°
>1m
2) Start at the rear of
the base station and
run the boundary
wire anti-clockwise
around the lawn to
form a loop around
the working area.
End the boundary
wire at the front of the
base station, leaving
enough wire to go
under the base station
to the terminal at the
rear.
3) Secure the boundary
wire to the ground
with supplied wire
pegs. Each peg
should be placed
around 50cm apart.
Use the provided
measurement gauge
to ensure the proper
distance. Keep the
boundary wire straight
and tight. There
should be no slack
wire between the
pegs.
Please refer to the Instruction Manual for important safety information and more detailed
information on all of the steps above.


