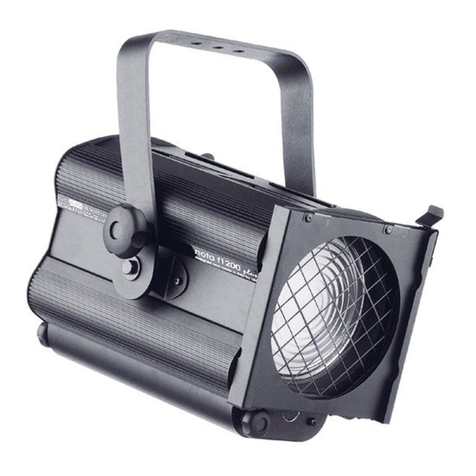
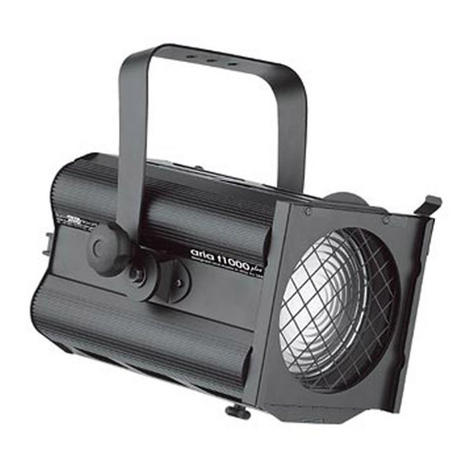
LDR Nota Moving F1200 User manual

14851000 Nota f1200 Moving
with Xpress 19 scroller
istruzioni per l'uso
operating instructions
Bedienungsanleitung
instrucciones de manejo
mode d'emploi
gebruiksaanwijzing
Luci della Ribalta srl, Via Berna 14, 46042 Castel Goffredo mn Italy. tel +39 0376 771 777 - fax +39 0376 772 140 - email [email protected]

Nota Moving User’s Manual – 1.0
Luci della Ribalta srl, Via Berna 14, 46042 Castel Goffredo (MN) Italy
Tel. +39 0376 771 777 – fax +39 0376 772 140 – email info@ldr.it – web www.ldr.it
1
ENGLISH – TABLE OF CONTENTS
Important safety norms ……………………………………………………………………... page 3
1. Check box content…………………………………………………………………. page 4
2. Weight and dimensions……………………………………………………............ page 4
3. Important notice before installation ……………………………………………… page 4
4. Lamp-holder setting ……………………………………………………………….. page 5
5. Balance setting …………………………………………………………………….. page 5
6. Installation …………………………………………………………………………… page 6
7. Installation example ………………………………………………………………... page 7
OPERATION
8. DMX connection ……………………………………………………………………. page 8
9. Connection to the Nota Moving ………………………………………………….. page 8
10. Power cable …………………………………………………………………………. page 8
11. 7-segment display ………………………………………………………………….. page 8
12. Setting the start address ……………………………………………………………. page 8
13. LED status indicators ………………………………………………………………… page 9
14. The “LEARN” key ……………………………………………………………………… page 9
15. 6-way control/power unit …………………………………………………………… page 10
16. Fuse replacement ………………………………………………………………….. page 10
17. Colour scroller – LDR Xpress 19 ……………………………………………………. page 10
18. Horizontal movement (Pan) ………………………………………………………… page 11
19. Vertical movement (Tilt) …………………………………………………………….. page 11
20. Focus (zoom) control ……………………………………………………………….. page 11
21. Cleaning and maintenance ………………………………………………………. page 11
22. Spare parts …………………………………………………………………………… page 12
23. Warranty ……………………………………………………………………………… page 12
ITALIANO – INDICE
Importanti norme di sicurezza………………………..……………………………………... pag. 13
1. Controllo del contenuto dell’imballo ………………………………….…………. pag. 14
2. Peso e dimensioni …………………………………………………….................. pag. 14
3. Prima dell’installazione …………………………………………..………………… pag. 15
4. Regolazione del porta-lampada ………………………………………………… pag. 15
5. Bilanciamento …………………………………………………..………………….. pag. 15
6. Installazione ………………………….……………………………………………… pag. 16
7. Esempio di installazione …………………………………………………………... pag. 17
FUNZIONAMENTO
8. Collegamento DMX ………………………….……………………………………. pag. 18
9. Collegamento al Nota Moving ………………………………………….……….. pag. 18
10. Cavo di alimentazione …………………………………………….………………. pag. 18
11. Display ……………………………………………………………………………….. pag. 18
12. Assegnazione dell’indirizzo DMX di inizio …………………………………………. pag. 18
13. Indicatori di stato - LED ……………………………………………………………… pag. 19
14. Il tasto “LEARN” ……………………………………………………………………… pag. 19
15. Alimentatore PSU-6 .……………………………………………………………….… pag. 20
16. Sostituzione del fusibile …………….……………………………………………….. pag. 20
17. Colour scroller – LDR Xpress 19 ……………………………………………………. pag. 21
18. Movimento orizzontale (Pan) ………………………………………………………. pag. 21
19. Movimento verticale (Tilt) ……………………………………………………….….. pag. 21
20. Messa a fuoco (zoom) ……………………………………………………….…….. pag. 21
21. Pulizia e manutenzione ………………….…………………………………………. pag. 22
22. Parti di ricambio …………….…………………………………………….………… pag. 22
23. Garanzia ………………………………………………………………..…….……… pag. 22

Nota Moving User’s Manual – 1.0
Luci della Ribalta srl, Via Berna 14, 46042 Castel Goffredo (MN) Italy
Tel. +39 0376 771 777 – fax +39 0376 772 140 – email info@ldr.it – web www.ldr.it
2
DEUTSCH – INHALTSVERZEICHNIS
Wichtige Sicherheitshinweise …………………………..…………………………………... Seite 23
1. Inhalt der Verpackung …………….………………………………………………. Seite 24
2. Gewicht und Abmessungen ………….…………………………………............ Seite 24
3. Vorsicht ……………………………………………………………………………… Seite 24
4. Verstellung des Lampensockels ………………………………………………….. Seite 25
5. Schwerpunkteinstellung ..………………………………………………………….. Seite 25
6. Montage ………………………………………………….………………………… Seite 26
7. Installationsbeispiel …………………………………………….…………………... Seite 27
INBETRIEBNAHME
8. DMX Anschluss ………………………………………………………………………. Seite 28
9. Verbindung zum Nota Moving …………………………………………………….. Seite 28
10. Netzkabel …………………………………………………………………………….. Seite 28
11. Die 7-Segment Anzeige …………..……………………………………….……….. Seite 28
12. Einstellen der Startadresse …………………………………………………………. Seite 28
13. Die Leuchtdioden …………………………………………………………………… Seite 29
14. Die “LEARN” Taste …………………………….……………………………………… Seite 29
15. DMX-Adressen am 6-Fach Steuer/Netzgerät ……..……………………………… Seite 30
16. Sicherungswechsel ………………………………………………………………….. Seite 30
17. Farbwechsler – LDR Xpress 19 ……………………………………………..………. Seite 30
18. Horizontalantrieb (Pan) ……………………………………………………………… Seite 31
19. Vertikalantrieb (Tilt) ……………………………………………………….………….. Seite 31
20. Fokusverstellung ………….………………………………………………………….. Seite 31
21. Reinigung und Wartung …………………………………….………………………. Seite 31
22. Ersatzteile ……………………………………………………………………………… Seite 32
23. Garantie ……………….……………………………………………………………… Seite 32
LI Conformity Certificate – Certificato di Conformità – Konformitätserklärung ……….… Page 33
LDR Conformity Certificate – Certificato di Conformità – Konformitätserklärung ……… Page 34
Complaint form – Modulo di reclamo – Reklamationsformular …………………………. Page 35
WEEE Directive – Direttiva RAEE – WEEE Richtlinie …………………………………………… Page 36

Nota Moving User’s Manual – 1.0
Luci della Ribalta srl, Via Berna 14, 46042 Castel Goffredo (MN) Italy
Tel. +39 0376 771 777 – fax +39 0376 772 140 – email info@ldr.it – web www.ldr.it
3
ENGLISH
Thanks for having chosen Luci della Ribalta srl. We hope our products and services meet your
requirements, but should this not be the case, we kindly ask you to contact us directly to help us
supply you and all our customers with better and better quality. The product you purchased has
been manufactured with maximum care and selected components, but should you, for reasons
beyond our control, have received it damaged, we kindly ask you to contact the dealer who
supplied the product to you. To help you in this casualty, a form is supplied at the end of this
manual.
Carefully read user’s instructions before using this lighting unit
The instructions given here below ensure a safe and correct usage of this product. User’s failure to
comply with the installation, operating, maintenance and safety procedures mentioned in this
manual, as well as those generally applicable to this lighting equipment, may cause the luminaire
not to perform as expected.
Luci della Ribalta accepts no liability for direct, indirect, incidental, special, or consequential
damages resulting from the customer’s failure to follow the installation, operating, maintenance and
safety procedures in this manual or those generally applicable to lighting equipment.
The limitation extends to damages for personal injury, property damage, loss of
operations, loss of profits, loss of product or loss of time, whether incurred in by the customer, the
customer’s employees or a third part.
Apart from the instructions given on this manual, all relevant safety and health standards of the
appropriate EU Directives must be complied with
IMPORTANT SAFETY NORMS
* this product is fitted with a remote control yoke for stage lighting fixtures, which can only be
operated by experts.
* make sure balance is always reset before operation in case one or more accessories have been
added or removed (colour scrollers or changer, barndoors, etc.) See specific instructions on page 5
and 6 of this manual
* this product reaches high temperatures. Avoid any direct contact with its metallic parts.
* this product is rated IP 20 and is therefore designed for interior use and in dry environment only
(humidity < 90%). For details on maximum ambient temperature, minimum distance from
flammable objects and tilt angle, please refer to what indicated on the product label.
* do not install this product on or near flammable surfaces
* before installing this product make sure the structure you are fixing the product to can withstand its
load.
* replace the lamp, the mirror and the lenses if damaged or deformed by heat. Make sure the
lamp is cold before attempting to remove it. To perform a correct installation of the lamp, please
refer to the lamp manufacturer's instructions included in the lamp box and to the relevant chapter in
this manual
* make sure the unit is disconnected from the mains before attempting to replace the fuse or any
other component
* fixing and replacement of any component of this product must be carried out exclusively by
professional personnel in conformity with the relevant safety and health standards and only with
original manufacturer’s components.

Nota Moving User’s Manual – 1.0
Luci della Ribalta srl, Via Berna 14, 46042 Castel Goffredo (MN) Italy
Tel. +39 0376 771 777 – fax +39 0376 772 140 – email info@ldr.it – web www.ldr.it
4
* replacement of any part of the wiring system must be carried out exclusively by professional
personnel in compliance with the original wiring diagrams and with components identical or
compatible with those originally fitted.
* installation of this product must be exclusively carried out by professional personnel in compliance
with the safety norms in force in the country where the product is used.
1. CHECK BOX CONTENT
Upon opening the packaging, please make sure it contains the following:
luminaire:
a. lighting unit complete with motor yoke
b. colour scroller Xpress 19, fitted
c. 2 mega clamps for ø50/60mm pipe
d. safety cable
PSU: (if ordered)
a. this product can only be operated through a dedicated PSU. Please make sure the shipment
includes the model you have ordered
Should one or more items miss, we kindly ask you to contact your dealer immediately.
2. WEIGHT AND DIMENSIONS
Total net weight: 15,5 kg – including the Xpress 19 colour scroller
3. IMPORTANT NOTICE BEFORE THE INSTALLATION
1. Make sure the two mega clamps are correctly fixed and strongly tightened

Nota Moving User’s Manual – 1.0
Luci della Ribalta srl, Via Berna 14, 46042 Castel Goffredo (MN) Italy
Tel. +39 0376 771 777 – fax +39 0376 772 140 – email info@ldr.it – web www.ldr.it
5
2. Make sure each part of this unit (power supply, motor yoke as well as colour scroller and, if
installed, a barndoor, are securely fixed to the structure by an individual safety cable
3. Make sure none of the safety cables installed hinders in any way the free movement of the
unit
4. The gearbox controlling the drive of the yoke is protected by a friction clutch to avoid
possible damages to transmission, for example by decoration items on the wall. In order to
avoid malfunctioning of the clutch we strongly recommend that pan and tilt position are
NOT MANUALLY SET
4. LAMP-HOLDER SETTING
This unit is fitted with a double-microswitch which disconnects power as soon as the lam-tray is
open. The lampholder is factory set for usage with a CP70 GX9.5 1000W lamp. Should you require
to set it for usage with CP90 GX9.5 1200W lamp, remove the lampholder support plate from its seat
by slackening its fixing screw. Reposition the plate in the lower cut and re-tighten the screw to fix it in
place.
5. BALANCE SETTING
This unit has been designed to operate under different weight loads and it therefore features two
possible pre-set balance settings.
Before installing the unit make sure balancing is correctly set according to the accessories mounted
on the front of the luminaire:
Position 1: with colour scroller or colour scroller + barndoor
Position 2: with or without barndoor
Please remember that a correct balance setting is vital for a correct operation of the unit and to
avoid damages to the drive.

Nota Moving User’s Manual – 1.0
Luci della Ribalta srl, Via Berna 14, 46042 Castel Goffredo (MN) Italy
Tel. +39 0376 771 777 – fax +39 0376 772 140 – email info@ldr.it – web www.ldr.it
6
A: balance-setting sliding plate
B: balance-setting guide fixed to the side of the luminaire
6. INSTALLATION
Before installing this product make sure the structure you are fixing the product to can withstand its
load and the total load of any other unit installed.
1. Hang the unit to the structure and firmly tighten the clamps.
2. Make sure there is enough distance between each unit to allow free movement
3. Make sure there are no obstructions to the free movement of the yoke
4. Connect the dedicated PSU to the control desk
5. Connect a XLR4 control cable to the motor yoke and supply DMX signal from your control
desk
6. Set channel 1 of the motor yoke to 50% (control of pan position) – pict. 1 page 7
7. Fix the safety bond as in picture 2 (O-shape)
8. Close the bond and make sure the snaplink lies on the upper side of the pipe – pict. 3
9. Fix the snaplink in position with a cable tie, so that it will not move – detail A
10. Set channel 1 to 0% and then to 100% and make sure that the safety bond does not bend
or hinders the movement of the yoke

Nota Moving User’s Manual – 1.0
Luci della Ribalta srl, Via Berna 14, 46042 Castel Goffredo (MN) Italy
Tel. +39 0376 771 777 – fax +39 0376 772 140 – email info@ldr.it – web www.ldr.it
7
7. INSTALLATION - EXAMPLE

Nota Moving User’s Manual – 1.0
Luci della Ribalta srl, Via Berna 14, 46042 Castel Goffredo (MN) Italy
Tel. +39 0376 771 777 – fax +39 0376 772 140 – email info@ldr.it – web www.ldr.it
8
A PSU for 1 Nota Moving
B PSU for 6 Nota Moving
C Power supply cable
D Power/control cable
E Control desk
OPERATION
8. DMX CONNECTION
The DMX-signal cable is connected to the XLR5 plug "DMX IN". If you need to connect the DMX
signal to additional devices, the DMX-OUT output needs to be used. In this case it is necessary to set
the DMX termination switch to "OFF". If the unit is the last one in the DMX chain, set the DMX
termination switch to "ON".
9. CONNECTION TO THE NOTA MOVING
This connection is made with an XLR 4-control cable (maximum length 100 m), and can be
connected directly to the Nota Moving. Up to 6 Nota Moving can be connected to the DMX
Control/Power Unit No. LI 1002.06.
24VDC for the motor and electronics is provided by the PSU on the XLR4 output
10. POWER CABLE
Cables must be connected only to unregulated power circuits (no dimmer connection). Supply
voltage can range from 85-260 VAC 50 or 60 Hz.
11. 7-SEGMENT DISPLAY
The display shows the software version in use and the start address. It lights approx. 10 seconds after
power-up and after any address change. It will then automatically switch off after that time.
12. SETTING THE START ADDRESS
a) Press the “Select” key. The start address appears on the display and the start address flashes on
the 7-segment display.
b) By pressing the "Change" key, the start address can be increased by 1.
c) By pressing the “Select” key again you can control the decimal place.
This begins to flash.
d) With the "Change" key, select the desired value.
e) Repeat steps (c) and (d) for the hundred values.
f) After 10 seconds the display switches off and the address is stored.

Nota Moving User’s Manual – 1.0
Luci della Ribalta srl, Via Berna 14, 46042 Castel Goffredo (MN) Italy
Tel. +39 0376 771 777 – fax +39 0376 772 140 – email info@ldr.it – web www.ldr.it
9
Note: A DMX line transfers 512 data channels. If you want to use a higher address, (eg.525), follow
these steps:
1. Engage the second DMX path (address 513-1024)
2. The selected start address corresponds to the circuit number less 512 (525-512=13)
3. Set the resulting number (in this case 13) as the start address
13. LED STATUS INDICATORS
There are 3 LEDs indicating the status of the unit as follows:
Label LED colour Function
Power red Connected to power, fuse ok
DMX control green DMX signal presen
t
Y
oke ready
y
ellow Nota Moving is ready to use
14. THE “Learn” KEY
If you want to modify the horizontal (pan) or vertical (tilt) operation angle of the Nota Moving, press
the “Learn” key.
Note: this function only applies to pan and tilt, not to focus and colour changer.
Press the “Learn” key: the display shows “Lrn”. Keep the key pressed (approx. 12 secs) until the display
shows “run”. You can now set the desired operation angle, i.e. get the unit to learn its movement
limits. If the movement of the unit is not stopped, it will store the maximum capability as the default
operation angle. You can also manually stop the unit during this process and the unit will store the
angle reached when it’s been stopped as the standard operation angle. The “learning process” or
set up of the operation angles lasts approx 2min.
The advantage of this function is that the lighting control system can exploit the full capability of 0-
100%.
In case of power cuts or black-outs, the Nota Moving remains in the same position and resumes
standard operation after power up, without any need for a reset.
DM
X
Chan.
Resolution
A
ttribute
1
2
16bi
t
Pan
Pan fine
3
4
16bi
t
Til
t
Tilt fine
5 8bi
t
Focus
6 8bi
t
Colour (Step mode)
7 8bi
t
Colour motor speed
8 8bi
t
Colour fan speed

Nota Moving User’s Manual – 1.0
Luci della Ribalta srl, Via Berna 14, 46042 Castel Goffredo (MN) Italy
Tel. +39 0376 771 777 – fax +39 0376 772 140 – email info@ldr.it – web www.ldr.it
10
If you are using a 6-way PSU, the “LEARN” function will only be available through output “Yoke 1”. If
you need to custom set the operation angle on a unit plugged onto a different output, unplug it
and temporarily plug it onto output “Yoke 1” while setting the new parameters.
15. 6-WAY CONTROL/POWER UNIT
This unit can control up to 6 Nota Moving. It takes 8 channels per controlled device, i.e. when used
at full capacity, it will take 48 channels of your console. When used only partially, for example with 4
units of Nota Moving, (8 channels x 4 = 32 channels), it allows to use, in this case, the 33rd channel
in sequence for other DMX devices, such as dimmers, effects, etc. As an alternative option this
channel can be set as the start address for the next 6 way PSU.
There is a shift of 8 channels in between the outputs. So, the first channel of the next Nota Moving is
the first channel of the previous one increased by 8. If the start address is, for example, 010, the
sequence would be as follows: Nota Moving 1: 10-17, Nota Moving 2: 18-25, Nota Moving 3: 26-33,
Nota Moving 4: 34-41, Nota Moving 5: 42-49, Nota Moving 6: 50-57.
The “LEARN” function is only available through output “Yoke 1”
PSU for 1 Nota Moving PSU for 6 Nota Moving
16. FUSE REPLACEMENT
The fuse holder is fitted on the Control / Power Unit, located next to the cable entry.
Type: 32mm / 1.5A slow blow.
CAUTION: Replace the fuse only when power is disconnected!
17. COLOUR SCROLLER – LDR XPRESS 19 – STEP MODE
The Nota Moving is fitted with an XLR4 output on the opposite side of the tilt drive.
Most manufacturers of colour scrollers, including LDR, adopt the following scheme for the
connection of pins:
Pin 1 = 0V; Pin 2 = Data -; Pin 3 = Data +; Pin 4 = 24V

Nota Moving User’s Manual – 1.0
Luci della Ribalta srl, Via Berna 14, 46042 Castel Goffredo (MN) Italy
Tel. +39 0376 771 777 – fax +39 0376 772 140 – email info@ldr.it – web www.ldr.it
11
In case you are not using an LDR Xpress Colour Scroller, make sure that your scroller uses this
connection scheme. Should this not be the case, severe damages not covered by our warranty,
can occur to both Nota Moving and the scroller.
•The maximum output power of the PSU-6 is 30W per output, but it cannot exceed a total of
120W (100% overload on short term is accepted)
•The maximum output power of the PSU-1 is 30W.
CAUTION: Before installing a colour scroller make sure you adjust the balance setting to position
1 (see page 5 and 6 of this manual).
NOTE: for a correct operation of the Xpress Colour Scroller please refer to the relevant LDR user’s
manual supplied with each unit.
The sixth channel in the sequence is dedicated to the control of colours.
Set address for colour changing to 6 on your color changer. The supplied LDR Xpress 19 colour
scroller also allows control of motor speed (colour changing speed) on address 7 and control of fan
speed on address 8.
18. HORIZONTAL MOVEMENT (PAN) – MAX 364°
Pan movement is controlled at 16bit and occupies addresses 1 and 2 in the series. The maximum
operation angle of 364° allows a complete coverage of the stage. At maximum speed the unit
moves horizontally from 0 to 100% in 30 secs.
19. VERTICAL MOVEMENT (TILT) – MAX 94°
Tilt movement is controlled at 16bit and occupies addresses 3 and 4 in the series. The maximum
operation angle of 94° allows a complete coverage of the stage. At maximum speed the unit
moves vertically from 0 to 100% in 19 secs
20. FOCUS (ZOOM) CONTROL
Focus control on Nota is carried out through a DMX signal and a motor. It is controlled at 8bit and
occupies address 5 in the series.
21. CLEANING AND MAINTENANCE
To ensure maximum performance of the product, a regular maintenance service should be carried
out. Please make sure the product is cold and disconnected from power supply when doing this.
Pan and tilt drive
The special plastic materials used in the construction of the drive make it maintenance-free.
Focus mechanism
Because of the construction of the focus mechanism (screw focus-rod), it was necessary to protect
the rod with a special copper paste, in order to reduce the development of noise. Should focusing
become noisy, we suggest you repeat the operation with copper paste
(e.g. RS Components, part nr. 311-4326 – www.rs-components.com)

Nota Moving User’s Manual – 1.0
Luci della Ribalta srl, Via Berna 14, 46042 Castel Goffredo (MN) Italy
Tel. +39 0376 771 777 – fax +39 0376 772 140 – email info@ldr.it – web www.ldr.it
12
General maintenance
* clean all reflective parts such as reflector, mirror and lens opening the product, if necessary.
* check the lamp and the lenses and replace any visibly damaged component.
* clean air ducts and fans in order to allow proper ventilation activity on the product.
* check internal and external wiring and replace any cable which should be damaged by heat or
mechanical agents.
22. SPARE PARTS
All components are available as spare parts. We strongly recommend you always use original LDR
components as spare parts. Please refer to our technical assistance should you need to order
and/or replace any part of the unit.
23. WARRANTY
Our warranty covers all structural and manufacture defects for one year from the date you
purchased this product. In case of complaints we strongly recommend you contact the local
dealer who supplied the product to you. In any case please report the serial number of the product.
Luci della Ribalta srl reserves the right to modify the present document without prior notice.

Nota Moving User’s Manual – 1.0
Luci della Ribalta srl, Via Berna 14, 46042 Castel Goffredo (MN) Italy
Tel. +39 0376 771 777 – fax +39 0376 772 140 – email info@ldr.it – web www.ldr.it
13
ITALIANO
Grazie per aver scelto Luci della Ribalta srl. Speriamo che i nostri prodotti e servizi soddisfino le vostre
esigenze, ma se così non fosse vi preghiamo di contattarci direttamente per aiutarci ad offrire a voi
ed a tutti i nostri clienti un servizio sempre migliore. Il prodotto che avete acquistato è stato
fabbricato con il massimo della cura e con componenti di elevata qualità. Nel caso in cui, per
ragioni indipendenti dalla nostra volontà, l’aveste ricevuto danneggiato, vi preghiamo di contattare
il rivenditore che ve l’ha fornito. Per aiutarvi in questa evenienza, abbiamo inserito un modulo di
reclamo alla fine di questo manuale.
Leggete attentamente questo manuale prima di utilizzare questa apparecchiatura
elettrica
Le istruzioni qui di seguito riportate assicurano un utilizzo corretto e sicuro del prodotto che avete
acquistato. La mancata osservanza delle procedure di installazione, funzionamento, manutenzione
e sicurezza qui indicate, oltre alle norme generali di utilizzo di questo tipo di prodotti potrebbe
essere causa di malfunzionamento dell’apparecchiatura o di rese diverse da quanto specificato
dal produttore.
Luci della Ribalta srl non si assume alcuna responsabilità in caso di danno diretto, indiretto,
accidentale, specifico o conseguente a cose o persone derivante dalla mancata osservanza da
parte dell’utilizzatore delle procedure di installazione, funzionamento, manutenzione e sicurezza
indicate in questo manuale e di quelle genericamente applicabili a questa categoria di prodotto.
La limitazione si estende a danni a persone, cose, proprietà, interruzione o perdita di attività,
mancato profitto, o perdita di tempo, causati dal cliente, da un suo dipendente o da terzi.
L’utilizzo di questa apparecchiatura è regolato, oltre che dalle prescrizioni qui indicate, anche
da tutte le relative norme di sicurezza e protezione della salute riportate nelle specifiche
direttive EU relative a questo tipo di apparecchiature.
IMPORTANTI NORME DI SICUREZZA
* questa apparecchiatura è dotata di una forcella mobile con controllo a distanza che può essere
utilizzata solo da personale esperto
* assicuratevi che il punto di bilanciamento sia sempre regolato sulla posizione richiesta dall’assetto
dell’apparecchiatura, ossia degli accessori frontali quali scroller e o paraluce che vengano di volta
montati o rimossi. Si vedano dettagliate istruzioni a pag. 15 e 16
* questa apparecchiatura raggiunge temperature elevate. Evitate qualsiasi contatto diretto con le
parti metalliche.
* questo prodotto è classificato IP20 ed è quindi adatto al solo utilizzo in interni ed in ambienti con
umidità inferiore al 90%. Per informazioni sulla temperatura ambiente massima consentita, sulla
distanza minima del prodotto da oggetti infiammabili e l’angolo massimo di inclinazione utilizzabile,
vi preghiamo di far riferimento a quanto riportato sull’etichetta del prodotto.
* non installate questo prodotto su – o vicino a superfici infiammabili
* prima di installare questo prodotto assicuratevi che la struttura a cui lo state per fissare ne sopporti
il peso
* sostituite la lampada, lo specchio e le lenti se danneggiate o deformate dal calore. Assicuratevi
che la lampada sia fredda prima di iniziarne la sostituzione. Per eseguire una corretta installazione

Nota Moving User’s Manual – 1.0
Luci della Ribalta srl, Via Berna 14, 46042 Castel Goffredo (MN) Italy
Tel. +39 0376 771 777 – fax +39 0376 772 140 – email info@ldr.it – web www.ldr.it
14
della lampada vi preghiamo di attenervi alle istruzioni del fabbricante riportate all’interno della
confezione della lampada stessa ed al relativo capitolo di istruzioni di questo manuale.
* assicuratevi che il prodotto sia scollegato dall’alimentazione e che sia freddo prima di effettuare
la sostituzione del fusibile o di qualsiasi altro componente.
* la riparazione e/o sostituzione di qualsiasi componente di questo prodotto deve essere effettuata
esclusivamente da personale qualificato in conformità con le specifiche norme di sicurezza e
protezione della persona ed esclusivamente con parti di ricambio originali
* la riparazione e/o sostituzione di qualsiasi componente delle parti elettriche deve essere
effettuata esclusivamente da personale qualificato in conformità con gli schemi elettrici forniti da
Luci della Ribalta e con componenti identici o compatibili con quelli originariamente montati.
* l’installazione di questo prodotto deve essere effettuata esclusivamente da personale qualificato
in conformità con le specifiche norme di sicurezza e protezione della persona in vigore nel paese in
cui il prodotto viene utilizzato.
1. CONTROLLO DEL CONTENUTO DELL’IMBALLO
Controllate che l’imballo contenga I seguenti articoli:
illuminatore:
a. illuminatore completo di forcella motorizzata
b. colour scroller Xpress 19, montato
c. 2 mega ganci per tubo ø50/60mm
d. cavo di sicurezza
alimentatore : (se ordinato)
a. questo prodotto può funzionare solo in combinazione con un alimentatore dedicato.
Controllate che l’imballo contenga il modello che avete ordinato.
Nel caso in cui mancassero uno o più articoli vi preghiamo di contattare immediatamente il vostro
rivenditore.
2. PESO E DIMENSIONI

Nota Moving User’s Manual – 1.0
Luci della Ribalta srl, Via Berna 14, 46042 Castel Goffredo (MN) Italy
Tel. +39 0376 771 777 – fax +39 0376 772 140 – email info@ldr.it – web www.ldr.it
15
Peso netto totale: 15,5kg – compreso lo scroller Xpress 19
3. PRIMA DELL’INSTALLAZIONE
1. Assicuratevi che i due mega ganci siano correttamenti montati e ben fissati.
2. Assicuratevi che ogni componente mobile di questo prodotto (alimentatore, forcella
motorizzata, colour scroller e paraluce) vengano saldamente fissati alla struttura di supporto
con un cavo di sicurezza individuale.
3. Assicuratevi che nessuno dei cavi di sicurezza impedisca in ogni modo il libero movimento
del prodotto.
4. Il sistema di controllo del movimento della forcella è dotato di un blocco frizione che
impedisce possibili danni alla trasmissione, per esempio a causa dell’urto con tendaggi o
altri elementi decorativi. Al fine di evitare il malfunzionamento del blocco frizione si
raccomanda DI NON SETTARE MAI MANUALMENTE LA POSIZIONE ORIZZONTALE E VERTICALE
DELLA FORCELLA.
4. REGOLAZIONE DEL PORTA-LAMPADA
Questo prodotto è dotato di un doppio microinterruttore di sicurezza che scollega l’alimentazione
all’apertura del carrello porta-lampada. Il porta-lampada è settato di serie per l'uso con lampada
CP70 GX9.5 1000W. Per l'uso con CP90 GX9.5 1200W, togliere dalla propria sede la squadretta di
supporto-del porta-lampada svitandone la vite di fissaggio. Riposizionate la squadretta nel taglio
inferiore e riavvitate.
5. BILANCIAMENTO
Questo prodotto è stato progettato per funzionare in diversi assetti di peso ed è quindi dotato di
due punti di bilanciamento possibili. Prima di installare questo prodotto assicuratevi che il
bilanciamento sia adeguato agli accessori montati sulla parte frontale dell’illuminatore.
Posizione 1: con colour scroller o con colour scroller + paraluce
Posizione 2: con o senza paraluce

Nota Moving User’s Manual – 1.0
Luci della Ribalta srl, Via Berna 14, 46042 Castel Goffredo (MN) Italy
Tel. +39 0376 771 777 – fax +39 0376 772 140 – email info@ldr.it – web www.ldr.it
16
Vi preghiamo di ricordare che solo un corretto bilanciamento consente il corretto funzionamento
del prodotto ed evita danni al sistema di trasmissione.
A: piastra scorrevole di bilanciamento
B: guida di bilanciamento fissata sul lato dell’illuminatore
6. INSTALLAZIONE
Prima di installare questo prodotto assicuratevi che la struttura a cui lo state per fissare ne sopporti il
peso.
1. Appendete il prodotto alla struttura e chiudete fermamente I ganci
2. Assicuratevi che fra ogni prodotto e quello adiacente ci sia una distanza sufficiente a
garantire il libero movimento di ognuno.
3. Assicuratevi che non vi siano ostacoli nel raggio di azione del prodotto.
4. Collegate l’alimentatore dedicato al banco regia.
5. Collegate un cavo di segnale dotato di XLR4 al Nota Moving e trasmettete il segnale DMX
dal vostro banco regia.
6. Regolate il canale 1 del Nota Moving sul 50% (controllo della posizione orizzontale) dis.1
7. Fissate il cavo di sicurezza come indicato in dis.2 (a cerchio)
8. Chiudete il cavo di sicurezza ed assicuratevi che il moschettone sia posizionato sul lato
superiore del tubo – dis.3
9. Bloccate il moschettone in posizione con una fascetta per cavi, in modo tale che non si
muova – dettaglio A
10. Regolate ora il canale 1 su 0% e poi su 100%, ed assicuratevi che il cavo di sicurezza non
impedisca in alcun modo il movimento della forcella.

Nota Moving User’s Manual – 1.0
Luci della Ribalta srl, Via Berna 14, 46042 Castel Goffredo (MN) Italy
Tel. +39 0376 771 777 – fax +39 0376 772 140 – email info@ldr.it – web www.ldr.it
17
7. ESEMPIO DI INSTALLAZIONE

Nota Moving User’s Manual – 1.0
Luci della Ribalta srl, Via Berna 14, 46042 Castel Goffredo (MN) Italy
Tel. +39 0376 771 777 – fax +39 0376 772 140 – email info@ldr.it – web www.ldr.it
18
A Alimentatore per 1 Nota Moving
B Alimentatore per 6 Nota Moving
C Cavo di alimentazione
D Cavo di alimentazione/segnale
E Banco regia
FUNZIONAMENTO
8. COLLEGAMENTO DMX
Il cavo di segnale DMX viene collegato alla presa XLR5 "DMX IN". Nel caso in cui doveste collegare
al segnale DMX ulteriori apparecchiature, dovrete utilizzare l’uscita “DMX-OUT”. In questo caso
dovrete regolare l’interruttore DMX su OFF. Se l’apparecchiatura è l’ultima della sequenza DMX,
regolate l’interruttore DMX su ON.
9. COLLEGAMENTO AL NOTA MOVING
Questo collegamento va effettuato con un cavo di segnale XLR4 (lunghezza massima 100m), che
va collegato direttamente sul Nota Moving. Con l’alimentatore PSU 6 (Cod. LI1002.06) è possibile
controllare fino a 6 Nota Moving.
L’alimentazione a 24VDC a motore ed elettronica viene fornita dall’alimentatore sull’uscita XLR4.
10. CAVO DI ALIMENTAZIONE
I cavi di alimentazione devono essere collegati solo a fonti libere, ossia non sotto dimmer. Il
voltaggio di alimentazione può variare tra 85V e 260V AC e la frequenza tra 50Hz e 60Hz.
11. DISPLAY
Il display indica la versione di software in uso e l’indirizzo iniziale. Si illumina per circa 10 secondi
dopo l’accensione e dopo ogni modifica di indirizzo, per poi spegnersi nuovamente.
12. ASSEGNAZIONE DELL’INDIRIZZO DMX DI INIZIO
a) Premete il tasto “Select”. L’indirizzo di inizio lampeggia sul display, dove rimane visibile,
b) Premendo il tasto "Change" è possibile incrementare il valore dell’indirizzo di 1.
c) Premendo di nuovo il tasto “Select” è possibile gestire e modificare il valore delle decine, che
inizia a lampeggiare
d) Utilizzando il tasto "Change" selezionate il valore desiderato.
e) Ripetete i passi (c) e (d) per le centinaia.
f) Dopo 10 secondi il display si spegne ed il nuovo indirizzo è memorizzato.

Nota Moving User’s Manual – 1.0
Luci della Ribalta srl, Via Berna 14, 46042 Castel Goffredo (MN) Italy
Tel. +39 0376 771 777 – fax +39 0376 772 140 – email info@ldr.it – web www.ldr.it
19
Nota: una linea DMX trasmette 512 canali di dati. Se volete utilizzare un indirizzo di valore superiore
a 512 (es. 525), adottate la seguente procedura:
1. Spostatevi sulla seconda linea DMX (indirizzo 513-1024)
2. L’indirizzo di inizio selezionato corrisponde al numero del circuito meno 512 (es. 525-512=13)
3. Attribuite il numero risultante, in questo caso 13, come indirizzo di inizio.
13. INDICATORI DI STATO - LED
I 3 LED indicatori di stato segnalano quanto segue:
Dicitura Colore del LED Funzione
Power rosso Collegato all’alimentazione, fusibile O
K
DMX control verde Segnale DMX presente
Y
oke ready giallo Nota Moving pronto all’uso
14. IL TASTO “Learn”
E’ possibile modificare l’angolo del movimento orizzontale (pan) e di quello verticale (tilt) utilizzando
il tasto “Learn”.
Nota: questa funzione è disponibile solo per i movimenti di pan e tilt, e non per la messa a fuoco o
il cambia-colori.
Premete il tasto “Learn”: il display indica “Lrn”. Tenete premuto il tasto per circa 12 secondi, finchè il
display indicherà “run”. E’ ora possibile impostare l’angolo di movimento richiesto (es. 90° o 180°),
ossia fare in modo che l’apparecchiatura “impari” i propri limiti di azione. Se durante questa
operazione il movimento del Nota Moving non viene interrotto, verrà salvato come impostazione di
default l’angolo massimo disponibile per ogni movimento. E’ inoltre possible bloccare
manualmente il movimento durante questa fase di settaggio. In questo caso il sistema imposterà
come default l’angolo raggiunto al momento in cui l’apparecchiatura è stata bloccata. Il processo
di modifica dell’angolo di movimento dura circa 2 minuti.
In caso di interruzione di corrente il Nota Moving non perde il settaggio della posizione e ripartirà
dalla posizione in cui si trovava al momento del black-out non appena l’alimentazione viene fornita
di nuovo, senza alcun bisogno di re-set.
Can.
DMX
Risoluzione Funzione
1
2
16bi
t
Pan (mov. orizzontale)
Pan fine
3
4
16bi
t
Til
t
(mov. verticale)
Tilt fine
5 8bi
t
Messa a fuoco
6 8bi
t
Scroller (modalità Step)
7 8bi
t
Velocità motore scroller
8 8bi
t
Velocità ventola scroller
Table of contents
Languages:
Other LDR Light Fixture manuals

LDR
LDR Nota f1000 plus 120V User manual

LDR
LDR 20102622 User manual

LDR
LDR 575 MK2 User manual

LDR
LDR Nota f1000 plus P.O. User manual

LDR
LDR Nota f1200 PO Series User manual

LDR
LDR Inno A 1000 PO black User manual

LDR
LDR Tono f2000 plus User manual

LDR
LDR Aria f1000 plus Series User manual

LDR
LDR Aria f1000 plus Series User manual

LDR
LDR Rima A500 F User manual