LED IT LARVIK SOLAR User manual

Subject to change without notice.
LED IT COMPANY LIMITED
Room A, 21/F, Gaylord Commercial building,
114 -118 Lochkart Road, Wanchai, Hong Kong
1
LARVIK SOLAR User Manual

Subject to change without notice.
LED IT COMPANY LIMITED
Room A, 21/F, Gaylord Commercial building,
114 -118 Lochkart Road, Wanchai, Hong Kong
2
LARVIK SOLAR User Manual
IMPORTANT SAFETY INFORMATION
GENERAL SAFETY INFORMATION
This manual contains important safety, installation and operating instructions.
The following symbols are used in this manual to indicate potentially
dangerous conditions or mark safety instructions.
▶Read all of the instructions and cautions in the manual before installation.
▶There are no user serviceable parts inside the light.
▶Do not disassemble or attempt to repair it.
▶Disconnect the solar module to remove the light if required.
▶Connector connections must remain tight to avoid
excessive heating from a loose connection.
WARNING: Indicates a potentially dangerous condition.
Use extreme caution when performing this task.
CAUTION: Indicates a critical procedure for safe and proper operation of the controller.
NOTE: Indicates a procedure or function that is important
for safe and proper operation of the controller.

Subject to change without notice.
LED IT COMPANY LIMITED
Room A, 21/F, Gaylord Commercial building,
114 -118 Lochkart Road, Wanchai, Hong Kong
3
LARVIK SOLAR User Manual
(1) Solar Panel
(2) Bracket
(3) Screws on spigot
(4) Spigot
(5) Pole Top
(6) Pole Support
(7) MC4 Connectors
(8) Light bracket
(9) Light head
(10) Plate
(1)
(10)
(2)
(3)
(4)
(5)
(8) (9)
(7)
(6)

Subject to change without notice.
LED IT COMPANY LIMITED
Room A, 21/F, Gaylord Commercial building,
114 -118 Lochkart Road, Wanchai, Hong Kong
4
LARVIK SOLAR User Manual
①Mounting Solar Panel to bracket with screws tightly
②Let MC4 cables go through plate of spigot
③Fix spigot to bracket of solar panel with screws
④Insert MC4 cables on solar panel into the pole from pole top
⑤Put spigot on pole top and tight screws of spigot
⑥Pull out MC4 cable of solar panel from pole support
⑦Connect MC4 plug of solar panel and light properly
⑧Insert the MC4 plugs into pole support
⑨Fix light head on pole support and tight it with screws
⑩ Check every parts are connected and xed properly
▶The light turns on at dusk with a pre-programmed setting function and works continuously until dawn.
▶The ON and OFF functions are controlled automatically by the built in charge
controller with light-sensitive timings. At sunset NTTV ( Night Time Threshold Voltage)
goes less than 7V, the solar panel, the lights will turn ON. In the morning the DTTV (
Day Time Threshold Voltage) from the panel reaches 7V the lights will turn OFF.
▶The system also comes with a manual switch for manual operation for testing purposes.
INSTALLATION
WORKING MODE & ON and OFF TIME

Subject to change without notice.
LED IT COMPANY LIMITED
Room A, 21/F, Gaylord Commercial building,
114 -118 Lochkart Road, Wanchai, Hong Kong
5
LARVIK SOLAR User Manual
OPERATION METHOD
▶Once the installation is complete, plug the MC4 connectors in the Light to the solar panel.
▶Press the power button on the light xture to the ON position to make the light turn on automatically
after sunset (Lighting mode is set to dusk to dawn mode as default by factory before delivery).
▶The smart solar led light is now ready for use.
▶You can also use the remote control to change the lighting modes or brightness in
case required. The lighting time can be selected easily by the remote controller.
▶Press the power button to the OFF position to turn OFF the light, the
light will stop working, for the maintenance and transport.
▶Do not remove or dismantle the MC4 Connectors or try to plug in the light
as the polarity can go wrong IN CASE OF DAMAGE OF LIGHT.
▶Do not open the light xture by unauthorized persons, can affect
the IP rating of the xture and void the warranty.
Power bottom

Subject to change without notice.
LED IT COMPANY LIMITED
Room A, 21/F, Gaylord Commercial building,
114 -118 Lochkart Road, Wanchai, Hong Kong
6
LARVIK SOLAR User Manual
Cleaning material
- A good quality of soft brush
- Squeegee with a plastic blade
- Cleaning agent - liquid soap
Use a hose with a suitable nozzle to allow the stream of water to reach the panels if a
water source is possible to get the location or use the normal pressure sprayer
Cleaning Process
Remove the dust with the soft brush. Once the dust is removed, you can
apply water on the panel surface. If you have a pressure sprayer, it will
be an easy option or a running water source to wash the panel surface.
Apply Soap water ONLY if Hard Stains
Apply Soap water gently if there is hard stains or bird
droppings on the panel surface. IF THERE IS NO Hard stains,
just running water is enough and go to the next step.
Wipe off the soap and excess water
Using a rubber / plastic soft
Squeegee or wiper with a plastic blade and leave it for dry.
Solar Panel Maintenance Instructions (Part A)
Safety First – CAUTION NOT TO SCRATCH THE PANEL SURFACE AND ALSO NOT TO DAMAGE
THE CABLE AND THE CONNECTOR

Subject to change without notice.
LED IT COMPANY LIMITED
Room A, 21/F, Gaylord Commercial building,
114 -118 Lochkart Road, Wanchai, Hong Kong
7
LARVIK SOLAR User Manual
Solar Panel Maintenance Instructions (Part B)
Tips for cleaning solar panel glass
For safety reasons, it’s also wise to clean your panels from the ground if possible. A good quality
soft brush and a squeegee with a plastic blade on one side and a cloth covered sponge on the other
coupled with a long extension can make for the perfect tools allowing you to stay on the ground.
▶Clean your panels on an overcast day with no sun, early in the morning or in the evening. If the sun is
beating down on the panels , any water used can quickly evaporate and dirt will become smeared.
▶Early morning can be a particularly good time for cleaning as dew that has
steeled on the panels overnight will likely have a softened grime; meaning you’ll
need to use less water and less energy to clean your solar panels.
▶If the panels are dry, before tackling the modules with water, brush off
any loose materials, this will make cleaning easier and faster.
▶Don’t use metal objects or harsh abrasive products for removing hard stains on materials,
scratching the glass a solar panel can affect its performances as scratches will cast shadows.
▶Avoid using detergents if possible as these may streak the glass of the panel.
To use abrasive powders also risks scratching the panels.
▶Given the nature of good quality solar panel glass, clean water and a little scrubbing with a
coarse cloth covered sponge or soft brush should remove the most stubborn grime.
▶The cleaning interval is recommended once in two months at normal weather conditions.
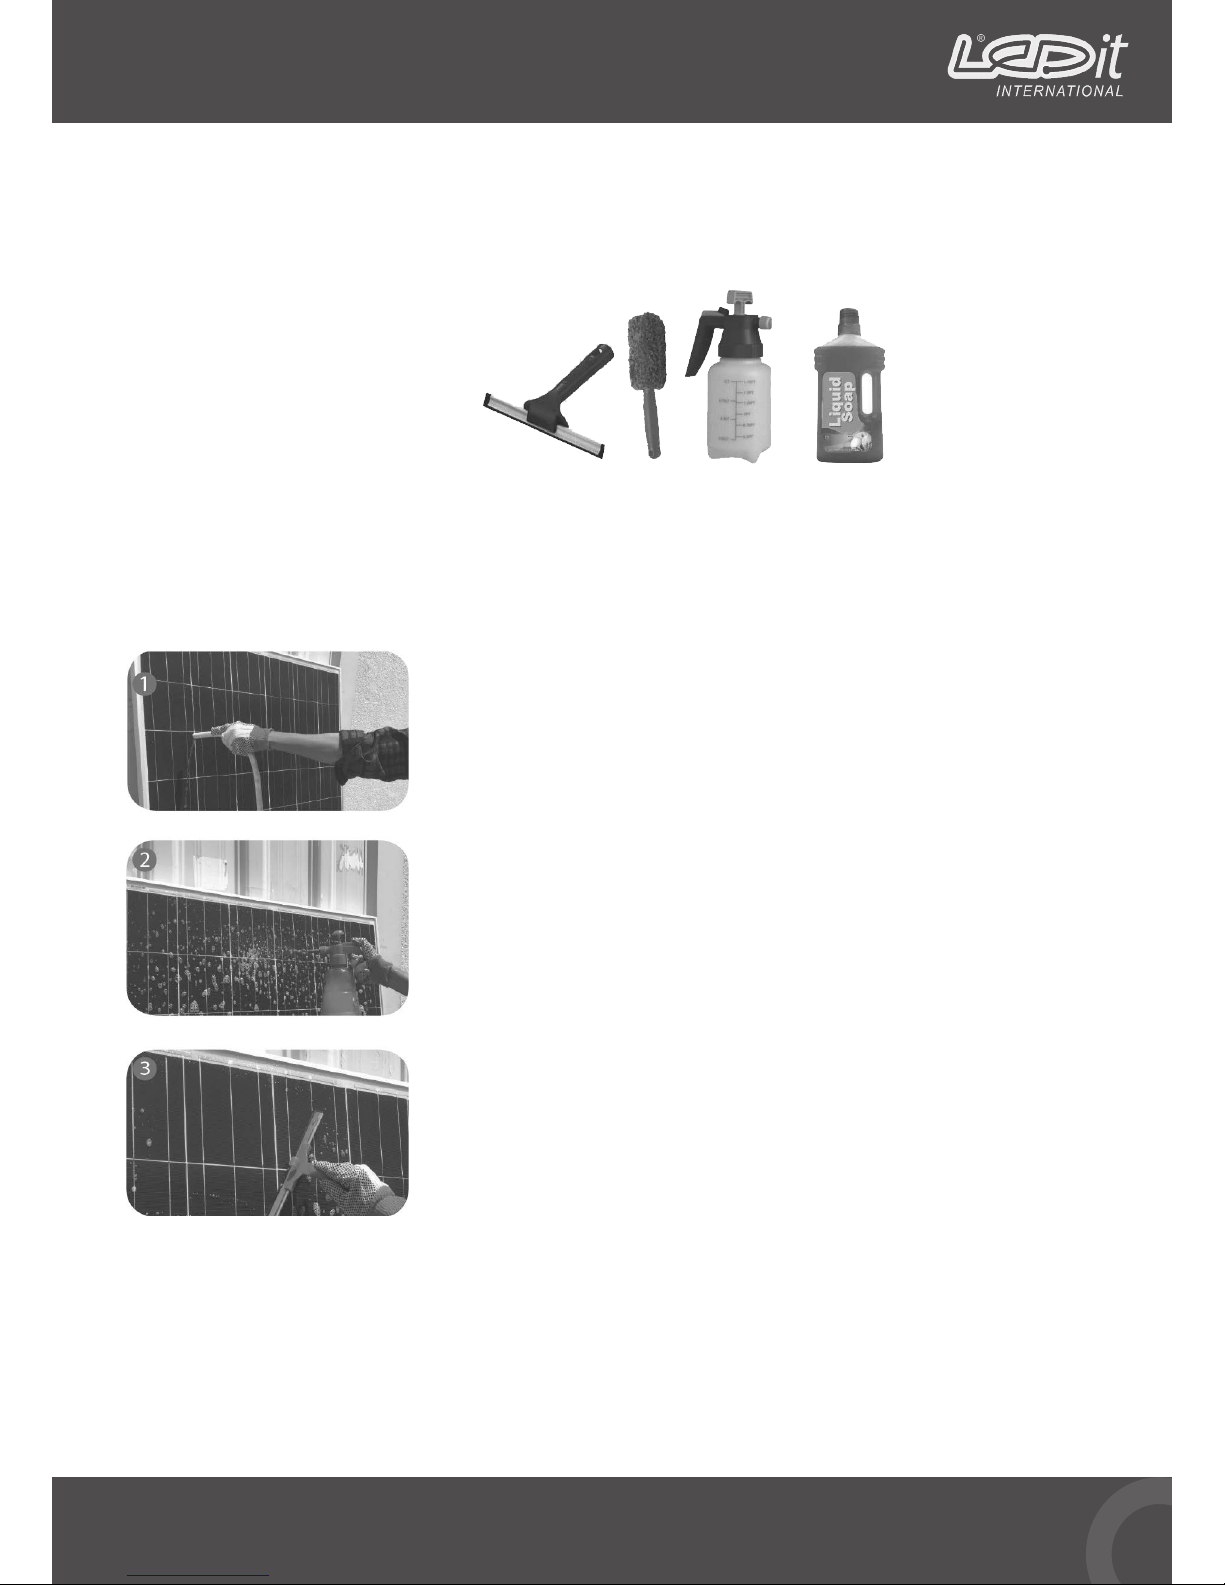
A long extension
pipe is a perfect
tool allowing you to
stay on the ground
Use a hose with a
suitable nozzle to
allow the stream
of water to reach
the panels
WARNING
MAINTENANCE
Symptom Problem Cause Solutions
Lamp doesn’t work
Light source is damaged Replace it with the same light source
The battery has run down Charging the battery
Light doesn’t work in day time Changing the light setting with remote control
Positive & negative of solar panel
are connected conversely Connect the positive & negative of solar panel to a correct
position
Table of contents
Popular Lantern manuals by other brands

Eaton
Eaton Metalux VT4S LED installation instructions

Platinum Customer Care
Platinum Customer Care GX-2476-Twin Care and use instructions

Linergy
Linergy DU239P13EGS manual

SLV
SLV BIG THEO CEILING OUT GX53 operating manual

Digital Lumens
Digital Lumens RLE Series installation instructions

Gardco
Gardco 121L installation instructions