Ledra Brands Inc.
www.LedraBrands.com
In a continuing effort to offer the best product possible we reserve the right to change, without notice, specications or materials that in our opinion will not alter the function of the product.
15774 Gateway Circle Tustin, CA 92780
P 714.259.9959 F 714.259.9969
v.12.10.19
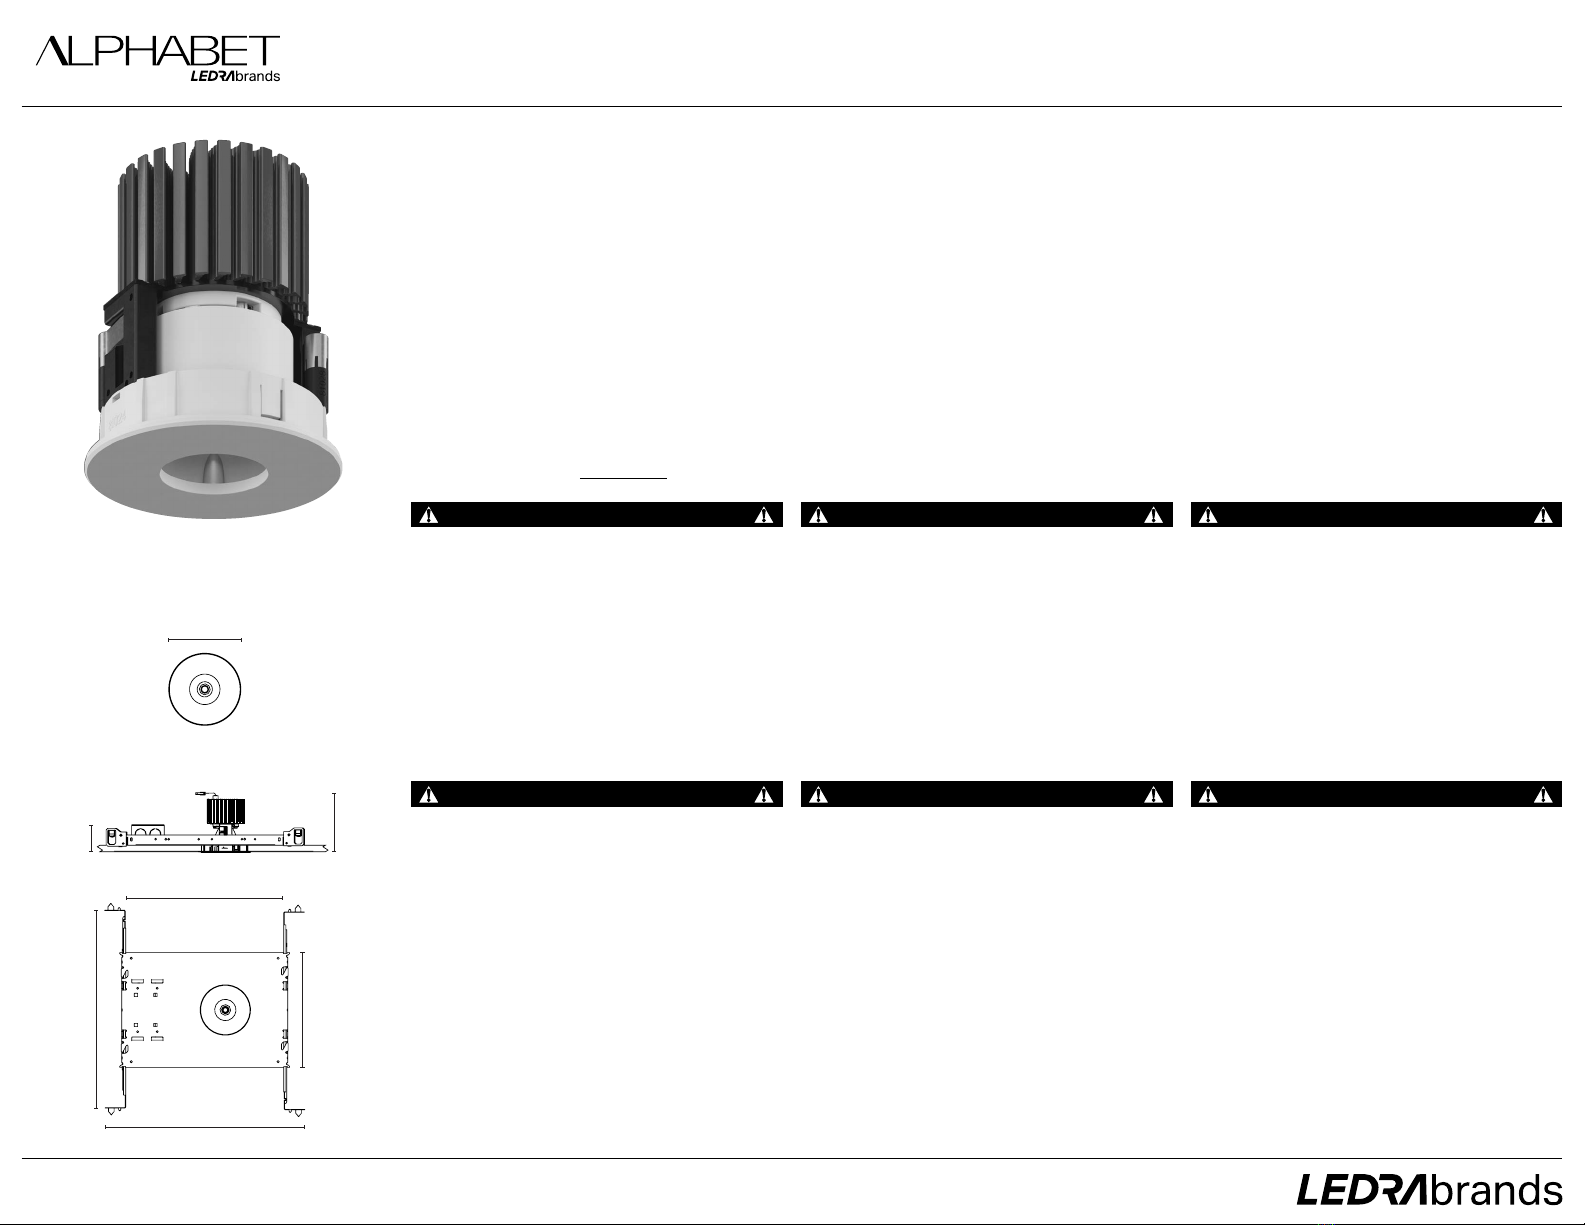
1-1/2"
8-5/8"
5/8"
3-3/4"
ceiling cutout
3-3/8" diameter
4-1/2"
expandable from 14-3/4" to 26"
14-1/8"
11-7/8"
3"
3-3/4"
aperture dimensions
3-3/4"
ceiling cutout
3-3/8" diameter
4-1/2"
expandable from 14-3/4" to 26"
14-1/8"
11-7/8"
3"
3-3/4"
aperture dimensions
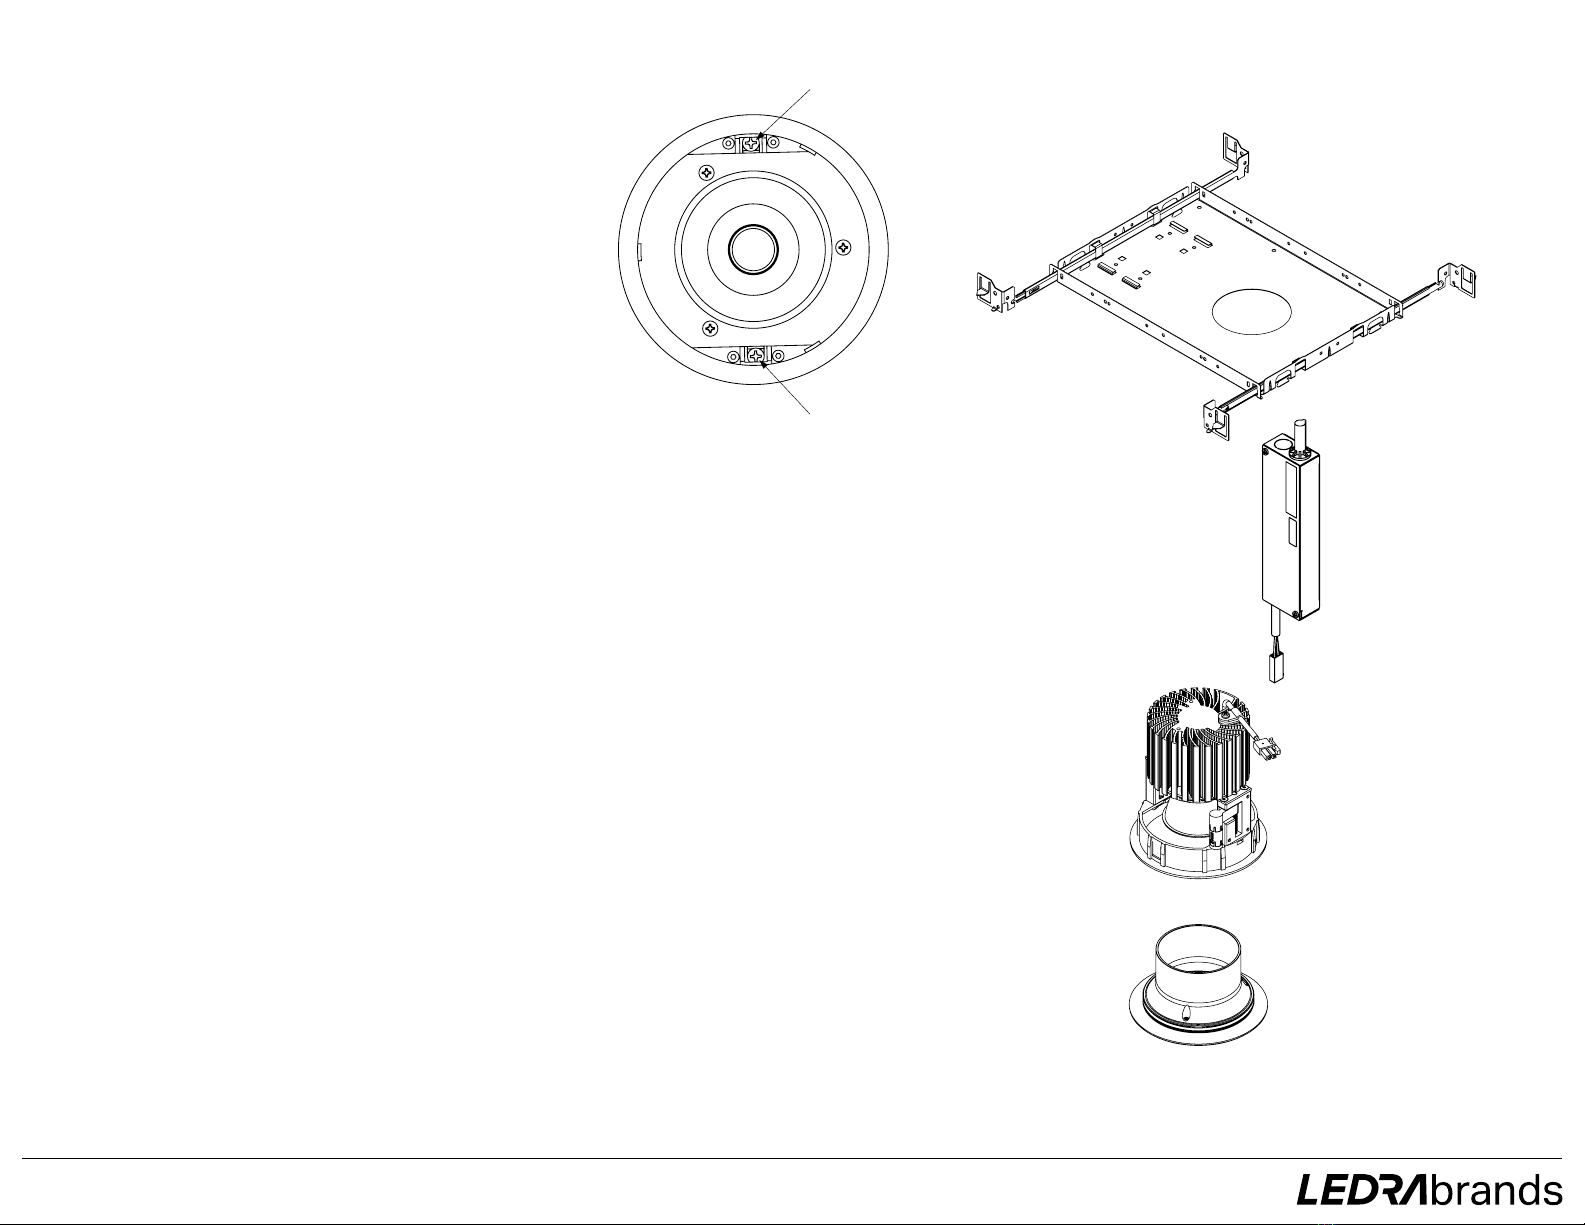
NU3RD Round Downlight Pinhole
Installation Instructions
WARNING – PLEASE READ ALL INSTRUCTIONS PRIOR TO INSTALLATION.
READ AND FOLLOW ALL WARNINGS AND INSTRUCTIONS BEFORE INSTALLING OR MAINTAINING THIS PRODUCT.
TURN OFF POWER PRIOR TO ANY WORK ON THE SYSTEM OR PRODUCT.
DO NOT INSTALL DAMAGED PRODUCT.
HOLE CUTOUT 3-3/8” DIAMETER
Installing, wiring, and maintenance must be done by qualied persons or a certied electrician in accordance with all local and National Electrical Codes.
Warranty is voided in case of unauthorized modications and/or improper use.
Save these instructions. Use as reference when service or maintenance is performed.
CAUTION – Do not install any xture assembly closer than 6 inches (15.24 cm) from any combustible material.
New Construction Mounting Plate driver compartments are rated for through wiring.
Refer to product label for voltage requirements and properly ground xture in accordance with all local and national electrical codes.
If building and product supports optional dimming, connect dimming leads to dimming control system (provided by others). Refer to product label for dimming requirements.
Isolate dimming wires individually if not in use.
Suitable for WET locations with lens only.
*Applicable for Eco version
To avoid possible electrical shock, before installing light
xtures, disconnect power by turning off the circuit breakers
both to the outlet box and to its associated wall switch
location. If you cannot lock the circuit breakers in the off
position, securely fasten a prominent warning device, such as
a tag, to the service panel.
Verify that supply voltage is correct by comparing it with the
luminaire label information.
Make all electrical and ground connections in the accordance
with the National Electrical Code (NEC) and any applicable
local code requirements.
Wait for xture and driver to cool before servicing and
performing maintenance.
Para evitar un choque eléctrico, antes de instalar luminarias,
desconecte la alimentación apagando los interruptores de
circuito en el panel de servicio y en las paredes. Si no es
posible bloquear los interruptores en la posición de apagado,
sujete una etiqueta de seguridad en el panel de servicio.
Compruebe que la tensión de alimentación es correcta
comparándola con la información en la etiqueta de la
luminaria.
Haga todas las conexiones eléctricas y puesta a tierra de
acuerdo con el código eléctrico nacional (NEC) y los requisitos
del código local aplicable.
Espere hasta que la luminaria y el controlador se enfríen antes
de empezar el servicio y mantenimiento.
Pour éviter les chocs, avant d’installer des appareils
d’éclairage, coupez l’alimentation en désactivant les
disjoncteurs et l’emplacement du commutateur mural. Si vous
ne pouvez pas verrouiller les disjoncteurs en position d’arrêt,
xer un avertissement sur le panneau de service.
Vériez que la tension d’alimentation est correcte en le
comparant avec les informations d’étiquette de luminaire.
Effectuer tous les raccordements électriques et mise à la terre
dans la conformité avec le Code électrique National (NEC) et
des exigencies du code local applicable.
Laisser sufsamment de temps pour l’appareil et pilote
refroidir avant d’effectuer l’entretien et la maintenance.
All wiring must comply with national and local electrical codes
and ANSI/NFPA 70. If you are unfamiliar with wiring, consult a
qualied electrician.
PPE Personal Protective Equipment such as gloves and safety
glasses should always be used when installing, maintaining
or servicing.
Risk of re. Keep combustible material away from xtures.
Todo el cableado debe cumplir con los códigos eléctricos
nacionales y locales y ANSI/NFPA 70. Si no está familiarizado
con el cableado, consulte a un electricista.
Al instalar, mantener o reparar, siempre se debe utilizar equipo
de protección personal como guantes y lentes de seguridad
Riesgo de incendio. Mantenga los materiales combustibles
lejos de las luminarias.
Tout le câblage doit être effectué conformément aux codes
électriques locaux et nationaux et ANSI/NFPA 70. Si vous êtes
peu familier avec câblage, vous devez utiliser un électricien
qualié.
Équipement de protection personnelle comme des gants et
des lunettes de sécurité doivent être utilisé en tout temps lors
de l’installation, maintenance ou entretien.
Risque d’incendie. Garder les matières combustibles loin de
luminaires.
•
•
•
•
•
•
•
•
•
•
•
•
•
•
•
•
•
WARNING
CAUTION
ADVERTENCIA
PRECAUCION
AVERTISSEMENT
MIS EN GARDE
•
•
•
•
•
•
•