LE06282AA-01
Etape 5 : Déplacement des charnières
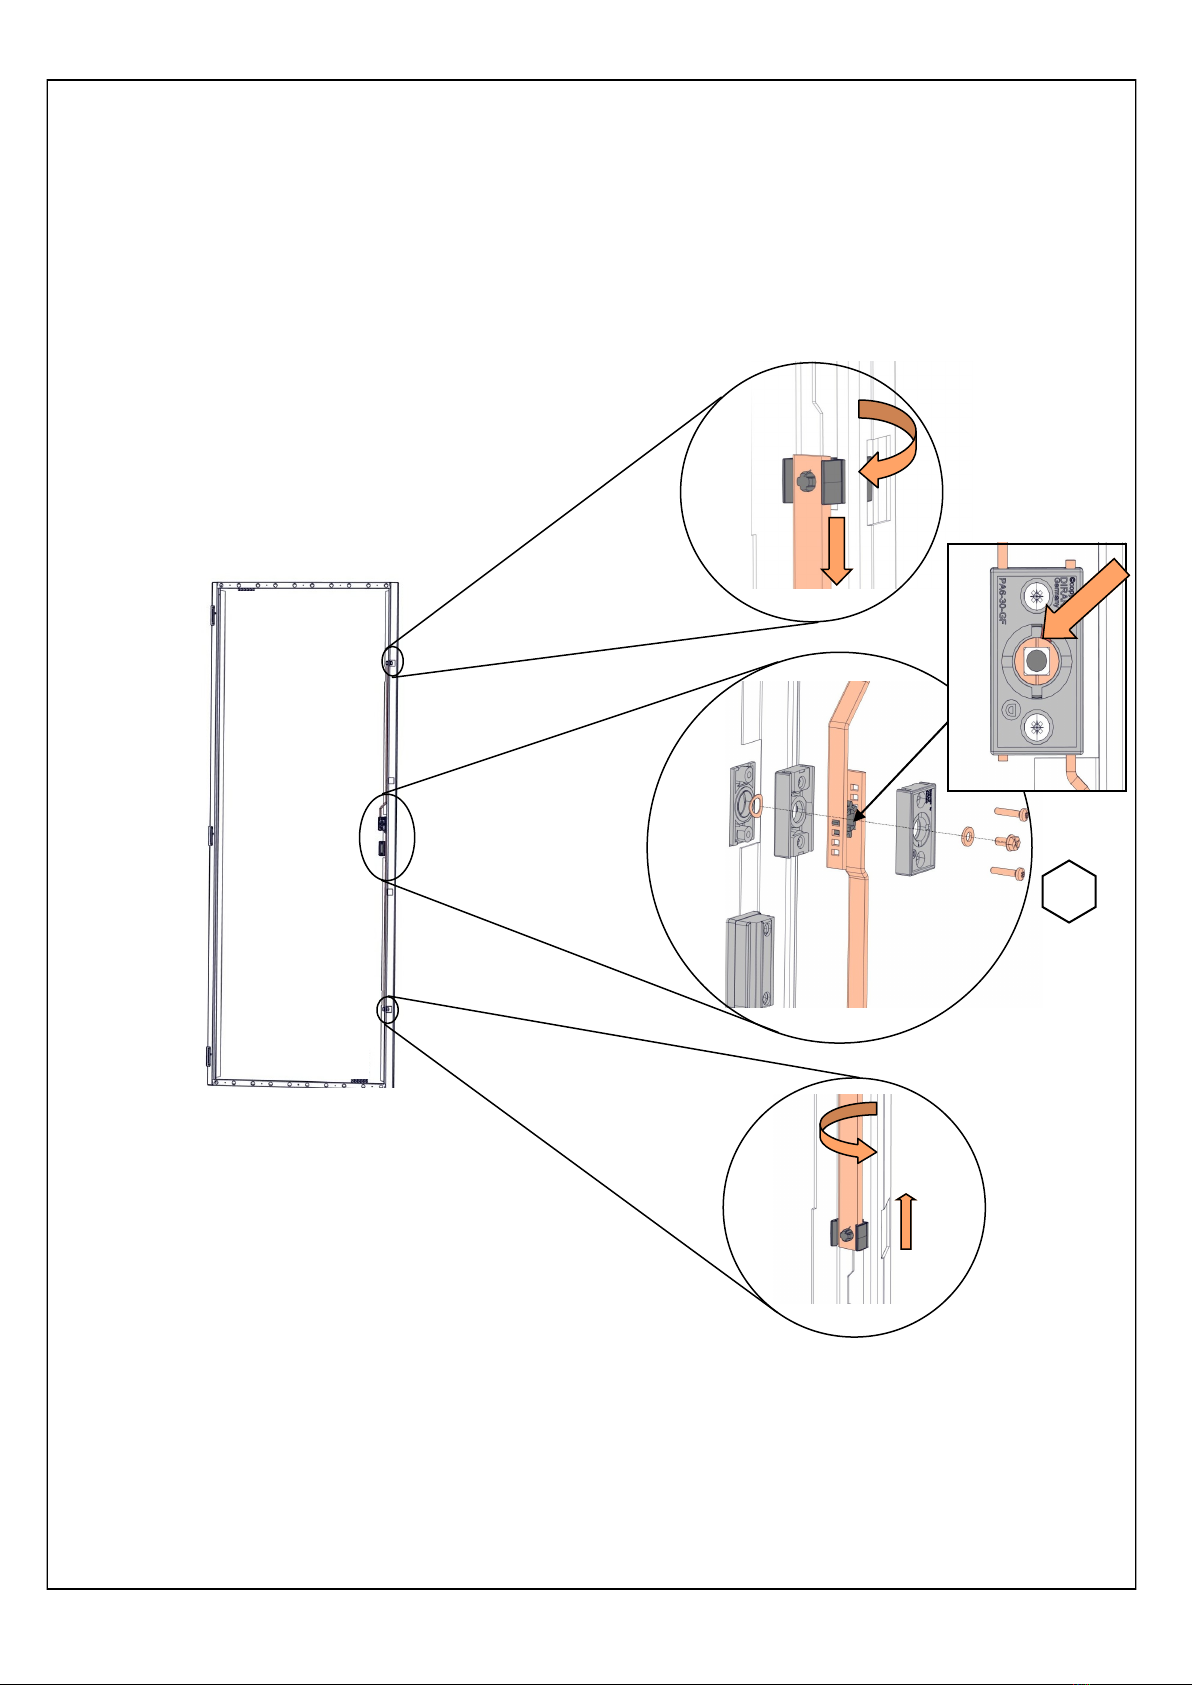
Déconnecter le conducteur de masse du haut de
la porte.
Déposer la porte en position ouverte à 90 degrés.
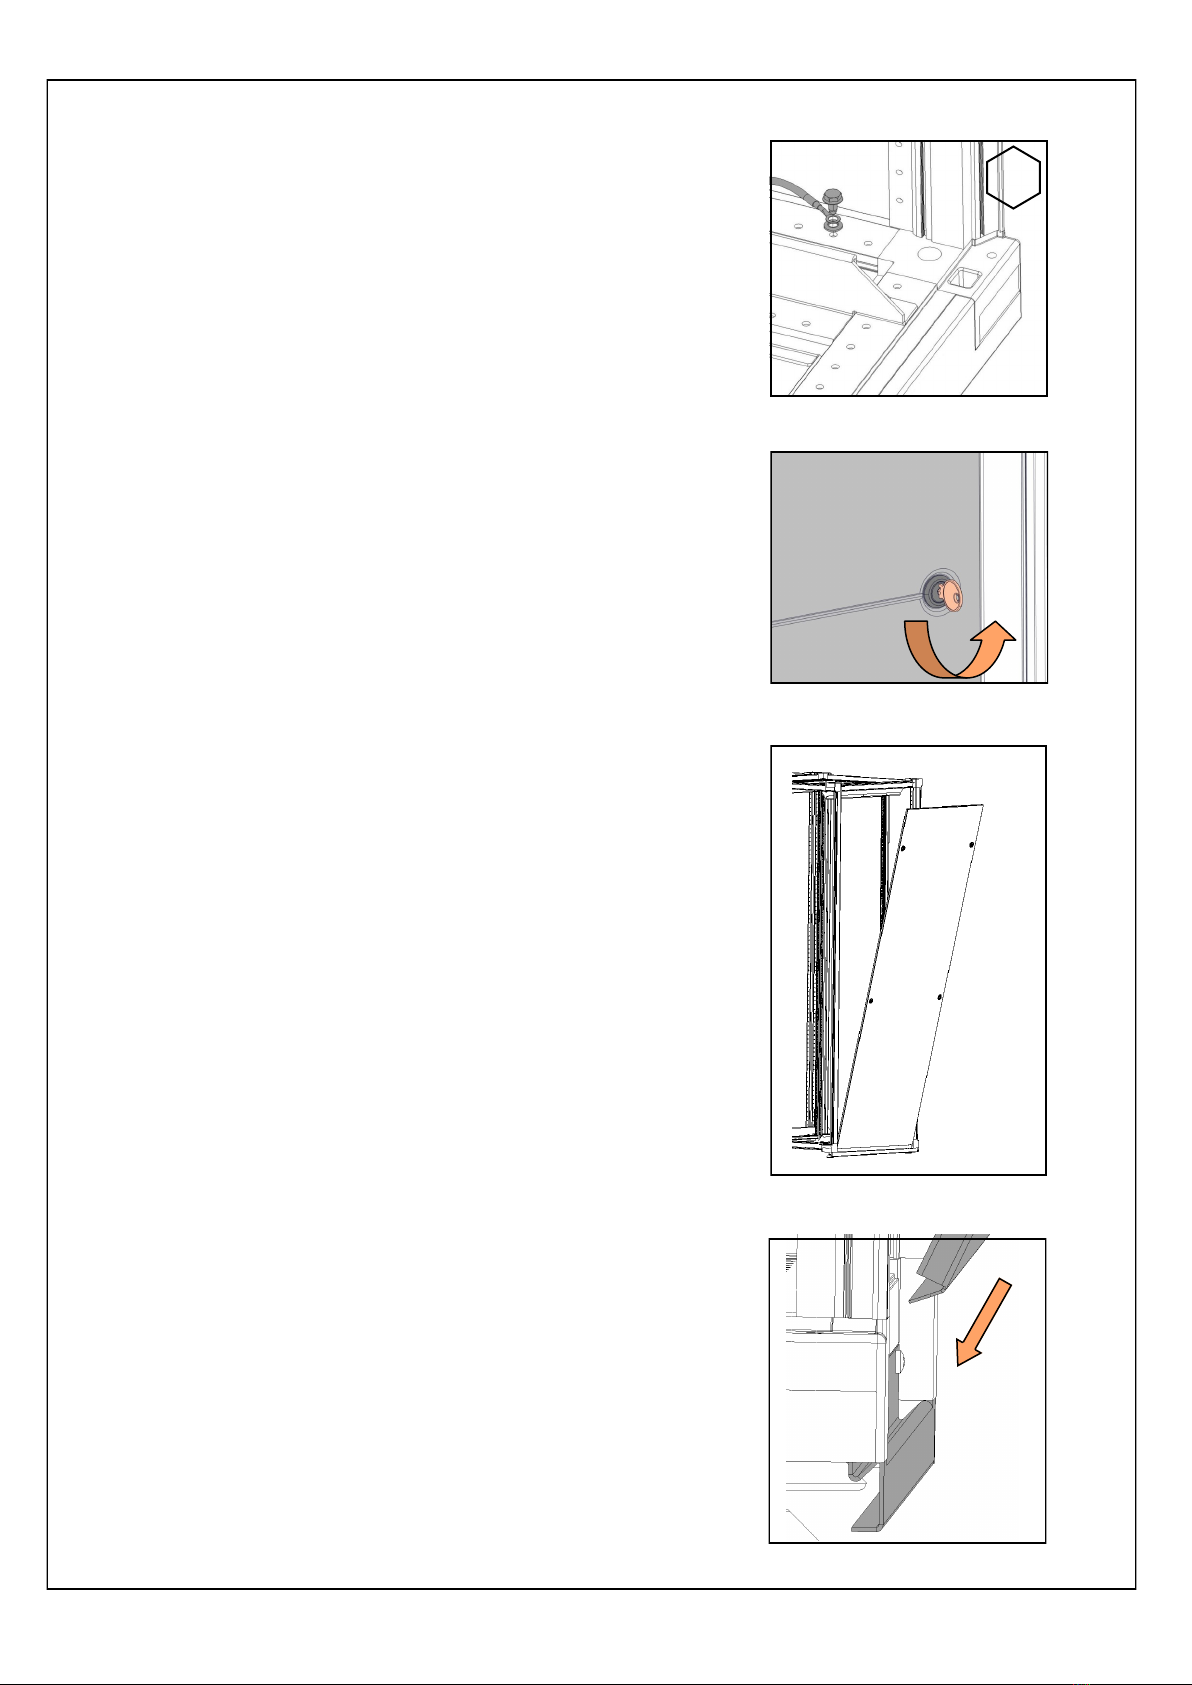
Enlever les capuchons de gonds de la porte.
Avec un chasse-goupille, démonter les axes puis
les remonter en dessous des charnières (Vue P).
Démonter les charnières des emplacements A, B
et C.
Démonter les taquets des emplacements G et H
(Vue Q).
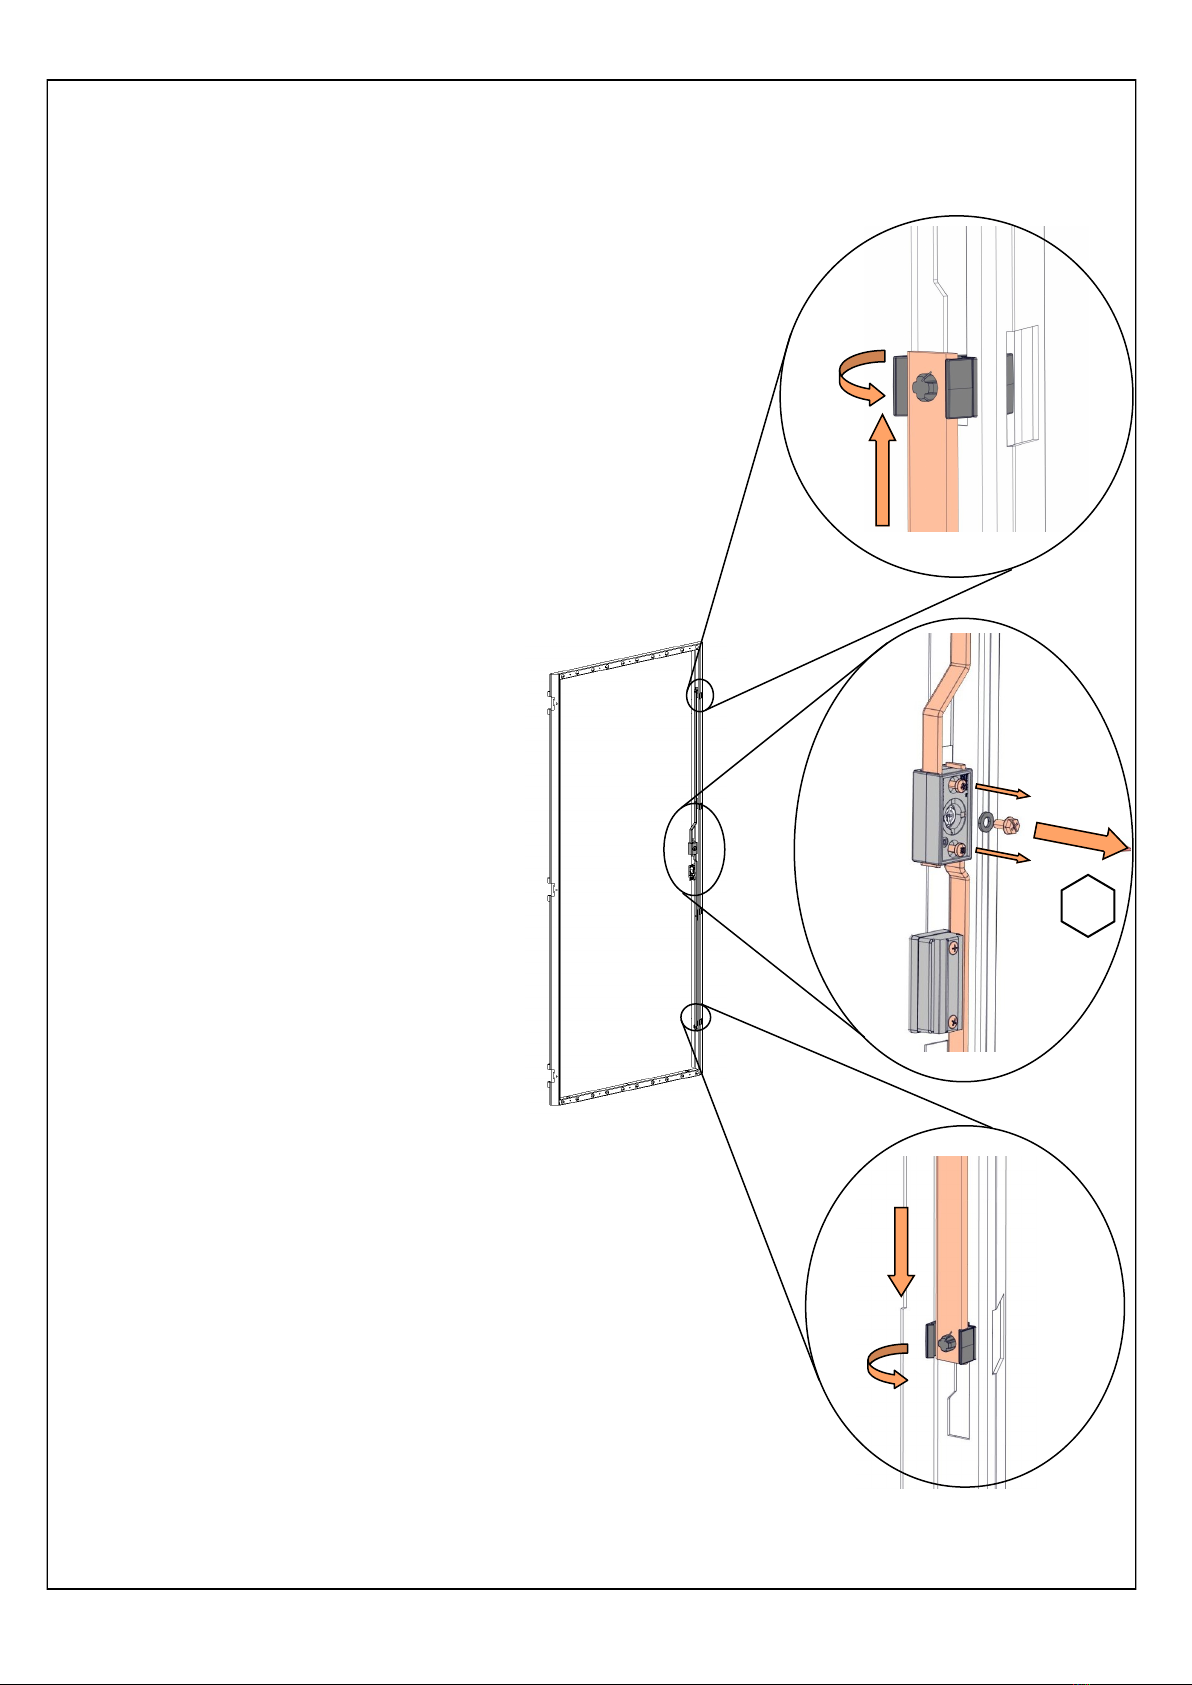
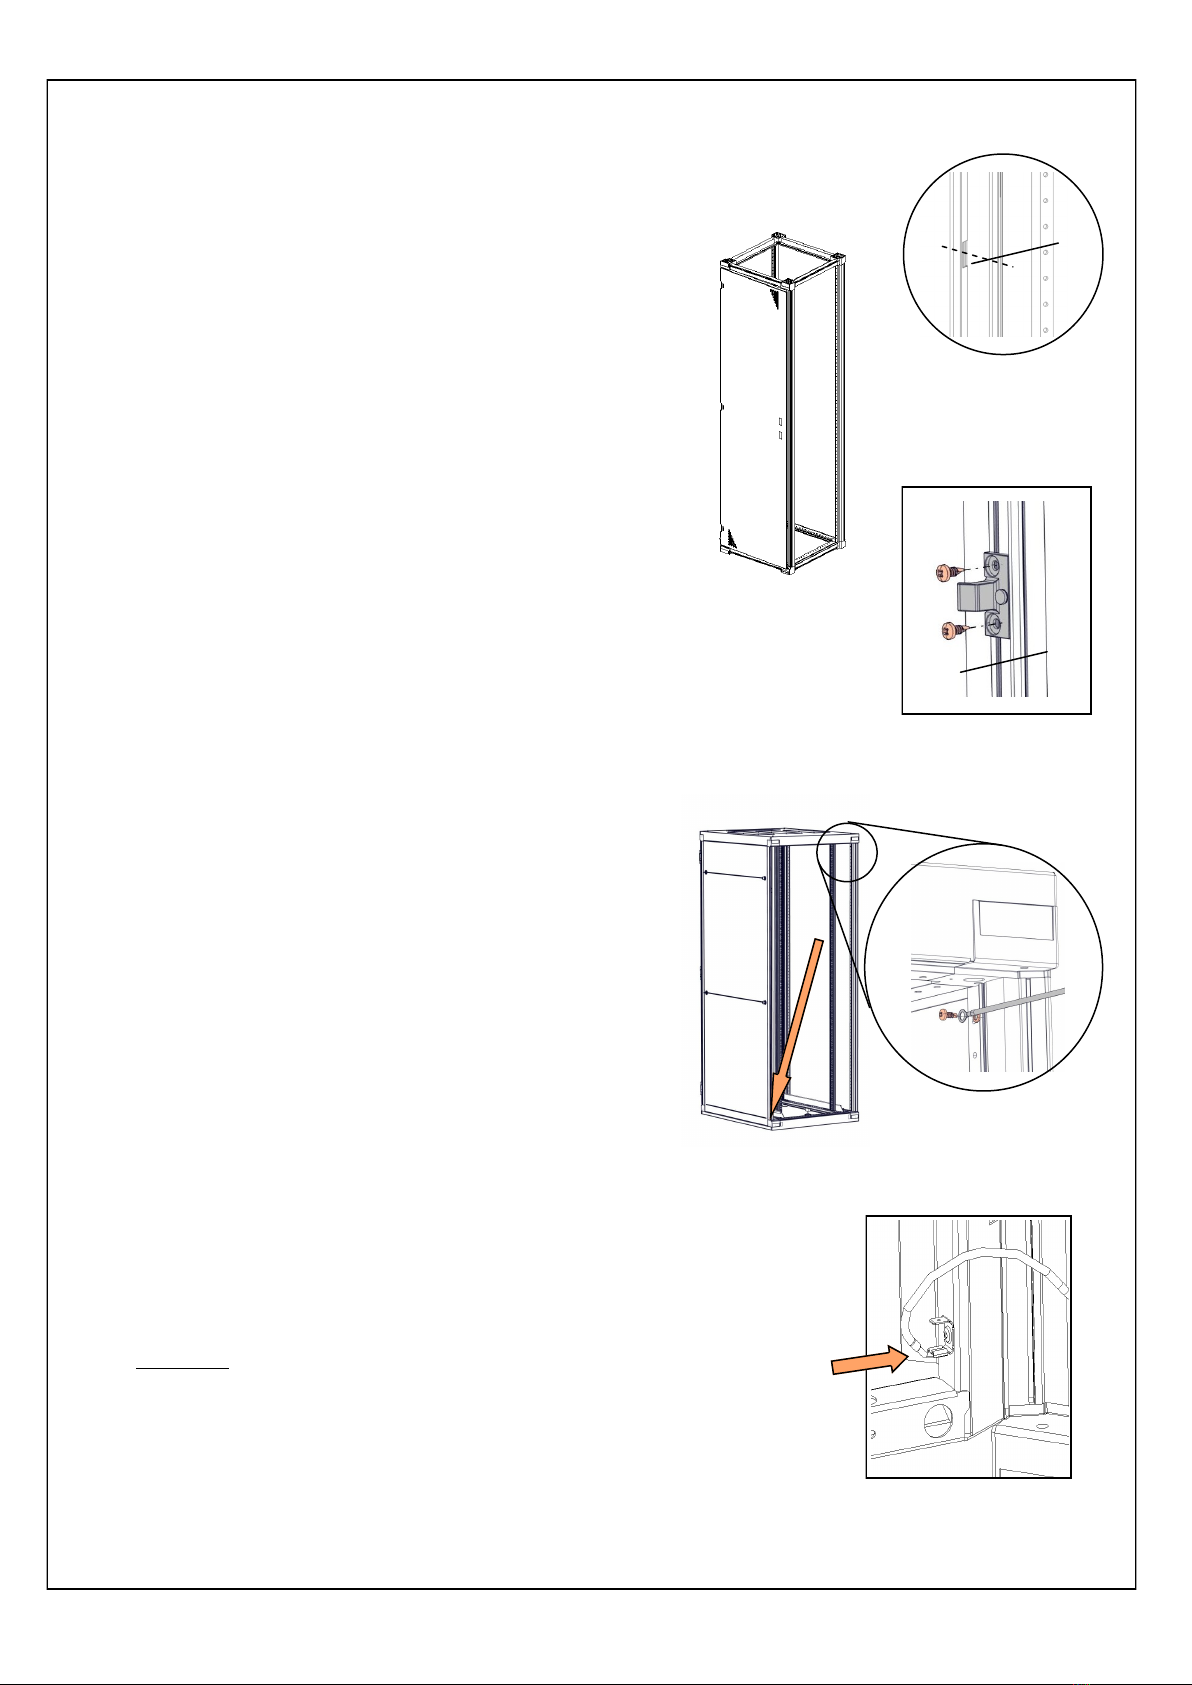
Visser une première charnière à l’emplacement D
(Vue Q) en utilisant une autre charnière comme
gabarit pour la cote A (Vue R).
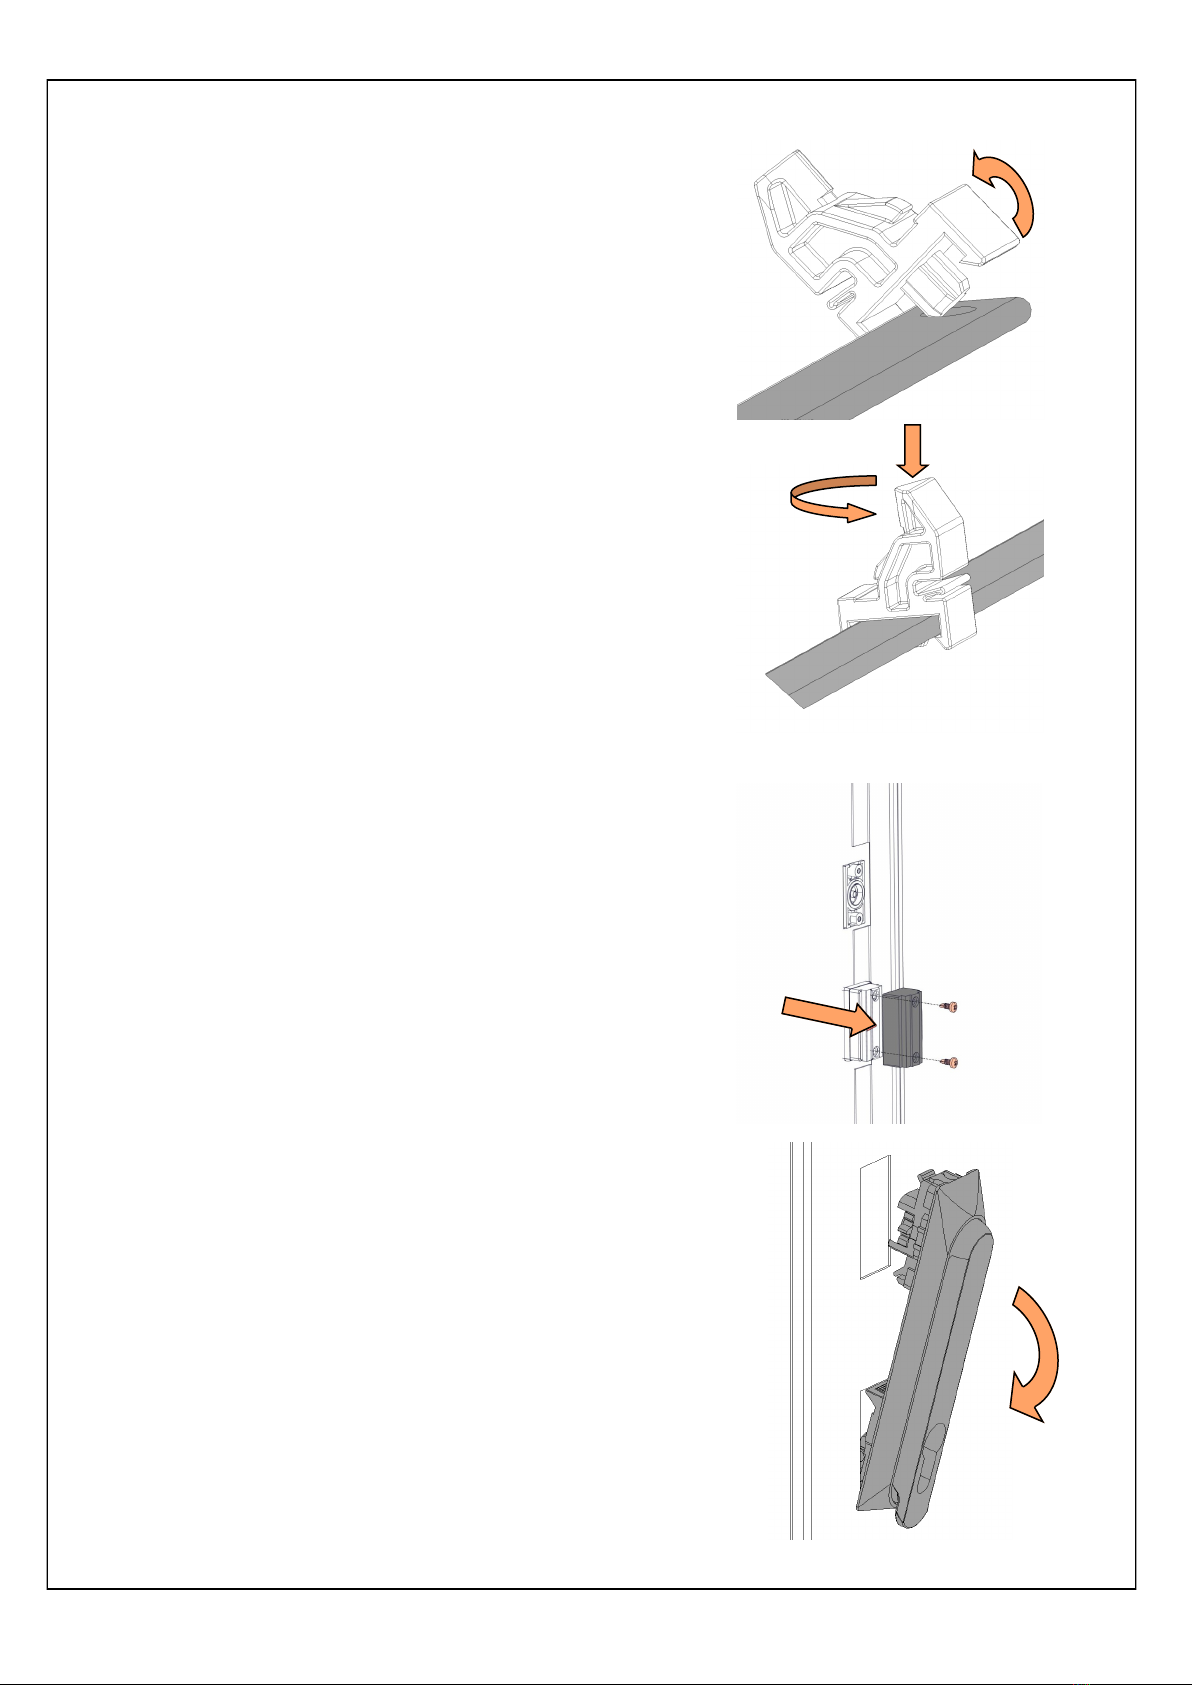
Accrocher la porte à la charnière précédement
fixée à l’emplacement D. Positionner et fixer les
autres charnières aux emplacements correspon-
dants sur la porte E et F (Vue T—détail S).
View T
‘A’
Detail S
View R
View Q
View P
A
B
C
D
E
F
H
G
Step 5 : Move door hinges
Disconnect the earth lead at top side of the door.
Open the door 90° and lift the door from its
hinges. Remove the hinge covers.
Remove the hinge pins from the hinges on the
frame with a punch and mount it again in the hole
at bottom side (See view P).
Remove the hinges which are located at position
A, B and C.
Remove the door latches from the frame at posi-
tion G and H (View Q).
Mount hinge on position D (See view Q). Use an-
other hinge to define the position of the hinge.
Dimension “A” is the length of a hinge and also
the distance between top of the hinge and bot-
tom of the frame (See view R).
Hang the door on the hinge at position D and
hang the other hinges on the door, now the
hinges can be mounted to the frame (on positions
E and F). See view T, detail S.
7