Name Description/Format
Leica
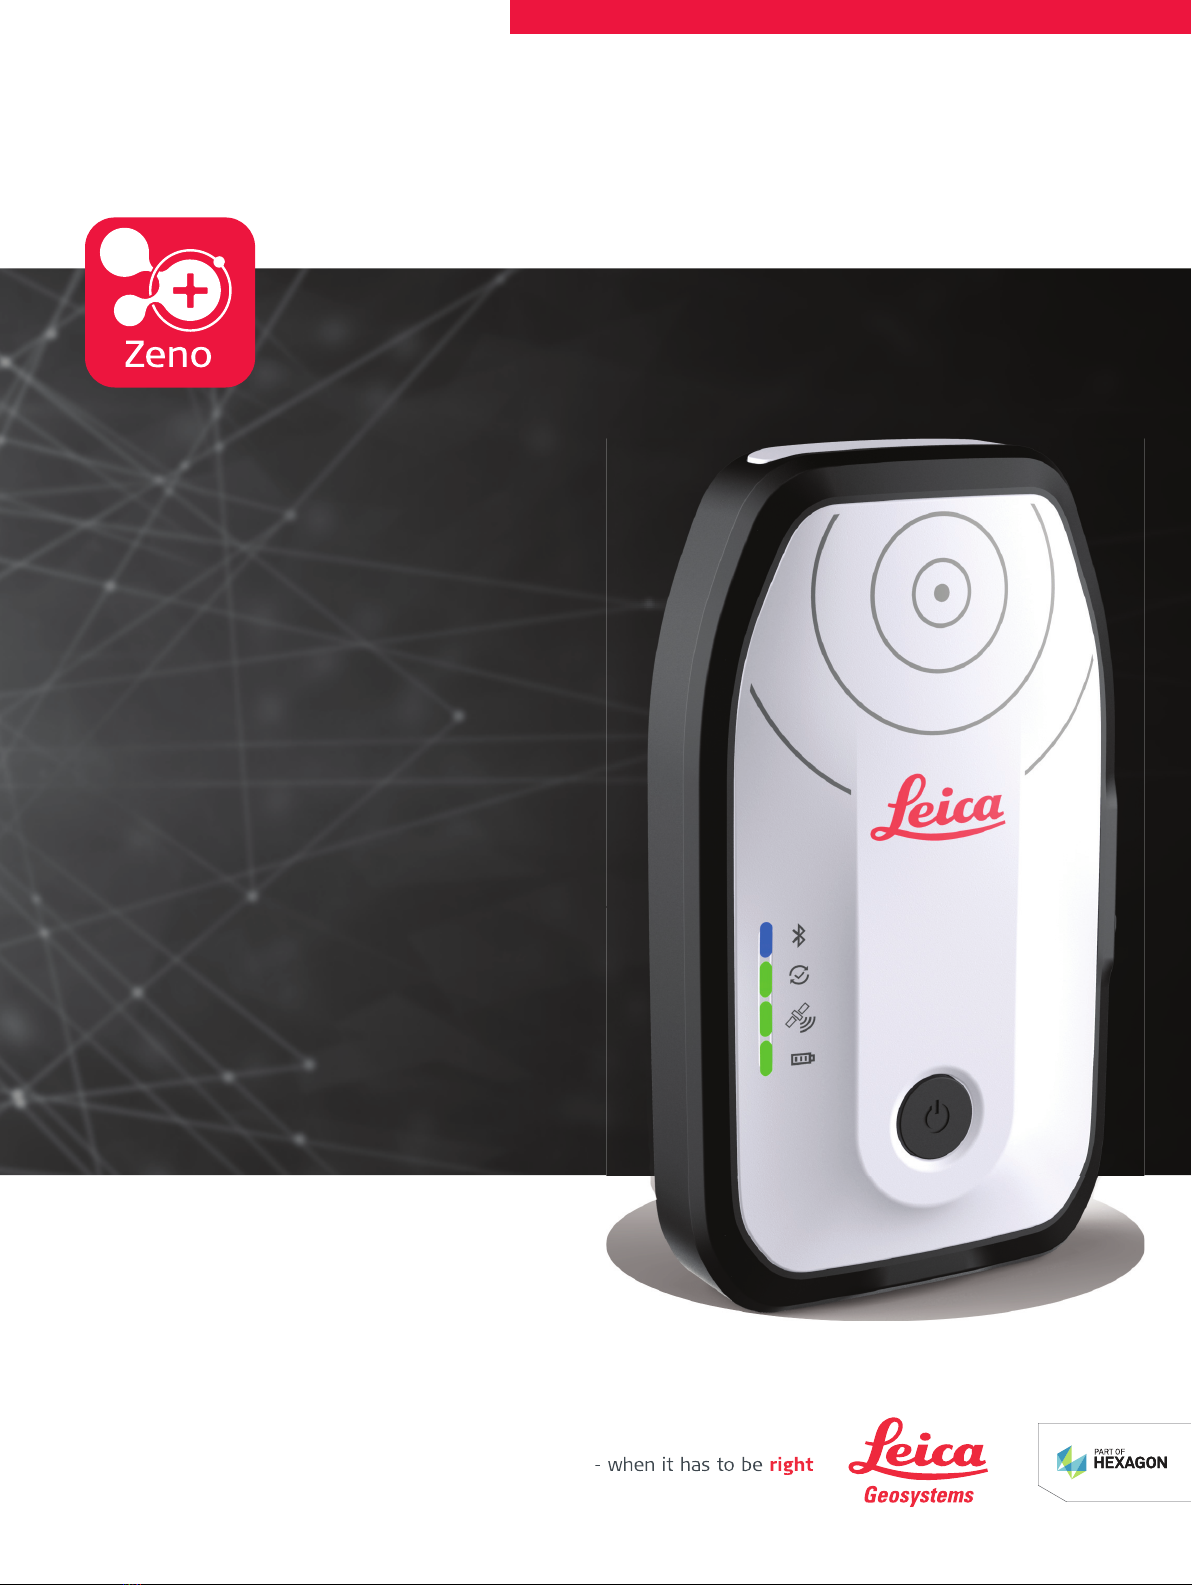
FLX100 plus
smart
antenna
User Manual
All instructions required in order to operate the
product to a basic level are contained in the
User Manual. Provides an overview of the product
together with technical data and safety directions.
–ü
Refer to the myWorld web page for all Leica FLX100 plus smart antenna
documentation/software:
•https://myworld.leica-geosystems.com
https://myworld.leica-geosystems.com offers a wide range of services, inform-
ation and training material.
With direct access to myWorld, you are able to access all relevant services
whenever it is convenient for you.
The availability of services depends on the instrument model.
Service Description
myProducts Add all products that you and your company own
and explore your world of Leica Geosystems: View
detailed information on your products and update
your products with the latest software and keep up-
to-date with the latest documentation.
myService View the current service status and full service his-
tory of your products in Leica Geosystems service
centres. Access detailed information on the services
performed and download your latest calibration cer-
ticates and service reports.
mySupport Create new support requests for your products that
will be answered by your local Leica Geosystems
Support Team. View the complete history of your
support requests and view detailed information on
each request in case you want to refer to previous
support requests.
myLearning Welcome to the home of Leica Geosystems online
learning! There are numerous online courses – avail-
able to all customers with products that have valid
CCPs (Customer Care Packages).
myTrustedServices Add your subscriptions and manage users for Leica
Geosystems Trusted Services, the secure software
services, that assist you to optimise your workow
and increase your efciency.
mySmartNet Add and view your HxGN SmartNet subscriptions and
user information. HxGN SmartNet delivers high-pre-
cision and high-availability GNSS network correction
services in real time. The HxGN SmartNet Global
family offers Network RTK with RTK bridging and
Precise Point Positioning (PPP) services. These ser-
vices work exclusively with Leica Geosystems GS
sensors, providing the highest accuracy. Combined,
they ensure HxGN SmartNet coverage everywhere.
3