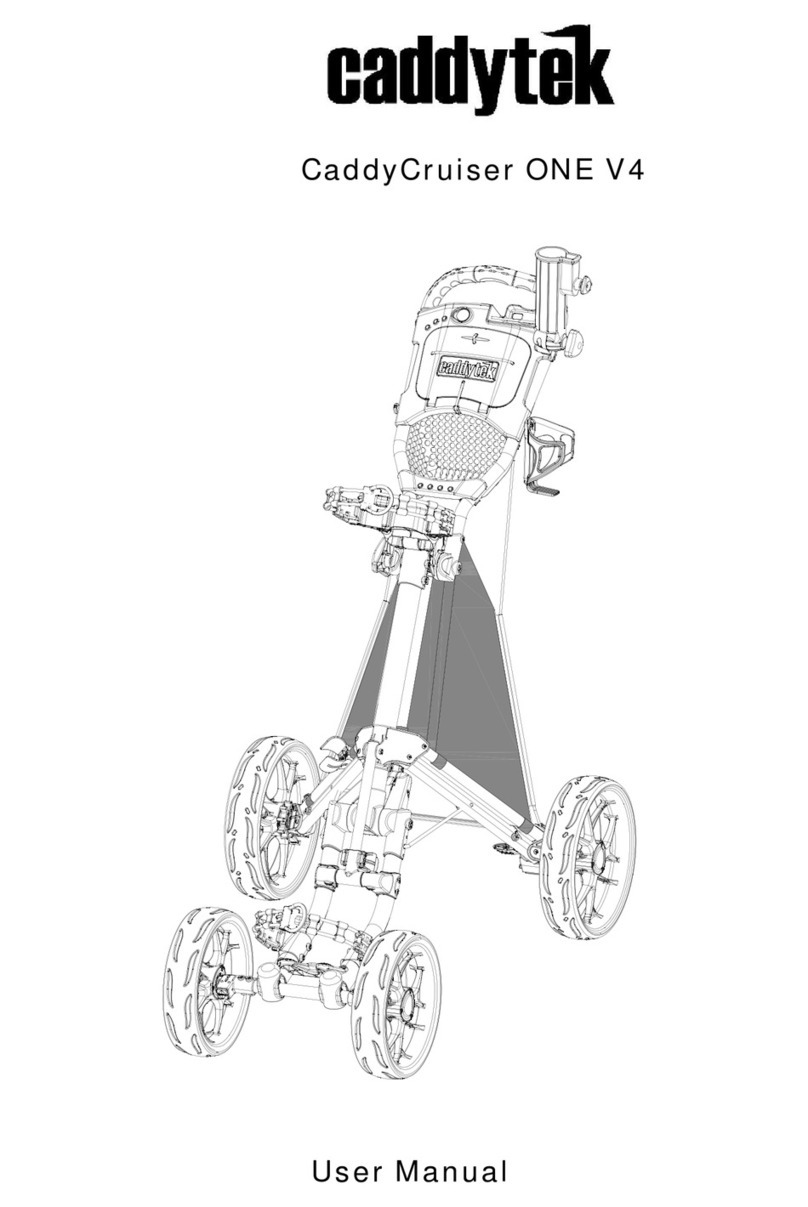
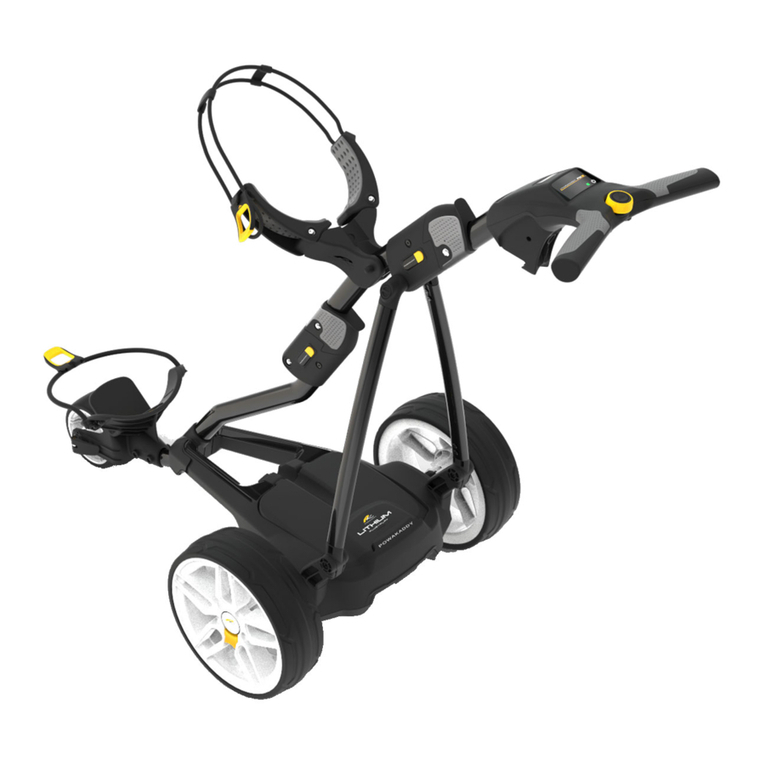
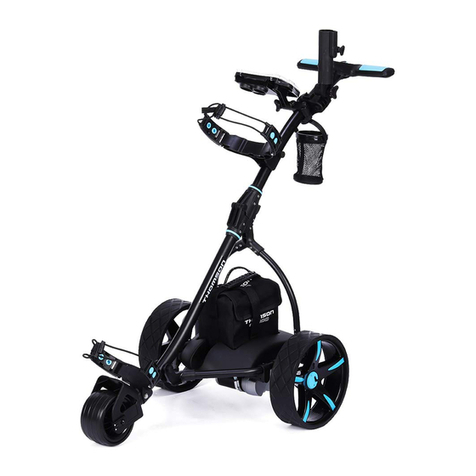
Leisure Golf Taurus Slim Line User manual

Taurus Slim Line &
Quantum Slim Line
Bedienungsanleitung
leisuregol
f
leisuregol
f
DE
EN
FR

Sehr geehrter Kunde,
herzlichen Glückwunsch zu Ihrem neuen Elektro Golf trolley der Marke
leisure golf. Sie haben damit ein Gerät erworben, was dem heutigen Stand
der Technik entspricht und mit einer hochwertigen Lithium-Ionen- Batterie
ausgestattet ist.
Bitte lesen Sie die Bedienungsanleitung vor dem ersten Gebrauch sorgfältig
durch. Dann werden Sie viel Freude mit Ihrem Elektro Golftrolley der Marke
leisure golf haben.
Sicherherheits- und Pflegehinweise ........................................................................... 4
Aufbau
Montage der Räder, Griffstange und Batterie ................................................6
Faltschritte Demontage ............................................................................................7
Justierung Vorderrad/Geradeauslauf ..................................................................7
Funktionen
Lithiumbatterie ...........................................................................................................8
Fahrfunktionen ............................................................................................................8
Herstellergarantie ...............................................................................................................9
Fehlerbehebung ................................................................................................................. 10
Hinweis Batterieentsorgung ..........................................................................................11
Inhaltsübersicht
2 3

Sicherheits- und Pflegehinweise
4 5
In der Zeit wo Sie das Gerät nicht benutzen, ist die Batterie alle 30 Tage
aufzuladen.
Die Batterie muss an einem kühlen, trockenen und frostfreien Ort ge-
lagert werden.
Alle Aktivitäten der Batterie werden in der Batterie gespeichert, die im Fall
einer Reklamation ausgewertet werden können. Dadurch lassen sich die
Ladezyklen und evtl. Druckeinwirkung durch Sturz auswerten.
Spülen Sie das Gerät und die Batterie nicht mit Wasser ab, da Sie das Gerät
oder die Batterie beschädigen können. Feuchtigkeitsschäden jeglicher Art
sind erkennbar und fallen nicht unter die Garantie.
Wenn Sie bei feuchtem Wetter spielen, überprüfen Sie die Batterie auf Feuch-
tigkeit, indem Sie die Batterie aus der Batterietasche nehmen. Wischen Sie
die Batterie ggf. ab.
Bitte bewahren Sie den Karton inkl. Styroporeinsatz auf. Falls das Gerät für
Reparatur- oder Wartungs zwecke eingeschickt werden muss, schützt die
Ver packung das Gerät optimal. Eine Alternativverpackung ist meist sehr
schwer zu finden und kann zu Beschädigungen am Gerät führen.
Machen Sie sich vor dem ersten Gebrauch auf dem Golfplatz mit Ihrem
Caddy und seiner Funktionsweise vertraut und fahren ihn „voll beladen“,
um seine Laufeigenschaften kennen zu lernen. Das Fahrverhalten variiert
immer abhängig von Witterung, Geländebeschaffenheit, Zuladung und
Gewichtsverteilung. Bitte laden Sie die Batterie vor der ersten Benutzung
komplett auf. Bitte befolgen Sie die Ladeanweisung auf Seite 12.
Kippgefahr in schnellen Kurven! Je besser Sie mit Ihrem Caddy vertraut
sind, desto geringer ist das Risiko einer Verletzung. Dies gilt für Sie selbst,
besonders aber für andere Personen. Auch wenn der Umgang kinder-
leicht ist – Ihr Caddy ist ein Sportgerät und kein Kinderspielzeug. Daher
nutzen Sie ihn nur dort wo sein Einsatz auch vorgesehen ist
Der Trolley wurde dafür entwickelt, es dem Benutzer zu ermög lichen,
sich auf sein Golfspiel zu konzentrieren, während der Trolley den Job
des Bag-Trägers erfüllt. Damit der Trolley dabei dauerhaft in tadellosem
Zustand ist, sollte nach jeder Runde mit einem Lappen oder Papiertuch
Schmutz und Gras von Rahmen, Rädern und Gehäuse gewischt werden.
Demontieren Sie alle paar Wochen die Hinterräder und entfernen Sie
Ablagerungen, die dazu führen können, dass die Räder schleifen und
sich nicht mehr leicht drehen. Mit ein wenig Schmier mittel z. B. Ballistol
können bewegliche Teile geschmeidig gehalten werden.
Trennen Sie stets die Batterie vom Trolley, wenn Sie ihn lagern. Wenn
Sie nicht planen mindestens innerhalb eines Monats wieder zu spielen,
lagern Sie die Batterie an einem kühlen, frostfreien und trockenen Ort. Bei
einer Fußbodenheizung bitte nicht auf dem Fußboden lagern.
Um die Lebensdauer optimal auszunutzen und die Kapazität der Batterie
zu erhalten, laden Sie die Batterie bitte nach jedem Spiel wieder auf, egal
ob 9 oder 18 Loch gespielt worden sind.

Aufbau
6
Montage der Räder, Griffstange und Batterie
1. Nehmen Sie die Achse in die Hand und verbinden diese mit dem Vorder-
teil. Schieben Sie das Vorderteil bis zu dem Pin in die Öffnung der Querachse.
Drücken Sie den Edelstahlpin in den Rahmen und schieben Sie das Vorder-
teil vollständig in die Querachse. Drehen Sie die beiden Teile so zusammen,
dass der Pin in die Bohrung einrasten kann.
2. Nehmen Sie die Hinterräder und montieren Sie diese wie folgt beschrieben
auf der Querachse.
Achtung:
Achten Sie auf die Laufrichtung der Hinterräder. Das Profil muss mit
dem Vorderradprofil in die gleiche Laufrichtung zeigen.
-
Drücken Sie den Stift an der Felge.
-
Schieben Sie die Räder auf die erste Nut auf der Achse. Dies ist die
Freilaufposition, im Falle des manuellen Schiebens.
-
Schieben Sie das Rad bis zur Endposition auf die Achse und rasten
Sie ein. Dies ist die Position für den Antrieb.
Wichtig:
Wenn das Rad sich nicht in der Antriebsposition befindet, gibt es
keinen Vortrieb des Gerätes.
3. Verbinden Sie nun die senkrechte Stange mit der Querachse. Gehen Sie
wieder genauso vor, wie bei Punkt 1.
4. Mit dem seitlichen Drehknauf können Sie die Griffhöhe einstellen und den
oberen Baghalter individuell auf Ihre Baggröße ”einstellen“. Drehen Sie an-
schließend die seitliche Fixierschraube fest.
5. Befestigen Sie die Batterie auf dem Vorderrahmen mit den beiden Klett-
bändern und schließen die Batterie an den Batterieanschluss des Golftrolleys
an. Die LED am Bedienfeld blinkt blau.
Der Quantum verfügt optional über einen Batteriekorb, alternativ wird der
Akku mit einem Verlängerungskabel im Bag mit geführt.
7
Justierung Vorderrad/ Geradeauslauf
Bei jedem Trolley wird der Geradeauslauf im Werk voreingestellt.
Trotzdem kann es sein, dass Sie den Lauf nachjustieren müssen.
1. Lösen Sie die Hutmutter ein bis zwei Umdrehungen.
2. Läuft das Gerät nach links, müssen Sie die vordere Madenschraube
herausdrehen und die hintere Madenschraube hineindrehen.
3. Läuft das Gerät nach rechts, müssen Sie die hintere Madenschraube
herausdrehen und die vordere Madenschraube hineindrehen.
4. Anschließend drehen Sie die Hutmutter wieder fest.
5. Es kann sein, dass Sie sich an die Einstellung mit einem zweiten
Durchgang herantasten müssen.
vordere Madenschraube
hintere Madenschraube
Madenschraube
Hutmutter
Faltschritte Demontage
1. Nehmen Sie den mitgelieferten Steckschlüssel und drücken Sie den
Federknopf in den Rahmen hinein. Drehen Sie die Stange leicht, damit der
Knopf nicht zurück springen kann und ziehen das Gestänge auseinander.
2. Das Gleiche führen Sie mit der Stange durch, die
zum Vorderrad führt. Durch Drücken und leichtes
Drehen des Gestänges, lässt sich die Arretierung
leicht lösen.
3. Ziehen Sie die Räder von der Achse, indem Sie den
Stift an der Felge drücken.
Sollten Sie die Trolleytasche mitbestellt haben, können
Sie alle Bauteile in der Tasche optimal verstauen.
Der Quantum
kann zusätzlich zum Zerlegen, einfach
und schnell zusammen geklappt werden. Hierfür lösen Sie die Griffhöhenverstel-
lung und klappen den oberen Baghalter nach unten. Die senkrechte Stange können
Sie nach vorn klappen, das Vordergestänge können Sie durch Drücken des Rastpins
um 90° verdrehen, um ein noch flacheres Packmaß zu erhalten. Die Hinterräder sind
für das Verstauen in der optionalen Packtasche abzunehmen.
8 9
Funktion
Herstellergarantie
Die Herstellergarantie beträgt 24 Monate ab Kaufdatum.
Folgende Bauteile sind in die Garantie eingeschlossen:
Golftrolley Falcon inkl. Hinterräder
Lithiumbatterie
Ladegerät
Folgende Bauteile sind von der Garantie ausgeschlossen und werden über
die gesetzliche Gewährleistung abgedeckt:
Scorekartenhalter
Regenschirmhalter
Transporttasche
Getränkehalter
Die Garantie umfasst alle bei einer sachgemäßen Benutzung entstandenen
Fehler am Golftrolley, an der Batterie und am Lade gerät. Unsachgemäßes Be-
nutzen des Golftrolleys, unzureichende Pflege, die zu einer merklichen Ver-
schlechterung des Zustandes beitragen, stehen im Konflikt mit der Garantie
und sind deshalb zu vermeiden. Siehe hierzu auch das Kapitel Sicherheits-
und Pflegehinweise.
Durch unsachgemäßes Behandeln des Golftrolleys erlischt die Garantie. Um
einen Garantiefall anzumelden, wenden Sie sich vor dem Versand per Telefon
oder E-Mail an uns, um den Ablauf zu besprechen. Der Versand und die damit
verbundenen Versandkosten werden durch uns über unser Retourenportal
getragen und organisiert. Nachnahmepakete werden generell nicht ange-
nommen. Der Versand zu uns von Geräten, die älter als 6 Monate sind, sind
durch den Kunden zu tragen.
Folgende Bauteile unterliegen dem Verschleiß und sind von der Garantie und
der Gewährleistung ausgeschlossen:
Gummibereifung
Klettbänder Batteriehalter
Garantieerklärung
Lithiumbatterie
Verbinden Sie die Batterie zuerst mit dem Ladegerät und schließen dieses an-
schließend an die Steckdose an. Am Ladegerät befindet sich eine LED. Wenn Sie
das Ladegerät in die Steckdose stecken, leuchtet die LED orange. Ist die Batterie
vollständig geladen, leuchtet die LED grün. Sollten Sie das Ladegerät ohne Batterie
in die Steckdose stecken, leuchtet die LED ebenfalls grün.
Bitte achten Sie immer darauf, dass die LED, nach dem Einstecken des Lade geräts
mit der Batterie, immer auf orange springt.
Je nach Ladungszustand kann das Wiederaufladen der Batterie bis zu 4 Stun-
den dauern. Die normale Lebensdauer einer Batterie liegt bei ca. 800 Wieder-
aufladungen. Sie hängt unter anderem von der durchschnittlichen Beanspru-
chung, Länge der Ladungsintervalle sowie den Lagerbedingungen ab.
Fahrfunktionen
Der Golftrolley verfügt über folgende Fahrfunktionen:
Beschleunigung über den Geschwindigkeitsdrehregler
Reduzierung der Geschwindigkeit über den Geschwindigkeitsregler
Start/ Stop Funktion über den stirnseitigen Edelstahlknopf (Taste A)
Distanztimer über den seitlichen Edelstahlknopf (Taste B).
Bedienung:
Wenn Sie die Batterie in das Gerät einstecken, blinkt die Blaue
Kreis LED an der Stirnfläche des Griffes. Das Gerät ist aktiv und
wartet auf Ihre Eingabe.
Drehen Sie den Drehregler vorsichtig nach vorn, um das Gerät
zu beschleunigen, rückwärts um das Gerät wieder zu stoppen.
Sie können das Gerät auch durch Drücken der Taste A
stoppen. (Parkbremse dadurch aktiviert)
Durch erneutes Drücken des Taste A, fährt das Gerät wieder an.
Das Gerät fährt mit der zuletzt gefahrenen
Geschwindigkeit weiter. ( Memory Funktion)
Distanztimer
Nachdem Sie die Taste A zum Stoppen gedrückt haben, können Sie
mit der Taste B den Distanztimer aktivieren.
Durch 1 oder 2 maliges Drücken der Taste B fährt das Gerät mit der
zuletzt eingestellten Geschwindigkeit für 10 bzw. 20 sek.
Anschließend hält das Gerät wieder an und kann durch
Drücken der Taste A wieder angefahren werden.

10
Funktionsprobleme
11
Batterieentsorgung
Fehlerbehebung
Frage: Der Trolley stoppt von allein. Was ist zu tun?
Antwort: Bitte prüfen Sie den Ladungszustand der Batterie. Ist die Sicher-
heitsabschaltung der Hauptsteuereinheit erfolgt? Dies kann bei zu nied-
rigem Ladezustand der Batterie (Batterie laden) oder bei Überhitzung der
Hauptsteuereinheit (abkühlen lassen) erfolgen.
Frage: Der Trolley zieht zu einer Seite. Was ist zu tun?
Antwort: Sie können die Spur Ihres Trolleys nachjustieren, indem Sie die
Achse des Vorderrades lösen, ausrichten und anschließend wieder befestigen.
Frage: Der Trolley macht Quietschgeräusche. Woran liegt das?
Antwort: Lokalisieren Sie das Quietschen und benutzen Sie etwas Schmie-
rung um das Quietschen zu beseitigen.
Frage: Muss der Golftrolley gewartet werden?
Antwort: Nein, das ist nicht nötig. Wichtig ist, dass Sie das Gerät sauber
halten und bewegliche Teile leicht gefettet sind. Dazu zählen die Achse und
das Kippgelenk der Rahmenstange. Am besten blasen Sie das Gerät nach
jedem Spiel mit Druckluft ab. Grobe Verschmutzungen sollten mit einem
Lappen gelöst werden.
Hinweise nach Batterieentsorgungsgesetz
Da wir Batterien und Akkus bzw. solche Geräte verkaufen, die Batterien und
Akkus enthalten, sind wir nach dem Batteriegesetz (BattG) verpflichtet, Sie
auf Folgendes hinzuweisen:
Batterien und Akkus dürfen nicht im Hausmüll entsorgt werden,
sondern Sie sind zur Rückgabe gebrauchter Batterien und Akkus gesetzlich
verpflichtet. Altbatterien können Schadstoffe enthalten, die bei nicht sach-
gemäßer Lagerung oder Entsorgung die Umwelt oder Ihre Gesundheit schä-
digen können.
Batterien enthalten aber auch wichtige Rohstoffe wie z. B. Eisen, Zink, Mang-
an oder Nickel und werden wieder verwertet. Sie können die Batterien nach
Gebrauch entweder an uns zurücksenden oder in unmittelbarer Nähe (z. B. im
Handel oder in kommunalen Sammel stellen) unentgeltlich zurückgegeben.
Diese durchgekreuzte Mülltonne bedeutet, dass Sie Batterien und Akkus
nicht im Hausmüll entsorgen dürfen.
WEEE-Reg.-Nr. DE 27489275
Seite 1582 und Bundesgesetzblatt Jahrgang 2009 Teil I Nr. 74 vom 19.
November 2009, Seite 3783) sind wir verpflichtet, die von uns vertrie-
benen Akkus und Batterien zwecks Entsorgung wieder zurück zu
nehmen. Sie können verbrauchte Akkus und Batterien somit selbstverständ-
lich unentgeltlich an uns zurück geben. Bitte senden Sie diese zusammen
mit einer kurzen Notiz (Rechnungsnummer, Kaufdatum) frei an uns.

leisuregol
f
leisuregol
f
DE
EN
FR
Taurus Slim Line &
Quantum Slim Line
User Manual

Dear customer,
Congratulations on your new electric golf trolley from leisure golf. You have
purchased a state-of-the-art device equipped with a high-quality lithium-ion
battery.
Please read the user manual carefully before using your golf trolley for the
first time to ensure you have a lot of fun with your electric golf trolley from
leisure golf.
Safety and care instructions ......................................................................................... 16
Structure
Installing the wheels, handlebar and battery ................................................18
Dismantling procedure .......................................................................................... 19
Adjusting the front wheel/going forward ..................................................... 19
Features
Lithium battery ..........................................................................................................20
Driving functions ......................................................................................................20
Manufacturer’s warranty ................................................................................................21
Troubleshooting .................................................................................................................22
Battery disposal note ....................................................................................................... 23
Contents
14 15

Charge the battery every 30 days when the device is not being used.
The battery must be stored in a cool, dry and frost-free place.
All battery activities are stored within the battery in order to allow for evalua-
tion in the case of a complaint. This allows us to evaluate the charging cycles
and a possible pressure impact by falling.
Do not rinse the device and the battery with water as they may damage
the device or the battery. Moisture damage of any kind is recognisable and
is not covered by the guarantee.
If you play in humid weather, check the battery for moisture by removing the
battery from the battery bag. If necessary, wipe off the battery.
Please keep the box, including the Styrofoam insert. If the device has to be
returned for repair or maintenance purposes, the packaging will perfectly
protect the device. Alternative packaging is usually very difficult to find
and can lead to damage to the device.
Safety and care instructions
Familiarise yourself with your caddie and how it works before you use
it for the first time on the course, and operate it ‘fully loaded’ to get to
know how it rolls. The handling always varies depending on the weather,
terrain, payload and weight distribution. Please fully charge the battery
before using it for the first time. Please follow the charging instructions
on page 12.
Danger of tipping over on fast turns! The better you know your caddie, the
lower the risk of injury. This applies to you, but especially for other people.
Even if the handling is easy, your caddie is a piece of sports equipment
and not a toy. Therefore, use it only where its use is intended.
The trolley is designed to allow the user to focus on their golf game while
the trolley fulfils the job of a bag carrier. After each round, dirt and grass
should be wiped from the frame, wheels and housing with a cloth or pa-
per towel in order to keep the trolley in perfect condition over the long
run.
Remove the rear wheels every few weeks and get rid of any deposits that
may cause the wheels to grind and not turn easily. Mobile parts can be
kept running smoothly with a little lubricant, such as Ballistol.
Always disconnect the battery from the trolley when storing it. If you do
not plan to play at least within a month, store the battery in a cool, frost-
free and dry place. Please do not store on a floor with underfloor heating.
To maximise the life and maintain the capacity of the battery, please
recharge the battery after each game, regardless of whether 9 or 18 holes
have been played.
16 17

Structure
18
Installing the wheels, handlebar and battery
1. Take the axle in your hand and connect it to the front part. Slide the front
part up to the pin in the opening of the lateral axle.
Press the stainless steel pin into the frame and push the front part com-
pletely into the lateral axle. Turn the two parts together so that the pin can
engage into the hole.
2. Take the rear wheels and install them on the lateral axle as described below.
Danger: Pay attention to the running direction of the rear wheels. The profile
must point in the same direction as the front wheel profile.
-
Press the pin on the rim.
-
Slide the wheels onto the first groove on the axle. This is the freewheel posi-
tion (for manual pushing).
-
Push the wheel to the final position on the axle and engage. This is the posi-
tion for driving.
Important:
If the wheel is not in the drive position, there is no propulsion of
the device.
3. Now connect the vertical bar with the lateral axle. Proceed in the same way
as above.
4. With the side knob, you can adjust the handle height and ‘adjust’ the upper
bag holder individually to your bag size. Then tighten the lateral fixing screw.
5. Attach the battery to the front frame with the two Velcro straps and connect
the battery to the battery connector on the golf trolley. The LED on the control
panel will flash blue.
The Quantum optionally has a battery basket, alternatively the battery can
storage with an extension cable in the bag.
19
Adjusting the front wheel/going forward
With each trolley, the factory preset is straight travel.
Nevertheless, it may be necessary to readjust the barrel.
1. Loosen the cap nut one or two turns.
2. If the device is pulling to the left, unscrew the front grub screw and
screw in the rear grub screw.
3. If the device is pulling to the right, unscrew the rear grub screw and
screw in the front grub screw.
4. Then tighten the cap nut again.
5. You may have to readjust the setting with a second pass.
Dismantling procedure
1. Take the supplied socket wrench and press the spring button into the
frame. Turn the rod slightly so that the knob cannot spring back and pull the
linkage apart.
2. Repeat the same steps you have with the rod that
leads to the front wheel. By pressing and slightly
turning the linkage, the lock can be easily released.
3. Pull the wheels off the axle by pressing the pin on
the rim.
If you have ordered the trolley bag, you can optimally
stow all components in the bag.
The Quantum
can be folded in addition to the disas-
sembly, easy and fast. To do this, release the handle height adjustment and fold
down the upper bag holder. The vertical rod can be folded forward, the front rod can
be rotated by pressing the locking pin by 90 ° to obtain an even flatter pack size. The
rear wheels should be removed for storage in the optional trolleybag
Front grub screw
Rear grub screw
Grub screw
Cap nut

20 21
Function
Manufacturer’s warranty
The manufacturer’s warranty is valid for 24 months from the date of
purchase.
The following components are included in the warranty:
Golf trolley Falcon, including rear wheels
Lithium battery
Battery charger
The following components are excluded from the warranty and are covered
by the statutory warranty:
Scorecard holder
Umbrella holder
Transport bag
Drink holder
The warranty covers all defects in the golf trolley, the battery and the charger
when used properly. Improper use of the golf trolley and inadequate care
that contributes to a significant deterioration of the condition are in conflict
with the warranty and should therefore be avoided. See also the chapter on
safety and care instructions.
Improper handling of the golf trolley voids the warranty. To file a warranty
claim, please contact us by phone or email before shipping to discuss the
process. The associated shipping costs are borne and organised by us via our
returns portal. C.O.D. packages are generally not accepted. Shipping costs on
returns of items older than six months are paid for by the customer.
The following components are subject to wear and are excluded from the
warranty:
Rubber tyres
Velcro battery holder
Warranty policy
Lithium battery
First, connect the battery to the charger, then plug it into the wall outlet. The char-
ger has an LED. When you plug the charger into the power outlet, the LED turns
orange. When the battery is fully charged, the LED turns green. If you insert the
charger without battery into the socket, the LED also turns green.
Please always make sure that the LED turns orange after plugging in the charger
with the battery.
Depending on the state of charge, recharging the battery can take up to four hours.
The normal life of a battery is about 800 recharges. It depends, among other things,
on the average load, the length of the charge intervals, and the storage conditions.
4.2 Driving functions
The golf trolley has the following driving functions:
Acceleration using the speed regulator
Reduce the speed using the speed regulator
Start/Stop function using the front stainless steel button (A)
Distance timer using with the side stainless steel button (B)
Control:
If you insert the battery plug into the trolley, the Button A is flashing
Blue. The Trolley is ready to control.
Turn the speed regulator to the front to accelerate the trolley and turn
back to reduce or stop.
Alternate you can stop the trolley with button A.
The Parking brake is activated.
If you push the button A again the trolley will accelerate to
the old speed. (Memory function)
4.3 Distance timer function
For using the timer function you have to stop the trolley with button A.
After stopping you can push button B one or two times.
After pushing the button B the trolley will accelerate to the old speed
and hold the speed for 10 or 20sec. ( One time push=10 sec., two times
push= 20sec.)
After the time the trolley stop automatically. After this you can start the
trolley again with Button A in normal mode.

22
Function problems
23
Battery disposal
Troubleshooting steps
Issue: The trolley stops by itself. What should I do?
Answer: Please check the charge status of the battery. Is the safety shut-
down of the main control unit done? This can occur if the battery is low
(charge the battery) or if the main control unit overheats (allow it to cool
down).
Issue: The trolley pulls to one side. What should I do?
Answer: You can readjust the track of your trolley by loosening, aligning and
then reattaching the axle of the front wheel.
Issue: The trolley makes squeaking noises. Why is that?
Answer: Locate the squeak and use some lubricant to stop the squeaking.
Issue: Does the golf trolley have to be serviced?
Answer: No, that’s not necessary. It is important that you keep the device
clean and that moving parts are lightly greased. These include the axle and
the tilting joint of the frame bar. It is best to blow off any dirt and debris
with compressed air after every game. Coarse dirt should be removed with
a cloth.
Information according to the Battery Disposal Act
Since we sell batteries and/or devices that contain batteries and recharge-
able batteries, we are obliged under the Battery Act (BattG) to point out the
following:
Batteries (rechargeable and otherwise) must not be disposed of with
household waste; but instead you are legally obliged to return both used
and rechargeable batteries. Old batteries may contain harmful substances
which, if not properly stored or disposed of, could damage the environ-
ment or your health.
But batteries also contain important raw materials such as iron, zinc, manga-
nese or nickel, which can all be recycled. You can either return the batteries
to us after use or return them free of charge in the immediate vicinity (e.g. in
shops or municipal collection points).
This image of a crossed-out waste bin means that you must not dispose of
old and rechargeable batteries as household waste.
WEEE reg. no. DE 27489275
German Bundesgesetzblatt (Journal of Federal Law), Volume 2009, Part I, no.
74, November 19, 2009, pages 3,783 and 1,582 state that we are obliged to take
back all batteries that have been returned to us for the purpose of disposal.
Of course, you can return used and old batteries to us free of charge. Please
send them to us together with a short note containing the invoice number
and date of purchase.

leisuregol
f
leisuregol
f
DE
EN
FR
Taurus Slim Line &
Quantum Slim Line
Notice d‘utilisation

Cher client,
Félicitations, vous venez d‘acquérir votre nouveau chariot de golf électrique
de la marque leisure golf. Vous avec opté pour un appareil correspondant aux
standards techniques d‘aujourd‘hui et équipé d‘une batterie lithium-ion de
qualité.
Nous vous invitons à lire cette notice d‘utilisation avec attention avant la pre-
mière utilisation. Vous aurez ainsi beaucoup de plaisir à utiliser votre chariot
de golf électrique de la marque leisure golf
Conseils d‘utilisation et d‘entretien ..........................................................................28
Montage
Montage des roues, du guidon et de la batterie ..........................................30
Démontage opération de pliage .........................................................................31
Ajustement roue avant/stabilité directionnelle ...........................................31
Fonctions
Batterie lithium ......................................................................................................... 32
Fonctions de pilotage ..............................................................................................32
Garantie fabricant ............................................................................................................. 33
Résolution des problèmes .............................................................................................34
Conseils sur l‘élimination des batteries ................................................................... 35
Sommaire
26 27

dans un endroit frais, sec et à l‘abri du gel. Si vous possédez un chauffage
au sol, veillez à ne pas la ranger sur le sol.
Afin d‘optimiser au mieux la durée de vie ainsi que la capacité de la batte-
rie, veuillez la recharger après chaque partie, peu importe que vous ayez
joué 9 ou 18 trous.
Durant la période de non-utilisation de l‘appareil, la batterie devra être
chargée tous les 30 jours.
La batterie doit être stockée dans un endroit frais, sec et à l‘abri du gel.
Toutes les activités de la batterie sont sauvegardées dans la batterie, qui
pourront être analysées dans le cas d‘une réclamation. Il est ainsi possible
d‘analyser les cycles de charge et éventuellement l‘effet de pression par ren-
versement.
Ne nettoyez pas le chariot avec de l‘eau au risque de l‘abîmer ou d‘abîmer
la batterie. Les dégâts dus a l‘humidité de tout type sont reconnaissables
et ne sont pas couverts par la garantie.
Si vous jouez par temps humide, veuillez vérifier que la batterie est bien pro-
tégée de l‘humidité en l‘enlevant de son sac. Essuyez la batterie si nécessaire.
Veillez à garder le carton avec l‘insert en polystyrène. Dans le cas où l‘ap-
pareil devrait être renvoyé à des fins de réparation ou de maintenance,
l‘emballage pourra le protéger efficacement. Utiliser un autre emballage
est souvent difficile et peut endommager l‘appareil.
Conseils d‘utilisation et d‘entretien
Familiarisez-vous avec votre chariot et son fonctionnement avant sa pre-
mière utilisation sur le terrain de golf et conduisez-le « à pleine charge »
afin de connaitre ses caractéristiques de conduite. Le comportement de
conduite varie toujours selon les conditions météorologiques, la qualité
du terrain, la charge et la répartition des poids. Veuillez charger compléte-
ment la batterie avant la première utilisation. Nous vous invitons à suivre
les instructions de charge de la page 12.
Attention: risque de basculement dans les virages rapides. Mieux vous
connaitrez votre chariot, moins vous aurez de risque de vous blesser. Cela
vaut aussi bien pour vous-même que pour d‘autres personnes. Même si
son utilisation est très simple, votre chariot est un équipement sportif et
non un jouet. Nous vous invitons donc à vous en servir là où son usage est
prévu.
Ce chariot a été développé pour permettre aux utilisateurs de se concen-
trer sur la partie de golf tandis qu‘il s‘occupe de porter le sac de golf. Afin
de garder le chariot dans un état irréprochable, il devra être nettoyé après
chaque partie avec un chiffon ou une serviette en papier pour enlever la
saleté et l‘herbe du châssis et des roues.
Démontez toutes les quelques semaines les roues arrières et enlevez
les dépôts qui pourraient abîmer les roues et qui pourraient alors les
empêcher de tourner. Un peu de lubrifiant, par ex. de l‘huile de Ballistol,
pourra vous aider à garder les pièces mobiles en bon état.
Enlevez toujours la batterie du chariot lorsque vous le rangez. Si vous pla-
nifiez de ne pas l‘utiliser pendant au moins un mois, stockez la batterie
28 29

Montage
30
Montage des roues, du guidon et de la batterie
1. Prenez l‘axe dans la main et reliez-la avec la partie avant. Poussez la par-
tie avant jusqu‘à la broche dans l‘ouverture de l‘axe transversal. Insérez la
broche en acier inoxydable dans le cadre et poussez la partie avant complé-
tement dans l‘axe transversal. Faites pivoter ensemble les deux pièces de
sorte à ce que la broche puisse bien s‘insérer dans le trou percé.
2. Prenez les roues arrière et montez-les sur l‘axe transversal selon les indica-
tions ci-dessous..
Attention: Veillez au sens de la rotation des roues arrières. Le profil doit être
orienté dans la même direction que le profil de la roue avant.
-
Poussez la tige contre la jante.
-
Poussez les roues jusqu‘à la première encoche sur l‘axe. Ceci est la position de
roulement libre, dans le cas d‘un usage manuel.
-
Poussez la roue jusqu‘à sa position définitive sur l‘axe et encliquetez-la. Ceci
est la position pour l‘actionnement.
Important:
Lorsque la roue ne se trouve pas dans la position d‘actionnement,
l‘appareil n‘avance pas.
3. Reliez à présent la barre verticale avec l‘axe transversal. Suivez les mêmes
indications que pour le point.
4. Le bouton rotatif sur le côté vous permet de régler la hauteur du guidon ainsi
que d‘« ajuster » le porte sac supérieur à votre taille de sac. Vissez ensuite forte-
ment la vis de fixation latérale.
5. Fixez la batterie sur la châssis avant avec les deux bandes velcro et raccordez
la batterie à la prise du chariot. La LED sur le plateau de commande clignote
bleu.
Le Quantum dispose d‘un panier à batterie en option, ou bien la batterie
peut être transportée dans le sac à l‘aide d‘un câble de rallonge.
31
Ajustement roue avant/stabilité directionnelle
Chaque chariot est paramétré à l‘usine avec stabilité directionnelle.
Il est pourtant possible que vous deviez réajuster la direction.
1. Faites tourner l‘écrou borgne sur un ou deux tours.
2. Si l‘appareil tourne vers la gauche, vous devrez dévisser la vis de serra-
ge avant et resserrer la vis de serrage arrière.
3. Si l‘appareil tourne vers la droite, vous devrez dévisser la vis de serrage
arrière et resserrer la vis de serrage avant.
4. Ensuite, resserrez bien l‘écrou borgne.
5. Il est possible que vous deviez procéder à un deuxième réglage.
Démontage opération de pliage
1. Prenez la clé à douille comprise dans la livraison et poussez le bouton à res-
sort dans le cadre. Tournez légèrement la barre afin que le bouton ne puisse
pas sauter et écartez la tringle.
2. Procédez de la même manière avec la barre reliée
à la roue avant. Le verrouillage peut être légèrement
desserré en appuyant et en tournant légèrement la
barre.
3. Retirez les roues de l‘axe, en poussant la tige
contre la jante.
Vous pourrez ranger toutes les pièces de manière
optimale su vous avez commandé le sac de chariot.
En plus d‘être démonté, le Quantum peut être replié rapidement et facilement.
Pour ce faire, relâchez le réglage en hauteur de la poignée et rabattez le support de
sac supérieur vers le bas. La tige verticale peut être repliée vers l‘avant, la tige avant
peut être tournée à 90° en appuyant sur la goupille de verrouillage pour obtenir
des dimensions encore plus plates. Les roues arrière doivent être démontées pour
ranger l‘article dans le sac en option.
Vis de serrage avant
Vis de serrage arrière
Vis de serrage
Écrou borgne

32 33
Fonctions
Garantie fabricant
La garantie fabricant est de 24 mois à partir de la date d‘achat.
Les pièces suivantes sont exclues de la garantie:
Chariot de golf Falcon avec roues arrières
Batterie lithium
Chargeur
Les pièces suivantes sont exclues de la garantie et sont couvertes par la
protection de garantie légale:
Porte-carte de score
Porte-parapluie
Sac de transport
Porte-boissons
La garantie concerne toutes les défaillances se produisant dans le cadre
d‘une utilisation conforme au niveau du chariot, de la batterie et du charge-
ur. Une utilisation non conforme du chariot, un entretien insuffisant pouvant
mener à une dégradation significative de l‘appareil sont incompatibles avec
la garantie et sont par conséquent à éviter. Nous vous invitons à consulter à
ce propos le chapitre sur les conseils d‘utilisation et d‘entretien.
La garantie est annulée en cas d‘utilisation non conforme du chariot de golf.
Si vous souhaitez profiter de votre garantie, veuillez-vous adresser à nous par
téléphone ou par e-mail avant l‘envoi afin que nous puissions discuter du
déroulement. Nous prenons en charge et organisons l‘envoi et les frais de
transport via notre portail de retours de marchandises. Les colis contre rem-
boursement ne sont en général pas acceptés. Le renvoi d‘appareils datant de
plus de 6 mois est à la charge du client.
Les pièces suivantes sont soumises à l‘usure et sont exclues de la garantie et
de la protection de garantie :
Pneumatiques
Porte-batterie velcro
Déclaration de garantie
Batterie lithium
Raccordez tout d‘abord la batterie avec le chargeur et branchez-le au secteur. Une
LED se trouve sur le chargeur. Lorsque vous branchez le chargeur à une prise de
courant, la LED est orange. Une fois la batterie chargée, la LED sera verte. Lorsque
vous branchez le chargeur à une prise de courant sans batterie, la LED est également
verte. Veuillez toujours vérifier que la LED, après la connexion du chargeur et de la
batterie, passe à l‘orange. La recharge complète de la batterie peut prendre jusqu‘à
4 heures selon l‘état de charge. La durée de vie normale d‘une batterie est d‘environ
800 rechargements. Cette dernière dépend entre autres de la moyenne d‘utilisati-
on, la durée des intervalles de charge ainsi que des conditions de stockage.
4.2 Fonctions de pilotage
Ce chariot de golf dispose des fonctions de pilotage suivantes :
Accélération via le bouton rotatif de réglage de vitesse
Décélération via le bouton de réglage de vitesse
Fonction marche / arrêt via le bouton frontal en acier inoxydable
(bouton A)
Minuteur de distance via le bouton latéral en acier inoxydable
(bouton B)
Utilisation:
Lorsque vous introduisez la batterie dans l‘appareil, le cercle bleu
de la LED clignote sur la face avant du guidon. L‘appareil est actif
et attend vos indications.
Tournez avec précaution le bouton rotatif de réglage B vers l‘avant
afin de faire accélérer l‘appareil, vers l‘arrière pour le stopper.
Vous pouvez également stopper l‘appareil en appuyant sur le
bouton A. (Frein de stationnement ainsi activé)
En appuyant à nouveau sur le bouton A, l‘appareil repart.
L‘appareil repart à la vitesse sur laquelle il était
programmé. (Fonction Memory)
4.3 Minuteur de distance
Gardez le bouton A d‘arrêt enfoncé, pour activer le minuteur de
distance à l‘aide du bouton B.
Appuyez 1 ou 2 fois sur le bouton B pour que l‘appareil reparte pour 10
à 20 secondes à la vitesse sur laquelle il était programmé.
Ensuite l‘appareil s‘arrête de nouveau et peut être redémarré en
appuyant sur le bouton A.

34
Problèmes fonctionnels
35
Élimination des batteries
Résolution des problèmes
Question: Le chariot s‘arrête tout seul. Que faire?
Réponse: Veuillez vérifier le niveau de charge de la batterie. La coupure de
sécurité de l‘unité de commande centrale a t‘elle eu lieu ? Cela peut arriver
en cas de niveau de charge faible de la batterie (recharger la batterie) ou en
cas de surchauffe de l‘unité de commande centrale (laisser refroidir).
Question: Le chariot penche d‘un côté. Que faire?
Réponse: Vous pouvez réajuster la direction de votre chariot en détachant,
réglant et en refixant l‘essieu de la roue avant.
Question: Le chariot fait des bruits de crissements. À quoi cela est-il dû?
Réponse: Localisez l‘endroit du crissement et lubrifiez-le un peu pour régler
le problème.
Question: Le chariot de golf doit-il faire l‘objet d‘une maintenance?
Réponse: Non, cela n‘est pas nécessaire. Il est important que vous gardiez
l‘appareil propre et que les pièces mobiles soient légèrement graissées. Cela
concerne entre autres l‘essieu et l‘articulation basculante de la barre du
châssis. Passez l‘appareil à l‘air comprimé si vous le pouvez après chaque
partie. Les salissures doivent être enlevées au moyen d‘un chiffon.
Conseils conformes à la loi sur les piles et les
accumulateurs
En tant que vendeurs de batteries et de piles ainsi que d‘appareils contenant
des batteries et des piles, nous sommes dans l‘obligation de vous informer
des indications suivantes conformément à la loi allemande sur les piles et les
accumulateurs (BattG):
Il est interdit d‘éliminer les piles et les batteries dans les ordures ménagères.
Vous êtes tenu(e) de restituer les piles et les batteries usagées. Les piles
usagées peuvent contenir des substances toxiques pouvant nuire à la
santé du client ou à l‘environnement si elles ne sont pas stockées et éli-
minées de façon adéquate.
Les piles contiennent également des matières premières importantes
comme par exemple du fer, du zinc, du manganèse ou nickel qui seront
recyclées. Vous pourrez aussi nous retourner après usage les batteries liv-
rées par nos soins ou les déposer gratuitement ou à proximité immédiate
(par ex. dans des commerces ou des sites de collecte communaux).
Ce symbole de poubelle barrée signifie que les batteries et les piles ne peu-
vent pas être jetés dans les ordures ménagères classiques.
WEEE-Reg.-Nr. DE 27489275
Page 1582 et Bundesgesetzblatt Année 2009 Partie I Nr. 74 du 19 novembre
2009, Page 3783), nous sommes dans l‘obligation de récupérer les piles et bat-
teries que nous avons commercialisés afin de les éliminer. Vous pouvez bien
entendu nous redonner gratuitement les piles et batteries que vous pu ac-
quérir chez nous. Veuillez-nous les envoyer avec une brève indication (numéro
de facture, date d‘achat).
This manual suits for next models
2
Table of contents
Languages:
Other Leisure Golf Golf Trolley manuals