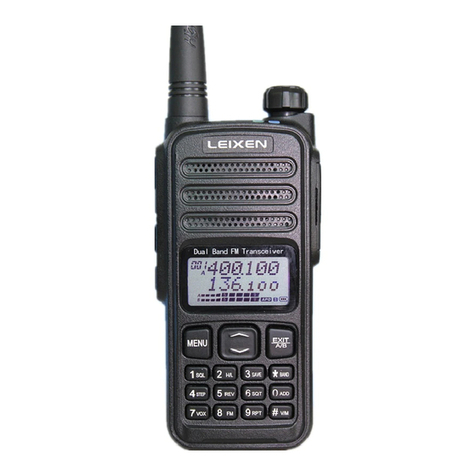
Leixen UV-25HX User manual

1

Indice
2

3

Installation Instalación
Connect Power
This transceiver should be connected to a
13.8V DC power supply. It can not be
connected directly to an AC outlet. Connect
the transceiver to a regulated power supply
with the supplied power cable. Do not
replace the DC power cable with a thinner
wire. The supplied cable is rated to meet the
power re uirements of the transceiver.
Connect the DC power cable to a DC power
supply or battery. Connect the red wire to
the positive terminal and the black wire to the
negative terminal. Then, plug the power
connector into the DC power outlet of the
transceiver.
Note: Make sure to turn off the DC
power supply and transceiver before
connecting.
The DC power supply can only be
connected to an AC
power outlet after all connections are
completed.
Conexión de la alimentación
Este equipo debe conectarse a un 13.8V DC
fuente de alimentación. No se puede conectar
directamente a una toma de CA. Conecte el
transceptor a una fuente de alimentación
re ulada con el cable de alimentación
suministrado. No
Reemplace el cable de alimentación de CC con
un alambre más del ado. El cable está
preparado para cumplir con los requisitos de
alimentación del transceptor.
Conecte el cable de alimentación DC a DC
fuente de alimentación o batería. Conecte el
cable rojo al borne positivo y el cable ne ro al
terminal ne ativo. Lue o, enchufe el conector
de alimentación en el toma corriente de CC de
la
transmisor-receptor.
Nota: Ase úrese de apa ar la fuente de
alimentación y equipo antes de conectar.
La fuente de corriente continua sólo puede
conectarse a un AC
toma de corriente después de que se hayan
completado todas las conexiones.
Keeping the Transceiver Cool
As with all modern electronics, it is very
important hat the transceiver not be allowed
to overheat. The VV-898 has been
designed to take advantage of natural air
flow to keep it cool. Thus, to help in
providing enough space for natural air flow, it is
very important that you install the transceiver
using the supplied mounting bracket. If the
transceiver is installed without providing for
ade uate air flow, the transceiver may
overheat. If ade uate air flow is not
available, the transceiver will be damaged
from overheating. Do not place books or
other e uipment directly on the transceiver.
Allow 4In (10cm) of clearance between the
rear of the transceiver and any other objects.
Mantener fresco el transceptor
Como con toda la electrónica moderna, es muy
importante sombrero el transceptor no puede
sobrecalentarse. VV-898 ha sido diseñado para
aprovechar las ventajas naturales del flujo de
aire para mantenerlo fresco. Por lo tanto, para
ayudar a proporcionar suficiente espacio para
el flujo de aire natural, es muy importante que
instale el transceptor utilizando el soporte
suministrado correspondiente. Si el transceptor
se instala sin prever el flujo de aire adecuado,
el transceptor puede recalentarse. Si no hay
flujo de aire adecuado, el transceptor a
dañarse por sobrecalentamiento. No coloque
libros u otro equipo directamente en el
transceptor. Permiten en 4 (10cm) de espacio
libre entre la parte trasera de la emisora y otros
objetos.
Install with Bracket
An adjustable angle bracket is supplied
with the transceiver. Please attach the
bracket to your desired installation location.
Instalar con el soporte
Un soporte de án ulo ajustable se suministra
con el transceptor. Por favor, instale el soporte
en el sitio de instalación deseado. Quitar los
4

Remove the two mounting screws from
the sides of the transceiver and reinstall
them through the holes in the bracket.
Note: Do not install the transceiver where it
might interfere with the deployment of airbags.
Do not place the transceiver in the front
windshield. The heat of the sun may damage
the transceiver.
dos tornillos de los lados del equipo y vuelva a
instalarlos a través de los orificios en el
soporte.
Nota: No instale el transceptor donde pudiera
interferir con el desplie ue de los airba s.
No coloque el transceptor en el parabrisas
delantero. El calor del sol puede dañar el
equipo.
Connect Accessories
Hand Microphone: The Hand microphone
connection jack is located on the left side of the
front panel of the transceiver.
Earphone: The Earphone connection jack is
located in the right of the rear panel of the
transceiver. The internal speaker is muted
when an earphone or external speaker is
connected to this jack.
Antenna: The SO-239 mount connection is on
the left of the rear panel of the
transceiver. The antenna system is
composed of an antenna, feedline, and
ground network components. Carefully
consider your antenna system installation for
best results with this transceiver. For
instance, be sure the antenna you will use
matches your desired operating
fre uencies.
Selecting an appropriate antenna is beyond
the scope of this manual. Do not
transmit without first connecting an
antenna. Doing so may damage the
transceiver.
Conectar accesorios
Micrófono de mano: El enchufe de conexión
de micrófono de mano está situado en el lado
izquierdo del panel frontal de la emisora.
Auricular: La toma de conexión de auriculares
se encuentra en la derecha de la parte trasera
de la emisora. El altavoz interno se enmudece
cuando un auricular o altavoz externo está
conectado a esta entrada.
Antena: La conexión del montaje SO-239 está
a la izquierda de la parte trasera de la emisora.
El sistema de la antena se compone de una
antena, automatización y componentes de la
red de tierra. Considerar cuidadosamente la
instalación de su sistema de antena para
obtener mejores resultados con este equipo.
Por ejemplo, ase úrese de que la antena que
se utiliza coincida con sus frecuencias de
funcionamiento deseados.
Selección de una antena apropiada es más allá
del alcance de este manual. Transmitir sin
primera conexión de una antena. Hacerlo
puede dañar el equipo.
5

6

1, Loudspeaker
2, Indicator Li ht (Red, reen li ht)
3, MIC Connector (RJ45)
4, CHA+(Channel Up)
5, CHA-(Channel Down)
6, LCD display screen
7, VOL+(Volume Up)
8, VOL-(Volume Down)
9, Menu Key
10, P1 Key (User defined)
11, P2 Key (User defined)
12, P3 Key (User defined)
13, Power Switch
14, Antennaa Connector
15, Power Connector
1, altavoz
2, indicador de luz (rojo, verde)
3, conector de micrófono (RJ45)
4, CHA + (canal arriba)
5, CHA-(canal abajo)
6, pantalla LCD
7, VOL + (subir volumen)
8, VOL- (bajar volumen)
9, tecla de menú
10, P1 (definido por el usuario)
11, P2 (definido por el usuario)
12, P3 (definido por el usuario)
13, interruptor de encendido
14, conector de antena
15, conector de alimentación
16, conector altavoz externo
7

1, PTT Push to Talk
2, MIC Microphone
3, UP Up, VOL+
4, DN Down, VOL-
5, A Call
6, B VFO/MR Switch
7, C A/B mode Switch
8, D VFO Band Chan e
9, # CHA+
10, * CHA-
1, PTT Push to Talk
2, micrófono MIC
3, hasta arriba, VOL +
4, abajo de la DN, VOL-
5, una llamada
6, B interruptor de VFO/MR
7, C A B modo interruptor
8, cambio de banda VFO D
9, # CHA +
10, * CHA -
8

No icon Feature Description Operation Method
1Memory Channel No.
Nº de canal de memoria
--
2A
Being A Channel
Volver a canal A
Switch A/B Key
3B
Being B Channel
Volver a canal A
Switch A/B Key
4Keyboard Lockout
Bloquo de teclado
Press M Key for 2 Seconds
Pulsar tecla M durante 2 se undos
5VOX Open
Vox operativo
Refer to Menu 45
6DCS Open
modo de DCS abierto
In VFO/MR mode :Decode Type
and Decode Code referto Menu 08
and 09, Encoded Type and
Encoded Code refer to Menu 10
and 11
En VFO/MR: tipo de descifrar y
decodificar Códi o consulte menú
08 y 09, tipo codificada y codificada
consulte menú 10 y 11
7CT CT Open
Abrir CT
The same as above (DCS)
I ual que el anterior (DCS)
Offset Fre uency
Frecuencia de desplazamiento
Refer to Menu 34 and 35
9FWireless Fre uency
Frecuencia de Wireless
Open Refer to Page 44
10 Channel scan disabled
Exploración del canal desactivado
Refer to Menu 39
11 Low Power
Baja Potencia
Refer to Menu 30
12 High Power
Alta potencia
Refer to Menu 30
13 Indicate Power strength when
transmitting, 10 grids for high power, 5
grids for small power.Indicate signal
---
9

strength when receiving.
Indicador de potencia, 10 casillas para
alta potencia, 5 casillas baja potencia.
En RX indica intensidad de la señal.
14 Auto Power off
Autoapa ado
Refer to Menu 01
15 Reverse Fre uency
Frecuencia inversa
Refer to Menu 33
16 NNarrowband
Banda estrecha
Refer to Menu 50
17 Dual Reception
Recepción dual
Refer to Menu 07
1 DTMF Refer to Menu 06
19 Displayed fre uency value, channel
names, menu items, and other
numbers, letters or symbols
Information.
Aparecen los nombres de las
frecuencias, canales, menú y otros
números, letras o símbolos de
información.
---
10

Front Panel Description
Orient the transceiver with the front panel facing
you.
Find the RJ-45 microphone jack on the left side
of the front panel. To the right of the
microphone jack is a column of three buttons.
From top to bottom, these are CH+, CH-, and
M (Menu). The LCD display is directly to
the right of these three buttons.
Below the LCD display is a row of four buttons.
From left to right, these are P1, P2, P3,
and the power button.
Finally, to the right of the LCD display is a
column of two buttons, labeled VOL+ and VOL-.
Descripción del Panel frontal
Oriente el transceptor con la parte frontal hacia
usted.
Encontrará al enchufe de micrófono de RJ-45
en el lado izquierdo del panel frontal. A la
derecha del conector de micrófono hay una
columna de tres botones. De arriba a abajo,
son CH +, CH-y M (menú). La pantalla LCD
esta directamente a la derecha de estos tres
botones.
Por debajo de la pantalla LCD hay una fila de
cuatro botones. De izquierda a derecha, estos
son P1, P2, P3 y el botón de encendido.
Finalmente, a la derecha de la pantalla LCD la
pantalla hay una columna de dos botones,
denominados VOL + y VOL-.
Basic Operation
Power on/off
Once power is connected, press the
button to turn the transceiver on. Three
ascending tones will sound, indicating that
the transceiver has correctly powered on.
Hold the key for 2 seconds to turn the
transceiver off.
Turn Volume
Press “VOL+” to raise the volume. Press
“VOL-” to lower the volume. Hold the key to go
fast. The volume is adjusted in 15 steps from 0
(lowest) to 15 (highest).
The default setting is 4.
Select Channel
You can select an operating channel in one
of several ways:
1) Use the programming software to store
operating channels ahead of time. You can
then access them directly in MR mode, using
the channel up/down buttons or the numeric
keypad on the microphone.
2) Input fre uency values by using the
numeric keypad in VFO mode.
3) Press the “CHA+” or “CHA-” key to
select the fre uency in VFO mode. Hold the
key to go fast.
4) Input channel number by using the numeric
Operación básica
Encendido y apagado
Una vez que la ener ía está conectada,
presione el botón para encender el
transceptor. Sonarán tres tonos
ascendentes, lo que indica que el transceptor
ha encendido correctamente. Manten a
pulsada la tecla durante 2 se undos para
apa ar el transceptor.
Volumen
Pulse "VOL +" para aumentar el volumen.
Pulse "VOL-" para bajar el volumen. Pulsada la
tecla para ir rápido. El volumen se ajusta en 15
pasos desde 0 (más bajo) a 15 (más alto).
El valor predeterminado es 4.
Seleccione canal
Puede seleccionar un canal de funcionamiento
en una de varias formas:
1) Utilice el software de pro ramación para
almacenar canales de funcionamiento antes de
tiempo. Usted puede entonces acceder a ellos
directamente en el modo de MR, utilizando los
botones arriba/abajo o el teclado numérico en
el micrófono.
2) Introducir valores de la frecuencia utilizando
el teclado numérico en el modo VFO.
3) Presione el "CHA +" o "CHA-" para
seleccionar la frecuencia en el modo VFO.
Pulsada la tecla para ir rápido.
11

keypad to select memory channel in MR mode.
Note: This transceiver has a dual-watch
function, you can switch between A and B
channels using the “C” key (A/B switch key)
on the microphone keypad. The A channel can
only operate in MR/CH mode, while the B
channel can be set to either MR/CH or VFO
mode. Please refer to page 40-41 regarding
the user-defined key unction of the A/B switch
and the VFO/MR switch.
In VFO mode, the transceiver will store the most
recently used fre uency in each of its
supported ranges. To switch uickly between
the transceiver’s supported fre uency ranges,
press the key.
Transmitting and receiving
To transmit, press and hold the PTT key of the
Microphone and speak normally. Release the
PTT key to stop transmitting.
Please use Low Power whenever
possible. If the distance between
you and the other station is short,
low power (5 watts) should be
ade uate. Using low power when
possible will not only use less power
from your battery or power supply,
but your transmitter will also produce
less heat, increasing the life of your
final amplifier.
For best voice uality, hold the
microphone about 2 IN (5 cm) away
from your mouth and speak
normally.
A red LED indicates that the transmitter
is active.
4) entrada de número de canal usando el
teclado numérico para seleccionar el canal de
memoria en el modo de MR.
Nota: Este transceptor tiene una función de doble
escucha, usted puede cambiar entre los canales
A y B usando la tecla "C" (A / B interruptor) en el
teclado del micrófono. Un canal puede funcionar
sólo en modo de MR/CH, mientras que el canal B
se puede establecer en modo de VFO o MR/CH.
Por favor consulte la pá ina 40-41 con respecto a
la definición de clave por el usuario de la A / B
interruptor y el VFO/MR
En el modo VFO, el transceptor almacena la
frecuencia más recientemente usada en cada
una de sus amas compatibles. Para cambiar
rápidamente entre del transmisor-receptor
frecuencia compatible, pulse la tecla.
Transmisión y recepción
Para transmitir, presione y manten a
presionada la tecla PTT del micrófono y hable
normalmente. Suelte la tecla PTT para
interrumpir la transmisión.
Utilice baja potencia siempre que sea
posible. Si la distancia entre usted y la
otra estación es corta, baja potencia (5
watts) debe ser adecuada. Uso de baja
potencia cuando sea posible utilice
menos ener ía de la batería o fuente de
alimentación, no sólo su transmisor
también producen menos calor,
aumentando la vida del amplificador
final.
Para mejor calidad de voz, el micrófono
aproximadamente 2 en (5 cm) de la
boca y hablar normalmente.
Un LED rojo indica que el transmisor
está activo.
Function Menu Operation
To modify settings in the VV-898’s settings
menu, follow these steps:
1) Press the “M” key.
2) a, Use the “CHA+” and “CHA-“ keys, or
the “VOL+” and “VOL-“ keys to select the
menu option you wish to modify. Hold the key
to go fast b, You can also input menu
number directly by using the numeric keypad
to select desired menu.
3) Press the “M” key to select the menu for
modification.
Operación del menú función
Para modificar la confi uración en el menú de
VV-898, si a estos pasos:
1) Presione la tecla "M".
2) a, utilice las teclas "CHA +" y "CHA-", o las
teclas "VOL +" y "VOL-" para seleccionar la
opción de menú que desee modificar.
Manten a pulsada la tecla para ir rápido b,
también puede introducir el número del menú
directamente por el uso del teclado numérico
para seleccionar el menú deseado.
3) Presione la tecla "M" para seleccionar el
12

4) Use the “CHA+” and “CHA-‘ keys, or the
“VOL+” and “VOL-“ keys to select the desired
value.
5) Press the “M” key to confirm your changes,
6) Repeat steps 2-5 above to modify other
menu options.
7)Finally, when you have made all of your
changes, press any of the front panel keys,
except “CHA+”, “CHA-“, “VOL+”, or “VOL-“, to
exit the menu.
menú de modificación.
4) Use "CHA +" y "CHA-' o las teclas"VOL +" y
"VOL-" para seleccionar el valor deseado.
5) Presione la tecla "M" para confirmar los
cambios,
6) Repita los pasos 2 a 5 anteriores para
modificar otras opciones del menú.
7) finalmente, cuando usted ha hecho todos los
cambios, presione cualquiera de las teclas del
panel frontal, excepto "CHA +", "CHA-", "VOL
+" o "VOL-", para salir del menú.
Auto Power Off(APO): Menu 01
Auto Power Off will automatically turn the
transceiver off after a set length of inactivity.
This function is disabled (off) by default.
The Auto Power
Off interval can be set to 10 minutes, 20
minutes, 30 minutes, 40 minutes, 50
minutes, 60 minutes, 90 minutes, 2 hours, 4
hours, 6 hours, 8 hours, 10 hours, 12 hours,
14 hours, or 16 hours. The transceiver
displays a icon when APO function is
enabled.
Auto Power Off(APO): Menú 01
Con Auto Power Off, se apa ará
automáticamente el equipo después de un
lar o determinado de inactividad. Esta función
se desactiva (off) por defecto.
Autopower
El intervalo puede establecerse en 10 minutos,
20 minutos, 30 minutos, 40 minutos, 50
minutos, 60 minutos, 90 minutos, 2 horas, 4
horas, 6 horas, 8 horas, 10 horas, 12 horas, 14
horas o 16 horas. El transceptor muestra un
icono cuando se habilita la función
APO.
AP O (AP O): Menu 02
The audio processing menu allows you to
set up the compander and voice scrambler.
This setting is stored on a per channel basis.
Each channel can have a different
processing setting.
By default all processing options are
disabled (Off). You can set this menu to
either enable the compander (Comp) or
voice scrambler (Scra).
APRO (APRO): Menú 02
El procesamiento de audio menú le permite
confi urar el codificador compander y voz. Esta
confi uración se uarda en una base por
canal. Cada canal puede tener un entorno de
procesamiento diferente.
Por defecto todas las opciones de tratamiento
son desactivadas (Off). Puede confi urar este
menú para activar el expansor (Comp) o voz
scrambler (Scra).
Busy Channel Lock (BC Lock): Menu 03
When a Channel has the “BC LOCK”
function enabled, the ability to transmit is
disabled on that channel if it is active. You
will again be able to transmit on the
channel when the channel is uiet.
This option can be set to “ON” or “OFF”. The
default setting is OFF.
Bloqueo de canal ocupado (bloqueo BC):
Menú 03
Cuando un canal tiene la función de "BC
LOCK" activada, se desactiva la habilidad de
transmitir en ese canal si está activo. Otra vez
podrá transmitir en el canal cuando el canal
esté desocupado.
Esta opción se puede establecer en "ON" u
"OFF". El valor predeterminado es OFF.
Key Beep (Beep): Menu 04
This function determines whether pressing keys
on the transceiver or DTMF microphone
Clave Beep (pitido): Menú 04
Esta función determina si teclas en el
transceptor o micrófono DTMF suena un pitido
13

sound an audible confirmation beep when
they are pressed. It can be set to “ON” or
“OFF”. This feature is turned on by default.
audible de confirmación cuando se presionan.
Puede ser fijado en "ON" u "OFF". Esta función
está activada por defecto.
Channel Save (CHASave): Menu 05
Users can save custom fre uency as memory
channel, so that save time to re-set the
fre uency parameters.
In VFO mode, enter the fre uency you
want to save, press the M key and press
“CHA+/CHA-/VOL+/VOL-” to menu 05
“CHASAVE”, select the channel number
which you want to keep after the screen
displayed "CHASave TO 001", then the
fre uency is saved.
Up to 199 of your favorite or most
commonly used simplex or repeater channels
can be stored in the VV-898 for uick and
convenient recall.
In VFO mode, enter the fre uency you
want to save by using the numeric keys on
the microphone or the “CHA+” and “CHA-”
keys. Once you have tuned to your desired
fre uency, press the “M” key, then press
the “CHA+” and “CHA-“, or the “VOL+”
and “VOL-“ keys to select menu 05
“CHASAVE”, and press the “M” key again.
Select the channel number you wish to
program. The default is 001. Once you
have selected the channel to program,
press the “M” key again to confirm.
Canal Salvar (CHASave): Menú 05
Los usuarios pueden uardar frecuencia de
encar o como canal de memoria, así ahorrar
tiempo para volver a confi urar los parámetros
de frecuencia.
En el modo VFO, introduzca la frecuencia que
desea uardar, presione la tecla M y presione
"CHA+CHA-/VOL+ / VOL-" al menú "CHASAVE
05", seleccione el canal que desea mantener
después de la pantalla aparece "CHASave a
001", entonces la frecuencia número está
uardado.
Utilizados canales simplex o repetidor se
pueden almacenar hasta 199 de su preferido o
más comúnmente en la VV-898 para
recuperación rápida y cómoda.
En el modo VFO, in rese la frecuencia para
uardar usando las teclas numéricas en el
micrófono o el "CHA +" y "CHA-" las llaves.
Una vez que han sintonizado a la frecuencia
deseada, tecla "M", lue o presione
«CHA+» y "CHA-" o las teclas "VOL+" y "VOL-"
para seleccionar menú 05 "CHASAVE" y
presione la tecla "M" de nuevo. Seleccione el
número de canal que desea pro ramar. El
valor predeterminado es 001. Una vez que
usted
ha seleccionado el canal para pro ramar,
presione la tecla "M" nuevamente para
confirmar.
DTMF Function (DTMF): Menu 06
DTMF (Dual Tone Multi Fre uency), dual
tone multi-fre uency, consists of high-
fre uency group and low fre uency group,
each group contains four fre uencies. A
high fre uency signal and a low
fre uency signal superimposed to form a
combined signal which representing a
number. DTMF signaling has 16 codes, can
be set fre ely. When a radio channel setting of
the DTMF enabled, you can send DTMF
codes by wireless control to achieve
individual call, group call or RX Inhibition,
RXTX Inhibition and other functions.
Dual-Tone Multi-Fre uency (DTMF) is a
signaling method in which two tones are
combined to create one of 16 separate codes.
Función DTMF (DTMF): Menú 06
DTMF (Dual Tone Multi Frequency),
multifrecuencia de tono dual, consiste en rupo
de alta frecuencia y baja frecuencia, cada
rupo contiene cuatro frecuencias. Una señal
de alta frecuencia y una baja
señal de frecuencia superpuesta para formar
una señal combinada que la representación de
un número. Señalización DTMF tiene 16
pueden instalar los códi os, fre Ely. Cuando un
ajuste de canal de radio de DTMF habilitado,
puede enviar los códi os DTMF por control sin
hilos para lo rar la llamada individual, llamada
de rupo o inhibición de RX, inhibición de la
RXTX y otras funciones.
Dual-Tone multi-Frequency (DTMF) es un
método de señalización en la que dos tonos se
14

These codes represent digits 0-9, plus *, #, A,
B, C, and D. TheVV-898 can generate and
decode DTMF se uences in order to control
other e uipment, remotely control or inhibit
other VV-898 transceivers, or page
individual radio users or groups of users.
Each of the 199 channels can be individually
programmed for DTMF signaling to be
enabled or disabled. Note that if DTMF is
disabled on a channel, it can neither be
transmitted nor decoded.
combinan para crear uno de los 16 códi os
separados. Estos códi os representan dí itos
0-9, además de *, #, A, B, C y D. El VV-898
puede enerar y descifrar secuencias DTMF
para controlar otro equipo, remotamente o
inhibir otros transceptores VV-898, o pá ina
individual radio usuarios o rupos de usuarios.
Cada uno de los 199 canales puede ser
individualmente pro ramado para DTMF
señales ser activada o desactivada. Ten a en
cuenta que si DTMF está desactivado en un
canal, no puede ser transmitido ni descifrado.
Enable Or Disable DTMF Signaling
1, In VFO / MR mode, select a fre uency or
memory channel to modify DTMF signaling.
Alternatively, you can enable DTMF
signaling in the programming software.
Note:
a), If the transceiver is in CH mode, you can
not enable or disable DTMF signaling from
the transceiver’s front panel. In CH mode,
this setting can only be modified from the
programming software.
b), In MR mode, each memory channel can
be independently set to have DTMF signaling
enabled or disabled.
2, Press the “M” key and use the “CHA+”
and “CHA-“ or “VOL+” and “VOL-“ keys to select
Menu 06. Press the “M” key to open the
menu, and select “ON” or “OFF” to enable or
disable DTMF signaling.
The default setting is ON. Once you have
meda your selection, press the “M” key to
accept the change, followed by the key to exit
the menu.
Individual call/ group call
Individual call: Using the VV-898
programming software, set the transceiver’s
individual ID code. This can be any code of up
to 15 haracters, using the digits 0-9, *, #, A,
B, C, and D. The default transceiver
individual call ID code is 1000.
Group Call: Using a group call character in
any part of a radio calling se uence will
Activar o desactivar la señalización DTMF
1, en VFO / Sr. el modo, seleccione un canal
de frecuencia o memoria para modificar la
señalización DTMF. Como alternativa, puede
habilitar la señalización DTMF en el software
de pro ramación.
Nota:
a), si el receptor está en modo CH, puede no
activar o desactivar la señalización DTMF desde
el panel frontal del equipo. En el modo CH, este
ajuste sólo puede modificarse desde el software
de pro ramación.
b), en modo de Señor, cada canal de memoria
puede ser establecer de forma independiente
tener señalización de DTMF habilitada o
deshabilitada.
2, pulse la tecla "M" y utilizar el "CHA" y "CHA-"
teclas + o "VOL +" y "VOL-" para seleccionar el
menú 06. Presione la tecla "M" para abrir el menú
y seleccione "ON" u "OFF" para activar o
desactivar la señalización DTMF.
El valor predeterminado es ON. Una vez haya
hecho su selección, pulse la tecla "M" para
aceptar el cambio, se uido de la tecla para salir
del menú.
Persona llamada / llamada del grupo
Llamada individual: utilizando el software de
pro ramación de VV-898, establece el códi o
de identificación individual del equipo. Esto
puede ser cualquier códi o de hasta 15
caracteres, usando los dí itos 0-9, *, #, A, B, C
y D. El códi o de identificación de llamadas
individuales de transceptor por defecto es
1000.
Llamada de Grupo: Utilizando un carácter de
llamada de rupo en cualquier parte de una
15

call all radios in a specific calling group.
The only radios in the group that will not
automatically respond to a group call are
transceivers which are either set to selective
call only or those which have receive or
receive/transmit inhibit enabled. The group
character may be *, #, A, B, C, or D. The default
group character is A.
Consider the following example.
Set 10 transceivers as follows:
radio llamada secuencia llamará a todas las
radios en un rupo específico de llamadas. Las
radios sólo en el rupo que no responde
automáticamente a una llamada de rupo son
transceptores que son ya sea para llamada
selectiva sólo o los que tienen que recibir o
recibir/transmitir inhiben habilitado. El carácter
de rupo puede ser *, #, A, B, C o D.
El carácter de rupo predeterminado es A.
Considere el ejemplo si uiente.
Set 10 transceptores como si ue:
Send the ID code: 80814 to call "Transceiver 4".
Send the ID code: 80832 to call "Transceiver 7".
Send the ID code: 8081C to call all transceivers in
Subgroup 1.
Send the ID code: 8083C to call all transceivers in
Subgroup 3.
Send the ID code: 808CC to call all transceivers in
Group 1 and Subgroup 3 which are both in Group C.
Enviar el códi o de ID: 80814 llamar "Equipo 4".
Enviar el códi o de ID: 80832 llamar "Equipo 7".
Enviar el códi o de ID: 8081C llamar transceptores
todos en el sub rupo 1.
Enviar el códi o de ID: 8083C para llamar a todos
los transceptores en 3 sub rupos.
Enviar el códi o de identificación: 808CC llamar a
emisoras todos en rupo 1 y 3 sub rupos que están
en el rupo C.
DTMF code transmission mode:
1, Automatic transmission: Fill in the DTMF
call list in the programming software. In
VFO / MR / CH mode, be sure that DTMF
Mode is enabled.
Press the CALL key (A key on the
DTMF microphone). Select an autodial slot
from the list.
Press the PTT key to send the selected
DTMF se uence. (Note: Slots 0-9 can be
entered directly, or 22
press UP / DOWN keys on the microphone or
press “CHA+/CHA- or VOL+/VOL-”on the
transceiver front panel to select. Slots 10-15
can only be selected by using the “UP/DOWN”
Modo de transmisión de código DTMF:
1, transmisión automática: Rellene la lista de
llamadas DTMF en el software de
pro ramación. En VFO / MR /CH mode,
ase úrese de que está habilitado el modo
DTMF.
Pulse la tecla de llamada (una clave en el
micrófono DTMF). Seleccione una ranura de
marcación automática en la lista.
Presione el botón PTT para enviar la secuencia
DTMF seleccionada. (Nota: las ranuras 0-9
pueden introducirse directamente, o 22
Pulse UP / DOWN en el micrófono o presione
"CHA+/CHA- o VOL+/VOL-" en el panel frontal
del receptor para seleccionar. Ranuras de 10-15
sólo pueden seleccionarse mediante los
botones «UP/DOWN» del micrófono o "CHA+
16

buttons on the microphone or “CHA+/CHA-“ or
“VOL+/VOL-“ keys on the transceiver front
panel.
2, Manual transmission: If the DTMF
autodial list is empty, automatic DTMF
transmission is disabled.
However, you can manually enter a
se uence of DTMF tones manually.
Press the “CALL” key twice, then enter your
desired se uence of DTMF tones from the
keypad. Finally, press the PTT key to
transmit. You will hear the DTMF tones
transmit if they were properly entered.
CHA-" o "VOL+/VOL-" las teclas del panel
frontal del receptor.
2, transmisión manual: Si está vacía la lista
DTMF de marcado automático, transmisión
automática DTMF está deshabilitada.
Sin embar o, puede introducir manualmente
una secuencia de tonos DTMF manualmente.
Pulse dos veces la tecla "PTT", lue o introduce
la secuencia deseada de tonos DTMF desde el
teclado. Por último, oprima la tecla PTT para
transmitir. Usted escuchará los tonos DTMF
transmitir si se in resaron correctamente.
emote X Inhibition and XTX Inhibition
X Inhibition : If RX Inhibit is enabled, the
receiver will remain inactive until it receives
the correct RX Enable code.
XTX Inhibition: With RX/TX Inhibit
enabled, the transceiver will be unable to
recidive or transmit until it receives the correct
RX/TX Enable code.
Refer to page 46 for more about RX
Inhibition and RXTX Inhibition.
RX control remoto inhibición e inhibición de
la RXTX
Inhibición de la RX: Si inhiben la RX está
habilitado, el receptor permanecerá inactivo
hasta que recibe el códi o correcto para
permitir RX.
Inhibición de RXTX: Con RX/TX inhibidor
habilitado, el transceptor será incapaz de recibir
o transmitir hasta que reciba el códi o correcto
de RX/TX permitido.
Consulte la pá ina 46 para más información
sobre RX inhibición y RXTX inhibición.
Dual Watch (DW): Menu 07
This setting determines whether the dual
watch feature is enabled or disabled.
With dual watch enabled, the transceiver
will monitor two fre uencies periodically.
Select Menu 07 to modify this function,
which can be turned ON or OFF.
The default is ON.
Vigilancia doble (DW): Menú 07
Esta confi uración determina si la función de
vi ilancia doble está habilitada o deshabilitada.
Con doble reloj habilitado, el transceptor
supervisará periódicamente dos frecuencias.
Seleccione menú 07 modificar esta función, que
se puede dar vuelta encendido o apa ado.
El valor predeterminado es ON.
Decode Type and Decode Code (Menus 0
and 09)
Using Menus 08 and 09, you may determine
what will open the receiver’ s uelch. Set the
“DecType” option (Menu 08) to select the
s uelch mode:
OFF: Any signal on the channel will
open the receiver’s s uelch.
CTCSS: Only a signal on the channel
containing a matching CTCSS tone (one of 58
tones) will open the receiver’s s uelch.
NDCS: Only a signal on the channel
containing a matching normal DCS code
(one of 107 codes) will open the receiver’s
Forma de descifrar Tipo y decodificar
Código (menús 0 y 09)
Usando menús 08 y 09, usted puede determinar
lo que abrirá el receptor squelch. Defina la
opción de "DecType" (menú 08) para
seleccionar el modo de silenciamiento:
OFF: Cualquier señal en el canal abrirá el
s uelch del receptor.
CTCSS: Sólo una señal en el canal que
contiene un tono CTCSS que empareja (uno de
los 58 tonos) abrirá el s uelch del receptor.
NDCS: Sólo una señal en el canal con un
correspondiente códi o DCS normal (uno de los
107 códi os) abre el s uelch del receptor.
17

s uelch.
IDCS: Only a signal on the channel
containing a matching inverted DCS code
(one of 107 codes) will open the receiver’s
s uelch.
After you have selected the decode type in
Menu 08, select the CTCSS or DCS code
in Menu 09 from the following tables.
You can press and hold
“CHA+/CHA-/VOL+/VOL-” key to go fast.
CTCSS: 56-254.1 Hz (58 groups), NDCS: 107
groups Normal DCS code. IDCS: 107 groups
Invert DCS code.
IDCS: Sólo una señal en el canal con un
correspondiente códi o DCS invertido (uno de
los 107 códi os) abrirá el s uelch del receptor.
Después de seleccionar el decode type en 08
de menú, selecciona el códi o CTCSS o DCS
en menú 09 de las tablas si uientes. Puede
presione y manten a presionado
"CHA+/CHA-/VOL+/VOL-" para ir rápido.
CTCSS: 56-254.1 Hz (58 rupos), NDCS: 107
rupos DCS Normal. IDCS: 107 rupos
invertidos
18

Encode Type and Encode Code (Menus
10 and 11)
Similar to the settings for “Decode Type”
and “Decode Code” above, using Menu
10, “EncType” and Menu 11 ”Enc code”,
you may determine the CTCSS or DCS
code that is used on a particular
channel. You may need such a code in
order to access a repeater system or
other radio users who have CTCSS or DCS
s uelch enabled. You may set Menu 10 as
follows:
Tipo de codificar y codificar código
(menús 10 y 11)
Similar a la confi uración de “Decode Type”
y “Decode Code” anteriormente, utilizando
menú 10, "EncType" y menú 11 ”Enc code”,
puede determinar el códi o CTCSS o DCS
que se utiliza en un canal en particular.
Puede que necesite dicho códi o para
poder acceder a un sistema de repetidor o
con otros usuarios de radio que tienen
silenciamiento CTCSS o DCS activado.
Puede establecer 10 menú como si ue:
19

OFF: Disable. The transmitted signal
does not send any CTCSS or DCS codes.
CTCSS: Transmit a specified CTCSS tone
(one of 56 tones)
NDCS: Transmit a specified normal DCS
code (one of 107 codes).
IDCS: Transmit a specified inverted DCS
code (1 of 107 codes)
Use Menu 11 to set the desired CTCSS
or DCS tone, using the same tables as for
Menu 09.
OFF: desactivar. La señal transmitida no
envía los códi os de CTCSS o DCS.
CTCSS: Transmitir un tono CTCSS
especificado (uno de 56 tonos)
NDCS: Transmitir un códi o DCS normal
especificado (uno de los 107 códi os).
IDCS: Transmitir un códi o DCS invertido
especificado (1 de 107 códi os)
Utilice el menú 11 para establecer el tono
CTCSS o DCS deseado, utilizando las
mismas tablas en cuanto a menú 09.
FM adio Function(FM): Menu 12
This transceiver has a built-in FM
broadcast receiver.
You may listen to FM radio broadcasts
using this transceiver. To turn the FM
broadcast radio on or off.
FM frequency range: 87.5-108MHz. In
VFO / MR / CH mode, press the “M”
key, then press “CHA+/CHA-“ or
“VOL+/VOL-” keys to select Menu 12,
then press “M” key to turn on the FM
broadcast radio. To turn off again, follow
the same procedure.
Open/Close FM Function
You can set the P1, P2, or P3 key as the
shortcut key to turn the FM radio on or off.
With the FM radio turned on, use
“CHA+/CHA-” keys to select a station, or
enter the station’s fre uency directly
from the numeric keypad on the
microphone. You can also store your
favorite radio stations using the VV-898
programming software.
Note: To ensure good FM reception, please
connect an antenna to the transceiver.
FM DualWatch (FM DW): Menu 13
The FM Dual Watch feature allows you
to continue listening to an FM broadcast
adio FM Function(FM): Menú 12
Este transceptor tiene un receptor
incorporado de radiodifusión de FM.
Se pueden escuchar emisiones de radio de
FM usando este transceptor. Para activar el
FM broadcast radio on o off
Rango de frecuencia FM: 87.5-108MHz.
En VFO / MR / CH, presionar tecla "M",
lue o presione "CHA+/CHA-" o
"VOL+/VOL-" teclas para seleccionar el
menú 12, lue o presione la tecla "M" para
encender la FM broadcast radio. Para
desactivar de nuevo, si a el mismo
procedimiento.
Abrir y cerrar la función de FM
Puede confi urar la tecla P1, P2 o P3 como
el atajo de teclado para activar o desactivar
la la radio FM.
Con la radio encendida, utilice las teclas
"CHA+/CHA-" para seleccionar una
emisora, o entrar en la frecuencia de la
emisora directamente desde el teclado
numérico en el micrófono. También puede
uardar sus emisoras favoritas utilizando el
software de pro ramación de VV-898.
Nota: Para ase urar una buena recepción de
FM, conecte una antena en el transceptor.
FM DualWatch (FM DW): Menú 13
La función de vi ilancia doble FM le permite
se uir escuchando una emisora de FM al
20
Table of contents
Other Leixen Transceiver manuals