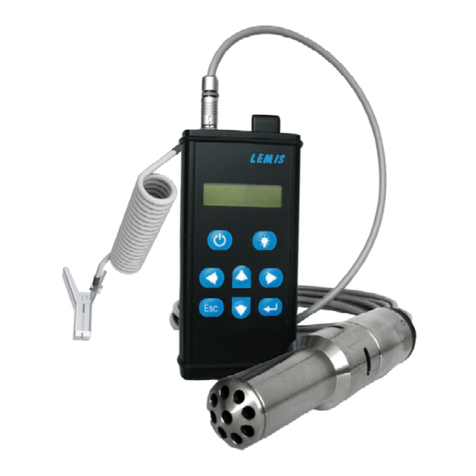
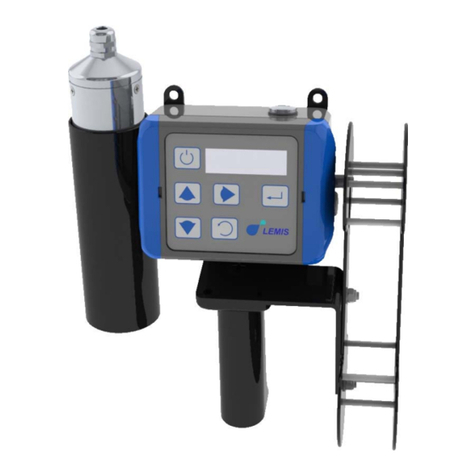
LEMIS DM-250.3 User manual

Portable / Laboratory Density Meter
for
Liquefied Petroleum Gases (LPG)
(DM-250.3)
Owners Manual
August 2015
Version_V2

Density Meter LPGDi (DM250.3) Owner’s Manual
2
INFORMATION
Information in this document is subject to change without notice and does not
represent a commitment on the part of LEMIS Instruments who provides this
document "as is", without warranty of any kind, expressed or implied, including,
but not limited to, the particular purpose. LEMIS Instruments may make
improvements and/or changes in this manual or in the product(s) and/or the
program (s) described in this manual at any time. This product could include
technical inaccuracies or typographical errors. Technical review is periodically
made to the information herein; these changes may be incorporated in new
editions of the publication.
Reproduction of any part of this manual without express written permission is
forbidden.
WARRANTY
LEMIS Instruments warrants that all equipment manufactured by it shall be free
from defects, in material and workmanship, which might impair its usefulness.
LEMIS Instruments does not warranty that the equipment is fit for a particular use.
The manufacturer is only responsible for the reliability and performance of the
equipment, if the unit is operated in accordance with the operating instructions,
and all extensions, adjustments, changes and/or repair is only performed by
LEMIS Instruments authorized persons. All equipment and materials are further
subject to tolerances and variations consistent with the usage of the trade.

Density Meter LPGDi (DM250.3) Owner’s Manual
3
CONTENTS
1. APPLICATIONS ..................................................................................4
2. STANDARD COMPLETE....................................................................4
3. WARNINGS & OPERATOR SAFETY .................................................5
4. SPECIFICATIONS ..............................................................................6
5. CONSTRUCTION & OPERATING PRINCIPLE ..................................7
6. MENU..................................................................................................9
7. SETTINGS ........................................................................................10
7.1. “DENSITY” Units setting............................................................11
7.2. “TEMPERATURE” Units setting ................................................12
7.3. “DATE” setting .........................................................................12
7.4. “TIME” setting ...........................................................................13
7.5. “SHUTDOWN” setting ..............................................................14
7.6. “BEEPER” setting .....................................................................15
7.7. “BLUETOOTH” ON / OFF setting .............................................15
7.8. “Bluetooth PIN” setting ..............................................................15
7.9. “PASSWORD” setting................................................................16
7.10. “DEVICE INFO” .....................................................................17
8. “PRINTER” setting.............................................................................18
9. “CALIB” setting ..................................................................................21
10. Explosion-proof protection.................................................................21
11. OPERATING MODE .........................................................................22
11.1. Preparations ..........................................................................22
11.2. Sampling and density meter purging .....................................23
11.3. Measuring mode....................................................................24
11.4. Orderly closedown.................................................................26
12. OPERATIONS WITH SAVED DATA.................................................26
12.1. VIEW / Saved Data Browsing...............................................26
12.2. Saved Data Printing...............................................................29
12.3. CLEAR / Saved Data Deleting...............................................30
13. BATTERY..........................................................................................31
13.1. Battery State Review .............................................................31
13.2. Battery Charging....................................................................32
13. SERVICING.......................................................................................33
14. TESTING AND CALIBRATION .........................................................34
15. VERIFICATION notes .......................................................................35
16. STORAGE and TRANSPORTATION................................................35

Density Meter LPGDi (DM250.3) Owner’s Manual
4
1. APPLICATIONS
Portable/Laboratory density meter for liquefied petroleum gases (LPG) LPGDi
(DM-250.3) (hereinafter LPGDi or device) is designed for real density and
temperature measurements of LPG samples; for referred density and propane
concentration (for propane/n-butane mixtures) calculation according to ASTM
D1250 and GOST28656. In addition LPGDi measures liquids with specified
density range (see p.4.). LPGDi is designed for operation in field conditions.
2. STANDARD COMPLETE
Density & temperature meter (hereinafter density meter) with power/data line
cable;
Explosive proof transducer (digital unit) with built-in Bluetooth channel for data
transfer; built-in battery and dustproof/drip-proof keyboard and display;
Charging device;
Case for storage and transportation;
Technical Manual

Density Meter LPGDi (DM250.3) Owner’s Manual
5
3. WARNINGS & OPERATOR SAFETY
Operate LPGDi only in safe areas or open territories in accordance with local
and industrial regulations.
Ensure the maintenance in accordance with the instructions contained in this
manual and with general industrial safety standards and procedures.
Only suitable trained personnel that go through this manual could operate the
device. Device operation without this manual study is forbidden!
Operate only serviceable device. Device operation with valves and hoses
defects, mechanical defects of safety bodies (for density meter or transducer)
or cables is forbidden!
Devices may be disassembled and repaired only by manufacturer or
authorized distributor’s company personnel with corresponding training!
The device has hydraulic test certificate with following information: day of last
hydraulic test and date of next hydraulic test; test pressure; max operating
pressure. Ensure hydraulic tests min 1 time per two years by manufacturer or
other certificated company. The use of untested devices is forbidden!
Operator should control operating temperature and pressure! If the
temperature or pressure is more than specified (40oC and 16 Bar), operator
will reduce temperature or pressure (for example, bleed gas via outlet valve or
cool measuring chamber housing).
In case of strong gas smell during device or sampling cylinder purging operator
should stop doing it, close all valves and check device, sampling cylinder and
gas flexible hoses for security of attachment. If all valves were closed but
pressure continues decreasing, the seal failure presents. In this case operator
should immediately empty measuring chamber and send to after-sales service
(or manufacturer) for repairing.
After measuring operator must empty device. LPG meter is not storage tank!
Protect the device from any kinds of mechanical damages! Within the density
meter safety body placed highly sensitive parts, which might be impaired in
result of careless operation!
Density meter safety body opening is forbidden!
Do not charge the battery or open the battery compartment in explosive zones!
This documentation does not cover all security aspects regarding the device
and samples. It is in the responsibility of the end user to comply with all
industrial, health, safety and maintenance standards.

Density Meter LPGDi (DM250.3) Owner’s Manual
6
4. SPECIFICATIONS
PERFOMANCES PARAMETERS
Measuring ranges:
Density, g/cm3(kg/m3)
Temperature, С
0.475...0.700 (475.0...700.0)
-30...+50
Absolute error:
Density, g/cm3(kg/m3)
Temperature, С
0.0005 (0.5)
0.2
Resolution:
Density, g/cm3(kg/m3)
Temperature, С
0.0001 (0.1)
0.01
Max. operating pressure, B (MPa) 16 (1.6)
Testing pressure, B (MPa) 25 (2.5)
Sample volume (ml), any more 250
Dimensions, any more:
Density meter, mm
Transducer, mm
245 х225 х120
180 х85 х40
Weight, any more:
Density meter, kg
Transducer, kg
5.5
0.7
Safety:
controller
sensor
ATEX II (2G) EEx ib [ia] IIB T4
ATEX II 1G EEx ia IIB T4
Connections Nipple for flexible gas hose with 6
mm; other connection is customized
Weather rating
Density meter
Transducer
IP65
IP65
Process temperature, C -30...+40
Battery
Charging device
NiMH-accumulator 3,6 Volts -1500mAh
Input: AC 100-240 V AC
Output: 4,5 – 9,5 V DC
Charge: 0.8 A
Continuous operating time No less than 10 hours

Density Meter LPGDi (DM250.3) Owner’s Manual
7
5. CONSTRUCTION& OPERATING PRINCIPLE
The device consists of two main units:
Density meter (pic.2) that contains hermetic measuring chamber within
density and temperature sensors.
Electronic digital unit (transducer) (pic.3) with keyboard, LCD panel and
built-in battery;
Density meter contains electronic block and density/temperature sensors which
are placed within hermetic measuring chamber. The measuring chamber purges
in liquefied petroleum gas (LPG). Sensors have electrical connections to
electronic block that provides signal receiving, signal transformation and data
transmition to transducer.
Sensor principal of operation based on resonance frequency measuring of the
mechanical oscillating system that is immersed in liquid. Temperature sensor is
standard platinum thermistor Pt-1000. Electronic block transforms resonance
frequency value of the oscillating system to density; thermister resistance is
transformed to temperature.
Transducer’s built-in battery supplies the power for density meter. Transducer has
the plug for charging unit connection.
Purging in of the density meter implements through the inlet valve and following
air and part of gas bleeding through the outlet valve. Density meter could empty
through any valve. Density meter contains manometer for pressure control and
max operating pressure excess prevention.
Pic. 2. Density meter
The manufacturer reserves the right to make some changes in construction and software of the
device, which will not adversely affect to the quality of the device

Density Meter LPGDi (DM250.3) Owner’s Manual
8
Transducer and density meter are connected by the aid of shield cable with
connector on the transducer’s safety body. Transducer (Pic.3) is the portable,
explosive-proof digital unit, with accumulator, keyboard, LCD and built-in
Bluetooth.
- power switch ON/OFF
Esc
- “Escape”
- “Enter”
- “right” cursor key
- 1) “left” cursor key;
2) additional data/readings display
- “up” cursor key
- “down” cursor key
- backlight switch ON/OFF
Pic. 3. Transducer Pic. 4. LCD Panel
The LCD panel (Pic.4) can display two lines of 16 characters each and shows the
programmed parameters for the selected mode, or the options available for each
function.

Density Meter LPGDi (DM250.3) Owner’s Manual
9
6. MENU
6.1. Switch ON the transducer
. When the power is switched on, a
copyright / version notice similar to the one below is displayed:
LPG-Di
Density Meter
After 1 second the line “Density Meter” will be changed to info travelling line
“www.lemis-process.com”. To escape the travelling line - press .
6.2. The device begins testing:
Testing…
██∏∏∏∏∏∏
6.3.If the clock must be reset display shows:
Year/Month/Date
2009/ Jul / 25
(See p.p. 7.3. and 7.4. to set date and time).
6.4. If the sensor is not well connected or it is defected, the display shows:
No sensor
detected...
6.5. If it is all right – the operating modes menu will be displayed:
Measuring
Notes
:
Battery
Printer
:
Settings
Calib

Density Meter LPGDi (DM250.3) Owner’s Manual
10
6.6. To enter in MENU – mark necessary selection with cursor by pressing key
, then press key . For example:
/ Notes /
:
Notes: View
Clear
6.7. Menu selections description:
Measuring – measuring mode;
Notes – saved notes operational mode;
Battery – battery state information;
Printer – Bluetooth printer setting mode;
Settings – settings mode;
Calib – calibration mode.
NOTE: to enter in MENU from the Notes Mode – press
Esc
.
7. SETTINGS
Enter in MENU (see point 6) and select Settings:
Printer
Settings
/ Settings /
:
Density: kg/m3
Temperature: oC
:
Date: 15/Aug/09
Time: 15:04:33
:
Shutdown: Auto
Beeper: ON

Density Meter LPGDi (DM250.3) Owner’s Manual
11
:
Bluetooth: ON
Bluetooth PIN
:
Password
Device Info
Where: Density – setting of the density units;
Temperature – setting of the temperature units;
Date – date setting;
Time – time setting;
Shut down – ON / OFF setting;
Beeper – ON / OFF setting;
Bluetooth – ON / OFF setting;
Bluetooth PIN – PIN code for authorized PC connection;
Password – setting of the password for enter in «Clear» mode;
Device Info – information about a copyright/version of the device.
Mark the required selection with the cursor by pressing and press
.
7.1. “DENSITY” Units setting
This selection allows setting of density units suitable for measurements
representation in “Measuring” mode.
7.1.1. Find “Density” in the Settings menu by the aid of keys and .
7.1.2. Select the suitable density units by the aid of key :
Density: kg/m3
Temperature: oC
:
Density: g/cm3
Temperature: oC

Density Meter LPGDi (DM250.3) Owner’s Manual
12
:
Density: lb/gal
Temperature: oC
:
Density: lb/ft3
Temperature: oC
7.1.3. Select the suitable units and press .
7.1.4. To return in the Settings Mode – press
Esc
.
7.2. “TEMPERATURE” Units setting
7.2.1. Find “Temperature” in the Settings menu by the aid of and keys.
7.2.2. Select the suitable units by the aid of key :
Density: kg/m3
Temperature: 0C
:
Density: kg/m3
Temperature: 0F
7.2.3. Select the suitable units and press .
7.2.4. To return in the Settings Mode – press
Esc
.
7.3. “DATE” setting
7.3.1. To adjust date and time – find “Date” in the Settings menu by the aid of
and keys:
Date: 15/Aug/09
Time: 15:04:33

Density Meter LPGDi (DM250.3) Owner’s Manual
13
7.3.2. Select required format with key:
Date: 15/Aug/09
Time: 15:04:33
:
Date: 8/15/09
Time: 15:04:33
:
Date: Aug/15/09
Time: 15:04:33
for other formats.
7.3.3. Select the suitable format by the aid of key and press to
enter correct year, month and date (password required):
:
Year/Month/Date
2009/ Aug / 15
Adjust the date by the aid of , and press to mark next selection.
7.3.4. Confirm selection by pressing .
7.3.5. To return in the Settings Mode – press
Esc
twice.
7.4. “TIME” setting
7.4.1. To adjust time – find “Time” in the Settings menu by the aid of and
keys:
Date: 15/Aug/09
Time: 12:35:57
:
Date: 25/Jul/03
Time: AM 12:35

Density Meter LPGDi (DM250.3) Owner’s Manual
14
:
Date: 25/Jul/03
Time: 12:35 AM
7.4.2. Select the suitable format by the aid of key and press to
enter correct year, month and date (password required):
:
Hour : Minute
12:35
Adjust the time by the aid of , and press to mark next selection.
7.4.3. Confirm selection by pressing .
7.4.4. To return in the Settings Mode – press
Esc
twice.
7.5. “SHUTDOWN” setting
7.5.1. Find “Shutdown” in the Settings menu by the aid of and keys:
Shutdown: Auto
Beeper: ON
7.5.2. Select the suitable position by the aid of key :
Shutdown: Manual
Beeper: ON
AUTO – the mode of automatic “Power OFF” if a device is not in use for
20 minutes.
MANUAL – the mode of manual “Power OFF”.
7.5.3. Confirm selection by pressing .
7.5.4. To return in the Settings Mode – press
Esc
.

Density Meter LPGDi (DM250.3) Owner’s Manual
15
7.6. “BEEPER” setting
This selection allows to switch ON/OFF beeping for every button pushing.
7.6.1. Find “Beeper” in the Settings menu by the aid of and keys:
Shutdown: Auto
Beeper: ON
:
Shutdown: Auto
Beeper: OFF
7.6.2. Confirm selection by pressing .
7.6.3. To return in the Settings Mode – press
Esc
.
7.7. “BLUETOOTH”
ON / OFF setting
7.7.1. Find “Bluetooth” in the Settings menu by the aid of and keys:
Bluetooth: ON
Bluetooth PIN
:
Bluetooth: OFF
Bluetooth PIN
7.7.2. Confirm selection by pressing .
7.7.3. To return in the Settings Mode – press
Esc
.
7.8. “Bluetooth PIN” setting
The Bluetooth PIN code (any 6 digits) may be set by user to prevent unauthorized
PC connection.
7.8.1. To set the PIN code – enter in Settings menu and find “Bluetooth PIN”:
Bluetooth: OFF
Bluetooth PIN

Density Meter LPGDi (DM250.3) Owner’s Manual
16
:
000000 000000
Old PIN New PIN
7.8.2. Enter the old PIN code to the left side of the display (“Old PIN”) and press
. The manufacturer-defined password is “000000”.
A marker “0” indicates the digit to be changed by the keys or . The key
moves the marker from one digit to the other.
Enter the old PIN code and press .
7.8.3. After correct old PIN code was entered – the access to the “New PIN”
becomes available. Enter new PIN code and press :
Are You sure?
yes →No←
7.8.4. To confirm new PIN code – press , to mark ‘Yes’. Then press
:
Are you sure?
→Yes←no
→Yes←/
.
7.9. “PASSWORD” setting
The password (any 6 digits) may be set by user to prevent unauthorized access in
the “CLEAR” mode and Date/Time setting also.
7.9.1. To set the password – enter in Settings menu and find “Password”:
Bluetooth PIN
Password

Density Meter LPGDi (DM250.3) Owner’s Manual
17
:
000000 000000
Old val New val
7.9.2. Enter the old password to the left side of the display (“Old val”) and press
. The manufacturer-defined password is “000000”.
A marker “0” indicates the digit to be changed by the keys or . The key
moves the marker from one digit to the other.
Enter the old password and press .
7.9.3. After correct old password was entered – the access to the “New value”
of password becomes available. Enter new password and press :
Are You sure?
yes →No←
7.9.4. To confirm new password – press , to mark ‘Yes’. Then press
:
Are you sure?
→Yes←no
→Yes←/
.
7.10. “DEVICE INFO”
7.10.1. To view the information about the device’s software – find “Device Info” in
the Settings menu:
Password
Device Info

Density Meter LPGDi (DM250.3) Owner’s Manual
18
:
Vers.: 1.01.01
Date: 15.08.2009
Esc
:
Password
Device Info
8. “PRINTER” setting
8.1. This item supplies with printer Bluetooth setting. In additional operator can
add to printer list new printer, delete printer from printer list or select
concrete printer for printing. To see printer list:
:
Battery
Printer
:
View List
Add to List
:
List
1.XXX XXXX
1.XXX XXXX is a printer name. In device memory can save up to 3 printers.
8.2. This item supplies with printer selecting that is set as default printer.
Device prints all notes via default printer every time operator is printing. If
in the list is one printer, it is default printer. If there are some printers,
operator need to set concrete printer as default. Find printer (see p.8.1.):
List
1.XXX XXXX
:
Default printer
Delete Printer

Density Meter LPGDi (DM250.3) Owner’s Manual
19
Press to set selected printer as default:
Printer Selected
List
1.XXX XXXX
8.3. Operator can delete printer from printer list:
:
Default printer
Delete Printer
:
Delete Printer?
yes →No←
To confirm deleting – press , to mark ‘Yes’. Then press :
Delete Printer?
→Yes←no
→Yes←/
.
8.4. Operator can add printer to printer list:
:
View List
Add to List
:
Searching
██∏∏∏∏∏∏
If memory has free position for new printer the device will search up to 10 ambient
devices Bluetooth. Search continues 1 minute. Device displays all found printers
(use key to view all the list).

Density Meter LPGDi (DM250.3) Owner’s Manual
20
Select necessary printer:
Add Printer:
1.XXX XXXX
Press to add printer. If printer is in the printer list operator will see the
following notice:
Error:
Already stored
If this is new one:
Access PIN Code:
NOTE: Please see your BT printer documentation, to get the printer PIN code.
Enter printer PIN code. Press :
Pairing
██∏∏∏∏∏∏
If pairing was successful:
Pairing
Successful
If pairing was not successful:
Pairing Not
Successful
If printer list is full operator will see the following notice:
Error:
Memory is full
Table of contents
Other LEMIS Measuring Instrument manuals
Popular Measuring Instrument manuals by other brands

SATO KEIRYOKI
SATO KEIRYOKI 1722-00 instruction manual

PCB Piezotronics
PCB Piezotronics IMI SENSORS 604B31 Installation and operating manual

Vaisala
Vaisala HUMICAP HMI41 operating manual

Micronix
Micronix MSA538 operating manual

Shure
Shure PSM 300 Online user's guide

Felix Storch
Felix Storch Check it! F-920 Operation manual

Keysight
Keysight N6705C Operating and service guide

Endress+Hauser
Endress+Hauser ria45 Brief operating instructions

PRECISION DIGITAL
PRECISION DIGITAL Helios PD2-6060 instruction manual

OPHIR
OPHIR NOVA II user manual

VOLTCRAFT
VOLTCRAFT 4000PRO operating instructions

SKF
SKF WEM-200 User Manual & Quick Start