E7
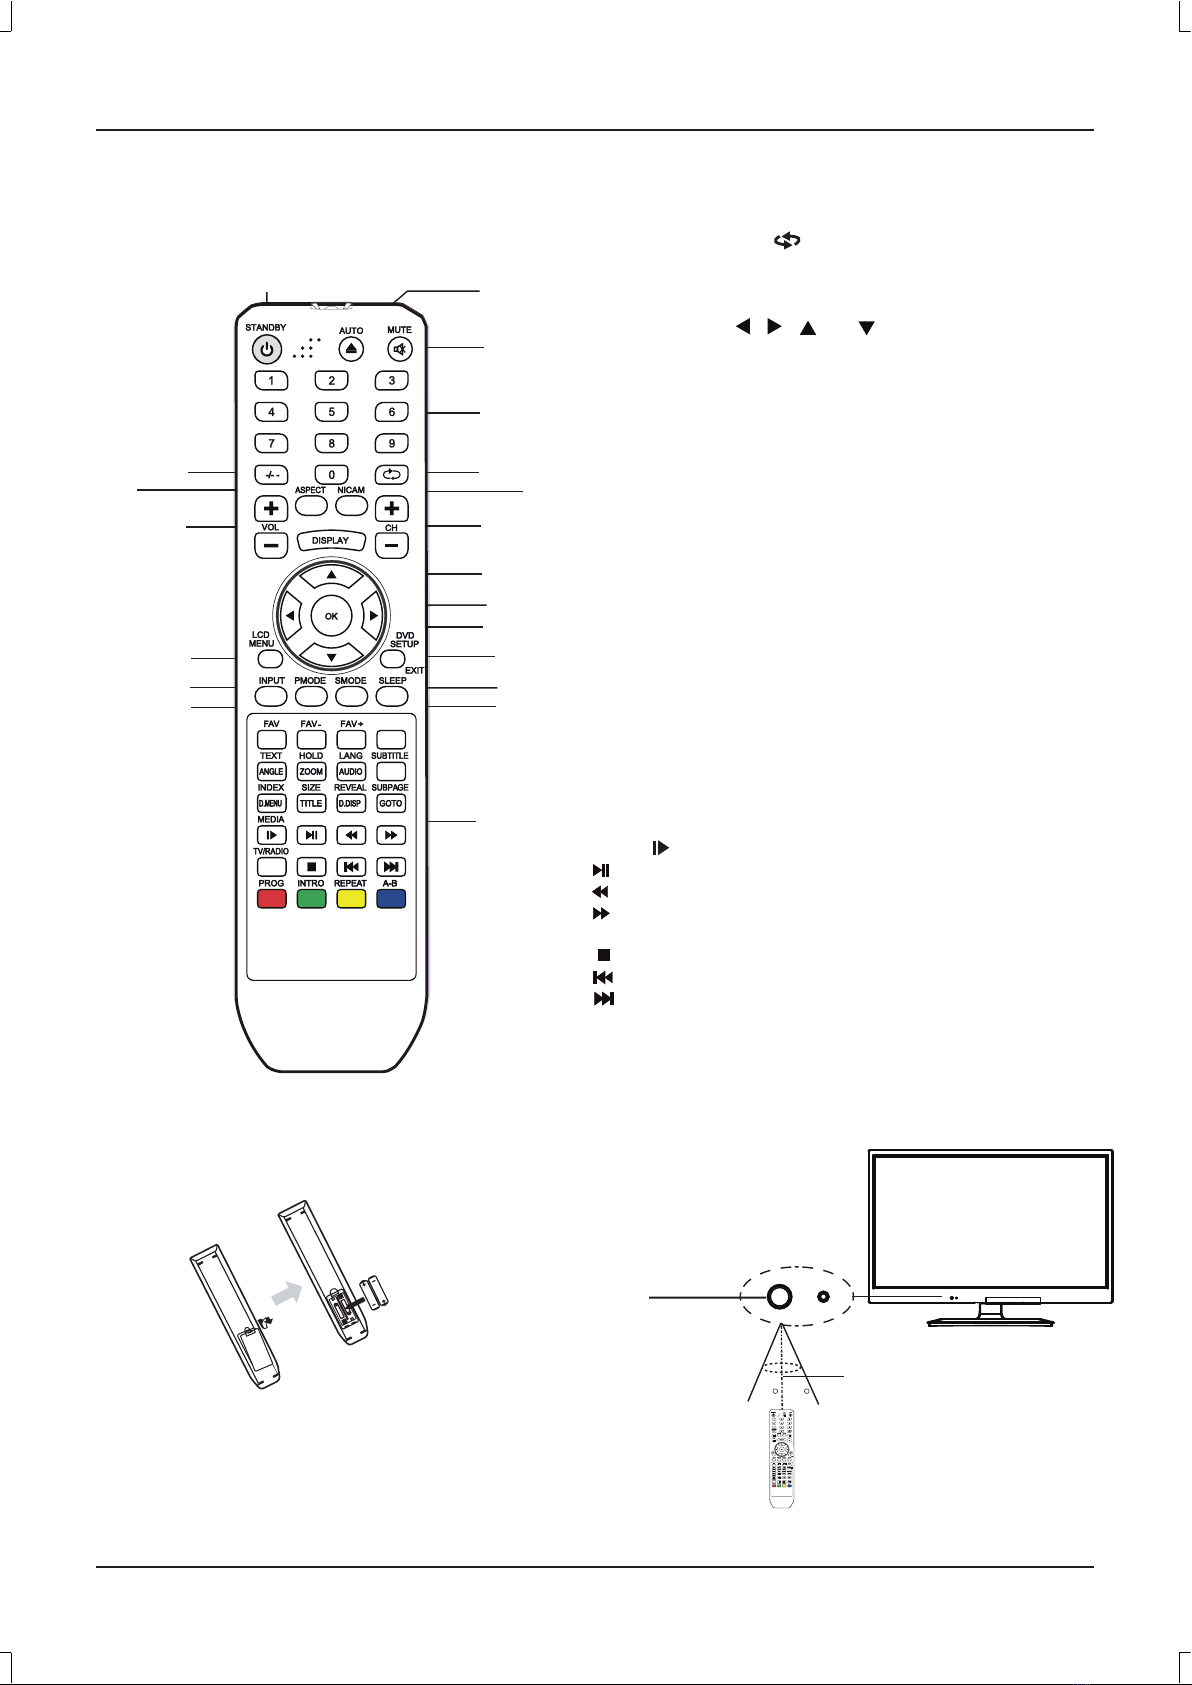
Teletext Function
TEXT: Press this button to enter teletext state and display teletext page; press this button again, display both image and
teletext page at the same time. If you want to exit teletext state, press this button again.
SUBPAGE: It is refer to the subpage of teletext page, i.e subcode page. When it is pressed, the screen display the
requirement of subpage code entry. If there is no subpage, it will not be displayed. In most case, there is no subpage.
HOLD: Press this button if you want to keep the displaying of the page and press it again to exit hold state.
SIZE: Press this button if you want to enlarge the content on the upper part of the page, and press the second time to enlarge
the content on the lower part of the page, and the third time to resume normal display of all the contents on the page.
REVEAL: Press this button if you want to display the concealed text. Press it again to close the display of concealed text.
INDEX: Press this button if you want to display the index for all the teletext page.
Number buttons 0~9 on the remote control can be used to get to a certain page. " / " button on the remote control can be
used to display the content of previous or next page.
Press the RED/GREEN/YELLOW/CYAN button on the remote control, the page of relevant color displayed on the lower part
of the screen will be displayed.
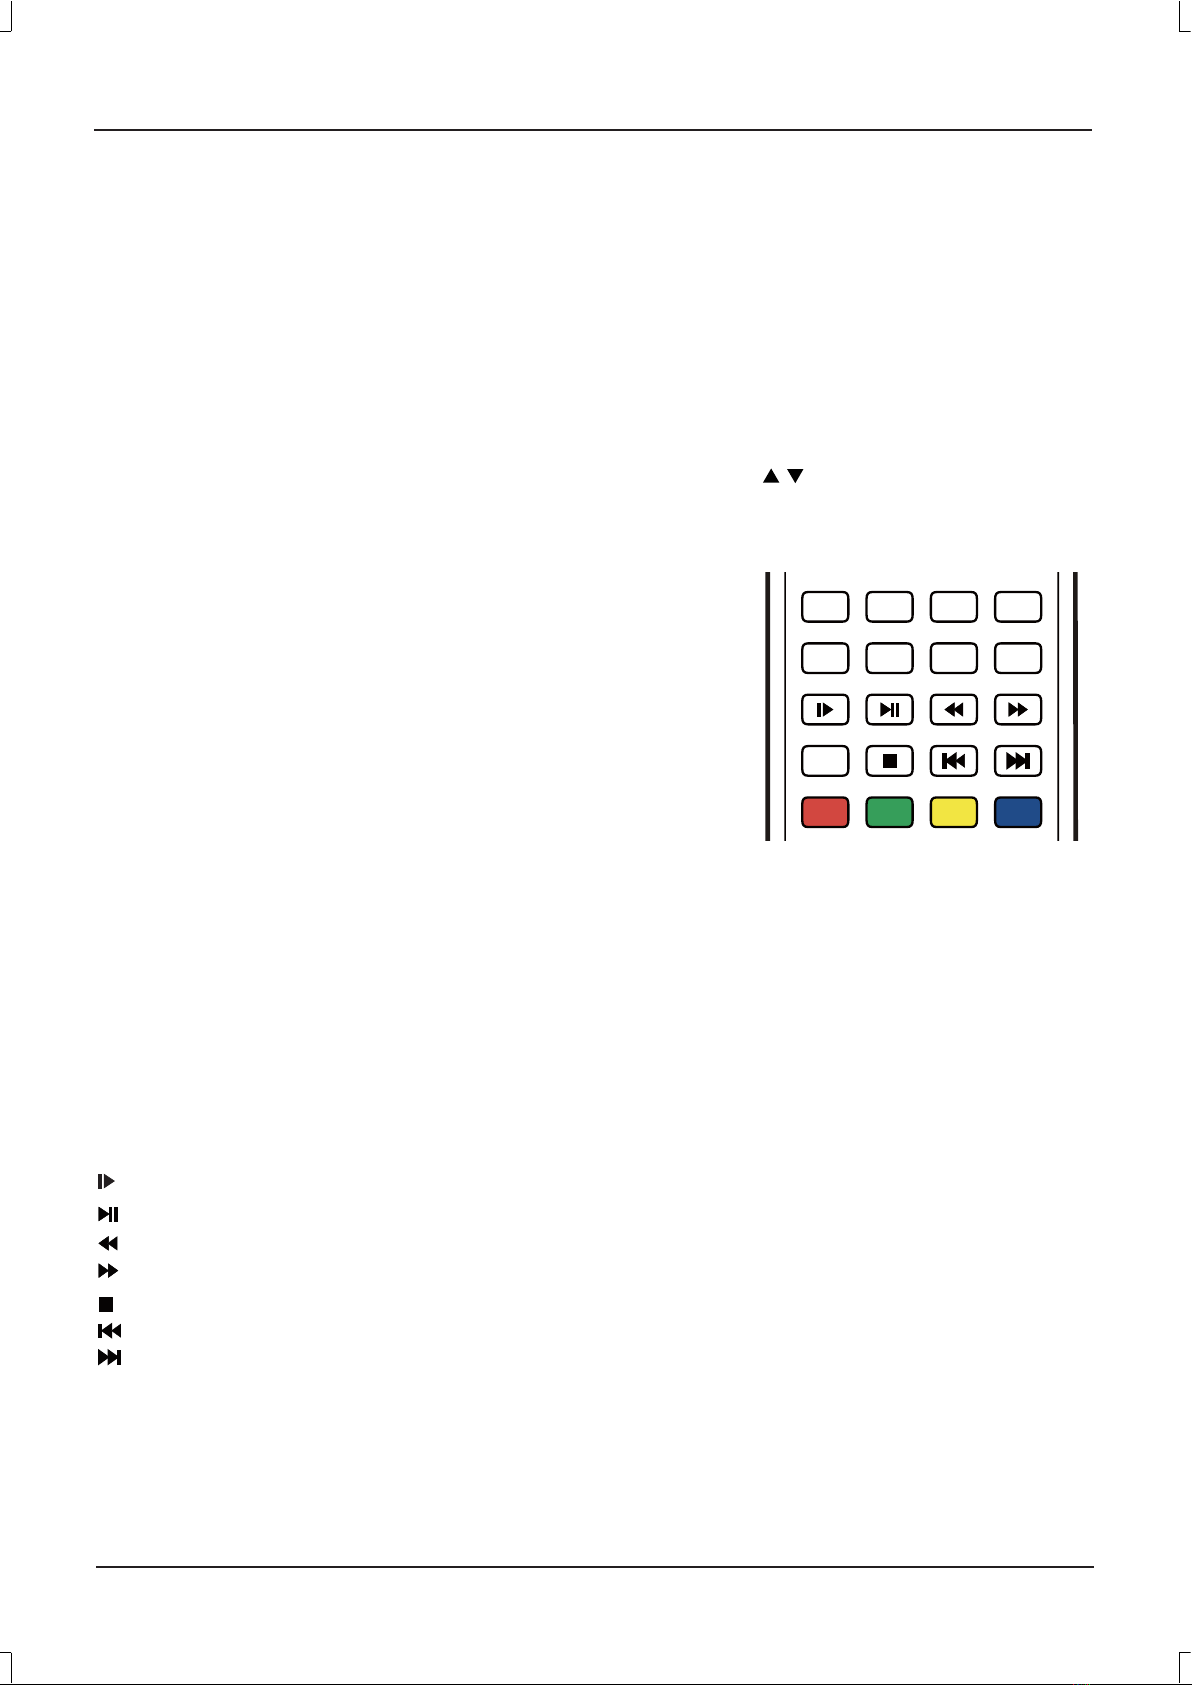
TEXTTEXT HOLDHOLD LANGLANG
SUBTITLESUB TITLE
NA ELGNA
OOZ MOOZ UA OIDUA
INDEXINDEX SIZESIZE
REVEALREVEAL
SUBPAGESUB PAGE
D UNEM.D
TITLETITLE
D PSID.D GOTOGOT
MEDIAMEDIA
PROG INTROINTRO
REPEA
T
REPEA
A-BA-B
TV/RADIOTV /RADIO
DVD Function
ANGLE: Press to display current playback angle, press again to toggle between different playback angle code in sequence
(DVD mode only). Note: Selectable playback angle depends on the availability of the DVD contents.
ZOOM: Press to zoom in the picture. There are 3 zoom modes.
AUDIO: Press to select the sound mode (DVD mode only).
SUBTITLE: Press to display current sub-title.
D.MENU: Press to display the menu for disc.
TITLE: Press to display the title (only for DVD mode).
D.DISP: Press to display the DVD disc information (DVD mode only).
GOTO: Press to activate the on screen scroll down menu for edit.
: Press this button to play movie slowly in different styles of speed.
:Press to play or pause the DVD display (DVD mode only).
: Press to move backward. There are 5 speeds for backward (DVD mode only).
:Press to move forward. There are 5 speeds for forward (DVD mode only).
: Press to stop the DVD display (DVD mode only).
: Press to play last Title/Chapter/Track (DVD mode only).
:Press to play next Title/Chapter/Track (DVD mode only).
PROG: Press to edit the program of the disc (DVD mode only).
INTRO: Press to preview and introduce DVD disc contents (DVD mode only).
REPEAT: To playback the portion automatically, you could select one of OFF/CHAPTER/TRACK/REP ALL mode (DVD
mode only).
A-B: To start the repeat portion from A-B (DVD mode only).