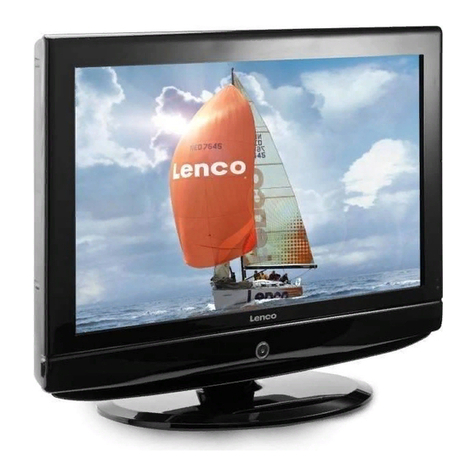
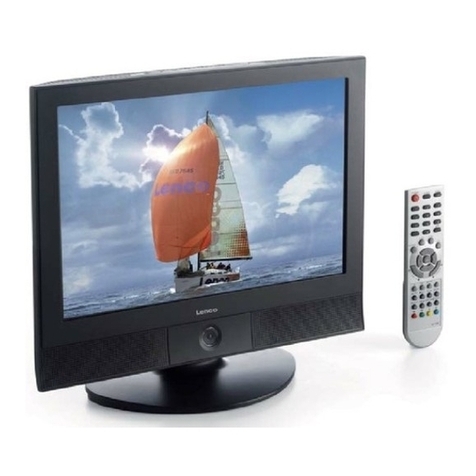
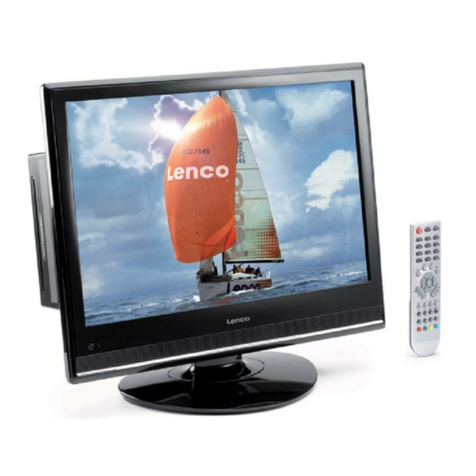
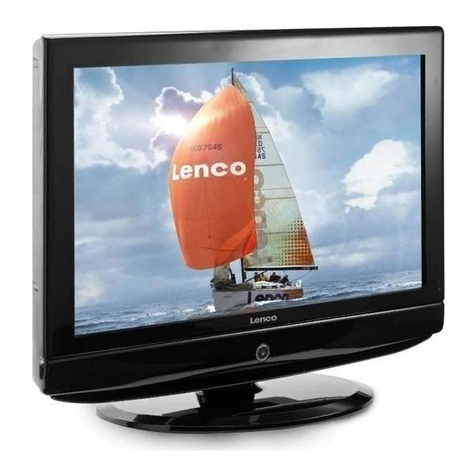
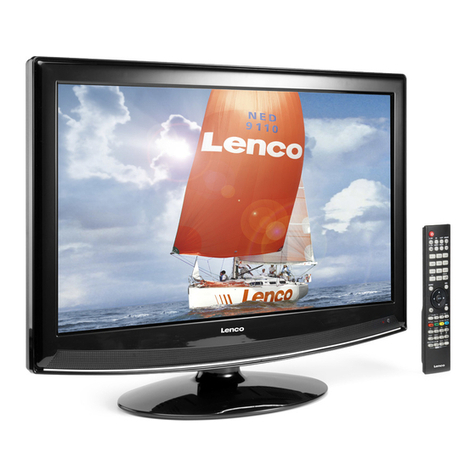
LENCO DVT-221 User manual

USER MANUAL
DVT-221
BENUTZERHANDBUCH
GEBRUIKSAANWIJZING

USER MANUAL
DVT-221
BENUTZERHANDBUCH
GEBRUIKSAANWIJZING

TO THE CUSTOMER:
Thank you for purchasing this LCD TV. When opening the box for the first time, please
check whether all the accessories are present. Before connecting parts and power, please
carefully read the user manual and always keep these instructions handy and close by your
LCD TV.
Contents
Notes:
1.Safety precaution
The lightning flash with arrowhead symbol, within an equilateral
triangle, is intended to alert the user to the presence of insinuated
dangerous voltage within the product's enclosure that may be
of sufficient magnitude to constitute a risk of electric shock
WARNING:
TO REDUCE THE RISK OF FIRE OR ELECTRIC SHOCK, DO NOT EXPOSE THIS PRODUCT TO RAIN
OR MOISTURE.
The exclamation point within an equilateral triangles is intended
to alert the user to the presence of important operating and
maintenance (servicing) instructions in the literature
accompanying the product.
CAUTION:
TO REDUCE THE RISK OF ELECTRIC SHOCK, DO NOT
REMOVE COVER(OR BACK). REFER SERVICING TO
AUTHORISED SERVICE PERSONNEL.
WARNING
RISK OF ELECTRIC SHOCK
DO NOT OPEN
DO's
Always power this product from an outlet with the same rating (voltage and
frequency) as indicated on the rating label on the back of the product.
If this product has been damaged (including cord or plug) take it to an authorised
service technician for inspection, and if necessary, repair.
Turn off and disconnect the power cable before cleaning or storing this product.
Ensure this product does not get wet or splashed.
Only use the A/C power adapter supplied with your product, or a replacement
recommended by an authorised technician.
DON'Ts
Do not place naked flames, such as lighted candles on or near the product.
Do not place objects filled with liquids, such as vases on or near the product.
Do not install this product on top of other electrical equipment or on uneven surfaces.
Do not use or store this product in a place where it is subject to direct sunlight, heat,
excessive dust or vibration.
Do not use this product with wet hands.
Do not clean this product with water or other liquids.
Do not block or cover the slots and holes in the product.
Do not push foreign objects into the slots or holes in the product.
The screen surface is easily scratched. Do not touch the screen with your hands or
any hard object.
Do not pull the power cord when disconnecting power. Turn off the switch on the
socket and pull the plug not the cord.
Do not attempt to open this product yourself. There are no user serviceable parts
inside.
DO's and DON'T's
Safety precaution...........................................................................................2
Accessories...................................................................................................3
Remote control manual...................................................................................4
Remote control functions................................................................................5
LCD TV panel overview...................................................................................6
Connecting to external devices.......................................................................7
OSD basic adjustment....................................................................................8
TV................................................................................
2
DVD Functions operating instructions.............................................................18
Supporting DVD format.................................................................................17
Basic operation............................................................................................16
Trouble shooting..........................................................................................26
Function Settings.........................................................................................21
MP3/JPEG Playback.....................................................................................20
Maintenance................................................................................................27
Specifications..............................................................................................28
DVD................................................................................................................

1
4
7
2
5
8
0
3
6
9
X
Before using this product, read and follow all warnings and instructions.
This product is intended for household use only and not for commercial or industrial use.
Do not expose to dripping or splashing.
No naked flame sources, such as lighted candles, should be placed on the product.
Allow suitable distances around the product for sufficient ventilation.
Ventilation should not be impeded by covering ventilation openings with items such as
newspapers, table cloths, curtains and the like.
Make sure the LCD TV stand is adjusted to a stable position. Damage caused by using
this product in an unstable position or by failure to follow any other warning or precaution
contained within this user manual will not be covered by warranty.
This product is not intended for use by young children. Young children should be properly
supervised.
SAFETY WARNINGS
2.Accessories
Check the accessories
(TV accessories)
User manual Remote control/batteries
AV cableconnection
Power button
Numeric button
Channel setup
Picture mode button Sound mode button
RIGHT
DOWN
Channel selection button
UP
LEFT
Signal source selection button
Volume adjusting button
Sleep button
Mute button
Return channel button
TV setup menu
ENTER
3.Remote control manual
Bright sunlight or lighting may cause erractic remote operation
Power cord
OPEN/CLOSE button
PREV
Information button
TXT/MIX/PLAY /PAUSE
CANCEL/STOP
INDEX/GOTO button
REVEAL/SLOW button
DVD Setup button
AUDIO
SIZE/TITLE button
HOLD/MENU/PBC button
SUBPAGE/ SUBTITLE button
REPEAT button
FORWARD button
REWIND button
NEXT button
34

SOURCE
MENU
CH- CH+
VOL- VOL+ POWER
5.LCD TV panel overview
TV Control Panel
TV Terminal connections
1.Volume adjusting.
2.Channel selecting.
3.Main menu display and confirm.
4.Selecting exterior signal input.
5.On/off button.
RF(75 ) VGA DC-12V
RL
PC
AUDIO
1.PC AUDIO
2.Antenna/close circuit TV network port(75 Ohm VHF/UHF).
3.Audio-L-R input terminal.
4.SCART input terminal ,suitable for a European export machine.
5.Component input terminal.
6.VGA input terminal of simulation signal of PC.
7.DC 12V 5A power input terminal.
12345
123
5
4
1.STOP button
2.PREV button
3.PLAY/PAUSE
4.NEXT button
5.OPEN/CLOSE button
SCART
Y
PbPr
7
56
4.Remote control functions
POWER: Power on/off button , press once to turn the TV on and press again to turn the TV off.
SLEEP: Sleep button , setting TV power off time.
MUTE: Mute button , press once to disable the audio and press again to enable the audio.
0,1-9:TV channel selection button.
-/--:TV channel range selection button, select TV channel by entering 1,2 or 3 digits.To change the channel with the
number keys in the remocon,press this button first to select number of digit,then press channel number to change.
: Previous channel button , return to the previous channel watched.
SOURCE: Signal source selection button (TV/SCART/PC-RGB/YPbPr/DVD).
P.STD: P.STD button , setting the picture mode for TV AV S-Video input mode.
S.STD: S.STD button , setting the sound mode.
DISPLAY: Press display button to view the current channel. Press again to remove channel information.
MENU: OSD menu button , to enter the TV setup menu.
(UP/Down): Up and down button of OSD menu. To change the OSD menu items and to increase or decrease
the channel.
Left/Right): Left and right button of the OSD menu. To select the OSD menu items and to increase or decrease
the volume.
VOL+/-: Volume adjusting button, to increase or decrease the volume.
Program+/-:Channel selection button, to increase or decrease channel.
:Press OPEN CLOSE button when power on the disc tray is pushed out Put the disc on the tray with the title
faced Up. Press OPEN CLOSE again to close the disc tray and the unit starts playing automatically
(Without auto play funetion for JPEG discs)
:When playing the disc,press PLAY/PAUSE once to pause,Press PLAY/PAUSE again to return to normal play.
:When playing DVD,SVCD,VCD,CD disc,press STOP once,the unit will memorize the previous ending point.Press
PLAY/PAUSE button to go on the play. Press STOP for the second time to stop the play and end the memory.
:Press button for quick forward search.
:Press button for quick rewind search.
:When playing DVD disc,press NEXT to the next chapter .when playing SVCD,CD disc,press NEXT to the next track.
:When playing DVD disc,press PREV to the previous chapter.when playing SVCD,VCD,CD disc,press PREV to the
previous track.
Slow:When playing SVCD,VCD,DVD discs,press SLOW to select slow speed playing.press PLAY/PAUSE to resume
normal play.
TITLE:When playing DVD disc,press TITLE to return the main title page.
GOTO:
/
/ (
Press GOTO button and go on press GOTO, or to choose Normal or Random or Program mode and
press ENTER button to the selected play mode Press GOTO, state changes: normal -> random -> program
-> normal.ROGRAM function can change the playback order as you designed.
Special note:
In case of MMN, the program support 3-digital numbers of folder and 4-digital numbers of file programming.
While DVD support 2-digital numbers of title and 3-digital numbers of chapter programming, and VCD only
support 2-digital numbers track programming.Use number buttons to input your preferred TRACK Title or
Chapter on the highlight item, press ENTER button or direction button to confirm. Also you can use , , or
button to select an arbitrary position to input. You can clear all programmed item by press ENTER button on
clear all ,or start program play by press ENTERbutton on play .You can also clear certain programmed
item by press ENTER button again.
REPEAT :press REPEAT button to repeat a title,chapter,track or the whole disc.When playing DVD disc,press REPEAT
button continually,the TV screen shows chapter repeat,all repeat,repeat cancel in turn,when playing VCD,CD disc,the turn
is track repeat,all repeat ,repeat cancel.when playing Mp3 disc,the turn is single repeat,directory repeat,file repeat,
repeat cancel.
SETUP:Press SETUP button to open setting menu.
AUDIO:Press L/R button to choose different audio channel.
INFO:Press INFO button for information.
SUBTITLE (for DVD and Super VCD discs)
- Press the SUBTITLE button once to display current subtitle.
- Press again to toggle between different subtitle modes in sequence.
NOTE: For Multi-languages subtitle DVD & Super VCD discs, press the SUBTITLE button to select your favorite subtitle
language.

VIDEO MENU
7.OSD basic adjustment
3. When you are satisfied with your adjustment, press
MENU or EXIT to exit the main menu.
2. Press and button to adjust.
CONTRASTCONTRAST
Press the / buttons and then use / to adjust the contrast of the picture.
BRIGHTNESSBRIGHTNESS
Press the / buttons and then use / to adjust the brightness of the picture.
SHARPNESSSHARPNESS
COLOURCOLOUR
Press the / buttons and then use / to adjust the color saturation.
Press the / buttons and then use / to adjust the sharpness level of picture.
VIDEO MENU
BRIGHTNESS 50BRIGHTNESS 50
CONTRAST
COLOUR
SHARPNESS
50
40
50
1. Use / to select what you want to adjust in the
VIDEO menu.
6.Connecting to exterior devices
RCA terminal is used to connect the output device of DVD (480I/480p/576I/576p/720P/1080I)
Video recorder
Camera
DVD
VIDEO/L/R
Left/right
S Video
1.VIDEO-L-R/S-Video use a common Audio in.
2.VIDEO-L-R of DVD is corresponding to VIDEO-L-R of LCD TV.
3.Scart to Scart from a VCR.
4.PC to VGA OK
5.VIDEO-L-R from a DVD
The rear of TV
Notes:
VCR
78

VIDEO MENU
7.OSD basic adjustment
3. When you are satisfied with your adjustment, press
MENU or EXIT to exit the main menu.
2. Press and button to adjust.
CONTRASTCONTRAST
Press the / buttons and then use / to adjust the contrast of the picture.
BRIGHTNESSBRIGHTNESS
Press the / buttons and then use / to adjust the brightness of the picture.
SHARPNESSSHARPNESS
COLOURCOLOUR
Press the / buttons and then use / to adjust the color saturation.
Press the / buttons and then use / to adjust the sharpness level of picture.
VIDEO MENU
BRIGHTNESS 50BRIGHTNESS 50
CONTRAST
COLOUR
SHARPNESS
50
40
50
1. Use / to select what you want to adjust in the
VIDEO menu.
6.Connecting to exterior devices
RCA terminal is used to connect the output device of DVD (480I/480p/576I/576p/720P/1080I)
Video recorder
Camera
DVD
VIDEO/L/R
Left/right
S Video
1.VIDEO-L-R/S-Video use a common Audio in.
2.VIDEO-L-R of DVD is corresponding to VIDEO-L-R of LCD TV.
3.Scart to Scart from a VCR.
4.PC to VGA OK
5.VIDEO-L-R from a DVD
The rear of TV
Notes:
VCR
78

TV MENU
CHANNEL 4CHANNEL 4
SYSTEM
SKIP
AFC
I
OFF
FINETUNE 175.85MHz
SWAP
MANUAL SEARCH
AUTO SEARCH
ON
TV MENU
3. When you are satisfied with your adjustment, press
MENU or EXIT to exit the main menu.
2. Press the and buttons to adjust.
1. Use / to select what you want to adjust in the
TV menu.
CHANNELCHANNEL
The current program number. Press the / buttons to select the upper or lower program.
SYSTEMSYSTEM
The TV sound system. Press the / buttons to select a corresponding sound system
as BG/DK/I.
SKIPSKIP
The skip option allows you to skip the current channel. When set On, the program number
will be skipped when you select the skipped channel with the CH+/CH- buttons. But you can
select the skipped channel by pressing the numeric buttons directly.
AFCAFC
FINE TUNEFINE TUNE
If the image received is not very good, you can press / to select the Fine Tuning item
in menu.Then, press the / buttons to adjust and improve the image quality.
SWAPSWAP
- Press the / buttons and then use to display the SWAP menu on screen.
- Swap option allows you to swap the current channel. When set to On, the program number
will be swapped when you select the swapped channel with the / buttons.
AUDIO MENU
VOLUME 40VOLUME 40
BALANCE
AUDIO PRESET
TREBLE
50
PERSONAL
50
BASS 50
3. When you are satisfied with your adjustment, press
MENU or EXIT to exit the main menu.
2. Press the and buttons to adjust.
1. Use / to select what you want to adjust in the
AUDIO menu.
You can select the type of sound by selecting AUDIO PRESET in AUDIO menu.
The following sound effects are available: THEATRE/ PERSONAL/ VOICE/ MUSIC.
VOLUMEVOLUME
AUDIO PRESETAUDIO PRESET
BASSBASS
TREBLETREBLE
BALANCEBALANCE
Press the / buttons and then use / to adjust the sound level.
Press the / buttons and then use / to adjust the audio output between left and right
speakers.
Press the / buttons and then use / to increase or decrease the level of the
lower-pitched sounds.
Press the / buttons and then use / to increase or decrease the level of the
higher-pitched sounds.
AUDIO MENU
910
Due to weak signals or wrong antenna configurations, some channels may not bein a good
reception condition. AFT function allows you to fine tune the selected channel.
TV SYSTEMTV SYSTEM
PAL-BG: Albania, Austria, Estonia, Faroe Islands, Finland, Germany, Gibraltar,Iceland, Italy, Netherlands,
Norway, Portugal, Spain, Sweden, Switzerland, Belgium, former Yugoslavia, Azores, Denmark, Malta
Luxembourgh, Greece
PAL-I: Ireland, United Kingdom
PAL-BG/SECAM L: Monaco
PAL-DK: Hungary, Poland, Roumaina
SECAM-L: France
SECAM-DK: Bulgaria, Czech,Slovakia (PAL-BG)

TV MENU
CHANNEL 4CHANNEL 4
SYSTEM
SKIP
AFC
I
OFF
FINETUNE 175.85MHz
SWAP
MANUAL SEARCH
AUTO SEARCH
ON
TV MENU
3. When you are satisfied with your adjustment, press
MENU or EXIT to exit the main menu.
2. Press the and buttons to adjust.
1. Use / to select what you want to adjust in the
TV menu.
CHANNELCHANNEL
The current program number. Press the / buttons to select the upper or lower program.
SYSTEMSYSTEM
The TV sound system. Press the / buttons to select a corresponding sound system
as BG/DK/I.
SKIPSKIP
The skip option allows you to skip the current channel. When set On, the program number
will be skipped when you select the skipped channel with the CH+/CH- buttons. But you can
select the skipped channel by pressing the numeric buttons directly.
AFCAFC
FINE TUNEFINE TUNE
If the image received is not very good, you can press / to select the Fine Tuning item
in menu.Then, press the / buttons to adjust and improve the image quality.
SWAPSWAP
- Press the / buttons and then use to display the SWAP menu on screen.
- Swap option allows you to swap the current channel. When set to On, the program number
will be swapped when you select the swapped channel with the / buttons.
AUDIO MENU
VOLUME 40VOLUME 40
BALANCE
AUDIO PRESET
TREBLE
50
PERSONAL
50
BASS 50
3. When you are satisfied with your adjustment, press
MENU or EXIT to exit the main menu.
2. Press the and buttons to adjust.
1. Use / to select what you want to adjust in the
AUDIO menu.
You can select the type of sound by selecting AUDIO PRESET in AUDIO menu.
The following sound effects are available: THEATRE/ PERSONAL/ VOICE/ MUSIC.
VOLUMEVOLUME
AUDIO PRESETAUDIO PRESET
BASSBASS
TREBLETREBLE
BALANCEBALANCE
Press the / buttons and then use / to adjust the sound level.
Press the / buttons and then use / to adjust the audio output between left and right
speakers.
Press the / buttons and then use / to increase or decrease the level of the
lower-pitched sounds.
Press the / buttons and then use / to increase or decrease the level of the
higher-pitched sounds.
AUDIO MENU
910
Due to weak signals or wrong antenna configurations, some channels may not bein a good
reception condition. AFT function allows you to fine tune the selected channel.
TV SYSTEMTV SYSTEM
PAL-BG: Albania, Austria, Estonia, Faroe Islands, Finland, Germany, Gibraltar,Iceland, Italy, Netherlands,
Norway, Portugal, Spain, Sweden, Switzerland, Belgium, former Yugoslavia, Azores, Denmark, Malta
Luxembourgh, Greece
PAL-I: Ireland, United Kingdom
PAL-BG/SECAM L: Monaco
PAL-DK: Hungary, Poland, Roumaina
SECAM-L: France
SECAM-DK: Bulgaria, Czech,Slovakia (PAL-BG)

GENERAL MENU
GENERAL MENU
LANGUAGE ENGLISHLANGUAGE ENGLISH
BLUE SCREEN ON
NOISE REDUCE MID
INPUT SOURCE TV
RESET
ZOOM FULL
3. When you are satisfied with your adjustment, press
MENU or EXIT to exit the main menu.
2. Press the and buttons to adjust.
1. Use / to select what you want to adjust in the
GENERAL menu.
LANGUAGELANGUAGE
Press the / buttons and then use / to select the language of OSD (On Screen Display).
BLUE SCREENBLUE SCREEN
Press the / buttons and then use / to select ON or OFF to display the blue screen when
no signal.
NOISE REDUCENOISE REDUCE
Press the / buttons and then use / to select ON or OFF to reduce the noise of the
picture and provide clearer picture .
INPUT SOURCEINPUT SOURCE
Press the / buttons and then use / to select the input source.
Press the / buttons and then use / to select FULL,4:3.
ZOOMZOOM
RESETRESET
Press the / buttons and then use to reset settings to the factory default.
FROM: 3
TO: 3
SWAP
- Press / to select the current channel.
- Press / to select the swap channel.
- Press to swap the channel.
The manual search option allows you to preset channels one by one, in the program order of
your choice.
Manual SearchManual Search
- Press the / buttons to select up and down.
- Press / to increase or decrease the frequency.
DOWN
UP
264.25MHz
Press the / buttons and then use to search stations that can be received automatically.
It's recommended that you use Auto tuning during installation of this unit.
AUTO SEARCHAUTO SEARCH
- During searching, you can press MENU or EXIT to stop searching at any moment, and
return to the previous menu.
AUTO SEARCH
PLEASE WAIT
0 252.75MHz
- Press MENU to auto search.
11 12
TXT LANGUANGE PAN EUROPEAN
TXT EAST/WEST WEST
TXT LANGUANGETXT LANGUANGE
Press the / buttons and then use / to select PAN EUROPEAN,CYRILLIC,GREEK.
TXT EAST/WESTTXT EAST/WEST
Press the / buttons and then use / to select EAST,WEST

GENERAL MENU
GENERAL MENU
LANGUAGE ENGLISHLANGUAGE ENGLISH
BLUE SCREEN ON
NOISE REDUCE MID
INPUT SOURCE TV
RESET
ZOOM FULL
3. When you are satisfied with your adjustment, press
MENU or EXIT to exit the main menu.
2. Press the and buttons to adjust.
1. Use / to select what you want to adjust in the
GENERAL menu.
LANGUAGELANGUAGE
Press the / buttons and then use / to select the language of OSD (On Screen Display).
BLUE SCREENBLUE SCREEN
Press the / buttons and then use / to select ON or OFF to display the blue screen when
no signal.
NOISE REDUCENOISE REDUCE
Press the / buttons and then use / to select ON or OFF to reduce the noise of the
picture and provide clearer picture .
INPUT SOURCEINPUT SOURCE
Press the / buttons and then use / to select the input source.
Press the / buttons and then use / to select FULL,4:3.
ZOOMZOOM
RESETRESET
Press the / buttons and then use to reset settings to the factory default.
FROM: 3
TO: 3
SWAP
- Press / to select the current channel.
- Press / to select the swap channel.
- Press to swap the channel.
The manual search option allows you to preset channels one by one, in the program order of
your choice.
Manual SearchManual Search
- Press the / buttons to select up and down.
- Press / to increase or decrease the frequency.
DOWN
UP
264.25MHz
Press the / buttons and then use to search stations that can be received automatically.
It's recommended that you use Auto tuning during installation of this unit.
AUTO SEARCHAUTO SEARCH
- During searching, you can press MENU or EXIT to stop searching at any moment, and
return to the previous menu.
AUTO SEARCH
PLEASE WAIT
0 252.75MHz
- Press MENU to auto search.
11 12
TXT LANGUANGE PAN EUROPEAN
TXT EAST/WEST WEST
TXT LANGUANGETXT LANGUANGE
Press the / buttons and then use / to select PAN EUROPEAN,CYRILLIC,GREEK.
TXT EAST/WESTTXT EAST/WEST
Press the / buttons and then use / to select EAST,WEST

PHASEPHASE
Press the / buttons and then use / to adjust the phase of the picture.
CLOCKCLOCK
Press the / buttons and then use / to adjust the clock of the picture.
Press”SOURCE” button to select a source from TV,SCART,PC-RGB,YPbPr,DVD.
TV
SCART
YPbPr
PC-RGB
DVD
SOURCE SELECT
PC MENU
BRIGHTNESS 50BRIGHTNESS 50
CONTRAST
COLOUR SETTING
AUTO CONFIG
50
USER
H-POSITION 0
V-POSITION
PHASE
CLOCK
NO INPUT
0
0
0
PC MENU
3. When you are satisfied with your adjustment, press
MENU or EXIT to exit the main menu.
2. Press the and buttons to adjust.
1. Use / to select what you want to adjust in the
PC menu.
CONTRASTCONTRAST
Press the / buttons and then use / to adjust the contrast of the picture.
BRIGHTNESSBRIGHTNESS
Press the / buttons and then use / to adjust the brightness of the picture.
COLOUR SETTINGCOLOUR SETTING
- Choose one of three automatic color adjustments. Set to 6500K to enhance hotter colors
such as red, or set to 9300K to see less intense colors with more blue.
-Press the / buttons and then use / to select one of USER/9300K/6500K.
-When you select USER, a sub-menu will display, then you can use to
select and adjust each item.
USER COLOUR SETTING
RED 171
GREEN 171
BLUE 171
AUTO CONFIGAUTO CONFIG
Press the / buttons and then use to do auto config that automatically adjusts the available
options for the best viewing configuration.
H-POSITIONH-POSITION
Press the / buttons and then use / to adjust the horizontal position of the picture.
V-POSITIONV-POSITION
Press the / buttons and then use / to adjust the vertical position of the picture.
13 14

DVD OperationDVD Operation
16
Basic operationBasic operation
1. Turn ON and OFF the DVD function
- Turn on the LCD TV and then press the source button repeatedly to select DVD mode.
2. Inserting a disc
- Insert the Disc into the Disc slot (Data side of the disc has to face towards the front of the unit), the player
will load the disc automatically. There will be an on screen indication “CLOSE” then “READ”. After loading
the disc content, it will switch to play mode automatically. If the disc is already placed inside, the disc will be
read automatically.
NOTE: - For some discs, after loading the content of the disc, you need to press or select it from the disc menu
to start.
- Please make sure when inserting the Disc, the Data side of the disc should be facing you, When inserting
the Disc incorrectly, you may damage the DVD mechanism.
3. Play the DVD
- The disc menu will display the content you are able to select. When playing the disc, you may use the button
to toggle between Play and Pause mode. This product also supports Menu, Title, Sequential
and Program playback.
4. Menu playback (for DVD/ super VCD and VCD 2.0 discs)
- Press the MENU/FAV button
For DVD discs, the screen will display the DVD Disc Menu (Root Menu)
For Super VCD & VCD2.0 discs, the screen will display the Super VCD, VCD2.0 Disc Menu (PBC: [OFF])
(Press the D.MENU button to display the PBC status).
Playback the Super VCD & VCD2.0 discs, the default PBC status is ON.
- For DVD discs, use the navigation buttons to select and Play the highlighted contents; For Super
VCD & VCD2.0 discs, use the numeric buttons to play your favorite content directly.
- Press the ENTER or button to start from the highlighted content.
- Return to the Root Menu when playing the disc
For DVD discs, press the MENU/FAV button to display the Disc Menu.
For Super VCD & VCD2.0 discs, when PBC is ON, press D.MENU to display the Disc Menu.
- STOP
Press button once to stop. Press button to resume from where you stopped.
Press button Twice to stop. Press button to start from beginning.
In order to protect the disc, press button then press EJECT button to take the disc out. When the disc is
ejected, hold the disc edges lightly and take it from the eject direction to prevent scratches.
When not using the DVD function (in stand-by mode or using others modes for a long time), please take out
the disc to protect the DVD loader and the disc.
5. Title playback (for DVD discs only)
- Press the TITLE button, there will be an on screen indication “TITLE”.
- Press the direction or numeric buttons to select your favorite title.
- Playing will start from the first chapter of the selected title.

Supporting DVD formatSupporting DVD format
This products can play the following format of DVD disc.
Remarks
Include SVCD
Include:
VCD2.0/ VCD1.1
VCD1.0/ DVCD
Disc Type Recorded Content
DVD format:
Compressed digital
audio and video
MPEG2
Compressed digital
audio and video
MPEG1
Compressed digital
audio and video
CD-DA: Digital audio
HD-DA: Digital audio
Disc Size (Diameter) Recorded Time
DVD 12cm
Single side:120mins. Approx
Double side:240mins. Approx
Super VCD 12cm 45mins. Approx
VCD 12cm 74mins. Approx
CD 12cm 74mins. Approx
HD-CD 12cm 74mins. Approx
MP3/JPEG 12cm 600mins. Approx Digital audio
NOTE: Also support DVD-R, CD-R, CD-RW playback.
WARNING! DO NOT INSERT OR PLAY 8CM DISC, THEY WILL GET STUCK.
Region Code 2
As it is usual for DVD movies to be released at different times in different regions of the world, all players have
region codes and discs can have an optional region code. If you load a disc of a different region code into your
player you will see the region code notice on the screen. The disc will not playback and should be unloaded.
The region code for this player is 2(refer to the symbols below).
17 18
DVD Functions operating instructionsDVD Functions operating instructions
1. Play (for DVD/ Super VCD/ VCD/ CD/ CD-G/HD-CD and Mp3/ JPEG discs)
-For DVD disc, press the button from the root or title menu; while playing the DVD, you may play your favorite
title directly with title selection by pressing the TITLE button.
- For Super VCD & VCD discs, while playing the disc, you may play your favorite tracks by the numeric buttons.
- For CD, CD-G & HD-CD discs, while playing the disc, you may play your favorite tracks by the numeric buttons.
- For MP3 / JPEG disc, you may play your favorite tracks by the numeric buttons from the content menu.
- If the entered track number is not valid, it will not function.
NOTE: From track 1-10, use the numeric buttons directly; For tracks over 10, press - / -- button first. (E.g. Track 15,
press - / -- then 5)
2. Previous/Next (for DVD/ Super VCD/ VCD/ CD/ CD-G/HD-CD and Mp3/ JPEG discs)
- While playing the disc;
Press the button to play the last Title / Chapter / track.
Press the button to play the next Title / Chapter / track
- For super VCD & VCD discs, in PBC OFF status;
If the current track is the first one, press the button will stop the playback.
If the current track is the last one, press the button will stop the playback.
- For DVD discs, the above functions may vary due to different DVD disc's structure.
3. Forward/ Backward (for DVD/ Super VCD/ VCD/ CD/ CD-G/HD-CD and Mp3/ JPEG discs)
- While playing the disc, you may use the forward or backward function.
- There are 4 speeds for forward. Press button to toggle between different speeds in sequent.
(FORWARDx2 / FORWARDx4 / FORWARDx8 / FORWARDx20 / Play).
While in backward mode, you may press to resume normal speed.
For CD, HD-CD, MP3, backward also has audio output(just only for forwardx2).
For DVD discs, if you backward to the first title / chapter, it will start from the beginning.
For Super VCD & VCD discs, in PBC ON status, if you backward to the first track, it will start from the beginning.
NOTE: During Forward or Backward playback, the sound will be off.
4. Slow motion(for DVD/ Super VCD/ VCDdiscs)
- While playing the disc, you may use the slow motion function.
There are 6 speeds for slow motion. Press the button to toggle between different speeds in sequence. (SF1/2, SF1/3,
SF1/4, SF1/5, SF1/6, SF1/7, Play).
While in slow motion, you may press to resume normal speed.
NOTE: During Slow motion, the sound will be off.
5. Pause (for DVD/ Super VCD/ VCD/ CD/ CD-G/HD-CD and Mp3/ JPEG discs)
-FOR CD, CD-G, HD-CD & MP3/JPEG discs, press the button to pause; press the button to resume.
- FOR DVD, Super VCD, VCD discs, press the button to pause; press SLOW/STEP button to playback frame
by frame; press the button to resume.
6. Repeat (for DVD/ Super VCD/ VCD/ CD/ CD-G/HD-CD and Mp3/ JPEG discs)
- Press the REPEAT button once to display the current repeat mode.
For Super VCD, VCD, CD, CD-G, HD-CD, discs, while playing in sequence, you may use the repeat playback.
There are 2 repeat modes, press REPEAT to toggle between different modes in sequent. (REPEAT (OFF)/ REPEAT (1)
/REPEAT (ALL)).
For DVD discs, you may setup the repeat playback mode. There are 2 repeat modes, press REPEAT to toggle between
different modes in sequence. (REP: (OFF) / REP: (CHAPTER) / REP: (TITLE) / REP: (ALL)).
For MP3 / JPEG discs, while playing the disc, you may use the repeat playback. There are 3 repeat modes, press
REPEAT to toggle between different modes in sequence. (REPEAT (OFF) / REPEAT (1) / REPEAT (DIR) / REPEAT (ALL)).
7.INFO(for DVD/ Super VCD/ VCD/ CD/ CD-G/HD-CD and Mp3/ JPEG discs)
- Press the INFO button to activate the on screen roll-down menu for the current Title, Chapter, time and other
information
ALL 21 2 1 2
3 4
Other manuals for DVT-221
2
Table of contents
Other LENCO LCD TV manuals

LENCO
LENCO TFT-225 User manual

LENCO
LENCO DVT-220 User manual

LENCO
LENCO DVT-2622 User manual

LENCO
LENCO DVT-2432 User manual

LENCO
LENCO TFT-350 User manual

LENCO
LENCO TFT-2401 User manual

LENCO
LENCO DVT-227 User manual

LENCO
LENCO TFT-2402 User manual

LENCO
LENCO DVT-2421 User manual

LENCO
LENCO TFT-1021 User manual

LENCO
LENCO DVT-1932 User manual

LENCO
LENCO DVT-154 User manual

LENCO
LENCO DVT-1533 User manual

LENCO
LENCO TFT-1028 User manual

LENCO
LENCO TFT-1026 User manual

LENCO
LENCO DVT-229 User manual

LENCO
LENCO TFT-1537 User manual

LENCO
LENCO TFT-2401 User manual

LENCO
LENCO TFT-360 User manual

LENCO
LENCO TFT-920 User manual