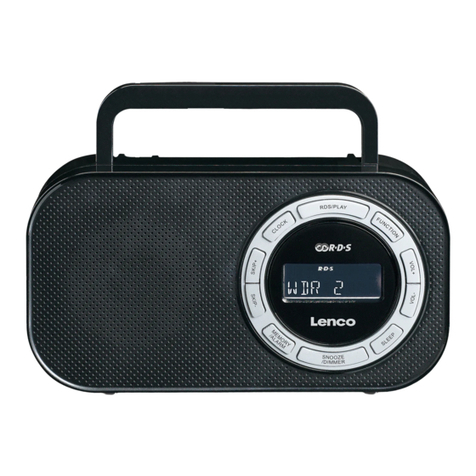
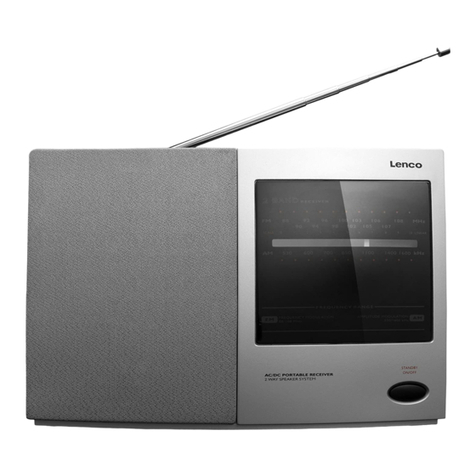
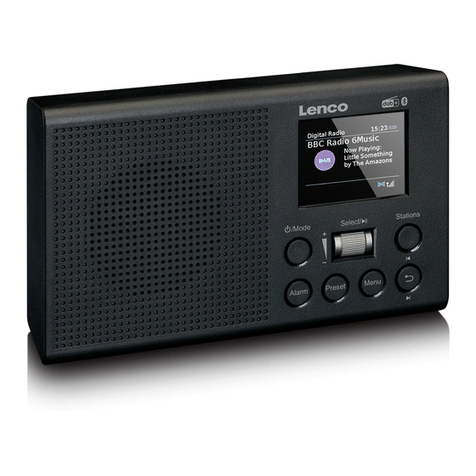
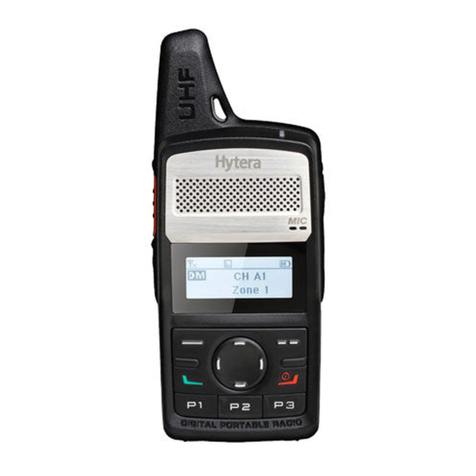
LENCO PDR-03 User manual

Model: PDR-03
Instruction Manual (Portable Radio with DAB+)
Bedienungsanleitung (Tragbares Radio mit DAB+)
Manual de instrucciones (Radio portátil con DAB+)
Handleiding (Draagbare radio met DAB+)
Manuel d'instruction (Radio portable avec DAB+)

Index
English.............................................................................................................
Deutsch............................................................................................................
............................................................................................................
.....................................................................................................
...........................................................................................................
Español
Nederlands
Français
1
13
30
45
61

English
Contents
1
3
4
7
8
9
10
Safety information..............................................................................................................
Panel controls......................................................................................................................
General operation..............................................................................................................
Display information ............................................................................................................
....................................................................................................................DAB operation
FM operation........................................................................................................................
Trouble shooting and Specification..........................................................................
6
Set time and alarm..............................................................................................................
11
Service and support..........................................................................................................

1. Safety Information
However, this is no guarantee that interference will not occur in a particular
installation. If this equipment does cause harmful interference to radio or
or other reception, which can be determined by turning the equipment off
on, the user is encouraged to try to correct the interference by one of the
following measures:
- Reorient or relocate the receiving antenna.
- Increase the separation between the equipment and receiver.
- Connect the equipment into an outlet on a circuit different from
which the receiver is connected.
- Consult the dealer or an experienced radio technician for help.
ELECTRICAL INFORMATION
Mains Supply: The mains operating voltage of this unit is marked on a rating
plate on the back of the unit. The means of disconnecting this appliance
from the mains supply is the mains plug. This should be unobstructed and
readily operable at all times.
This equipment generates, uses and can radiate radio frequency energy and,
if not installed and used in accordance with the instructions, may cause
harmful interference to radio communication.
1. Do not install or operate near any heat sources such as radiators, stoves,
or apparatus that produce heat.
2. Unplug this apparatus during lightning storms or unused for long time.
3. Refer all servicing to qualified service personnel.
4. Servicing is required when the apparatus has been damaged in any way,
such as the power-supply cord or plug is damaged, liquid has been
spilled or objects have fallen into the apparatus, the apparatus has been
exposed to rain or moisture, not operate normally, or has been dropped.
5. To reduce the risk of fire or electrical dangers, do not expose this unit to
rain or moisture.
6. The product must not be exposed to dripping and splashing and no object
filled with liquids such as a vase of flowers should be placed on the unit.
7. No naked fame sources such as candles should be placed on the unit.
8. Changes or modifications not expressly approved by the manufacturer
could void the user’s authority to operate this device.
9. Usage of controls or adjustments or performance of procedures other
than those specified herein may result in hazardous exposure.
1

2
10. Do not let children play with the product.
11. Do not store the product in extremely cold or warm environments.
12. The appliance is not intended for use by persons (including children)
with reduced physical, sensory or mental capabilities, or lack of
experience and knowledge, unless they have been given supervision
or instructions concerning the use of the appliance by a person
responsible for their safety.

2. Panel Controls
OFF ON
DC 5V IN
13 12
10
11
1 3 5
SLEEP/STBY
DAB/FM
INFO/MENU
ENTER
PRESET
4
2
6
7
8
9
1. SPEAKER
2. INFORMATION/MENU
3. DAB/FM
4. SLEEP/STANDBY
5. DISPLAY SCREEN
6. ENTER
7. VOLUME+/-
8. UP/DOWN
9. PRESET
10. FM ANTENNA
11. BATTERY COMPARTMENT
12. POWER INPUT
13. POWER SWITCH
FITTING OR REPLACING THE BATTERIES
When replacing the batteries, refer to the diagram.
1. Push the catch on the battery door to open.
2. Fit 4 x 1.5V AA type batteries of the same type observing polarity.
Then re-fit the battery door and clip it.
DISPOSAL OF BATTERIES
Dispose of used batteries with regard to the recycling regulations in your
area. Do NOT short circuit batteries or throw them into water, the general
rubbish or in a fire. Weak batteries can leak and damage the unit. Replace
them in good time!
3

3. General Operation
Mains Adaptor (supplied with the package)
Connect the mains adaptor to the power socket on the rear panel.
Get the best reception
Extend the telescopic aerial as far as it can go.
Power on the unit
Slide the Power ON/OFF to ON to turn on the radio. The radio will
automatically operate the quick scan.
Wake up the unit
Press the SLEEP/STBY button to turn on the unit, press and hold the
same button to turn to standby mode.
Adjust the volume
Rotate the Volume Knob to adjust the volume to a comfortable level.
Listening to the radio at high volume level may destroy the hearing.
Avoid listening at high volume level for long time.
Sleep timer
To set the sleep time at power on mode, press the SLEEP button
repeatedly to select from Sleep off, 15/30/45/60/90 minutes. When
the time is out, the unit will enter standby mode.
Select modes
Press DAB/FM button to enter DAB mode or FM mode.
FIRST TIME TO TURN ON THE UNIT
Slide the Power On/Off to switch on the radio, the unit will auto-scan
the stations it found. During scanning, the screen will display a slide bar
that indicates the progress of the scan, and the amount of radio stations
that have been found so far. Once the scan has finished, the radio will
play the first station it found. Scanning... 10
4

4. General Operation
Enter the menu setting interface
1. Press and hold the INFO/MENU button,
*when the <Station scan> appears in DAB mode, or
*when the <Audio setting> appears in FM mode,
press or button to find the <Main menu>.
2. Press ENTER button and then press / button to cycle through the
menu contents.
3. Select one content, press ENTER to enter the setting interface.
4. Press the INFO/MENU button to go back to the previous interface.
Backlight
At power on mode, backlight will be on for around 10 seconds and off.
For any button pressing or volume changing, backlight will be on and
corresponding function will be triggered at the same time when
applicable, then backlight will be off after around 10 seconds.
Factory Reset
To set the unit to original settings, enter the factory reset interface,
follow the tips (Press “ENTER” button), then the unit will restart.
SW Version
To check the software version of the system.
Store stations
It is possible to store up to 10 of your favorite stations. This will enable
you to access your favorite stations quickly & easily.
1. Listen to the station you would like to save.
2. Press the PRESET button. The screen displays:
3. Press or to select the desired preset number 1~10.
4. Press the PRESET button again to confirm.
Recall a stored station
Once you have saved the stations to the preset buttons, you can recall
by pressing the PRESET button. Then press or to select the stored
stations, and press ENTER to confirm.
Preset 1 empty
5

Press and hold the INFO/MENU button to find the <Main menu> and
press ENTER, press / and press ENTER to enter the <Time setup>.
Then press ENTER button to enter the selection interface.
Press / button to select the digits of the time and date.
1. Set clock> Press ENTER> 00:00(Hour:Minutes)> Press / to select
the Hour digits> Press ENTER> Press / to select the Minute digits>
Press ENTER to confirm.
2. Set date> Enter the date 01-01-2014 (Day-Month-Year)> Use the
above steps of SET CLOCK to select the digits, press ENTER to confirm.
3. Auto update> Select No update or From radio> Press ENTER.
*If selected NO UPDATE, the time and date will not update from the
system, and you should manually set the time and date.
*If selected FROM RADIO, the time and date will auto update from the
system if it detects the RDS signal. But if the RDS signal is not strong
enough, the time/date will not update.
4. After finish the steps above, the time is set up manually.
Manual set Time
1. When the <Alarm 1: off> appears, press ENTER to set the alarm ON,
press / , it displays: Time: 00:00, then press ENTER. Use / to
select alarm digits, press ENTER to confirm.
2. Select the alarm days: Daily, Once, Weekdays, Weekends.
3. Set the alarm mode: DAB, FM, Buzzer.
*Choose the DAB or FM mode as the alarm mode, when the alarm goes
on, the unit will turn on to the corresponding radio.
*Choose the Buzzer mode, when the alarm goes on, there comes a
audible sound, press ENTER button, the alarm will goes on again 5
minutes later. Press and hold the SLEEP button can stop the alarm.
4. Set the presets, this option enables the unit to turn on from the
preset station or the last listened station if the alarm mode is FM or
DAB with preset stations.
5. Set the alarm volume level, press / buttons to increase/decrease
the volume level, press ENTER to confirm.
6. After all the above steps, enter the SAVE interface, press ENTER to
save the alarm 1. To set alarm 2, follow the steps of alarm 1.
7. To cancel the alarms, enter the alarm setting interface, press ENTER to
select off, then enter the SAVE interface to save the alarm off setting.
Set the Alarms
6
Display information
Press the INFO/MENU button to check the information.
In FM mode, it displays:
Radio text, program type, signal strength, and date.
In DAB mode, it displays:
DLS information, program type, station name, date, frequency, bit rate
& mono/stereo, signal strength, signal error.
Ensemble/ Station name/Multiples
A multiplex/ensemble is a collection of radio stations that are bundled
and transmitted on one frequency. There are national and local
multiplexes. Local ones contain stations that are specific to that area,
e.g. MXR West.
NOTE: DAB-unlike normal radio, groups together several radio stations
and transmits them on one frequency.
DLS (Dynamic Label Segment)
Dynamic label segment is message the broadcaster may include with
their transmissions, such as music style.
Radio text
As with DAB, the broadcaster can include the station text that displays
the information about the current program. If radio text information is
not available, it will display: No Radio Text. If the RDS (radio data
system) is available, it will show the station information provided by
the station.
7

DAB menu settings
Press and hold the INFO/MENU button, then press the / to enter
the <Main menu> in DAB mode.
Prune the station
When the radio has performed a scan in several locations, you may find
there are some stored stations that no longer receive. This prune
function automatically can remove them from the stored station list.
Enter the menu, press / to find <Prune station>, then follow the
tips <Press “ENTER” to prune station> to press the ENTER button.
Station order
Enter the menu, find <Station order>, press ENTER, then press / to
select one of the station order: Multiplex, Alphanumeric, Active, press
ENTER to confirm selection.
DRC (Dynamic range control)
This function enables the radio to reduce the dynamic range of audio
signal and adapts to be listened to the audio in noisy environment.
Enter the menu and find the <DRC>, use / to select from: DRC off,
DRC low, or DRC high, press ENTER to confirm.
DAB Operation
Scan stations
When turning on to DAB mode, the unit will auto-scan the stations it
found in this area. Press / button to select the previous or next
stations, and press ENTER to activate to play the station.
Station tuning
Press and hold the INFO/MENU button, when the <Station scan>
appears, press ENTER, then use the / button to cycle through the
scanning options: <Full scan>, <Manual tune>.
* Select the Full scan, and press ENTER to enable a full scanning.
* Select the <Manual tune> and press ENTER, use / button to
select station from 5A:174.928MHz to 13F:239.200MHz.
Then press ENTER button to activate the selected station.
8

FM Operation
Select stations
To search for an FM station from 87.5 to 108.0MHz.
1. Press and hold the / to skip to the previous or next station of
strongest reception. Once a station has been found, it stops
scanning automatically. If no station is found, the unit will stop
after it has cycled through the entire frequency.
2. Briefly press the / to reward or forward the frequency by the
step of 0.05MHz.
3. Long press the ENTER button to auto scan the 30 stations.
4. To locate the required station, long press PRESET, press / to
select required station from the scanned stations, then press ENTER
to confirm. To Store Stations, refer to General Operation.
Station tuning
Press and hold the INFO/MENU button to enter the <Audio setting>,
press ENTER, then press the / to select one of the audio mode
Stereo or mono or Mono only, at last press ENTER to confirm.
9

5. Trouble Shooting
* There is no sound from the speaker.
Check if the volume level is turned up;
* The sound is distorted.
The volume is too high, turn down the volume level.
Adjust the antenna to get a stronger signal reception.
* Not find the desired stations.
Use the manual tune function to find the station.
Signal reception is too low, adjust the antenna or move to a stronger
signal location.
* Texts display abnormal on the screen.
No DAB coverage in your area, adjust the position of the aerial.
Turn off the machine, then turn back on again.
* A burbling noise on some stations.
Batteries power is low, exchange some new batteries.
Re-position the aerial to get the best reception.
Power input
Battery
Power consumption
DAB Frequency
FM frequency
DC 5V---750mA
4 x 1.5V (AA type)
3.5W
174 -240MHz
87.5-108MHz
6. Specification
Power supply adaptor
Model Number: DZ006HL050075V
Use only power supplies listed in the user instructions.
Manufacturer: Guangdong Keerda Electronic Co., Ltd.
(For EU only)
Input: 100-240V~50/60Hz, 0.15A
Output: 5V---0.75A
10

7. Service and support
1. Guarantee
Lenco offers service and warranty in accordance with the European law,
which means that in case of repairs (both during and after the warranty
period) you should contact your local dealer.
Important note: It is not possible to send products that need repairs to
Lenco directly.
Important note: If this unit is opened or accessed by a non-official
service center in any way, the warranty expires.
This device is not suitable for professional use. In case of professional
use, all warranty obligations of the manufacturer will be voided.
2. Disclaimer
Updates to Firmware and/or hardware components are made regularly.
Therefore some of the instruction, specifications and pictures in this
documentation may differ slightly from your particular situation. All
items described in this guide for illustration purposes only and may not
apply to particular situation. No legal right or entitlements may be
obtained from the description made in this manual.
3. Disposal of the Old Device
This symbol indicates that the relevant electrical product
or battery should not be disposed of as general household
waste in Europe. To ensure the correct waste treatment of
the product and battery, please dispose them in accordance
to any applicable local laws of requirement for disposal of
electrical equipment or batteries. In so doing, you will help
to conserve natural resources and improve standards of
environmental protection in treatment and disposal of electrical waste
(Waste Electrical and Electronic Equipment Directive).
4. CE Marking
Products with the CE marking comply with the EMC
Directive (2004/108/EC) and the Low Voltage Directive
(2006/95/EC) issued by the Commission of the European
Community.
11

Hereby, Lenco Benelux BV, Thermiekstraat 1a, 6361 HB Nuth, The
Netherlands, declares that this product is in compliance with the
essential requirements and other relevant provisions of Directive
1999/5/EC.
The declaration of conformity may be consulted via
.
5. Service
For more information and helpdesk support, please visit
.
Lenco Benelux BV, Thermiekstraat 1a, 6361 HB, The Netherlands.
techdoc@lenco.com
www.lenco.com
12

13
Deutsch
Inhalt
Sicherheitsinformationen............................................................................
Bedienelemente............................................................................................
Grundlegende Bedienung...........................................................................
Einstellen von Uhrzeit...................................................................................
Einstellen der Weckalarme...........................................................................
Sender speichern und Systemeinstellungen............................................
Bildschirmanzeige ........................................................................................
DAB-Betrieb....................................................................................................
UKW-Betrieb...................................................................................................
Fehlerbehebung / Technische Daten.........................................................
Service und hilfe............................................................................................
14
16
17
19
20
21
22
24
25
26
27

1. Sicherheitsinformationen
Dieses Gerät verursacht, benutzt und strahlt Radiowellen aus, und kann,
wenn es nicht der Bedienungsanleitung entsprechend installiert wird,
für Radiokommunikation schädliche Interferenz verursachen.
Es wird allerdings nicht garantiert, dass bei bestimmten Konfigurationen
keine Interferenz entstehen kann. Wenn das Gerät als Ursache für Inter
ferenz festgestellt werden kann, indem es an-und ausgeschaltet wird,
wird dem Benutzer empfohlen die Interferenz durch eine der folgenden
Maßnahmen zu korrigieren:
- Richten Sie die Empfangsantenne neu aus bzw. stellen Sie sie an
einem anderen Ort auf.
- Erhöhen Sie die Entfernung zwischen Gerät und Empfänger.
- Verbinden Sie das Gerät mit einer Steckdose, die nicht mit dem
Empfangsgerät verbunden ist.
- Wenden Sie sich an Ihren Händler oder an einen erfahrenen
Radiotechniker.
ELEKTRISCHE INFORMATIONEN
Netzstromversorgung: Die Netzspannung, mit der dieses Gerät
betrieben wird, ist auf dem Typenschild auf der Rückseite des Geräts
angegeben. Das Gerät wird mithilfe des Netzsteckers von der Steckdose
getrennt. Diese muss deshalb jederzeit zugänglich bleiben.
1. Stellen Sie das Gerät nicht in der Nähe von Hitzequellen, wie z. B.
Heizungen, Herden oder anderen Geräten die Hitze produzieren auf.
2. Ziehen Sie bei Gewittern oder bei längerer Nichtbenutzung den
Netzstecker aus der Steckdose heraus. Wenden Sie sich im
Wartungsfall nur an ausgebildetes Wartungspersonal.
3. Das Gerät muss in Wartung gegeben werden, nachdem es in
irgendeiner Weise beschädigt wurde, wie z. B. bei Beschädigung des
Netzkabels, nachdem Flüssigkeit über das Gerät gegossen wurde
oder Gegenstände in das Gerät gelangt sind, es herunter gefallen ist,
nicht auf normale Weise funktioniert oder Regen bzw. Feuchtigkeit
ausgesetzt wurde.
4. Um Feuer und elektrischen Schlägen vorzubeugen, vermeiden Sie es
das Gerät Regen oder Feuchtigkeit auszusetzen.
5. Dieses Gerät darf keinen Wassertropfen und -spritzern ausgesetzt
werden.
14

6. Gegenstände, die mit Flüssigkeiten gefüllt sind, wie z. B. Vasen,
dürfen nicht auf das Gerät gestellt werden.
7. Gegenstände mit offenen Flammen, wie z. B. Kerzen, dürfen niemals
auf das Gerät gestellt werden.
8. Veränderungen oder Modifikationen an diesem Gerät, die nicht
ausdrücklich vom Hersteller genehmigt wurden, machen das Recht
des Benutzers auf den Betrieb des Geräts nichtig.
9. Die Verwendung von Bedienungsweisen, die nicht in dieser Anleitung
beschrieben werden, kann zudem zur Aussetzung von gefährlicher
Strahlung führen.
10. Lassen Sie Kinder nicht mit dem Gerät spielen.
11. Lagern Sie das Gerät nicht an extrem kalten oder warmen Orten.
12. Das Gerät ist nicht geeignet für den Gebrauch durch Personen
(einschließlich Kinder) mit eingeschränkten körperlichen,
sensorischen oder geistigen Fähigkeiten, oder ohne Erfahrung und
Wissen, es sei denn sie werden von einer für ihre Sicherheit
zuständigen Person beaufsichtigt oder bzgl. der Nutzung des
Geräts angeleitet.
15

2. Bedienelemente
OFF ON
DC 5V IN
13 12
10
11
1 3 5
SLEEP/STBY
DAB/FM
INFO/MENU
ENTER
PRESET
4
2
6
7
8
9
1. LAUTSPRECHER
2. INFORMATIONEN/MENÜ
3. DAB/UKW
4. EINSCHLAFFUNKTION/
BEREITSCHAFT
5. BILDSCHIRMANZEIGE
6. EINGABE
7. LAUTSTÄRKE +/-
8. NAVIGATION OBEN /
UNTEN
9. SENDERSPEICHER
10. UKW-ANTENNE
11. BATTERIEFACH
12. STROMVERSORGUNG
13. EIN/Aus-Schalter
EINLEGEN ODER AUSWECHSELN DER BATTERIEN
Zum Wechseln der Batterien beziehen Sie sich bitte auf das Diagramm.
1. Drücken Sie auf die Lasche am Batteriefach auf der Geräterückseite,
um das Batteriefach zu öffnen.
2. Legen Sie 1,5-V-Batterien der Größe AA ein und achten Sie dabei auf
die korrekte Polarität. Schließen Sie das Batteriefach, indem
Sie die Abdeckung einrasten.
ENTSORGUNG DER BATTERIEN
Entsorgen Sie Altbatterien entsprechend in Ihren Ort geltender
Vorschriften. Schließen Sie Batterien NICHT kurz und werfen Sie sie
NICHT ins Wasser, in den Hausmüll oder Feuer. Schwache Batterien
können auslaufen und das Gerät beschädigen. Wechseln Sie sie
rechtzeitig aus!
16
3. Grundlegende Bedienung
Netzadapter (im Lieferumfang)
Schließen Sie den Netzadapter am Stromversorgungsanschluss auf der
Geräterückseite an.
Optimaler Empfang
Ziehen Sie die Teleskopantenne so weit wie möglich heraus.
Einschalten des Geräts
Schieben Sie den Power-ON/OFF-Schalter auf die ON-Position, um das
Radio einzuschalten. Das Radio geht automatisch zu einer Schnellsuche
über.
Bereitschaftsbetrieb
Betätigen Sie die SLEEP/STBY-Taste zum Einschalten des Geräts. Halten
Sie die Taste gedrückt, um das Gerät wieder in den Bereitschaftsbetrieb
zu versetzen.
Einstellen der Lautstärke
Drehen Sie am Lautstärkeregler zum Einstellen der Lautstärke ein
angenehmes Maß. Radiomusik bei zu hohen Lautstärken kann Ihr
Gehör dauerhaft schädigen. Vermeiden Sie das Hören bei hoher
Lautstärke über einen längeren Zeitraum.
Automatische Abschaltung - Einschlaffunktion
Um die Einschlafzeit im eingeschalteten Zustand einzustellen, betätigen
Sie die SLEEP-Taste mehrfach zur Auswahl von Aus, 15, 30, 45, 60 oder
90 Minuten. Sobald die Einschlafzeit erreicht wird, geht das Gerät in
den Bereitschaftsbetrieb.
Betriebsartauswahl
Betätigen Sie die DAB/FM -Taste, um den DAB- oder UKW-Modus
aufzurufen.
17
Table of contents
Languages:
Other LENCO Portable Radio manuals

LENCO
LENCO ODR-150 User manual

LENCO
LENCO DAR-017 User manual

LENCO
LENCO PDR-046 User manual

LENCO
LENCO SCD-38 USB User manual

LENCO
LENCO PDR-045BK User manual

LENCO
LENCO MPR-031 User manual

LENCO
LENCO PDR-045 User manual

LENCO
LENCO SCD-620 User manual

LENCO
LENCO SCD-580 User manual

LENCO
LENCO SCD-685BK User manual

LENCO
LENCO IPD-5100 User manual

LENCO
LENCO SCD-501 User manual

LENCO
LENCO PR2700 User manual

LENCO
LENCO SCD-341BK User manual

LENCO
LENCO IPD-5200 User manual

LENCO
LENCO PDR-045 User manual

LENCO
LENCO PDR-031 User manual

LENCO
LENCO SCD-430RD User manual

LENCO
LENCO SCD-70 User manual

LENCO
LENCO SCD-330 User manual